Takara Belmont YUME DX Operating Instructions Manual
Hide thumbs
Also See for YUME DX:
- Operating instructions manual (16 pages) ,
- Quick operation manual (14 pages) ,
- Installation instructions manual (20 pages)
Table of Contents
Advertisement
Quick Links
YUME DX
Operating Instructions
Thank you for purchasing our Takara Belmont YUME DX.
The instructions contained in this booklet should be thoroughly read and
understood before operating the shampoo unit.
This product is intended for the exclusive use for hairdressing & barber
salons, and must not be used for other purpose.
Keep manual in a place where it can be easily referred to when necessary.
1E002CC0
Version 7
2022.10
Advertisement
Table of Contents

Related Manuals for Takara Belmont YUME DX


Summary of Contents for Takara Belmont YUME DX
- Page 1 YUME DX Operating Instructions Thank you for purchasing our Takara Belmont YUME DX. The instructions contained in this booklet should be thoroughly read and understood before operating the shampoo unit. This product is intended for the exclusive use for hairdressing & barber salons, and must not be used for other purpose.
-
Page 2: Table Of Contents
TABLE OF CONTENTS 1. Locations of Warning Labels ........1 2. Dimension and Specifications ......... 2 3. Overall View and Major Components ...... 3 4. Accessories ............5 5. Preparation ............5 6. Operating Instruction ..........7 7. Maintenance ............11 8. -
Page 3: Locations Of Warning Labels
1. Locations of Warning Labels... -
Page 4: Dimension And Specifications
2. Dimension and Specificatio ns 8° 2000 Type ----------------------- EX-YM2*L, EX-YM2*R, SU-YM2 Drive System ---------------- Motorized Hydraulic System Measurement --------------- 760 x 2000 x 990 mm (W x L x H) Angle of Bracket ------------- 67°(8°〜75°) Type of Mixing -------------- Thermo Mixing Stop Valve ------------------ Water x 1 (Handle Type) / Hot Water x 1 (Handle Type) Electrical Requirements ------ AC 110・120V 50/60 Hz 4.8/3.5A Electrical Requirements ------ AC 220V 50/60 Hz 1.7A... -
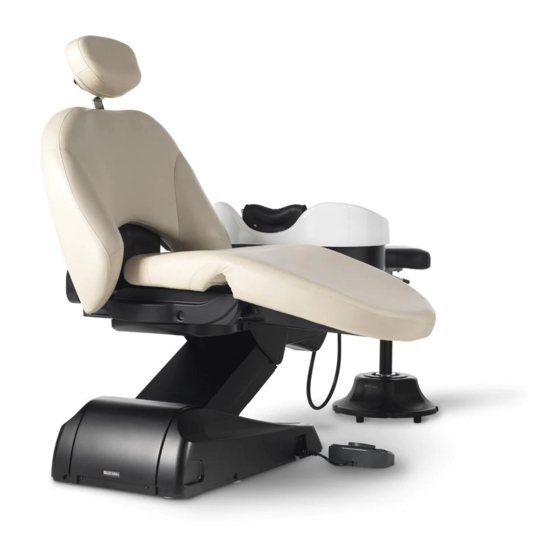
Page 5: Overall View And Major Components
3. Overall View and Major Components ■Main Body Shower head holder Headrest Shampoo basin Backrest Seat Legrest lever Legrest Main power switch Maintenance cover Service outlet A sticker of drain hose replacement Headrest handle Neck cushion (Consumable) Head pillow Headrest bar socket (Consumable) Thermostatic control knob Shower head... - Page 6 ■Foot Control EX-YM2*LA : Left side foot control EX-YM2*RA : Right side foot control Preset Shampoo Preset Shampoo Backrest Backrest position position return Seat lifting return Seat lifting Backrest Backrest Backrest Backrest reclining raising reclining raising Seat lowering Seat lowering Auto Return Auto Return Seat rotation lock...
-
Page 7: Accessories
4. Accessories Mohair Tape ...1 Neck Cushion ..1 Head Pillow ...1set Drain Cap ...1 Hair Catcher ...1 Sponge ...1 Operation Manual ...1 Installation instructions ...1 YUME SPA Technical Manual(except for China) ...1 5. Preparation 5-1. Attach the Neck Cushion Neck Cushion Snap button 1. - Page 8 5. Preparation 5-3. Removing the cover Turn the cover anticlockwise. Turn the cover around 5 degrees. Cover Pinch the front and back of the cover to deform and remove the catch. 【Image】 Catch Do not remove the cover of holder forcibly. Caution Failure to follow the instruction may cause damage the product.
-
Page 9: Operating Instruction
6. Operating Instruction 6-1 Main Switch Main switch is located on the left side of the pump cover (EX-YM2*L) or on the right side (EX-YM2*R). Caution Turn off the main switch after daily operation Operate the main switch by hand only. In the event of extremely low oil temperature, “warm-up”... - Page 10 (2) Auto Mode Control G. Preset Control Backrest return Preset Shampoo position Press P1 switch a little longer (for around half second), the seat will move to the preset shampoo position automatically. (If adjustment is needed, please refer AUTO MODE POSITION ADJUSTMENT.) H.
- Page 11 6-5 Using the Shower Head Dual function shower head Dual function shower head [OPTION] Changing the selection switch position switches between Shower Mode and air Low-splash Mode. <Shower Mode> <Low-splash Mode> Selection switch Protrusion Press the switch on the Press the switch on the side with the protrusion.
- Page 12 6-6 Adjustment the Water / Hot Water Temperature A. Turn the tap to anticlockwise. Open (H) Hot B. Adjust the water temperature with Thermostatic Control Knob thermostatic control knob. Stop (C) Cold Stop C. Press stop button on the thermostatic Button control knob to release lock for hot water, then turn clockwise.
-
Page 13: Maintenance
7. Maintenance Notice Do not use the following substances. Thinner, alcohol, gasoline, kerosene or other volatile chemicals; waxes containing abrasives; sponges containing abrasives, etc. Thinner Alcohol Chemicals Gasoline Waxes 7-1. Hair Catcher Drain Cap Take out the hair catcher under the drain cap and remove hairs Hair Catcher from the hair catcher. - Page 14 7-6. Sponge Cover Sponge is consumable supply. Replace the sponge if degradation causes rubbing sound when the hose is moving. (Available at additional cost) Sponge Remove the cover from the holder. [Page 6] - Remove the sponge from the hose and wash with water. Sponge holder - After washing the sponge with water, squeeze it like press- ing with both hands.
- Page 15 7-8. Strainer for check valve Clean strainer (built-in check valve) at regular intervals. Remove the water in strainer if freezing is expected in the cold district. A. Raise the chair and turn off the main switch. Maintenance Cover B. Remove 2 screws and open the maintenance cover C.
-
Page 16: Troubleshooting
8. Troubleshooting Symptom Check Seat and backrest Make sure that the power plug is properly plugged into the outlet. does not move Make sure that the main switch has been turned on. Fuse Box or Breaker Check the fuses in your fuse box to make sure they have not burned out. -
Page 17: Parts Replaced On A Regular Basis
(The parts are available at additional cost.) Our company will not assume responsibility for any harm, damage, or defects attributed to any part that was not replaced within the designated period. For ordering replacement work, contact your local Takara Belmont dealer. -
Page 18: Consumable Supplies
10. Consumable Supplies The following parts are "consumable supplies" and wear, degradation, changes in external appearance and damage are expected. Please note that repair or replacement of these parts is not covered by warranty, and a fee will be required. (* The level and period of wear, degradation or damage may differ depending on the environment and conditions that the customer uses this product in.) Inspections or replacement of parts will be required if there is extensive wear, degradation or... - Page 19 Memo...
- Page 20 NOTE TAKARA BELMONT CORPORATION 1-1, 2-Chome, Higashi-shinsaibashi,Chuo-ku,Osaka,Japan TEL : +81-6-6213-5945 FAX : +81-6-6212-3680 Printed in Japan...
Need help?
Do you have a question about the YUME DX and is the answer not in the manual?
Questions and answers