Table of Contents
Advertisement
Quick Links
Advertisement
Table of Contents

Subscribe to Our Youtube Channel
Related Manuals for Sper scientific 800022


Summary of Contents for Sper scientific 800022
- Page 1 Datalogging Dew Point Thermohygrometer 800022 SPER SCIENTIFIC...
-
Page 2: Table Of Contents
TABLE OF CONTENTS 1. FEATURES ..............3 2. PANEL DESCRIPTION ..........4 3. MEASURING PROCEDURE .........5 A Ambient Humidity and Temperature Measurement ...5 B Dew Point Measurement ...........5 C Thermocouple (Type K/J) Thermometer ....5 D Data Hold ..............6 E Data Record (Max, Min, Reading) ......6 F Data Logger ...............6 4. -
Page 3: Features
1. FEATURES Automatically records up to 16,000 (!) data points in the field along with time and date. These can later be downloaded to a computer via the meter’s RS232 port and the results viewed instantly on software which comes with the unit. The software also enables real time data logging directly from the meter to the computer. -
Page 4: Panel Description
2. PANEL DESCRIPTION - 4 -... -
Page 5: Measuring Procedure
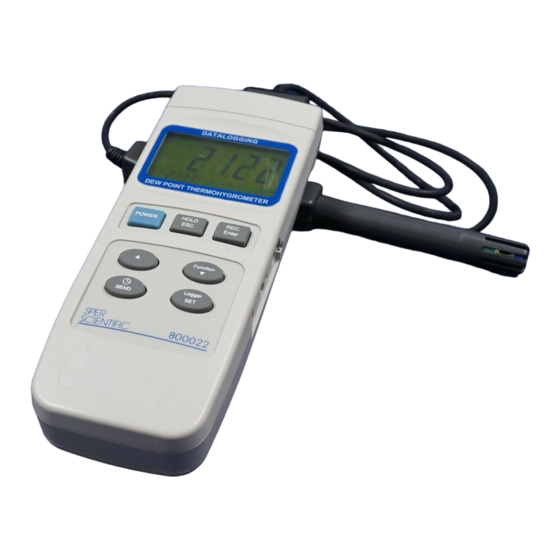
DISPLAY POWER button HOLD / ESC button REC / ENTER button ▲(UP) button FUNCTION / ▼(DOWN) button (CLOCK) / SEND button LOGGER / SET button STAND 10 BATTERY COMPARTMENT/COVER 11 TRIPOD SCREW 12 LCD BRIGHTNESS ADJUSTMENT VR 13 SYSTEM RESET 14 RS232 OUTPUT TERMINAL 15 DC 9V POWER ADAPTOR SOCKET 16 TYPE K/J PROBE INPUT... -
Page 6: D Data Hold
D. Data Hold • While measuring, press the HOLD button (3) to freeze the displayed value. The LCD will also display the word: "HOLD." • Press the HOLD button (3) again to exit E. Maximum / Minimum To record the maximum and minimum readings: •... -
Page 7: Advanced Adjustments
4. ADVANCED AJUSTMENT PROCEDURES Press the SET button (8) for at least two seconds to enter the advanced adjustment procedures. Press the ESC (3) button to exit. Before executing the advanced adjustment procedures, exit the HOLD and RECORD functions. A. Check Remaining Available of Data Points Press the SET button (8) at least 2 seconds until the lower display shows: "XXXXX"... -
Page 8: F Temp. Unit Default Setting
F. Temp Unit Default Setting Press the SET button (8) as needed to reach "temp. unit" screen. 1 = °F Use the ▲UP (5) and ▼ DOWN (6) buttons to switch between 0 = °C °F and °C. Press the ENTER button (4), then press the ESC button (3) to save the setting and exit this function. -
Page 9: Rs232 Pc Serial Interface
6. RS232 PC SERIAL INTERFACE The instrument features a 3.5 mm RS232 OUTPUT TERMINAL (14). The signal output is a 16-digit data stream that can be adapted to user-defined applications. A RS232 lead with the following connection is required to link the instrument with the PC serial interface. -
Page 10: Battery Replacement
7. BATTERY REPLACEMENT When the left corner of the LCD displays the low battery icon install 4 new AA 1.5V batteries. Slide the BATTERY COVER (10) away from the instrument to remove the old batteries. When the clock is not accu- rate, replace the 3V button cell battery located in the compartment behind the AA's. -
Page 11: Specifications
11. SPECIFICATIONS Range Resolution Accuracy >70%RH±3% rdg +1% RH 0~95%RH 0.01% <70%RH±3% RH Ambient -32~122ºF ±0.8ºC, ±1.5ºF fs. Temp. -0~50ºC Dew Point -25~48.9ºC 0.01º ºC Combined accuracy of RH & Temp. above. Dew Point -13.5~120.1ºF ºF -58~2372ºF Type K -50~1300ºC ±(0.2% + 1ºC ) fs. -
Page 12: Warranty
WARRANTY Sper Scientific warrants this product against defects in materials and workmanship for a period of five (5) years from the date of purchase, and agrees to repair or replace any defective unit without charge. If your model has since been discontinued, an equivalent Sper Scientific product will be substituted if available.
Need help?
Do you have a question about the 800022 and is the answer not in the manual?
Questions and answers