Table of Contents
Advertisement
Growatt New Energy Technology CO.,LTD
1st East & 3rd Floor, Jiayu Industrial Zone, Xibianling, Shangwu Village,
Shiyan, Baoan District, Shenzhen,P.R.China
T
+ 86 755 2747 1900
F
+ 86 755 2749 1460
E
info@ginverter.com
W
Www . ginverter.com
GR - UM - 035- A - 00
Installation
&
Operation Manual
Growatt 30000 TL3
Growatt 33000 TL3
Growatt 40000 TL3
Advertisement
Table of Contents

Related Manuals for Growatt 30000 TL3


Summary of Contents for Growatt 30000 TL3
- Page 1 Growatt 30000 TL3 Growatt 33000 TL3 Growatt 40000 TL3 Installation & Growatt New Energy Technology CO.,LTD Operation Manual 1st East & 3rd Floor, Jiayu Industrial Zone, Xibianling, Shangwu Village, Shiyan, Baoan District, Shenzhen,P.R.China + 86 755 2747 1900 + 86 755 2749 1460 info@ginverter.com...
-
Page 2: Table Of Contents
2.6 Symbols on the inverter make this document complete, accurate and up-to-date. Readers are cautioned, however, that Growatt reserves the right to make changes without notice and shall not be responsible for any damages, including indirect, incidental or consequential Product Description... - Page 3 6.2 Operation Modes 11.3 Torque Values 6.3 Country Setting and LCD Display 11.4 Spare Parts and Accessories 6.4 M3 LCD Display 6.5 Double MPPT of the Growatt TL3 6.6 Communication Start-up and Shut 7.1 Start-Up the inverter down the inverter Certificates 7.2 Shut down the Inverter...
-
Page 4: Information On This Manual
With this installation guide, users are able to install and operate the inverters easily. This manual does not cover any details concerning equipment connected to the Growatt TL3. Store this manual where accessible at all times. WARNING indicates a hazardous situation which, if not avoided, could result in death 1.1.2 Target Group... -
Page 5: Glossary
2.1 Intended Use Abbreviation for "Alternating Current” Growatt TL3 series inverters are to be used solely to feed solar energy converted photovoltaically into the public grid. Growatt TL3 series inverters are multi-string inverters with multi-MPP trackers, which mean they are able to connect to different Abbreviation for "Direct Current”... -
Page 6: Safety Precautions
2.2 Safety Precautions 2.4 Electrical Connection Warnings The GROWATT TL3 series Inverters is designed and tested according to international safety requirements; however, certain safety precautions must be observed when installing and operating this inverter. Read and follow all instructions, cautions and >... -
Page 7: Operation Warnings
To reduce the risk of injury, do not touch with protective insulation. Do not connect any source the heat sink at the back of the PV-Inverter or nearby of energy other than PV modules to the Growatt TL3 surfaces while Inverter is operating. series. -
Page 8: Symbols On The Inverter
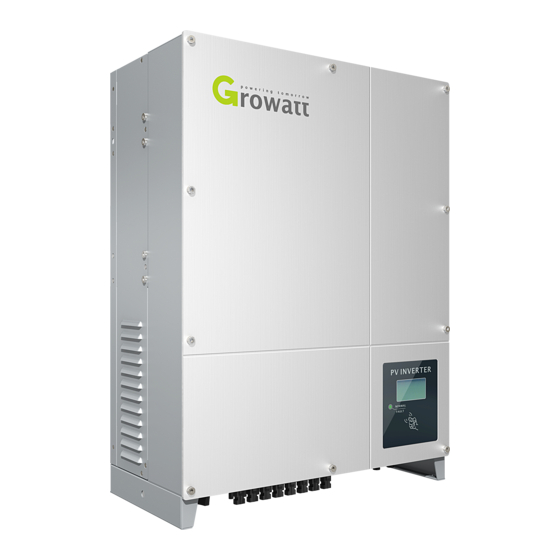
Product Description 2.6 Symbols on the inverter 3.1 Inverter overview Symbol Explanation Electrical voltage! Risk of burns! Point of connection for grounding protection. Operation after 5 minutes Direct Current (DC) Description Position Alternating Current (AC) DC Switch PV input terminals CE mark. -
Page 9: Size And Weight
> If there are lots of inverters need to be stored, the maximum layers for original carton is four. > After long term storage, local installer or service department of GROWATT should perform a comprehensive test before installation After long term storage, the Real Time Clock of the... -
Page 10: The Advantage Of The Inverter
– User manual (not show in the picture) * Number of I is 4 for Growatt 40000 TL3, and 5 for Growatt 30000/33000 TL3. Though the packaging box of the inverter is durable, please treat the packing box gently and... -
Page 11: Safety Instruction
Never install the inverter near the sensitive equipment (e.g. Radios, telephone, television, etc) Do not stay closer than 20 cm to the inverter for any length of time unless it is absolutely necessary. Growatt assumes no responsibility for compliance to EMC regulations for the complete system... -
Page 12: Selecting The Installation Location
5.2 Selecting the Installation Location Notice the minimum clearances of the inverter. (Refer to Chapter3.2 and Fig.5.2 Required Clearances). This is guidance for installer to choose a suitable installation location, to avoid potential damages to device and operators. The wall selected to install the inverter must be strong and firm enough to support and bear the weight of the inverter for a long period time. - Page 13 After the bracket is firmly mounted on the wall, then mount the inverter on the bracket. · Rise up the Growatt TL3 a little higher than the bracket. Considering the weight of Growatt TL3, you need to hang on the inverter. During the process please maintain Bracket of Growatt TL3 the balance of the Growatt TL3.
- Page 14 Fig 5.6 Fig 5.8 5.3.3 Installation layout More than one inverter need to be installed, the dimensions below should be considered. Avoid exposing inverter to direct sunlight, rain or snow to extend the inverter service life despite the IP65 protection degree. Exposure to the sunlight may cause additional internal heating which will cause power derating.
-
Page 15: Electrical Connections
· present in the conductive parts of the inverter. Prior to performing any work on the inverter, Specification of AC breaker: Growatt 30000 TL3: 63A/400V disconnect the inverter on the AC and DC sides Growatt 33000 TL3: 80A/400V Growatt 40000 TL3: 80A/480V Danger of damage to electronic components due to electrostatic discharge. - Page 16 5.4.3 Wiring DC Input Connection to the AC side terminal The AC side terminals of the inverter are like the following figure, it is clear to confirm that ‘L1, L2, L3’ represents three live line output, ‘N’ represents neutral line Danger to life due to lethal voltages! is grounding line.
- Page 17 Fig 5 5.4.4 Grounding AC Grounding The Growatt TL3 must be connected to the AC grounding conductor of the power distribution grid via the ground terminal (PE). PV Grounding The grounding conductor in the framework of the PV array must be connected to the PV grounding conductor and the DC grounding conductor.
-
Page 18: Grid Type
Neutral of transformer should not be connected to PE. 5.5 Grid Type 5.5.1 Common grid type Power grid mode supported by the Growatt 40000 TL3. For TT grid mode, the valid value of the Neutral to PE voltage should be less than 30 V. -
Page 19: Commission The Inverter
Commissioning 6.2 Operation Modes Normal Mode 6.1 Commission the Inverter In this mode, the inverter works normally and LED turns green. · Whenever the DC voltage is higher than 300Vdc, inverter converts power to grid as 1 ) Remove all covers from the PV array. generated by the PV panels;... -
Page 20: Country Setting And Lcd Display
1) When at the first interface ‘Select country:’ the option is ‘VDE0126’ in default. By Note: if you can’t find the country you want, please contact Growatt. single knock, countries will vary from one to another, for example, ‘France’, as Fig 6.3.1... - Page 21 Fig6.3.5 Power on Growatt Logo After displaying Growatt Logo for 2 seconds, LCD screen will switch to the second Interface 1: Running state. See Fig 6.3.8 as reference. The first line displays inverter’s interface;...
- Page 22 Interface 3: Output information. See Fig6.3.10 for reference. This interface displays output information of inverter, including output voltage of each phase, output current of each phase, and output power of each phase. ·V: Output voltage of each phase ·I: Output current of each phase ·P: Output power of each phase Fig6.3.12 Connect to gird interface Output Info...
- Page 23 Table 6.1 Knock definition list Second level menu In first level menu, double knock will lead to next level menu. Knock type Definition The followings are second level menu interfaces for each first level menu items, Single knock Down shown in Fig 6.3.15. Double knock Enter In second level menu, a single knock will switch the index to next item;...
- Page 24 Second level menu Third level items Item explanation Power chart Histogram of generation power Maxrve Maximum output power of inverter Power info Generation power information of inverter P_Factor Power factor Reactive power GridFreq Utility grid frequency Historical information Fig 6.3.17 is the third level menu interfaces for each second level menu items of historical information.
- Page 25 Table 6.3 Historical information sub-items explanation Explanation of each item in third level menu interface of working information: State information: Second level menu Third level items Item explanation First level menu Second level items Item explanation Error1: xxx Error Record Five latest error records No.:xxxxxxxxxx Serial number of this inverter.
- Page 26 Setting inverter’s COM address Setting inverter time When communicating with monitoring software or device, the software or device Inverter provides a system clock; user must set the system time after installation, as may regard inverter’s COM address as communication address (Also may use the historical statistic data for a period were based on the clock.
- Page 27 Position Detail Text line for displaying an event The graph shows recent 16 hours the energy Input voltage and current of MPPTA yield of and the maximum energy yield of the 16 values. Input voltage and current of MPPTB PV array A and B, Light when the array voltage is above the start voltage(250Vdc) Current power Daily energy...
- Page 28 You can operate the inputting “123”: 2) Knock the enclosure lid twice and the text will show the language. 1) Single knock the enclosure lid until the text line switch to the text as follow: 3) You can choose the language by tripping the enclosure once; the language includes English, Deutsh, Espanol, Francais, Italiano.
- Page 29 : 3) Then knock the enclosure three times to confirm it. And the text line change as follow 4) If you want to set the address more lager, double knock the enclosure lid to let the higher number text “002” flashing. And single knock the enclosure lid to change it from 0 to 9.
-
Page 30: Double Mppt Of The Growatt Tl3
MPPT A inputs is different from the power inputs of the MPPT B at the Total. The display is updated every five seconds. same time, the Growatt TL3 works at a non-symmetrical input state. But the MPPT algorithm of the inverter makes it tracking the maximum power point of every MPPT channel to improve the energy utilization of the PV arrays. -
Page 31: Communication
You can update firmware via RS232 or Rs485 About the software of Shinebus and the usage of it please download from the web: Plan A: www.growatt.com ·Through RS485 interface-Data logger-PC. The connecting diagram as follow: ·Through RS485 interface-RS485-232 /RS232 converter-PC. - Page 32 ·Through RS232 interface- wireless module-Data logger-PC. Plan B ·Through RS232 interface- wireless module-Data logger-Internet.
- Page 33 4.Plug in two terminals. Cover the fix board. When three phase inverter and single-phase inverter shared a RS485 communication line, the total length of which does not exceed 1km. 6.6.3 RS485 cable connection 1.Please loosen four screws, take down the RS485 waterproof cover from inverter. If you don’t choose RS485 as communication method, keep it on the inverter.
-
Page 34: Start-Up The Inverter
Start-Up and shut down the inverter Maintenance and Cleaning Once the output power is derating because of too high warming, some tips can help you solve such problems: 7.1 Start-Up the inverter ·The heatsink or cooling fans are clogged. · Cooling fans failed. -
Page 35: Error Messages Displayed On Lcd
An error message will be displayed on the LCD screen when a fault occurs. The faults 4. Pull out the white connectors with some tinny tools. consist of system fault and inverter fault. You may be advised to contact Growatt in some situation, please provide the following information. Information concerning the inverter: ·Serial number... - Page 36 Restart inverter, repeat Auto Test, if Auto test didn’t pass. Auto Test Failed 1. Check grid voltage. problem still exist, contact Growatt. 2. Check AC wiring, especially the ground wire. Utility grid voltage 3. If the error message still exists despite...
-
Page 37: Dismantling The Inverter
Wait 20 minutes before disassembling until the housing has cooled down. Restart inverter, if problem still exist, EEPROM fault. Error: 103 contact Growatt. 3. Screw off all projecting cable glands. 1. Check PE and Neutral line. Problem with PE or Error: 111 4. -
Page 38: Specification
Specification Growatt 30000TL3 Growatt 33000TL3 Growatt 40000TL3 11.1 Specification of Growatt TL3 General Data Growatt 30000TL3 Growatt 33000TL3 Growatt 40000TL3 Datasheet 551/740/276 mm 551/740/276 mm 551/740/276 mm Dimensions (W / H / D) Input Data Weight 61.6kg 61.6kg 61.6kg 44000W 36300W Max. -
Page 39: Torque Values
Certificates 11.3 Torque Values Growatt TL3 is designed to use worldwide, hence the inverters meet different safety Enclosure lid screws 1.3Nm(10.8 1bf.in) standards of variety countries and regions. Shell and RS232 screws 0.7Nm(6.2 1bf.in) AC terminal 1.8Nm(16.0 1bf.in) Model Certificates M6 socket head cap screws for 2Nm(18 1bf.in) -
Page 40: Contact
Contact If you have technical problems concerning our products, contact your installer or Growatt. During inquiring, please provide below information: 1.Inverter type 2.Modules information 3.Communication method 4.Serial number of Inverters 5.Error code of Inverters 6.Display of inverter Shenzhen Growatt New Energy Technology CO.,LTD 1st East &...
Need help?
Do you have a question about the 30000 TL3 and is the answer not in the manual?
Questions and answers