Advertisement
Quick Links
Day One+
ACX7509
IN THIS GUIDE
Step 1: Begin | 1
Step 2: Up and Running | 9
Step 3: Keep Going | 12
Step 1: Begin
IN THIS SECTION
Meet the ACX7509 | 1
Install the ACX7509 | 2
Power On | 7
In this guide, we provide a simple, three-step path, to quickly get you up and running with the Juniper Networks
router. You'll learn how to install, power on, and configure basic settings for an AC-powered ACX7509 router.
If you need instructions to install a DC-powered ACX7509, see the
Meet the ACX7509
®
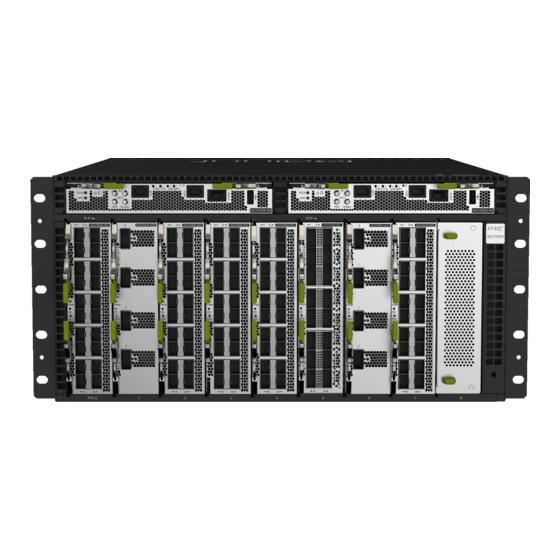
The Juniper Networks
aggregation router which supports IP services to service providers, web and enterprise networks. The ACX7509 also
comes with several other capabilities that include segment routing, advanced timing, flexible licensing and a comprehensive
set of features that are suited for 5G and cloud metro architectures.
ACX7509 is a high-performance and fully redundant (control plane and data plane) high-end
ACX7509 Router Hardware
®
ACX7509
Guide.
Advertisement

Summary of Contents for Juniper Day One+ ACX7509
- Page 1 Power On | 7 ® In this guide, we provide a simple, three-step path, to quickly get you up and running with the Juniper Networks ACX7509 router. You'll learn how to install, power on, and configure basic settings for an AC-powered ACX7509 router.
- Page 2 The ACX7509 router with a 5-U form factor (occupies 6-U rack space with the cable management system) provides a throughput of 4.8 Tbps while maintaining a power-efficient footprint. It supports three types of Flexible PIC Concentrators (FPCs) which offer 1GbE, 10GbE, 25GbE, 40GbE, 50GbE, 100GbE, 200GbE, and 400GbE port speeds and MACsec–ready ports.
- Page 3 AC power cord (country specific) Electrostatic discharge (ESD) wrist strap with cable What Else Do I Need? You’ll need: A mechanical lift rated for 250 lb (113.4 kg) to mount the router Three people to help you secure the router to the rack A Phillips (+) screwdriver, number 2 or number 3, depending on the size of your rack-mount screws A management host such as a laptop or desktop PC A grounding cable: 4 AWG (21.1 mm²) stranded wire should be rated 90°...
- Page 4 5. Slide the mounting blades out of the channels. 6. Perform one of the following steps: Use a mechanical lift to position the ACX7509 in the rack so that the chassis flanges contact the rack rails and the flange’s holes are aligned with the rack holes.
- Page 5 With one person on each side and the third person to support the rear, hold on to the bottom of the chassis, and carefully lift the chassis and position it in the rack so that the chassis flanges contact the rack rails and the flange’s holes are aligned with the rack holes.
- Page 6 8. Continue holding the router in place. Slide the mounting blades into the channels on either side of the chassis. 9. Secure the mounting blades to the rack rails using the rack moun\ t screws (and cage nuts and washers, if your rack requires them). 10.
- Page 7 11. Remove the M6 pan head screws from the chassis and secure the grounding lug and attached cable to the chassis with the M6 pan head screws. The earthing terminal is on the rear side of the chassis. 12. Connect the other end of the grounding cable to a proper earth ground, such as the rack. 13.
- Page 8 3. Plug the power cords into the power sockets of each AC power supply. 4. If the AC power outlet has a power switch, turn it off. NOTE: The router powers on as soon as you connect it to power. The ACX7509 doesn't have a power switch. 5.
-
Page 9: Step 2: Up And Running
Step 2: Up and Running IN THIS SECTION Plug and Play | 10 Customize the Basic Configuration | 10 Now that the ACX7509 is powered on, let’s do some initial configuration to get it up and running on the network. It’s simple to configure and manage the ACX7509 using the CLI. -
Page 10: Plug And Play
Plug and Play The ACX7509 router ships with factory-default settings that enable plug-and-play operation. These settings load as soon as you power on the router. Customize the Basic Configuration You can easily customize the factory-default configuration with just a few commands. Initially, you’ll need to make changes through the console port. - Page 11 3. At the Junos OS login prompt, type root to log in. You don't need to enter a password. If the software boots before you connect your laptop or desktop PC to the console port, you might need to press the Enter key for the prompt to appear. login: root 4.
- Page 12 10. (Optional) Configure the static routes to remote prefixes with access to the management port. [edit] root@# set routing-options static route remote-prefix next-hop destination-ip retain no-readvertise 11. Enable services such as SSH and Telnet. NOTE: You won’t be able to log in to the router as the root user through Telnet. You can only log in as root through SSH.
-
Page 13: What's Next
Juniper Networks main quick answers, clarity, and insight into specific features YouTube page and functions of Juniper technologies Learn how to install and configure your Juniper Networks Check out our free Web-based training videos at Hardware devices Installation and Configuration Videos... - Page 14 Juniper Networks, the Juniper Networks logo, Juniper, and Junos are registered trademarks of Juniper Networks, Inc. in the United States and other countries. All other trademarks, service marks, registered marks, or registered service marks are the property of their respective owners. Juniper Networks assumes no responsibility for any inaccuracies in this document. Juniper Networks reserves the right to change, modify, transfer, or otherwise revise this publication without notice.


Need help?
Do you have a question about the Day One+ ACX7509 and is the answer not in the manual?
Questions and answers