Table of Contents
Advertisement
Quick Links
Advertisement
Table of Contents

Related Manuals for Riello NXH 005


Summary of Contents for Riello NXH 005
- Page 1 NXH 005 - 015 INSTALLATION AND TECHNICAL SERVICE INSTRUCTIONS...
- Page 2 — Machinery Directive 2006/42 / CE and subsequent changes — ErP Directive 2009/125/EC and Regulation (EU) 813/2013 — RoHS Directive 2011/65/EU — F-Gas Regulation 2014/517/EU — WEEE Directive 2012/19/EU RANGE Model Code NXH 005 20161608 NXH 007 20161610 NXH 011 20161611 NXH 015 20161612...
-
Page 3: Table Of Contents
TAbLE OF CONTENTS GENERAL INFORMATION ....p. 4 General Notices ......p. 4 Safety precautions . -
Page 4: General Information
GENERAl INfORMAtION GENERAL INFORMATION This unit can be installed in systems that require heating cy- General Notices cles with anti-legionella function. It is mandatory to check every single installation and complete it, where necessary, with appropriate integration electric heaters in order to When you get the product, check immediately that the con- guarantee the completion of the required sanitation cycles. -
Page 5: Unit Description
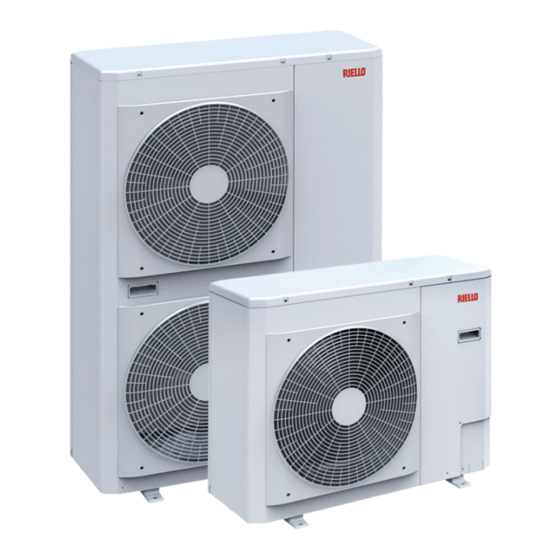
Designed to be placed outdoors, it is suitable for use in residen- tial and commercial applications. The compressor, of the Rotary (NXH 005) or Twin-Rotary (NXH 007- 011-015) type, is regulated by the DC Inverter control with con- tinuous power modulation. The compressor, working in combi-... -
Page 6: Layout
GENERAl INfORMAtION Layout Model 005 - 007 Heat exchanger Circulation pump Fan protection grille Expansion vessel Front panel 10 Safety valve Compressor Water inlet temperature probe Variable speed circulation pump 12 Pump release device Electrical box 13 Water outlet temperature probe Flow switch 14 Air bleeder valve Model 011 - 015... - Page 7 GENERAl INfORMAtION Model 011t - 015t Heat exchanger Flow switch Fan protection grille Expansion vessel Front panel 10 Safety valve Compressor Water inlet temperature probe Variable speed circulation pump 12 Pump release device Reverse cycle valve 13 Water outlet temperature probe Electrical box 14 Air bleeder valve...
-
Page 8: Technical Specifications
GENERAl INfORMAtION Technical specifications Model 011t 015t Cooling performance [A35 / W7] Nominal capacity 4,00 5,55 11,20 12,80 10,65 13,00 kW/kW 3,10 3,10 3,40 3,10 3,40 3,20 SEER kW/kW 4,85 5,75 5,15 5,00 5,40 5,25 Seasonal energy efficiency (ns) Cooling performance [A35/W18] Nominal capacity 4,85 8,00... -
Page 9: Performance Based On The Climatic Zone
GENERAl INfORMAtION Performance based on the climatic zone Model 011t 015t temperate zone - Average temperature [47 / 55 °C] Seasonal energy efficiency (ns) SCOP kW/kW 3,32 3,36 3,35 3,45 3,34 3,40 Pdesignh -7 °C 3,09 3,83 7,69 9,11 7,69 9,81 Pdesign at +2 °C 1,88... -
Page 10: Operating Limits
GENERAl INfORMAtION Operating limits COOlING HEAtING A (°C) A (°C) b (°C) b (°C) Outdoor air temperature Outdoor air temperature Supply water temperature Supply water temperature Model 005 1.10 Available static pressure it is equipped with a variable speed circulation For sizing the system, consider the residual head, shown below pump. - Page 11 GENERAl INfORMAtION MODEl 007 A (kPa) b (l/s) Available head pressure Water flow Medium speed High speed Low speed MODEl 011 - 015 A (kPa) b (l/s) Available head pressure Water flow Medium speed High speed Low speed...
-
Page 12: Refrigerant Circuit And Sensors Positioning
GENERAl INfORMAtION 1.11 Refrigerant circuit and sensors positioning The cooling circuit is of the heat pump type with cycle inversion in summer the cycle is inverted and the thermal energy is ex- on the refrigerant gas. The source fluid used is the external air tracted from the water, which cools down, and is transferred to while the user fluid is water possibly added with antifreeze liq- the air. -
Page 13: Installation
The Instruction book comes with the equipment and it should be taken, read and kept carefully. The document envelope must be kept in a safe place. Any duplicate must be requested from Riello S.p.A. which re- serves to charge the cost. Model... -
Page 14: Handling And Removal Of The Packing
INStAllAtION Handling and removal of the packing • Follow the below instructions for packing removal: — transport the equipment in the installation place, using tools that can withstand the weight before unpacking, personal protective clothing should be — remove the polyethylene film worn and used transport means and tools suitable for the —... -
Page 15: Recommended Distances
INStAllAtION If the unit is installed in a windy location, fit an anti-wind grille to protect the fan and check the correct functioning of the unit. Recommended distances The distances for the device installation and maintenance are to prevent the airflow from being blocked, as well as to allow shown in the figure. -
Page 16: Positioning
INStAllAtION Multiple installations 1000 2000 1500 Positioning R NXH devices must: — be positioned on a level surface that is capable of support- ing their weight — be positioned on a sufficiently rigid surface that will not transmit any vibrations to the underlying or adjacent rooms It is recommended to place a rubber sheet between the insole and the appliance (60 shore hardness, 10 mm thick) or use ap- propriately sized anti-vibration supports. -
Page 17: Installation On Old Systems Or Systems In Need Of
INStAllAtION 2.9.1 Plant water content to a place suitable for drainage. For correct operation of the appliance, a minimum volume of water must be guaranteed in the primary circuit of the system. The minimum volume is necessary to prevent the risk of ice formation during defrosting operations or the continuous modulation of the compressor frequency. -
Page 18: Hydraulic Connections
INStAllAtION System scheme for heat pumps cascade External sensor (option) Temperature probe for cascade connection (accessory) Only units of the same model can be cascaded. 2.10 Hydraulic connections The size and positioning of the hydraulic connections of R MODEl 005 - 007 are shown in the following table. - Page 19 INStAllAtION Do not use the heat pump for treating industrial water, MODEl 011 - 015 swimming pool water or domestic water. If water supplies of this kind are used, an intermediate heat exchanger must be used. Make sure to maintain the min. water content, possi- bly adding a storage.
- Page 20 INStAllAtION 2.10.1 Piping connections Factory connections Expansion vessel Field connections (for installer) Mesh filters (available as an option) 13 Calibration valve Plate heat exchanger Stop valves 14 Anti-vibration joint Temperature sensor Filling valve 15 Additional expansion vessel (if nec- Circulation pump 10 Pressure gauge essary) Safety valve...
-
Page 21: System Water Filling And Drainage
INStAllAtION 2.11 System water filling and drainage 2.11.2 System filling-up For the heat pump R a loading system is required. before filling and emptying the system, set the main switch of the system and the main switch of the unit on "0" (off). O F F The filling pressure of the cold system must be 1.2 -1.5 bar. -
Page 22: Wiring Diagrams
INStAllAtION 2.12 Wiring diagrams Model 005 - 007 POWER CIRCUIt MOD. 005 MOD. 007 A001 Drive per variable speed motor Compressor Compressor discharge temper- Outdoor air temperature sen- Fan motor ature sensor Compressor thermal relay Condenser coil temperature Suction temperature sensor PMV1 Electronic expansion valve... - Page 23 INStAllAtION CONtROl CIRCUIt A002 Main electronic board Command interface System return temperature SP90F Flussostato EP90 Water pump sensor Suction temperature sensor System flow temperature sen- Refrigerant temperature sen- YV41 Cycle inversion valve * consult the wiring diagram supplied with the unit...
- Page 24 INStAllAtION ElECtRICAl COMPONENtS POSItION A001 A002 A001 Drive per variable speed A002 Main electronic board SP90F Flussostato Compressor Compressor discharge temperature sensor EP90 Water pump Condenser coil temperature sensor Compressor thermal relay Outdoor air temperature sensor System flow temperature sensor Suction temperature sensor System return temperature sensor YV41...
- Page 25 INStAllAtION Model 011 - 015 POWER CIRCUIt A001 Drive per variable speed Compressor discharge temperature sensor Compressor Finned coil temperature sensor 1 Fan motor Finned coil temperature sensor 2 Fan motor Outdoor air temperature sensor Compressor thermal relay Suction temperature sensor PMV1 Electronic expansion valve motor YV41 Cycle inversion valve...
- Page 26 INStAllAtION CONtROl CIRCUIt * * * A002 Main electronic board Command interface SP90F Flussostato EP90 Water pump Trasformer System flow temperature sensor Refrigerant temperature sensor System return temperature sensor Suction temperature sensor * consult the wiring diagram supplied with the unit...
- Page 27 INStAllAtION A002 Main electronic board Trasformer Compressor Compressor discharge temperature sensor Compressor thermal relay Finned coil temperature sensor 1 PMV1 Electronic expansion valve motor Finned coil temperature sensor 2 System flow temperature sensor Outdoor air temperature sensor System return temperature sensor Suction temperature sensor SP90F Flussostato YV41...
- Page 28 INStAllAtION Model 011t - 015t POWER CIRCUIt A001 Drive per variable speed Compressor Compressor discharge temperature sensor EP90 Water pump Finned coil temperature sensor 1 Fan motor Finned coil temperature sensor 2 Fan motor Outdoor air temperature sensor Compressor thermal relay Suction temperature sensor PMV1 Electronic expansion valve motor YV41...
- Page 29 INStAllAtION CONtROl CIRCUIt * * * A002 Main electronic board System return temperature sensor Command interface SP90F Flussostato EP90 Water pump Trasformer System flow temperature sensor Refrigerant temperature sensor * consult the wiring diagram supplied with the unit...
-
Page 30: Electrical Connections
INStAllAtION ElECtRICAl COMPONENtS POSItION A002 Main electronic board Trasformer Compressor Compressor discharge temperature sensor Compressor thermal relay Finned coil temperature sensor 1 PMV1 Electronic expansion valve motor Finned coil temperature sensor 2 System flow temperature sensor Outdoor air temperature sensor System return temperature sensor Suction temperature sensor SP90F Flussostato... - Page 31 INStAllAtION — put the system main switch on "OFF" and the equipment MODEl 005 - 007 main switch on "0" (off) Passing electrical connections — punch the connection points of the pre-cut part — remove the pre-cut part — remove the sharp edges from the hole —...
- Page 32 INStAllAtION Model 011t 015t Electrical characteristics Power supply V/ph/Hz+N 230/1/50 400/3/50 Permitted voltage 220 - 240 380 - 415 Total power input 1,80 3,38 4,73 5,18 10,32 Cos Phi at max. power absorbed 0,98 Full load current 8,90 16,70 23,30 25,60 16,80 Switch magnetermic...
- Page 33 INStAllAtION 2.13.1 Euxiliaries connections tERMINAl BlOCKS X2 CCN - Unit WUI(Remote) Polarity Param. Func on CCN+ WUI CCN+ / B+ RS485 Ground CCN CCN- WUI CCN - / B- DI#01- O /On Switch (remote) DI#02- Mode Cool/Heat (remote DI#03- Normal/Eco (remote P501 DI#04- Safety Input Switch sfsw_typ...
- Page 34 INStAllAtION Connections for cascade heat pumps CCN-WUI CCN - / B- CCN Ground CCN+ WUI CCN+ / B+ CCN- WUI CCN - / B- CCN Ground CCN+ WUI CCN+ / B+ CCN-WUI CCN - / B- CCN Ground CCN+ WUI CCN+ / B+ Customized JBUS - JBUS Ground...
-
Page 35: Control Panel (Accessory)
INStAllAtION 2.14 Control panel (ACCESSORY) The control panel is the interface for the Installer and the User tion can be displayed on the display. to carry out all the operations for setting the operating parame- The panel can be used to set the temperature required for the ters and displaying the status of the components present in the system and for domestic hot water. - Page 36 INStAllAtION Display Displays all the information necessary to manage the appliance. Days of the week 13 Lock settings Clock 14 Home, Night, Away mode Ambient temperature 15 Setpoint Water temperature 16 Electric heaters operation Advanced settings 17 boiler operation Heating mode MON: Monday Cooling mode TUE: Tuesday...
- Page 37 INStAllAtION Display indication Description Icon with slow flashing: indication of communication error between master and slave unit Temperature indication Ambient temperature Temperatura acqua Indication of parameter number and value Indication of the alarm code Indication that the occupation mode is blocked by the user. In this case, the time programming is deactivated. Indication that the mode "In casa"...
- Page 38 INStAllAtION fault codes onds to confirm the selection Operating anomalies are signaled on the control panel display. — keep the key pressed for 2 seconds to exit Fixed icon: indication of intervention of an alarm that has stopped the unit Flashing icon: indication of intervention of an alarm that has left the unit in operation •...
- Page 39 INStAllAtION fault signals description cause, effect on the unit and the type of reset. The following tables include lists of alarm signals, their probable Alarm [P350] Reset type Alarm - [P354] or Description Unit status Verifications Inverter [P360] - Automatic feeding cycle Comment [P364]...
- Page 40 INStAllAtION Alarm [P350] Reset type Alarm - [P354] or Description Unit status Verifications Inverter [P360] - Automatic feeding cycle Comment [P364] 1. Check the operation of the 4-way valve. 2. Check the intake temperature This error becomes permanent after 4 sensor (TE) of the air heat exchanger.
- Page 41 INStAllAtION Alarm [P350] Reset type Alarm - [P354] or Description Unit status Verifications Inverter [P360] - Automatic feeding cycle Comment [P364] 1. Check the refrigeration cycle (gas leak) This error becomes permanent after 4 2. Electronic expansion valve Discharge temperature too high Stop cpr attempts to complete the operation.
- Page 42 INStAllAtION Parameters overview Enter your password(0120) This section includes an overview of all parameters that can be — push to select the first number read or modified by the user. — push to confirm the selection and access the next item The parameters are sorted as follows: —...
- Page 43 INStAllAtION Par. Modbus Sigla Description field Default Unit Control panel table RO/No 18A1H FREQ_MAX Compressor max. frequency 1/10 Hz GENUNIT Force RO/No 18A2H FREQ_REQ Comp. requested frequency 0°120 1/10 Hz GENUNIT Force RO/No 18A3H FREQ_CURRENT Current compressor frequency 1/10 Hz GENUNIT Force PMV_POS...
- Page 44 INStAllAtION Par. Modbus Sigla Description field Default Unit Control panel table SAFETY_SW Safety switch status INPUT RO/No 18A6H FLOW_SW Flow switch status INPUT OR Force RO/No 0710H CUST_DI5_STATUS Custom DI#5 status DHW_STAT Force RO/No 0711H CUST_DI6_STATUS Custom DI#6 status INPUT O Force RO/No 0712H...
- Page 45 INStAllAtION Service parameters Par. Jbus Sigla Description field Default Unit Control panel table INV_MODEL Model inverter Inverter INV_PROGRAM_ Inverter program version Inverter VERSION INV_PROGRAM_ Inverter program revision Inverter REVISION INV_EEPROM_CODE EEPROM inverter code Inverter INV_SWITCH_ Inverter switch setting Inverter SETTING 050bH INV_CDU_CAPACITY Capacity CDU 0°15...
- Page 46 INStAllAtION Par. Jbus Sigla Description field Default Unit Control panel table 0°4 0 = Evaluation off 1 = Cooling evaluation RAT_MOD QT: Evaluation mode RW/F QCH_TEST 2 = Heating rating 3 = Cooling ramp 4 = Heating ramp RAT_FRQ QT: Evaluation frequency -120°120 1/10 Hz RW/F...
- Page 47 INStAllAtION Par. Jbus Sigla Description field Default Unit Control panel table WATER_PUMP_ Number of starts of the water RUNTIME1 START_Nb pump WATER_PUMP_ Hours of operation of the water 0bDAH RUNTIME1 RUNTIME pump UNIT_WEAR_FACTOR Wear factor RUNTIME1 Restoration of the operating time RUNTIME2_RESET 0°3 RUNTIME2...
- Page 48 INStAllAtION Configuration parameters Par. Jbus Mnemonic Description field Default Unit Control panel table 0°13 0 = Disabilitato 1 = Unit in alarm (ancora funzionante) 2 = Unit in alarm (not running) 3 = Unit in Standby (request satisfied) 4 = Unit running (Cool, Heat, DHW, defrost) 5 = Unit running in cooling RW/No 01F4H...
- Page 49 INStAllAtION Par. Jbus Mnemonic Description field Default Unit Control panel table NIGHT_MODE_ Night mode end time 0:00°23:59 00:00 hh:mm GEN_CONF STOP 0°5 0 = No 1 = 10 KOhms Thermistor SPARE_SENSOR_ Replacement sensor type 2 = 5 KOhms Thermistor GEN_CONF TYPE 3 = 3 KOhms Thermistor 4 = Low pressure transducer...
- Page 50 INStAllAtION Par. Jbus Mnemonic Description field Default Unit Control panel table 0°4 0 = No additional pump 1 = Always on ADD_PUMP_ 2 = In accordance with the ambient temperature Additional pump logic PMP_CONF LOGIC (remote WUI) 3 = Always on, off when DHW mode is activated 4 = In accordance with room temperature (remote WUI), but off when in DHW mode -1 = No curve, fixed setpoint...
- Page 51 INStAllAtION Par. Jbus Mnemonic Description field Default Unit Control panel table DEF_OAT_ Minimum OAT defrost 2.0°10.0 bCK_CONF THRESHOLD threshold MAX_FD_ Maximum number of free 1°20 bCK_CONF NUMbER defrosts MAX_TIME_ Maximum time between 1°18 bCK_CONF bETWEEN_MD two mechanical defrosts MD_RECOVERY_ MD defrost recovery mode 0/1 Disabled/Enabled bCK_CONF SELECT...
- Page 52 INStAllAtION Par. Jbus Mnemonic Description field Default Unit Control panel table Maximum pump speed in DHW_VSP_SPEED 19°100 DHW_CONF DHW mode 0°11111110 bitmap: b7 : Monday b6 : Tuesday DHW_SCHEDULE_ b5 : Wednesday DHW program days 11111110 DHW_CONF DAYS b4 : Thursday b3 : Friday b2 : Saturday b1 : Sunday...
- Page 53 INStAllAtION Par. Jbus Mnemonic Description field Default Unit Control panel table Proportional cooling M / MSL_COOL_KP -10000°0.001 -6000 MSL_CONF S Gain MSL_COOL_TI Integral time cooling M / S 10°120 MSL_CONF MSL_COOL_TS Cooling sampling time M / S 10°120 MSL_CONF 0°3 0 = No pump control 1 = Common pump MSL_PUMP_TYPE Pump type Master / slave...
- Page 54 INStAllAtION REC10CH user interface (ACCESSORY) IMPIANTO 18/05/2013 12:17 1.3 bar MENU STATO °C INFO TEMPERATURA SANITARIO The unit user interface, also called the REC10CH interface, is in- stalled remotely. It is an extremely simple and intuitive interface and is designed to be used by the system user to set the operating temperatures of the heating, air conditioning and sanitary buffer tank.
-
Page 55: Commissioning
COMMISSIONING COMMISSIONING — that the suction pressure does not exceed the discharge Preparation for first commissioning pressure, if so, invert a phase. — the current consumed by the compressor is less than the The first commissioning must be carried out by the Technical maximum permitted Service. -
Page 56: Functions
fUNCtIONS Functions 3.5.1 Acronyms Indoor Air Temperature BPHE Plate heat exchanger CHWS (Chiller Water System), system water circuito Domestic Hot Water Electric heater stage Entering Water Temperature (Fan Coil Unit), Fan Coil Unit Leaving Water Temperature New Hydronic Control Outdoor Air Temperature Pulse Modulating Valve Space Heating/Cooling Control Refrigerant Temperature... - Page 57 fUNCtIONS COOlING ClIMAtIC CURVES OAT (°C) — If the OAT is valid (not transmitted by the inverter, value out temperature. of range, etc.), the water setpoint is equal to the current The climatic curve corresponds to the water setpoint for the minimum water temperature.
- Page 58 fUNCtIONS Climatic curve OAt min. OAt max. temp. water min. temp. water max. 3,5°C 20°C 27°C 60°C HEAtING ClIMAtIC CURVES (K7 AND K8) OAT (°C) — If the OAT is valid (not transmitted by the inverter, value out temperature. of range, etc.), the water setpoint is equal to the maximum The climatic curve corresponds to the water setpoint for the current water temperature.
- Page 59 fUNCtIONS Control panel Water setpoint with direct access to the control panel field Water setpoint from the parameter menu field occupation Cooling setpoint away 5 - 18°C Cooling setpoint home [P407] + away cooling offset [P409] 0 - 10°C HEAtING Control panel Water setpoint with direct access to the control panel field...
- Page 60 fUNCtIONS climate curve. following parameters: The customized heating climate curve can be defined using the Parameter Description Default Min. Max. P582 OAT min customized -7°C -30°C 10°C P583 OAT max customized 20°C 10°C 30°C P584 Personalized minimum water temperature 20°C 20°C 40°C P585...
- Page 61 fUNCtIONS HEAtING ClIMAtIC CURVES WItH OffSEt IN tHE UPPER PARt P412 OAT (°C)
-
Page 62: Maintenance
MAINtENANCE MAINTENANCE Under these conditions, the following maintenance work is rec- Ordinary maintenance ommended. Perform all level 1 operations, then perform: To ensure maximum efficiency and reliability of the units, it is Electrical checks recommended to establish a maintenance contract with your —... -
Page 63: Tightening Torque For Main Electrical Connections
MAINtENANCE — The modification of the parameters set in the factory suitable for the products. (change of application) Detected faults and leaks must be repaired immediately. The compressor oil that is recovered during maintenance con- — Removal or disassembly of the unit tains refrigerant and must be treated accordingly. -
Page 64: Maintenance
MAINtENANCE — the connections on the water side are clean and do not show signs of leaks. Maintenance before any intervention on the unit, make sure that the cir- cuit is isolated and that there is no voltage. Note that it may take 5 minutes for the circuit capacitors to fully discharge after isolating the circuit. - Page 68 RIELLO S.p.A. - 37045 Legnago (VR) tel. +39 0442 630111 - fax +39 0442 630371 www.riello.it As the manufacturer is constantly improving its products, the aesthetic or dimensional features, the technical data, the equipment and accessories indicated could be subject to variations.
Need help?
Do you have a question about the NXH 005 and is the answer not in the manual?
Questions and answers