Table of Contents
Advertisement
Quick Links
Advertisement
Table of Contents

Subscribe to Our Youtube Channel
Related Manuals for Biotage Extrahera LV-200


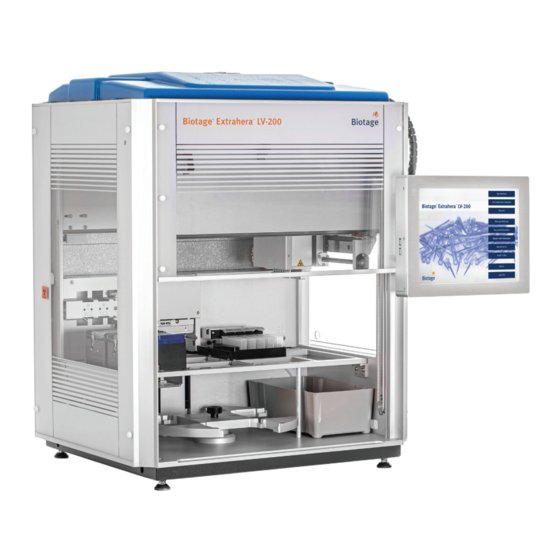
Summary of Contents for Biotage Extrahera LV-200
- Page 1 Biotage Extrahera LV-200 ® ™ User Manual...
-
Page 2: Table Of Contents
Pipette Pump Calibration and Adjustment Export Methods Replace the Pressure Head Seal Import Methods Replace the Fuses Delete Methods Drain the Filter Unit Replace the Filters in the Filter Unit Biotage Extrahera LV-200 User Manual | © Biotage 2021 ® ™... - Page 3 Pipette Pump Pipetting Tips Power Failure Pressure Head Pressurized Air and Nitrogen Retaining Clips Robot Sample Cross-Contamination Solvent Contamination Solvent Pumps Ventilation Fan Waste and Lifter Biotage Extrahera GLP Features ® ™ General Information Consumables and Accessories Manufacturer Contact Us...
-
Page 4: Biotage Extrahera
Liquid Handling The system contains corrosion sensitive parts. Best practice Extrahera LV-200 is equipped with five solvent inlets found on is to avoid sustained continuous exposure to acidic and basic the right hand side of the system (S1-S5). Solvents are pumped... -
Page 5: Working Area
System Overview Working Area The working area has seven positions (see Figure 2): » 1: Solvent pipette tips. » 2: Sample pipette tips. » 3: Extraction plate or columns. » 4: Sample plate. » 5: Solvent reservoirs, 5 x 25 mL. Filled using the five solvent pumps. -
Page 6: Columns, Plates, And Sample Tubes
Pressure Gradients When setting up a method, it is possible to create pressure gradients for conditioning, equilibration, sample load, wash, collection, and elution steps. For more information, see page 16. Biotage Extrahera LV-200 User Manual | © Biotage 2021 ® ™... -
Page 7: Visual And Audible Alarm
System Overview Visual and Audible Alarm Biotage Extrahera GLP Software ® ™ License (Optional) The system’s visual and audible alarm is triggered by non-user- initiated pauses, scheduled pauses (defined in the method), With the Extrahera GLP software license, you can combine and system errors: the utility of the system’s advanced lab automation with the... -
Page 8: Power Failure
Figure 8. Open the door manually by turning the screw counterclockwise using the T25 Torx screwdriver supplied with the system. Biotage Extrahera LV-200 User Manual | © Biotage 2021 ® ™... -
Page 9: Manage Solvents, Sample Types, Plates, Racks, And Tips
Manage Solvents, Sample Types, Plates, Racks, and Tips Manage Solvents, Sample Types, Plates, Racks, and Tips Data Administration Manage Solvents This bell appears in the lower right corner when important information regarding the setup is available. To add, copy, edit, view, and delete solvents, and lock a solvent View the information by pressing the bell. - Page 10 The predefined solvents include settings for the 50 µL, 200 µL, and 1000 µL pipette tips from Biotage. Figure 12. The parameters than can be set up for each tip that is assigned to the solvent.
-
Page 11: Manage Sample Types
The predefined sample types include settings for the 50 µL, 200 µL, and 1000 µL pipette tips from Biotage. To add a tip to a custom sample type, select the tip from the Add tip drop-down list at the General tab and press the + button (see Figure 15). -
Page 12: Manage Extraction Media
Note that this aliquot feature is disabled when the capacity volume is set to zero, which is the default value. » Format: The number of wells or columns. » Comment: Optional information about the plate or column rack. Biotage Extrahera LV-200 User Manual | © Biotage 2021 ® ™... -
Page 13: Manage Sample Plates
Manage Solvents, Sample Types, Plates, Racks, and Tips Manage Sample Plates Smart Sample Loading The Smart Sample Loading feature allows the pipette tips to To add, copy, edit, view, and delete sample plates, press Data move down into the sample plate/rack at a speed that enables Administration in the main menu and then Manage Sample the tips to continuously aspirate slightly below the sample Plates and Racks (see Figure 9 on page 6). -
Page 14: Manage Pipette Tips
2. Measure the distance from the surface of the working area to the top of the wells/tubes. As a reference, this value is between 36 and 61 mm for the default Biotage sample plates. 3. Set the Plate height to the measured value. -
Page 15: Biotage Extrahera Glp Features
Note: When setting up a DFE method, it is possible to set individual aspiration and dispensation heights for each wash and elution step. These will override the aspiration and dispensation heights set for the carousel plate. Figure 26. The New DFE Tip view. Biotage Extrahera GLP Features ® ™... -
Page 16: Set Up A Method
Figure 27). Copies are saved in the User methods folder. Predefined Methods The system comes with a number of predefined Biotage methods that cannot be modified or deleted. If desired, they can be copied and then edited to your preferences. -
Page 17: Method Operations
Set Up a Method Figure 29. Setting up an SPE method. The exclamation mark ( ) shows Figure 30. User methods highlighted with do not have all the necessary which information is required to run the method. For more information, information to be run and are not displayed in the Run view. -
Page 18: Method Parameters
Note: The solvent must include parameters for the pipette tip the pretreatment operation to the desired position, it will be used with; see “Manage Solvents” on page 6. before conditioning (default) or before load. SPE only. Biotage Extrahera LV-200 User Manual | © Biotage 2021 ® ™... - Page 19 Set Up a Method » Rinse volume (µL): The amount of rinsing solvent to be DME+ methods. To set up a pressure gradient, press the Edit... used for each well/tube in the sample plate. SPE only. button for the desired step (see Figure 31). This field is only visible when Rinsing? is set to Yes.
-
Page 20: Dfe Method Parameters
Mix?: Whether the sample/eluate is mixed (Yes) or not » Wait time (min): The amount of time to wait to complete (No) with the pretreatment/posttreatment solvent. the pretreatment/posttreatment operation. Biotage Extrahera LV-200 User Manual | © Biotage 2021 ® ™... -
Page 21: Biotage Extrahera Glp Features
Set Up a Residual Purge Figure 33. The Edit Residual Purge Settings view. The residual purge option allows all residual sample, wash, and/or elution solvents to be pushed out of the DFE column tips. Biotage Extrahera GLP Features ® ™... -
Page 22: Export, Import, And Delete Methods
Only one method at a time can be deleted. The user has to enter a reason for deleting and the user password. Note: It is only possible to export the predefined Biotage » methods as PDF file(s). -
Page 23: Set Up And Start A Run
Set Up and Start a Run Set Up and Start a Run Run Method/Run Individual Samples Warning 9. In the Run – Select Method view, select the method to run and press Prepare Run. Only methods relevant to the current »... -
Page 24: Adjust The Air Pressure
50% of the extraction plate/rack is populated. Figure 38. The Set Up Solvent Tips view. » Use 3 bar (0.3 MPa; 44 psi) when 25% of the extraction plate/rack is populated. Biotage Extrahera LV-200 User Manual | © Biotage 2021 ® ™... -
Page 25: Load Sample Pipette Tips
Set Up and Start a Run Load Sample Pipette Tips 16. Press the illustration of the sample pipette tips in the Prepare Run view (position 2) and ensure that the Set Up Sample Tips view (see Figure 41) corresponds to the physical pipette rack in position 2 on the working area. -
Page 26: Assign Solvent Bottles And Prime
Figure 44. The Solvent Feeder is blue in the Prepare Run view when it is positioned over the reservoirs and orange when it has been pushed back. Biotage Extrahera LV-200 User Manual | © Biotage 2021 ® ™... -
Page 27: Assign Manually Loaded Solvents (Optional)
Set Up and Start a Run Assign Manually Loaded Solvents (Optional) Load Carousel Plate(s) If more than five solvents are required to run the method or if Set Up the Carousel for SPE, SLE, PPT/PLD, you prefer to load the solvents manually, setup a solvent rack in Filtration, Filtration +, or Hydro DME+ position 6 on the working area. -
Page 28: Enter The Report Name And A Comment (Optional)
5 and 6 on the working area. 34. When done, press Save in the top pane. For more information, see the Extrahera GLP User Manual (P/N 417250). Biotage Extrahera LV-200 User Manual | © Biotage 2021 ® ™... -
Page 29: Monitor And Control A Run
Monitor and Control a Run Monitor and Control a Run Running Monitor the Run Pause or Abort the Run The progress of the run is displayed in the Running view; see If you need to pause or abort a run that is in progress, press Figure 49. -
Page 30: Post-Run Activities
End of Run dialog opens when the run has been completed but before the report is generated. For more information, see the Extrahera GLP User Manual (P/N 417250). Biotage Extrahera LV-200 User Manual | © Biotage 2021 ® ™... -
Page 31: View, Export, And Delete Reports
View, Export, and Delete Reports View, Export, and Delete Reports Reports Biotage Extrahera GLP Features Reports can be viewed, exported, and deleted in the Reports ® ™ view; see Figure 52. » Instead of saving the reports on the system, the reports can be saved in a network share folder. -
Page 32: Enable/Disable The Dfe Mode
4. Press Maintenance in the software’s main menu. 5. Enable the DFE mode option; see Figure 56 on page 30. Biotage Extrahera LV-200 User Manual | © Biotage 2021 ® ™... -
Page 33: Maintenance
® Support ; see “Export the System Logs” below. ™ When reporting a problem with your system to Biotage 1-Point » Re-Initialize System: Used for restoring the system to Support, you may be requested to send in the system logs. -
Page 34: Clean The Interior Of The System
1. Press Maintenance in the main menu and then Manual Control..2. If there are plates on the carousel, press Open in the Door field (if applicable) and remove them. 3. Press Close in the Door field. Biotage Extrahera LV-200 User Manual | © Biotage 2021 ® ™... -
Page 35: Replace The Solvent Tubing
When the liquid has been removed, press Close in the when the ventilation is turned off. Waste Valve field. » Use only tubing, nuts, and ferrules supplied by Biotage. 5. Press Move Out in the Pressure Unit field. » Use caution when finger-tightening fittings to prevent stripped threads or crushed ferrules. -
Page 36: Clean Or Replace The Waste Tubing
Open the solvent feeder by unscrewing the two screws tubing getting clogged. and remove the old tubes. » Use only tubing, nuts, and ferrules supplied by Biotage. c. Reassemble the solvent feeder with new tubes. » Use caution when finger-tightening fittings to prevent stripped d. -
Page 37: Pipette Pump Calibration And Adjustment
Maintenance 5. To replace the waste outlet tubing connected between the 3. Select the method for the volume to be calibrated and press waste valve and the waste reservoir (see C in Figure 64): Prepare Run in the top pane. a. -
Page 38: Replace The Pressure Head Seal
Figure 67. Ensure that the gas tubes are on the left side of the highlighted bracket. Biotage Extrahera LV-200 User Manual | © Biotage 2021 ® ™... -
Page 39: Replace The Fuses
Ensure that the system is turned off and the power cord is disconnected before replacing the fuses. 3. Replace the filters. » Use only exact replacement fuses supplied by Biotage. 4. Put the filter unit back in place. Incorrect fuses create a potential fire hazard. »... -
Page 40: Manual Control
Note: It is not possible to move the pipette head when the Head - Plate Dry field and press Start. pressure unit is in its outer position. Note: The pressure head must be moved out to apply pressure. Biotage Extrahera LV-200 User Manual | © Biotage 2021 ® ™... -
Page 41: Set Up Reminders For Pipette Pump Calibrations
Set Up Reminders for Pipette Pump Calibrations Set Up Reminders for Pipette Pump Calibrations System Administration The pipette pump can be calibrated for all types of pipette and DFE tips that are used on the system. Reminders for pipette pump calibrations can be set up in the System Administration view (see Figure 72). -
Page 42: Troubleshooting
Follow the instructions in “Power measured as described on page 34: Failure” on page 5. » Check that the correct pipette tip type is used. » Check that new pipette tips are used. Biotage Extrahera LV-200 User Manual | © Biotage 2021 ® ™... -
Page 43: Pressure Head
» Check that the correct gas tubing is used; the outer diameter should be 6 mm and the inner diameter 4 mm. Always use tubing supplied by Biotage. Figure 73. Retaining clips, weak and strong. If the pressure head does not move down or up:... -
Page 44: Solvent Pumps
If necessary, clean or replace the tube as described in “Clean or Replace the Waste Tubing” on page 33. » Remove any spillage; see “Clean the Interior of the System” on page 31. Biotage Extrahera LV-200 User Manual | © Biotage 2021 ® ™... -
Page 45: General Information
General Information General Information Consumables and Accessories Part No. Description Only genuine Biotage accessories must be used in the system. 414218SP Pipette Tip Waste Bin To order consumables and accessories, see contact information on 415985SP Extraction Waste Collector for Lifter the back of this document or visit our website www.biotage.com. - Page 48 Part Number: 417251-A © 2021 Biotage. All rights reserved. No material may be reproduced or published without the written permission of Biotage. Information in this document is subject to change without notice and does not represent any commitment from Biotage. E&OE.
Need help?
Do you have a question about the Extrahera LV-200 and is the answer not in the manual?
Questions and answers