Table of Contents
Advertisement
Quick Links
Advertisement
Table of Contents

Summary of Contents for sauter HMO
- Page 1 Sauter GmbH Ziegelei 1 Phone : +49-[0]7433- 9933-0 D-72336 Balingen Fax: +49-[0]7433-9933-149 e-mail: info@kern-sohn.com Internet: www.sauter.eu Instruction manual mobile Leeb hardness tester SAUTER HMO Version 2.0 04/2020 PROFESSIONAL MEASURING HMO-BA-e-2020...
-
Page 2: Table Of Contents
Thank you for purchasing the mobile digital Leeb impact hardness tester from SAUTER. We hope that you will be very satisfied with the high quality of this device and its extensive functionality. For any questions, wishes and suggestions we are at your disposal. -
Page 3: Before Commissioning
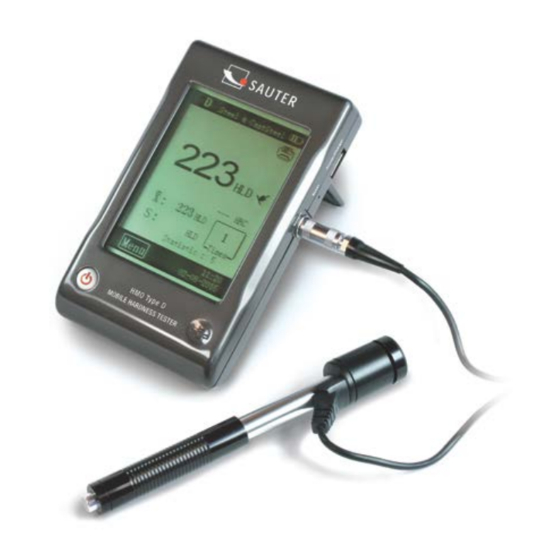
1 Before commissioning Before putting the device into operation, check the delivery for any transport damage to the packaging, the plastic case and the device itself. Should this be the case, SAUTER must be contacted immediately. 2 Introduction 2.1 Measuring principle The measuring principle for the measurements carried out with this dynamic impact hardness tester is physically quite uncomplicated. -
Page 4: Structure
1. Rebound sensor type: automatically detected or manually adjusted 2. materials: Material from which the sample is made 3. Battery indicator 4. Tolerance value 5. Conversion value IMPORTANT: if this symbol is displayed "---", it means that the conversion is out of range 6. Impact direction HMO-BA-e-2020... -
Page 5: Technical Data
• Simple operation and high measuring accuracy for measurements on round surfaces (R > 10 mm) • Metal production and processing, automotive industry and transport, engineering and power plants, refineries, petrochemical industry, aerospace industry, shipbuilding industry, metal construction, test and laboratory services HMO-BA-e-2020... -
Page 6: Test Procedure
During the surface preparation of the sample, its surface should not be exposed to thermal cooling or heating. The test surface should be flat and have a metallic gloss. There must be no oxide layers or other contamination. HMO-BA-e-2020... - Page 7 If the sample surface is not flat, the radius of the test area should not be less than 30 mm (50 mm for type G). If it is not specified, an appropriate support ring should be used. The sample should have no magnetic properties. HMO-BA-e-2020...
-
Page 8: Test Execution
The hardness tester enables hardness values to be stored, which can then be searched after the measurement has been completed. To do this, enter the menu to select the desired browse mode (see par. 3.2.3 for detailed information). Figure 2-7 HMO-BA-e-2020... -
Page 9: Print
4.1 Settings in the main mask The hardness tester is equipped with a touch display and the most common test parameters can be set directly in the main mask (Fig. 3-1). HMO-BA-e-2020... -
Page 10: Menu Settings
If only the Leeb hardness value is required, it can be disregarded. If the material is not specified in the menu, the user must familiarise himself with the Fig. 3-3 operating instructions in order to select a comparable type of material. Impact direction HMO-BA-e-2020... - Page 11 ❶ The value range for statistical parameters is 1 ~ 99, whereby with the setting "1" no statistical processes are carried out by the system. ❷ If some items (material group etc.) are reset, the count starts from "0". HMO-BA-e-2020 Fig. 3-8...
- Page 12 Fig. 3-13 to scroll down. Press the key to delete a selected data group. Press the key to print a selected data group. Press the OK key to display - the test time of the selected data group. Fig. 3-14 HMO-BA-e-2020...
- Page 13 (the printer must be switched on). Fig. 3-19 Coarse error If the function "Gross error" is active (ON), gross errors are displayed according to the settings for Grubbs after the determination of "Statistical parameters". HMO-BA-e-2020...
-
Page 14: Care And Maintenance
In principle, the tube and the housing of the impact device must be cleaned every 1 to 2 thousand measurements. Replacement of the impact ball Continuous use may damage the impact ball. It shall be replaced as soon as its condition appears to affect the accuracy of the measurement. 5.2 Shop Fig. 4-2 HMO-BA-e-2020... -
Page 15: Calibration
Fig. 4-4 and the actuating position of displayed values, a touch calibration must be carried out. To do this, simply press the centre of the crossing line or the square frame according to the displayed note. HMO-BA-e-2020... -
Page 16: Annex
/ slots. practically all applications. Type D+15 Type G Heavy housings and solid forgings. Especially thin front part, measuring coil with feedback. Suitable for hardness testing on grooves/grooves surfaces with indentations. HMO-BA-e-2020... -
Page 17: Conversion Area
1. Display 2. Impact device 3. Test block 4. Mini Printer 5. Battery charger 6. Small support ring, Cleaning brush 7. Operating instructions 8. Transport case Note: To view the CE declaration, please click on the following link: https://www.kern-sohn.com/shop/de/DOWNLOADS/ HMO-BA-e-2020...


Need help?
Do you have a question about the HMO and is the answer not in the manual?
Questions and answers