Table of Contents
Advertisement
Available languages
Available languages
Quick Links
Advertisement
Table of Contents

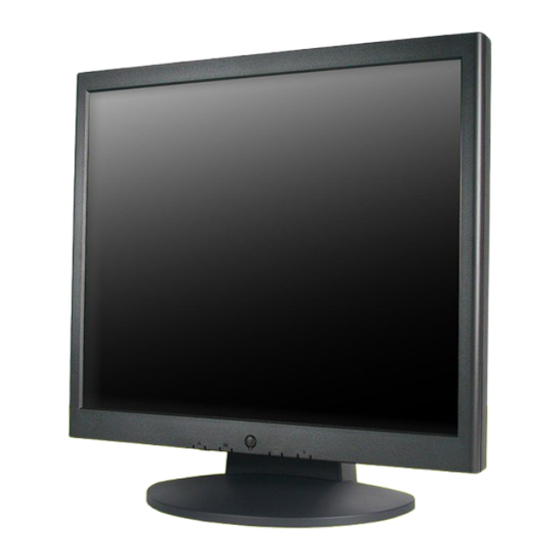
Related Manuals for Logic Controls LE1017


Summary of Contents for Logic Controls LE1017
-
Page 2: Table Of Contents
User´s Manual 17” Touch Screen Monitor Index English Notice Safety information Precaution Package contents Hardware Installation Input Control Buttons OSD (On-Screen Display) Menu Mode Miscellaneous Screw Specification for VESA Plate Stand or Wall Mount Quick Installation Guide for Touch Panel Driver... - Page 3 Specificazione della Vite per il Supporto Piatto VESA o per il Montaggio a Muro Guida veloce all’installazione per il Driver del Pannello Sensibile Guida alla calibrazione per il Pannello sensibile Calibrazione in 4 punti User´s Manual 17” Touch Screen Monitor...
- Page 4 User´s Manual 17” Touch Screen Monitor Linearizzazione Test di Traccia Emulatore di Mouse Ricerca Guasti Sincronizzazione Supportata Specifiche Português Aviso Informação de segurança Precaução Conteúdo do pacote Instalação do hardware Input Botões de contrôlo Modo do menu OSD (On-Screen Display) Miscelãneo...
-
Page 5: Safety Information
Be sure to turn the monitor off before plugging the power cord into the socket. • Be sure to check the power cord and other cords are connected correctly. • Do not attempt to open the monitor. You may be hurt by electric shock. For service, call your place of purchase. Precaution •... -
Page 6: Input
Touch Panel Interface Control Buttons There are 5 keys for user to set up the monitor, including "Auto Adjust", "OSD menu", "Power", "Adjust <->", "Adjust <+>". The following descriptions are the introduction of these Keys. A - Auto Adjust (Function) -
Page 7: Miscellaneous
* Please adjust your speaker volume via your computer speaker volume control icon. * Please note the sound will continue to play when your monitor is off. Please use the computer speaker volume control to turn off or mute the sound. -
Page 8: Screw Specification For Vesa Plate Stand Or Wall Mount
2. Mechanical Screw 4 mm Caution: Please follow the Screw Specification in diagram while you assembling VESA Plate stand or Wall Mount Plate into monitor back cover. Inner metal housing of monitor Metal depth 2mm Plastic back cover depth 3mm... -
Page 9: Quick Installation Guide For Touch Panel Driver
Choose the setup type that best suits your needs. There are two accessory utilities for choosing, Rotation Monitor Utility and Shutdown Utility. Users can install the utility they want by checking the box. Then Press [Next >] to continue installation. -
Page 10: Calibration Guide For Touch Panel
User´s Manual 17” Touch Screen Monitor Calibration Guide for Touch Panel 4 points calibration The touch screen needs to be calibrated before it can work accurately. Whenever feeling the accuracy is loosing, user can proceed another calibration to reset or adjust the touch screen. -
Page 11: Mouse Emulator
It no longer needs to touch the right button in the Touchtray to activate a right click. This feature allows users to do right click more easily with touch screen. User´s Manual 17” Touch Screen Monitor... -
Page 12: Troubleshooting
User´s Manual 17” Touch Screen Monitor Troubleshooting Make sure that your monitor is properly installed if you have encountered any trouble using this product. • There is no picture on the screen. Check: Power saving mode. Press any key and move the mouse to deactivate the mode Signal cable connector pins. -
Page 13: Specification
Others 1. * DVI, Speaker, Touch and Light Sensor are optional. 2. Product specification are subject to change without notice. User´s Manual 17” Touch Screen Monitor VGA compatible analog RGB Composite sync supported DDWG compliant Single Link TMDS Digital Visual... -
Page 14: Information De Sécurité
User´s Manual 17” Touch Screen Monitor Français Avertissement • Toutes les informations dans ce manuel peuvent être modifiées sans préavis. • Veuillez lire et suivre les informations et précautions suivantes avant d’utiliser l’appareil.. Information de sécurité • Ne placez aucun objet mouillé sur le moniteur ou le cordon d’alimentation. -
Page 15: Boutons De Configuration Du Menu
Allumer et éteindre l’écran LCD. Quand l’appareil est allumé, la lumière s’allume en vert, Et en orange en mode attente. Baisser l’option valeur dans le menu OSD. Augmenter l’option valeur dans le menu OSD. User´s Manual 17” Touch Screen Monitor Entrée audio In Interface Écran Tactile USB... -
Page 16: Mode De Menu Osd (On-Screen Display)
User´s Manual 17” Touch Screen Monitor Mode de menu OSD (On-Screen Display) * Veuillez régler le volume haut parleur depuis l’icône de contrôle de volume de votre PC. * Veuillez noter que le son continuera quand votre moniteur est éteint ; pour l’éteindre, veuillez éteindre votre PC ou mettre l’icône de contrôle du volume en sourdine. -
Page 17: Caractéristiques Des Vis Pour Le Pied Vesa Ou L'emplacement Mural
VESA. Dans le cas contraire, risque de dommage mécanique Boit métal interne du moniteur 1mm (Espace de sécurité) 1mm (Espace de sécurité) Profundeur métal de 2mm Profundeur de 3mm du couvercle arrière plastique Longueur de vis (A) mm (B)+6mm User´s Manual 17” Touch Screen Monitor... -
Page 18: Guide D'installation Rapide Du Pilote De L'écran Tactile
Choisissez le type d’installation qui convient le mieux à vos besoins. Il existe deux choix d’utilitaires en accessoire, Rotation Monitor Utility et Shutdown Utility. Les utilisateurs peuvent installer l’utilitaire de leur choix en sélectionnant la case. Pressez ensuite sur [Next >] pour continuer l’installation. -
Page 19: Guide De Calibrage De L'écran Tactile
à calculer. De plus, une barre ligne de temps s’affiche en bas de la fenêtre pour indiquer le temps écoulé. Si l’écran tactile n’est pas touché avant que la barre ligne de temps apparaisse en bas à droite, la tâche de calibrage sera terminée automatiquement. User´s Manual 17” Touch Screen Monitor... -
Page 20: Émulateur De Souris
User´s Manual 17” Touch Screen Monitor Test Dessin L’utilisateur peut presser sur le bouton Clear pour nettoyer la fenêtre. Presser sur Quit termine le test Dessin. Dans la fenêtre du test Dessin, les utilisateurs peuvent vérifier la linéarité de l’écran, la capacité... -
Page 21: Minutages Acceptés
31.87 60.00 48.36 65.00 70.07 56.48 75.00 75.03 60.02 78.75 60.02 63.98 108.0 75.03 79.98 135.0 User´s Manual 17” Touch Screen Monitor Sync Polarity or Operating composite Mode sync (H/V) A/D/G A/D/G A/D/G A/D/G A/D/G A/D/G A/D/G A/D/G A/D/G A/D/G... -
Page 22: Caractéristiques
User´s Manual 17” Touch Screen Monitor Caractéristiques Signaux d’entrée Compatibilité Connecteur Alimentation Internal Speaker User Interface Condition opératoire Dimensions Poids Net Angle d’inclinaison Gestion Alimentation Régulation (Certificats) Écran tactile Autres 1. * Le DVI, les haut- parleurs, Tactile et le capteur optique sont en option. -
Page 23: Sicherheitsvorkehrungen
Den Monitor jederzeit vor direkter Sonneneinstrahlung oder Hitze schützen. • Keine Flüssigkeiten über dem Monitor verschütten. • Den Monitor nicht in der Nähe von Magneten oder elektrischen Geräten, wenn diese in Betrieb sind, benutzen. • Zum Reinigen des Monitorbildschirmes verwenden Sie keine scharfen Chemikalien oder starke Reinigungsmittel. -
Page 24: Hardware-Installation
User´s Manual 17” Touch Screen Monitor Hardware-Installation Vorsichtig mit dem neuen LCD Monitor sein. Der Monitor ist sehr hochentwickelt und empfindlich. Trotz seinem einzigarten Design kann er aber auch leicht beschädigt werden. Schalten Sie die Stromzufuhr zum LCD-Bildschirm und zum PC aus, bevor Sie das Gerät aufstellen. Befolgen Sie den Installationsvorgang Schritt für Schritt. -
Page 25: Osd-Menü-Modus (Anzeige Auf Dem Bildschirm)
OSD-Menü-Modus (Anzeige auf dem Bildschirm) * Regeln Sie die Lautsprecherlautstärke über Ihr PC-Lautstärke-Kontrollesymbol. * Beachten Sie, dass der Sound auch bei ausgeschaltetem Monitor aktiv ist, schalten Sie zum Beenden Ihren PC aus oder deaktivieren Sie das Lautstärke-Kontrollsymbol.PC ou mettre l’icône de contrôle du volume en sourdine. -
Page 26: Schrauben Spezifikation Für Vesa Plattenständer Oder Wandberg
Schrauebenlänge (A) 1. (B)+5mm 2. Mechanische Schraube Achtung: Die Schraubenspezifikation im Bild befolgen, während der Zusammenbau des VESA Plattenständers oder der Wandhalterung in die Monitor Hinterdeckung. Plastik hinterdeckung tiefe 3mm (B)+6mm 4 mm Sonst könnte es mechanische Schaden verursachen. -
Page 27: Schneller Installationsführer Für Den Treiber Der Berührungsfläche
Dann [Weiter >] klicken, um mit der Installation fortzufahren. Den Einstellungstyp wählen, der am besten für Sie geeignet ist. Es stehen zwei Zubehöranwendungen zur Wahl, Rotation Monitor Anwendung and abschalten Anwendung. Anwender können die gewüns- chte Anwendung durch anklicken installieren. Dann [Weiter >] klicken, um mit der Installation fortzufahren. -
Page 28: Kalibrierungführer Für Die Berührungsfläche
User´s Manual 17” Touch Screen Monitor Kalibrierungführer für die Berührungsfläche 4 Punktekalibration Bevor der Berührungsbildschirm genau funktioniert, muss eine Kalibrierung vorgenommen werden. Wenn der Anwender spürt, dass die Genauigkeit weg ist, kann der Anwender die Kalibrierung nochmals vornehmen, um eine genauere Berührungsfunktion zu erhalten. -
Page 29: Zeichnentest
Bildschirm berührt bis die Zeit abgelaufen ist. Es wird nicht mehr nötig sein, die rechte Taste im Berührungsfach zu berühren, um ein Rechtsklicken zu aktivieren. Dieses Feature erleichtert dem Anwender, ein Rechtsklicken mit dem Bildschirm leichter vorzunehmen User´s Manual 17” Touch Screen Monitor... -
Page 30: Fehlersuche
User´s Manual 17” Touch Screen Monitor Fehlersuche Falls Schwierigkeiten auftreten, stellen Sie wie nachstehend beschrieben sicher, dass der Monitor richtig installiert wurde • Der Bildschirm bleibt leer. Nachprüfen: Energiesparmodus. Zum Deaktivieren dieses Modus drücken Sie auf eine beliebige Taste oder bewegen Sie die Maus. -
Page 31: Spezifikationen
Zertifizierungen Touch-Panel Anderes 1. * DVI, Lautsprecher, Touch und Lichtsensor sind optional. 2. Änderungen der Produktspezifikation sind vorbehalten. User´s Manual 17” Touch Screen Monitor VGA kompatibles analog RGB Composite Sync unterstützt DDWG konformes Single Link TMDS Digital Visual Interface (DVI) -
Page 32: Español Noticia
• Estar seguro de revisar el cordón eléctrico y los otros cordones para la correcta conexión. • Que no se intentar de abrir el monitor, Ud. podría ser dañado por choque eléctrico. Para servicio, llame al lugar de compra. Precaución •... -
Page 33: Instalación De Hardware
*ATENCION: Funciones de DVI y Audio son de características opcionales. Sensor de luz (Opcional) Botones de control Hay 5 teclas para que el usuario instale el monitor, incluyendo “Ajuste Auto”, “Menú OSD “, “Energía Eléctrica”, “Ajuste <->”, “Ajuste <+>”. Las siguientes descripciones forman la introducción a estas teclas. -
Page 34: Menú De Modo De Osd (Exhibición Sobre La Pantalla)
* Se le ruega ajustar el volumen de su altavoz con el icono de control de volumen del altavoz de su PC. * Favor notar que el sonido continuará cuando su monitor está apagado. Para apagar, favor apagar su PC o poner en mudo al icono de control de volumen del altavoz. -
Page 35: Especificación De Tornillo Para Placa Vesa De Piso O De Pared
2. Tornillo mecánico 4 mm Caution: Please follow the Screw Specification in diagram while you assembling VESA Plate stand or Wall Mount Plate into monitor back cover. Otherwise, It may cause a mechanical damage. User´s Manual 17” Touch Screen Monitor... -
Page 36: Guía De Instalación Rápida Al Controlador En El Panel De Tacto Digital
Seleccionar de tipo de instalación que Ud necesite. Hay 2 utilidades de accesorio disponibles, Uti- lidad de Rotación de Monitor y Utilidad de Apagado. Los usuarios pueden instalar la utilidad que deseenhacienda clique en la caja. Luego presionar [Siguiente >] para continuar con la instalación. -
Page 37: Guía De Calibración Al Panel De Tacto Digital
Si la pantalla de tacto digital no se haya tocado antes de la barra de línea de tiempo pase a la punta derecha, la calibración termina sóla. User´s Manual 17” Touch Screen Monitor... -
Page 38: Prueba De Dibujo
User´s Manual 17” Touch Screen Monitor Prueba de Dibujo Esta función se usa para examinar de exactitude y rendimiento. Presionar este botón y aparece una nueva imagen asomada en la localización cuando la pantalla de tacto digital haya sido designado a continuación. -
Page 39: Solución De Problemas
Solución de Problemas Hace seguro que su monitor está bien instalado, si Ud. ha encontrado cualquier problemas del uso sobre este producto. • Que no hay dibujo sobre la pantalla. Check: Apretar cualquier tecla y mover el ratón para desactivar el modo. -
Page 40: Especificación
User´s Manual 17” Touch Screen Monitor Especificación Signos input Compatibility Connector Power Internal Speaker User Interface Operating Condition Dimensions Net Weight Tilt Angle Power Management Regulation (Certifications) Touch Panel Others 1. * DVI, Altavoz, Touch y Sensor de Luz son elementos opcionales. -
Page 41: Italiano
Non usare il monitor quando dei prodotti elettronici o dei magneti operano nelle vicinanze. • Non usare delle sostanze chimiche forti o dei detersivi solventi forti per pulire lo schermo del monitor. Pulire con un panno spugnoso morbido, applicando una soluzione leggera. -
Page 42: Installazione Dello Hardware
User´s Manual 17” Touch Screen Monitor Installazione dello Hardware Fate attenzione con il vostro nuovo monitor LCD, il monitor è molto sofisticato e delicato. Spegnete la corrente dell’LCD e del PC prima d’installarlo. Seguite i nostri passi per l’installazione un passo per volta. -
Page 43: Modalità Menu Osd (On-Screen Display)
Modalità Menu OSD (On-Screen Display) * Regolare il volume degli altoparlanti via l’icona di controllo del volume PC. * È da notare che l’Audio continuerà, quando si spegne il monitor, per spegnerlo è necessario spegnere il PC oppure annullare l’icona del controllo volume. -
Page 44: Specificazione Della Vite Per Il Supporto Piatto Vesa O Per Il Montaggio A Muro
4 mm Attenzione: Mentre si assembla il Supporto Piatto VESA o il Piatto Montaggio a Muro nel coperchio posteriore del monitor, seguire la Specificazione per la Vite nel disegno qui sopra. Diversamente si potrebbe causare un danno meccanico. Scocca metallica interna del monitor... -
Page 45: Guida Veloce All'installazione Per Il Driver Del Pannello Sensibile
Scegliere il tipo d’impostazione che è più consono alle proprie necessità. Ci sono due utilitiesaccesso- rie fra cui scegliere, Rotation Monitor Utility e Shutdown Utility. L’utente può installarel’utility che desidera controllando la casella. Poi premere [Next >] per continuare l’installazione. -
Page 46: Guida Alla Calibrazione Per Il Pannello Sensibile
User´s Manual 17” Touch Screen Monitor Guida alla calibrazione per il Pannello sensibile Calibrazione in 4 punti Occorre fare la calibrazione perchè lo schermo sensibile al tocco possa funzionare con precisione. Quando l’utente si accorge di una perdita di precisione, l’utente può rifare la calibrazione per ottenere una funzione di tocco più... -
Page 47: Test Di Traccia
Non ha più bisogno di toccare il pulsante destro nel pannello di tocco per attivare una cliccata a destra. Questa funzione rende più facile per gli utenti la cliccata destra con lo schermo sensibile al tocco. User´s Manual 17” Touch Screen Monitor... -
Page 48: Ricerca Guasti
User´s Manual 17” Touch Screen Monitor Ricerca Guasti Se incontrate dei problemi nell’uso di quesdto prodotto, assicuratevi che il monitor sia stato installato nel modo corretto. • Sullo schermo non appare alcuna figura. Controllare: Modalità risparmio corrente. Premere un tasto qualsiasi e spostare il mouse per disattivare questa modalità. -
Page 49: Specifiche
Altro 1. * DVI, Altoparlanti, Touch e Sensore di Luce sono opzionali. 2. Le specificazioni del prodotto possono essere soggette a cambiamenti senza preavviso. User´s Manual 17” Touch Screen Monitor RGB analogico VGA compatibile Composite Sync supportato Single Link TMDS Digital Visual Interface (DVI) –... -
Page 50: Português
No colocar nada no seu monitor. Indesejável ventilação elevará a temperatura no monitor. Conteúdo do pacote Nosso pacote do monitor LCD conte os seguintes artigos. Esteja certo que você tenha todo o jôgo, de outra maneira, contata seu concesioário ou estabelecimentoonde você comprou o monitor. Pelo menos, contata-os. -
Page 51: Instalação Do Hardware
Instalação do hardware Ter cuidado coo o seu novo monitor LCD, o monitor é um dispositivo sofisticado e delicado. Desliga o LCD e o PC antes de instalar-o. Siga nossa instalação passo a passo. Input AC Input AC Input: Para a conexão do cabo elétrico. -
Page 52: Modo Do Menu Osd (On-Screen Display)
* Favor ajustar o volume do seu alta falante com o icono de contrôlo de volume do alto falante do seu *Favor notar que o som continuará quando seu monitor está desligado. Para desligar, favor desligar seu PC ou por o icono de contrôlo do volume do alto falante em mudo.Pressionar o botão OSD para ter acesso no menu e pressionar o botão Aumentar/Reduzir para ajustamentos. -
Page 53: Especificação De Parafuso Para Placa Vesa De Pavimento Ou Parede
2. Parafuso mecânico 4 mm Precaução: Favor seguir a especificação do parafuso dada no diagrama durante o montagem. A placa VESA de pavimento na tampa traseira do monitor. De outra maneira, causaria danos mecânicos. User´s Manual 17” Touch Screen Monitor Caixa interior de metal do monitor 1mm (Espaço de segurança) -
Page 54: Guia De Instalação Rápida Para O Controlador No Painel De Tato Digital
Selecionar de tipo de instalação que você necessite. Há 2 utilidades de acesso disponiveis, Utilidade de Rotação de Monitor e Utilidade de Desligado. Os usuários podem instalar a utilidade que desejem com o clique na caixa. Logo pressionar [Seguinte >] para continuar com a instalação. -
Page 55: Guia De Calibração No Painel De Tato Digital
Ademais, uma barra de linha de tempo aparece no fundo da imagem para indicar o tempo passado. Se a pantalla de tato digital não tenha tocado antes da barra de linha de tempo passe na ponta direita, a calibração termina só. User´s Manual 17” Touch Screen Monitor... -
Page 56: Prova De Plano
User´s Manual 17” Touch Screen Monitor Prova de Plano Esta função te usada para examinar de exatidão e cumprimento. Pressionar este botão e aparece uma nova imagem asomada na localização quando a pantalla de tato digital tenha designado abaixo. O usuário pode pressionar o botão Delir para delir a imagem. Pressionar o botão Abandonar para terminar esta prova de plano. -
Page 57: Localizador E Reparador De Defeitos
Localizador e Reparador de Defeitos Esteja certo que o seu monitor está bem instalado se você há encontrado problemas no uso deste produto. • Não há imagem na pantalha. Revisar: Modo de salvamento de energia. Pressionar qualquer tecla e mover o mouse para desmobilizar o modo. -
Page 58: Especificação
User´s Manual 17” Touch Screen Monitor Especificação Sinais input Compatibilidade Conector Energia elétrica Alto falante Interno Interface Usuário Condição de operação Dimensões Peso neto Ângulo de inclinação Administração da energia elétrica Regulamento (Certificações) Painel ao toque Outros 1. * DVI, Alto falante, Toque e Sensor de Luz são elementos opcionais.
Need help?
Do you have a question about the LE1017 and is the answer not in the manual?
Questions and answers