Advertisement
Quick Links
Advertisement

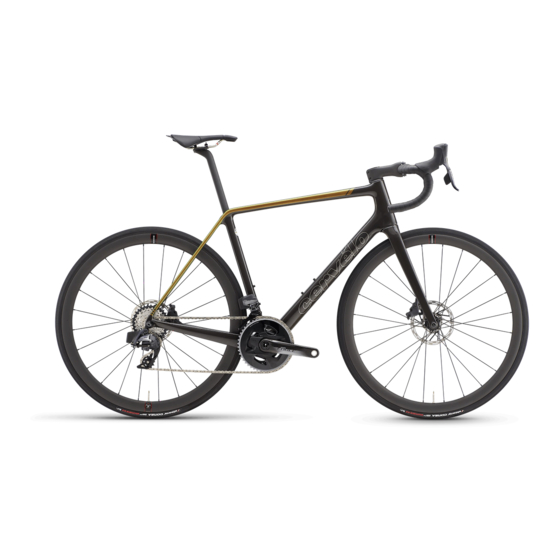
Summary of Contents for Cervélo R5
- Page 1 R5 RETAILER ASSEMBLY MANUAL...
-
Page 2: Table Of Contents
Bicycle workstand (types which R5 Parts List ..... . Electric Wire Routing & Installation... 15 these adjustments. - Page 3 R5 PARTS LIST SMALL PARTS Derailleur Hanger Fixing Direct Mount Derailleur Item Description Cervélo Part No. Item Description Cervélo Part No. Item Description Cervélo Part No. Hanger Front Derailleur Rubber Plug for ST32 DRH-SDM BB Blanking Plug GR-BB-140 Dropout Blanking Plug...
- Page 4 SMALL PARTS HB13 HANDLEBAR 80mm Seatpost Accessory Mount ST31 LT Computer/ Only use the components specified in this manual Battery Mount Kit (Rear) Accessory Mount Assembly for handlebar and stem assembly. Failure to use the MT-BINT-SP2 MT-LM-R-003 MT-521A 128mm specified parts and to follow the supplied assembly instructions may result in a loss of control 380mm while riding and serious injury.
- Page 5 ST31 LT STEM FRAME & COMPONENT PREPARATION Rubber Plug Cervélo ST31 LT Stem ST31 LT faceplate insert for ST32 (Carbon) Press fit is removable for use with Top Cap 80mm ST-C031L-80 Hold the frame using a secured seatpost only. Cover over the compatible Accessory PL-338 90mm...
- Page 6 FRAME & COMPONENT PREPARATION Secure the Front With 1x chainring To install the ST31 LT Derailleur Mount setups, use Front Computer/Accessory Mount, (FDM-2017) into Derailleur Mount remove the faceplate insert ST31 LT Accessory Mount frame with two Blanking Screws and install the Accessory includes inserts for fixing screws.
-
Page 7: Fork Preparation & Installation
FORK PREPARATION & INSTALLATION The component parts of the compression 1st Mark plug are side-specific. Re-assembling 1. Apply grease to the bearing pockets and install 10. Install the Stem Top Cap and Preload Fixing parts incorrectly may result in loss of the upper and lower headset bearings into the Screw into the stem. -
Page 8: Brake Hose Routing
BRAKE HOSE ROUTING Route hydraulic brake hose through the frame and fork with Route brake hose These routing illustrations are intended as a supplement to Route rear It is recommended to include brake hose the Disc Hose Guide (CBG-DBH). Install and adjust calipers as through Split the manufacturer’s installation instructions only. -
Page 9: Electric Wire Routing & Installation
ELECTRIC WIRE ROUTING & INSTALLATION These routing illustrations are intended as a supplement to the manufacturer’s installation instructions only. Please refer to the component manufacturer’s service center or website for further information. Brake E-Wire(SD300) 800mm E-Wire Install the Rear Derailleur Wire Guide (GR-DRPOUT-GUIDE). -
Page 10: Seatpost Assembly & Installation
1/2 turn. Once saddle is adjusted, tighten fixing screws to a Upper Clamps maximum of 8 Nm. The R5 uses a proprietary Accessory Mount Lower Clamp shaped seatpost. Do not Kit (Rear) attempt to use any seatpost... -
Page 11: Aero Thru-Axle Installation
AERO THRU-AXLE INSTALLATION To secure wheels, install the greased axle, through the drop out and the wheel hub, aligning the threaded end of the axle with the threaded insert. Once aligned and engaged, thread the axle (clock-wise) into the threaded component of the insert until the axle is secured tightly. -
Page 12: Tire/Rim Clearance
TIRE/RIM CLEARANCE NOTES Your Cervélo bicycle complies with the ISO 4210-2:4.10.2 standard for tire clearance. In order to comply with these safety standards and maintain your Limited Lifetime Warranty, a minimum of 4mm of clearance must remain between the tire and any frame element. Due to the growing complexity of tire and rim interfaces, Cervélo recommends identifying the available space before choosing a tire. - Page 13 R5 RETAILER ASSEMBLY MANUAL www.cervelo.com CER-R5-V1 2021-04-07...


Need help?
Do you have a question about the R5 and is the answer not in the manual?
Questions and answers