Table of Contents
Advertisement
Quick Links
Advertisement
Table of Contents

Related Manuals for Cervélo R5-CX


Summary of Contents for Cervélo R5-CX
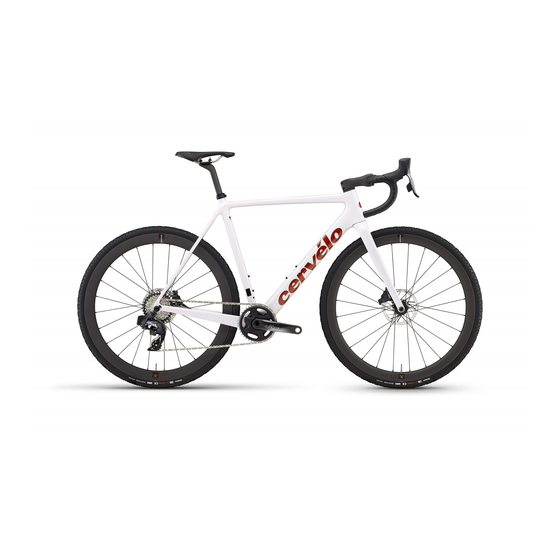
- Page 1 R5-CX RETAILER ASSEMBLY MANUAL...
-
Page 2: Table Of Contents
Frame & Component Preparation ....11 R5-CX Frame Details ....27... - Page 3 Seatpost Battery w/Fixing Screw 46mm OD T47 BB tool MT-BINT-SP2 stem. Mount required. Seat Tube Blanking The R5-CX frame is D-Shaped Seatpost Split Ring 312 SR-312 GR-576 Plug(1x & Wireless) designed solely Clamp & Secondary SPC-256...
- Page 4 SMALL PARTS Derailleur Hanger Fixing Direct Mount Seatpost Derailleur Accessory Mount ST31 Computer/Accessory Battery Mount Hanger Kit (Rear) Mount Assembly MT-BINT-SP2 DRH-SDM MT-LM-R-003 MT-LM-F-004 Front Derailleur Mount Blanking Plate FDM-CVR Secondary Front Derailleur Seatpost Clamp & Mount w/Fixing Seatpost Clamp Screws SPC-256 FDM-590...
- Page 5 ST31 STEM 1. Coat the surfaces where the stem body and faceplate contact the Cervélo ST31 Stem (Carbon) handlebar clamping area (as shown right) with carbon assembly paste. 80mm ST-C031-80 Rubber Plug for 90mm ST-C031-90 ST32 Top Cap 2. Center the handlebar against the stem body and secure it in place To mount a cycling 100mm ST-C031-100 PL-338...
- Page 6 HB13 HANDLEBAR FRAME & COMPONENT PREPARATION 80mm 1. Slide Secondary Seatpost Clamp onto seatpost. Use only original Cervélo components & included Hold the frame using a secured seatpost only. hardware specified for handlebar, stem, and fork 2. Apply carbon paste to the frame and Clamping the top tube can damage the frame Secondary 128mm...
- Page 7 FRAME & COMPONENT PREPARATION Install Front For 1x systems Derailleur Mount replace with the (FDM-590), and Front Derailleur To install ST31 Accessory Mount Blanking ensure fixing Mount (MT-LM-F-004), Plate (FDM-CVR). screws are angle mount into ST31 torqued to 3Nm. stem faceplate and torque to 2Nm.
- Page 8 FORK PREPARATION & INSTALLATION The component parts of the compression 1st Mark plug are side-specific. Re-assembling 1. Apply grease to the bearing pockets and install 9. Tighten the Compression Plug to 8Nm using a parts incorrectly may result in loss of ST32 Stem the upper and lower headset bearings into the torque wrench.
- Page 9 BRAKE HOSE ROUTING Route hydraulic brake hose through the frame and fork with Route brake hose These routing illustrations are intended as a supplement to Route rear It is recommended to include brake hose the Disc Hose Guide (CBG-DBH). Install and adjust calipers as through Split the manufacturer’s installation instructions only.
-
Page 10: Electric Wire Routing & Installation
ELECTRIC WIRE ROUTING & INSTALLATION These routing illustrations are intended as a supplement to the manufacturer’s installation instructions only. Please refer to the component manufacturer’s service center or website for further information. Brake E-Wire(SD300) 800mm E-Wire Install the Rear Derailleur Wire Guide (GR-DRPOUT-GUIDE). -
Page 11: Seatpost Assembly & Installation
1/2 turn. Once saddle is Crossbars adjusted, tighten fixing screws to a maximum of 8Nm. The R5-CX uses a proprietary Saddle shaped seatpost. Do not Clamp Accessory Mount attempt to use any seatpost... -
Page 12: Aero Thru-Axle Installation
AERO THRU-AXLE INSTALLATION To secure wheels, install the greased axle, through the drop out and the wheel hub, aligning the threaded end of the axle with the threaded insert. Once aligned and engaged, thread the axle (clock-wise) into the threaded component of the insert until the axle is secured tightly. -
Page 13: Tire/Rim Clearance
TIRE/RIM CLEARANCE INTENDED USE OF THE R5-CX BICYCLE Maximum Weight Limit - Cervélo R5-CX Your Cervélo bicycle complies with the ISO 4210-2:4.10.2 standard for tire clearance. In order to comply with these safety standards and maintain your Limited Lifetime Warranty, a minimum of 4mm of clearance must remain between the tire and any frame element. Due to Understand your bike and its intended use. - Page 14 R5-CX TORQUE SPECIFICATIONS R5-CX TORQUE SPECIFICATIONS Correct tightening torque of threaded fasteners is It is recommended that you permit your retailer to to frame, the stem to fork, and the handlebar to Component Torque(Nm) Notes crucial to your safety. Always tighten fasteners to perform the following adjustments, as they have stem joints.
-
Page 15: R5-Cx Frame Details
R5-CX FRAME DETAILS R5-CX FRAME GEOMETRY R5-CX (FM153) R5-CX (FM153) R5-CX (FM153) 51cm 54cm 56cm 58cm Bike Name R5-CX Upper Headset Bearing Dimensions 1-1/4", 34x46.8x7 , 45°x45° Reach 371 mm 380 mm 389 mm 398mm Model Year 2023 Lower Headset Bearing Dimensions 1-1/2", 40x51.8x7 .5, 36°x45°... -
Page 16: Cervélo Customer Support
CERVÉLO CUSTOMER SUPPORT NOTES Contacting Customer Support Visit www.cervelo.com/contact-us to submit a question to Cervélo. Product Registration Visit www.cervelo.com/support to register your Cervélo bicycle through your MyCervélo account. Manuals Visit www.cervelo.com/product-manuals for additional information on Cervélo products. Warranty Visit www.cervelo.com/warranty for information on Cervélo’s warranty policy. - Page 17 R5-CX RETAILER ASSEMBLY MANUAL www.cervelo.com CER-CXA-V1 2022-05-25...
Need help?
Do you have a question about the R5-CX and is the answer not in the manual?
Questions and answers