Table of Contents
Advertisement
Advertisement
Table of Contents

Subscribe to Our Youtube Channel
Related Manuals for Millipore MERCK EZ-Pak


Summary of Contents for Millipore MERCK EZ-Pak
- Page 1 User Guide EZ-Pak ® Dispenser Curve...
- Page 2 This manual is believed to be complete and accurate at the time of publication. In no event shall Millipore SAS be liable for incidental or consequential damages in connection with or arising from the use of...
-
Page 3: Table Of Contents
Contents Introduction......................Operator and Equipment Safety ................Specifications and Operating Requirements ............... System Components....................Dispenser Indicator Light Information ............... Dispenser powered by rechargeable battery ............Dispenser powered by AC .................. Installing the EZ-Pak® Dispenser Curve ..............Dispenser powered by rechargeable battery ............Dispenser powered by AC .................. - Page 4 REMARQUE : Ce guide de l’utilisateur est également disponible dans les langues suivantes : français, italien, allemand, espagnol et japonais. Les versions peuvent être téléchargées depuis notre site Internet : www.millipore.com/ techlibrary. NOTA: Il presente manuale e disponibile anche nelle seguenti lingue: francese, italiano, tedesco, spagnolo e giapponese.
-
Page 5: Introduction
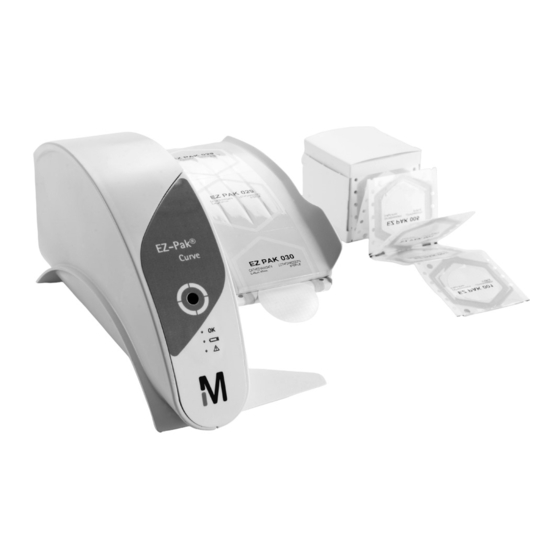
Introduction The EZ-Pak® Dispenser Curve provides portable, hands-free, high-speed dispensing of ready-to-use, sterile, individually-packed membranes for microbiological analysis of liquid samples. The system is available in two versions: • Powered by lithium ion battery (up to 10,000 membranes are dispensed per charge) •... -
Page 6: Operator And Equipment Safety
Operator and Equipment Safety • Read and understand this manual before using the EZ-Pak® Dispenser Curve. Failure to follow operating instructions could result in user injury or damage to the instrument. • Read and understand all maintenance instructions in this manual before performing maintenance on the EZ-Pak®... -
Page 7: Specifications And Operating Requirements
Specifications and Operating Requirements Dispenser Dispenser powered powered by by alternating lithium-ion current (AC) battery Width 31 cm / 12.2 in. Depth 18 cm / 7.1 in. Dimensions Height 16.5 cm / 6.5 in. Weight 2.1 kg / 4.7 lbs. 1.9 kg / 4.3 lbs. -
Page 8: System Components
System Components The package contains: • EZ-Pak® Dispenser Curve • Plastic film and paper spool clips • Rechargeable lithium-ion battery and battery charger (for dispenser powered by rechargeable battery) External power supply (for dispenser powered by AC) • Four power adapter plugs (Europe, USA/Japan, United Kingdom, and Australia/China) •... - Page 9 Screw Plastic film spool Back plate Plastic film/paper spool clips Power inlet Paper spool...
-
Page 10: Dispenser Indicator Light Information
Dispenser Indicator Light Information When the dispenser is ON, three indicator lights provide information about the state of the dispenser. Dispenser powered by rechargeable battery Indicator Meaning Status Information Color The dispenser is off or is not ready to use (battery completely discharged or dispenser failure). -
Page 11: Dispenser Powered By Ac
Dispenser powered by AC Indicator Meaning Status Information Color The dispenser is off or is not ready to use, or dispenser failure. Green Blinking The dispenser is in sleep mode. The dispenser is ready to use. Yellow Not applicable. This indicator light is always off. The dispenser is operating properly. -
Page 12: Installing The Ez-Pak® Dispenser Curve
Installing the EZ-Pak® Dispenser Curve 1. . Remove all components from the box. Remove the dispenser fr the protective bag. NOTE Retain all packing materials. If the unit needs to be shipped, it should be packed in the original materials. Place the dispenser in its working environment. - Page 13 Plug the battery delivered with the dispenser to the cord connector. Put the battery into the dispenser. 6. Put the plate back on the dispenser and fasten the screw. 7. Connect the appropriate power adapter plug to the battery charger.
-
Page 14: Dispenser Powered By Ac
NOTE Four power adapter plugs are supplied: Europe, USA/Japan, United Kingdom, and Australia/China. Four power Power inlet adapter plugs Battery charger 8. Connect the battery charger cord to the power inlet on the dispenser. 9. Connect the battery charger to a power outlet. NOTE Before first use, completely charge the battery. -
Page 15: Loading A Membrane Cartridge Into The Ez-Pak® Dispenser Curve
Loading a Membrane Cartridge into the EZ-Pak® Dispenser Curve 1. Ensure that the dispenser is off. 2. Open an EZ-Pak® membrane cartridge by detaching the piece of cardboard from the left side of the box. NOTE Only EZ-Pak® membrane cartridges with the “M” logo on the cartridge label are compatible with the EZ-Pak®... - Page 16 Insert the EZ-Pak® membrane cartridge as shown: Pull out the band until the first cell containing a membrane is visible and fully out of the membrane cartridge. NOTE To avoid membrane waste, the first cells on the band do not contain membranes.
- Page 17 Close the cover. Pull off the plastic film and the paper spool clips.
- Page 18 Peel away the transparent plastic film from the paper backing of the cells that are outside of the dispenser. Place the end of the plastic film below the plastic film spool. NOTE Refer to the arrows on the dispenser for placement of the film and the backing paper on the spools.
- Page 19 10. Place the long part of the clip in one of the plastic film spool grooves to pin the film against the plastic film spool. 11. Secure the film by pushing the small part of the clip into the plastic film spool until the end stop.
- Page 20 12. Place the backing paper above the paper spool. NOTE Refer to the arrows on the dispenser for placement of the film and the backing paper on the spools. 13. 3. Pin the backing paper against the backing paper spool by placing long part of the clip into one of the paper spool grooves.
- Page 21 14. Secure the backing paper by pushing the small part of the clip into the paper spool until the end stop. 15. Place the dispenser on the working area. 16. Power on the dispenser by pressing the On/Off switch to position |). The dispenser is ready to use.
-
Page 22: Using The Ez-Pak® Dispenser Curve
Using the EZ-Pak® Dispenser Curve 1. Press the On/Off switch to position | to power on the dispenser. 2. To dispense a membrane, move a hand in front of the membrane dispensing sensor until a membrane is released by the dispenser. NOTE The first cells of a new membrane cartridge are empty. - Page 23 3. . The membrane is dispensed and held in place in the partially open cell. NOTE The counter printed on the plastic film indicates the number of membranes that remain in the cartridge. Using forceps, remove the membrane by pulling it straight out from the cell.
-
Page 24: Adjusting The Membrane Exposure (Optional)
NOTE At the end of the day, or if the EZ-Pak® Dispenser Curve will not be used for an extended period of time, press the On/Off switch to position 0 to switch the dispenser off. Adjusting the Membrane Exposure (optional) The membrane exposure can be increased by about 10 mm from the nominal value. - Page 25 5. . Use the screwdriver delivered with the dispenser to slightly rota the adjustment screw clockwise to increase the membrane exposure. 6. Press the On/Off switch to position | to power on the dispenser. 7. Dispense a membrane to check membrane exposure. (See “Using the EZ-Pak®...
-
Page 26: Cleaning The Ez-Pak® Dispenser Curve
Cleaning the EZ-Pak® Dispenser Curve 1. Switch off and disconnect the EZ-Pak® Dispenser Curve from the power outlet before cleaning. 2. Wipe outside surfaces of the dispenser with a non-woven wipe moistened with one of the products listed in the following table. NOTE Do not spray any cleaning products, solvents, or abrasives onto or into the EZ-Pak®... -
Page 27: Replacing The Battery
Replacing the Battery NOTE Battery instructions apply only to the EZ-Pak® Dispenser Curve powered by a rechargeable battery. 1. Switch-off the EZ-Pak® Dispenser Curve and disconnect the battery charger. 2. Use the screwdriver delivered with the dispenser to remove the screw that secures the plate located at the back of the dispenser. - Page 28 Push on the clip of the connector located at the end of the cord to unplug the battery from the cord. NOTE Do not discard the battery in standard waste. Refer to your local regulations for proper disposal instructions. 6. Plug the new battery (catalog number EZCURVBAT) to the cord connector.
-
Page 29: Troubleshooting
Troubleshooting Generic problems Symptom Possible Cause Remedy The hand is too far from the Move the hand closer to the dispensing sensor. dispensing sensor. The green indicator light is on but Switch the dispenser off. Clean the nothing happens when a hand is dispensing sensor using a non- moved in front of the dispensing woven wipe moistened with one of... - Page 30 Specific problems related to the dispenser powered by a rechargeable battery Symptom Possible Cause Remedy The On/Off switch is in the on The battery is Charge the battery by (|) position, but all the indicator connecting the dispenser to a completely lights are off.
-
Page 31: Ordering Information
Ordering Information Description Quantity/Pack Catalog Number EZ-Pak® Membrane Dispenser Curve, powered by lithium-ion battery EZCURVE01 EZ-Pak® Membrane Dispenser Curve, powered by AC only (no battery) EZCURVEAC Spare Parts Rechargeable lithium-ion battery EZCURVBAT External power supply (for dispenser powered by AC) EZCURVP0W External power supply/charger for battery-powered dispenser EZCURVCHA... - Page 32 EZ-Pak® Membranes (150 membranes with 150 Microfil® funnels) 100 mL Microfil® funnels and EZ-Pak® Membranes, 0.45 µm, white, MZHAWG101 gridded, 47 mm diameter 250 mL Microfil® funnels and EZ-Pak® Membranes, 0.45 µm, white, MZHAWG251 gridded, 47 mm diameter 100 mL Microfil® funnels and EZ-Pak® Membranes, 0.45 µm, black, MZHABG101 gridded, 47 mm diameter 250 mL Microfil®...
-
Page 33: Symbols Referenced
Please visit www.millipore/weee to get details on how to ensure proper treatment of the product according to your country. The presence of this logo on the product testifies the compliance of... -
Page 34: Standard Product Warranty
Technical Assistance For more information: In the U.S., call 1-800-MILLIPORE (1-800-645-5476), or visit www.millipore.com/techservice EZ-Pak, Merck, Millipore, and Sigma-Aldrich are trademarks of Merck KGaA, Darmstadt, Germany or its affiliates. Detailed information on trademarks is available via publicly accessible resources. © 2019 Merck KGaA, Darmstadt, Germany and/or its affiliates. All Rights Reserved.
Need help?
Do you have a question about the MERCK EZ-Pak and is the answer not in the manual?
Questions and answers