Table of Contents
Advertisement
Quick Links
Advertisement
Table of Contents
Troubleshooting

Related Manuals for Millipore milli-q


Summary of Contents for Millipore milli-q
- Page 1 ® ® ® Milli-Q Synthesis and Milli-Q Synthesis A10 User Manual...
- Page 2 In the event of a breach of the foregoing warranty, Millipore’s sole obligation shall be to repair or replace, at its option, the applicable product or part thereof, provided the customer notifies Millipore promptly of any such breach.
- Page 3 EUROPEAN UNION EC DIRECTIVES Directive 89/336/CEE Directive 73/23/CEE ♦ The system mentioned above is manufactured in Millipore SAS - 67120 Molsheim - FRANCE - facilities whose quality management system is approved by an accredited registering body to the ISO9001 Quality System Standards.
- Page 4 Proper recycling of these products helps in environmental preservation and helps to protect natural resources. For more information about recycling of products containing electric or electronic components, please contact your local recycling representative or organisation. Milli-Q Synthesis/Milli-Q Synthesis A10...
-
Page 5: Table Of Contents
HAPTER RODUCT NFORMATION -Q P ..................5 ILLI RODUCT ATER PECIFICATIONS Water produced by the Milli-Q Synthesis or Synthesis A10 ..............5 Flowrate..............................5 Resistivity..............................5 Particles ..............................5 Pyrogens ..............................5 TOC ................................5 Micro-Organisms ............................5 Comparison of Milli-Q Water and ASTM Standard Specifications ............5 ....................6 CHEMATIC OF MAIN COMPONENTS .....................7... - Page 6 Pressure Regulator........................17 Ball Valve for shutting off the feedwater supply ................. 17 Remote Point Of Use Dispenser ..................... 17 Remote Point Of Use Dispenser used on a “Production” type Milli-Q ............. 18 Footswitch..........................18 Printer or Computer Cable......................18 Remote Display with Keypad ......................
- Page 7 OW TO VIEW THE AGE OF THE ONSUMABLES ..................54 OW TO UNDERSTAND ILLI MESSAGES ................57 HAPTER AINTENANCE ......................57 AINTENANCE CHEDULE ....................58 OW TO REPLACE THE ..................60 OW TO REPLACE THE UANTUM ARTRIDGE ....................65 OW TO REPLACE THE ILLIPAK Milli-Q Synthesis/Synthesis A10...
- Page 8 The problem is Low or No Flowrate from the POU Dispenser............... 77 The problem is Low Resistivity of the Product Water ................78 The problem is there is no power to the Milli-Q system............... 79 The problem is there is an “ERROR Number” Alarm displayed ............. 79 Continuation of “ERROR Number”...
-
Page 9: Chapter 1 Introduction
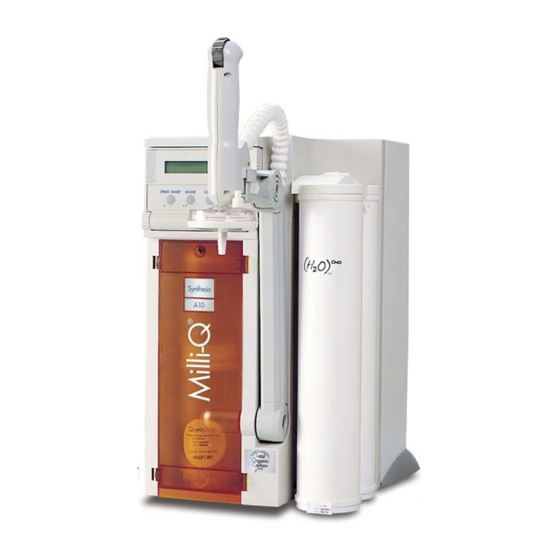
Water Purification System. You can easily identify your type of Water Purification System if you do not see the Catalogue Number. The Milli-Q Synthesis and Synthesis A10 Water Purification Systems have an Orange Door on the front cabinet. -
Page 10: Commonly Used Abbreviations In This Manual
μm micron (unit of length) μS/cm microSiemens per centimeter (a measurement unit describing the electrical conductivity of water) ® a Millipore device which measures TOC in Ultrapure Water ® ASTM American Society for Testing and Materials CFU/ml Colony Forming Units per milliLitre ®... -
Page 11: Safety Information
AFETY NFORMATION Your Milli-Q Water Purification System should be operated according to the instructions in this manual. In particular, the hydraulic and electrical specifications should be followed and met. It is important to use this equipment as specified in this manual; using this equipment in a different manner may impair the safety precautions of the Water System. -
Page 12: Contacting Millipore
NTRODUCTION ONTACTING ILLIPORE NTERNET AND MAIL The Millipore Internet Site can be used to find addresses, telephone/fax numbers, and other information. Internet Site Address: www.millipore.com www.millipore.com/techservice ANUFACTURING Millipore SAS 67120 Molsheim FRANCE Milli-Q Synthesis/Synthesis A10... -
Page 13: Chapter 2 Product Information
TANDARD PECIFICATIONS Milli-Q Product Water Quality will meet or exceed ASTM Type I Standard Specifications for Reagent Grade Water. The specifications for ASTM Type I Reagent Grade Water are shown below. Note that the Water Quality Specifications for a Milli-Q Synthesis (or Milli-Q Synthesis A10) are listed in the section just above. -
Page 14: Schematic Of Main Components
RODUCT NFORMATION CHEMATIC OF MAIN COMPONENTS The water flow through a Milli-Q Synthesis Water Purification System is shown here in a flow diagram. A description of each item is in the next section below. RECIRCULATED WATER PATH MILLI-Q PRODUCT FEEDWATER... -
Page 15: Description Of Main Components
Valve is factory installed inside all Milli-Q systems and only the tubing needs to be attached during installation. The Pump is used to bring water into the Milli-Q and then to send it through the various components such as the Q- Gard Purification Pack and the Quantum Ultrapure Cartridge. -
Page 16: When Do I Change The Q-Gard Purification Pack
HEN DO CHANGE THE It is recommended to change the UV Lamp every 365 Days (once per year). The Milli-Q LCD will show a message “EXCHANGE UV” after 365 Calendar Days indicating it is time to replace the UV Lamp. -
Page 17: Pyrogard 5000 Uf Cartridge
The UF Cartridge has a Reject Water Stream which is plumbed via a piece of 8 mm OD tubing from the back of the Milli-Q to a sink or a drain. This stream is used to transport the bacteria, pyrogens, particles, ... that are rejected by the UF Cartridge. -
Page 18: Millipak
ILTERS ARE THERE There are 2 types of Millipak Filters (sometimes called the Final Filter). The Sterile Millipak 40 is generally used for some Life Science applications. This has a Millipore Catalogue Number of MPGL04SK2. See Section 8-1 for more information. - Page 19 RODUCT NFORMATION Q-GARD QUANTUM MILLIPAK Milli-Q Synthesis/Synthesis A10...
-
Page 20: A10 Toc Monitor
HAT DOES THE The A10 TOC Monitor (called A10 in this manual) is used to measure the TOC of the Milli-Q Product Water. The A10 is located inside the Milli-Q System Cabinet. Any Milli-Q system with an A10 inside will have ‘A10’... -
Page 21: Technical Specifications
230 VAC ± 10%, 50/60 Hz. 0.26 amp source, 1 amp Time Lag fuse used (ref. ZMQS5VFT1, ZMQP5VFT1, ZMQS5VF01, ZMQP5VF01). The source of electrical power should be within 1 meter of the Milli-Q. The source of electrical power must be earth grounded. -
Page 22: Materials Of Construction
RODUCT NFORMATION ATERIALS OF ONSTRUCTION Please contact Millipore for a list of the materials of construction for wetted components. OISE EVEL The Milli-Q has a noise level of 42 dB at a distance of 1 meter away. Milli-Q Synthesis/Synthesis A10... -
Page 23: Chapter 3 Pre Installation
1/2 inch NPTM connection? Is there a way to shut off water from the pipe to the Milli-Q? If not, did you order a ball valve from Millipore to install on the Feedwater Tubing? -
Page 24: Pre Installation Checklist - "Armless " M
Remote Point Of Use Dispenser. It may be desired to have Remote Display with the “Production” Milli-Q System. An example of when this would be needed is when the Milli-Q System is being mounted underneath a Lab Bench. In this instance, the Remote Display (and Remote Point Of Use Dispenser) could be mounted on top of the Lab Bench. -
Page 25: Optional Equipment You May Need
ISPENSER A Remote POU Dispenser can be added to the Milli-Q. This allows you to dispense water a maximum distance of 2.5 meters away from the Milli-Q. The Remote POU Dispenser is rested on a moveable arm that allows 180°... -
Page 26: Remote Point Of Use Dispenser Used On A "Production" Type Milli-Q
TYPE ILLI A “Production” type Milli-Q System needs to have a Remote Point Of Use Dispenser added to it. Without one, you would not be able to dispense water from the Milli-Q. All of the information in the above section (“Remote Point Of Use Dispenser”) applies to a “Production” type of Milli-Q System. - Page 27 NSTALLATION FOOTSWITCH WALL MOUNTING BRACKET BALL VALVE PRESSURE REGULATOR REMOTE DISPLAY REMOTE POU DISPENSER Milli-Q Synthesis/Synthesis A10...
-
Page 28: Nstallation Equirements
230 VAC ± 10%, 50/60 Hz. 0.26 amp source, 1 amp Time Lag fuse used (ref. ZMQS5VFT1, ZMQP5VFT1, ZMQS5VF01, ZMQP5VF01). The source of electrical power should be within 1 meter of the Milli-Q. The source of electrical power must be earth grounded. -
Page 29: Feedwater Requirements
The end of the ball valve should terminate with a fitting that accepts 8 mm tubing. This fitting is not supplied on the standard Millipore 30 Litre or 60 Litre or 100 Litre Reservoirs. You can order a fitting from Millipore with a 1/4 inch NPTM connection on one end and an 8 mm tubing insert on the other. -
Page 30: Unpacking Them Illi Box Hats Inside
S INSIDE Open the Milli-Q Shipping Box. Use the checklist and illustrations below to make sure all items were shipped and are accounted for. It is highly suggested to become familiar with the items that are shipped in the Accessories Bag since these will be used in the Installation Section of this manual. - Page 31 NSTALLATION ACCESSORIES SAN. PORT REMOVAL TOOL Milli-Q Synthesis/Synthesis A10...
-
Page 32: Chapter 4 Installation
EEDWATER IS FROM A RESERVOIR Make sure the Reservoir is full of purified water (i.e. RO or Elix water). Make sure the Milli-Q is located either beside or lower than the Reservoir. It is not advisable to locate the Reservoir below the Milli-Q. - Page 33 NSTALLATION CONNECTION TO A PRESSURISED PIPE Milli-Q Synthesis/Synthesis A10...
-
Page 34: Connection Of Tubing And The Owercord
ELIEF UBING This procedure does not need to be done if the Milli-Q is being fed from a Reservoir. It is highly recommended to perform this procedure if the Milli-Q is being from a pressurised source such as a loop. -
Page 35: Connecting The Powercord
ONNECTING THE OWERCORD Locate the Milli-Q Power Switch. It is located on the back of the system cabinet. It is located just above the Feedwater Tubing connection. Make sure your Milli-Q System Power Switch is in the ‘OFF’ position. The Power Switch is off when the ‘0’... - Page 36 NSTALLATION FEEDWATER TUBING CONNECTION UF REJECT TUBING CONNECTION AND PRESSURE RELIEF TUBING CONNECTION POWERCORD CONNECTION Milli-Q Synthesis/Synthesis A10...
- Page 37 NSTALLATION INSTALLATION OF THE Q-GARD PACK Milli-Q Synthesis/Synthesis A10...
-
Page 38: Urning On The Ystem Ower
UANTUM ARTRIDGE Locate the 2 latches on the front door of the Milli-Q Cabinet. Push each latch to the left and then open the door. Remove the 2 yellow plastic inserts that are inside. Pull them out and remove them. - Page 39 NSTALLATION INSTALLATION OF THE QUANTUM CARTRIDGE Milli-Q Synthesis/Synthesis A10...
-
Page 40: Urging The Air From The System
(i.e. STANDBY or PRE OPERATE Mode). The Milli-Q will now go to STANDBY Mode and will remind you to close the POU Dispenser Valve. Move the POU Dispenser Trigger back (its upright position). The Milli-Q will now go to PRE OPERATE Mode. -
Page 41: Hydrating The System
(The next morning) Bring the POU Dispenser Trigger forward to put the Milli-Q into PRODUCT Mode. Allow about 10 to 15 Litres (about 7 to 10 minutes) of water to be dispensed from the Milli-Q. Bring the POU Dispenser Trigger upright. The Milli-Q will finish dispensing water. The Milli-Q will continue to operate for 90 seconds after which it will go into PRE OPERATE Mode. - Page 42 NSTALLATION INSTALLATION OF BARBED FITTING AND TYGON TUBING PURGING AIR FROM THE QUANTUM CARTRIDGE INSTALLATION AND AIR PURGE OF THE MILLIPAK Milli-Q Synthesis/Synthesis A10...
-
Page 43: Nstallation And Rinsing Of The Illipak
Millipak, then a reduction in Product Water flowrate can result. Move the POU Dispenser Trigger back to the upright position. The Milli-Q should now be in PRE OPERATE Mode 90 seconds later. Leave the Milli-Q in PRE OPERATE Mode. - Page 44 CLEANING MENU The Milli-Q will dispense water for 60 seconds. Wait until this is finished. The timer will count up from 1 second to 60 seconds. When the 60 second timer is finished, the Flow Calibration Factor display will be shown. Measure the total volume of water (in Litres) dispensed from the Milli-Q.
- Page 45 NSTALLATION In the example below, you measured 1.15 lpm. The flow measured during the manufacturing of the Milli-Q was 1.00 lpm. S E R V I C E : C A L I B S E R V I C E : C A L I B POWER F L O W : 1 .
-
Page 46: How To Change The Displayed Language
Keypad Button again. The Milli-Q will now be in PRE OPERATE Mode. Press the MENU Keypad Button again for 2 seconds to enter the Customer Service Software. Press the MENU Keypad Button 5 times (6 times for a Milli-Q Synthesis A10). Stop when you see the LANGUAGE (under SERVICE OPTIONS) display. -
Page 47: How To Show Either Mω. Cm Or Μs/ Cm ( Resistivity Or Conductivity Units )
Press the MENU Keypad Button again for 2 seconds to enter the Customer Service Software. Press the MENU Keypad Button 5 times (6 times for a Milli-Q Synthesis A10). You should press the MENU Keypad button each time. Stop when you see the LANGUAGE (under SERVICE OPTIONS) display. - Page 48 MENU Press MENU for about 2 seconds When the Milli-Q is put into PRODUCT Mode, the LCD will look like : 0 . 0 5 5 μ S / c m @ 2 5 ° C P R E O P E R A T E...
-
Page 49: How To Show Non Temperature Compensated Resistivity Or Conductivity Values
HAT IS TEMPERATURE COMPENSATION Suppose the feedwater to a Milli-Q is 15°C. The Milli-Q Resistivity Sensor will measure a Resistivity Value of 31.756 MΩ.cm (or a Conductivity of 0.032 μS/cm). This is the actual Resistivity of the Milli-Q Product Water at 15°C. - Page 50 NSTALLATION Press the MENU Keypad Button 5 times (6 times for a Milli-Q Synthesis A10). Stop when you see the LANGUAGE (under SERVICE OPTIONS) display. P R E S E T V O L U M E 0 . 0 0...
- Page 51 MENU Press MENU for about 2 seconds When the Milli-Q is in PRODUCT Mode (POU Dispenser Trigger forward), the Display will look like: Note that ‘@ 25°C’ is missing in P R E O P E R A T E 3 1 .
-
Page 52: How To Set The Date And The Time Of Day
The date (day-month-year) can be printed out or downloaded to a computer along with other operating data pertinent to the Milli-Q. The date is changed at midnight of each day. The time of day is not printed out or downloaded to a computer; it is used only to advance the date. - Page 53 O P E R A T E POWER W E D / A U G - 1 / 0 1 SERVICE ALARM OPERATE / STANDBY MEASURE CLEANING MENU You have finished setting the Date and the Time Of Day. Milli-Q Synthesis/Synthesis A10...
-
Page 54: Chapter 5 Using The Milli -Q
These instructions are written for the Milli-Q user who already has completed all of the installation steps in Chapter 4. 1. Make sure the Milli-Q is in PRE OPERATE Mode. If the Milli-Q is in STANDBY Mode, then press the OPERATE/STANDBY Keypad Button for about 2 seconds. This will change the Milli-Q from STANDBY Mode to PRE OPERATE Mode. - Page 55 SING THE ILLI POU DISPENSER IN PRE-OPERATE MODE POSITION POU DISPENSER IN PRODUCT MODE POSITION Milli-Q Synthesis/Synthesis A10...
-
Page 56: Illi
The Milli-Q will dispense for a maximum of 30 continuous minutes in PRODUCT Mode. Contact Millipore if you need to dispense for more than 30 continuous minutes. During PRODUCT Mode, there is no water coming out of the UF Reject tubing on the back of the Milli-Q system. Milli-Q Synthesis/Synthesis A10... -
Page 57: How To View The Resistivity , Temperature And Toc
EMPERATURE AND IEWING ESISTIVITY The Resistivity (MΩ.cm @ 25 °C) of the Milli-Q Product Water is seen while the Milli-Q is in PRODUCT Mode. 1 8 . 2 M Ω . c m @ 2 5 ° C 1 8 . 2 M Ω . c m @ 2 5 °... -
Page 58: How To Use The
The Milli-Q will go from PRE OPERATE Mode to PRODUCT Mode when the Footswitch is depressed. The Milli-Q will remain in PRODUCT as long as the Footswitch is depressed. When the Footswitch is released, the Milli-Q will go back to PRE OPERATE Mode after 90 seconds. - Page 59 You can cancel the dispensing of water by moving the POU Dispenser Trigger upright (back to the PRE OPERATE position). When the pre-set total volume of water has been dispensed from the Milli-Q, the system will automatically go to STANDBY Mode. The LCD will prompt you to ‘CLOSE THE VALVE’.
- Page 60 The Milli-Q Synthesis has 4 consumable items. These include the Q-Gard Pack, the Quantum Cartridge, Millipak and the UV Lamp. The Milli-Q Synthesis A10 has 5 consumable items. These include the A10 UV Lamp plus the Q-Gard Pack, the Quantum Cartridge, Millipak and the UV Lamp.
- Page 61 MENU Press OPERATE/STANDBY once Milli-Q Synthesis A10 only. Press the OPERATE/STANDBY Keypad Button once to change to the age of the A10 UV Lamp. The AGE of the A10 UV (the small UV Lamp on the A10 device) is 0 Days in the display below.
- Page 62 ILLI MESSAGES It is possible for various messages to be displayed on the Milli-Q LCD while you are using the Milli-Q. While a message is being displayed, either the Yellow Service LED or the Red Alarm LED can be blinking.
- Page 63 The measured resistivity value (@ Contact Millipore for assistance. 25 °C) between The ionic levels in the Milli-Q Product 2.5 MΩ.cm. Water are elevated and it is the decision of the Milli-Q user whether to use the water or not.
- Page 64 Supply for the Solenoid Valve in the POU Dispenser. SYSTEM ERROR 10 An error occurred with data transfer to Turn off the Milli-Q. Turn it back on or from the Milli-Q microprocessor about 20 to 30 seconds later. If the Prom).
-
Page 65: Chapter 6 Maintenance
See the Maintenance Guide below for the typical maintenance that needs to be performed on your Milli-Q Synthesis or Milli-Q Synthesis A10. The Catalogue Numbers and other ordering information can be found in Sections 8-1 and 8-2. Detailed information about the various consumable items can be found in Sections 2-2 and 2-3. -
Page 66: How To Replace The Q-Gard
For Milli-Q Synthesis A10 Systems: The Milli-Q Synthesis A10 systems will not display a message EXCH. CARTRIDGES. It is up to the user of the Milli-Q system to verify that the Resistivity and TOC values of the Product Water are still within specification. - Page 67 AINTENANCE INSTALLATION OF THE Q-GARD PACK Milli-Q Synthesis/Synthesis A10...
-
Page 68: Ow To Replace The Uantum Artridge
Since the Q-Gard was just replaced (see Section 6-2), it is not necessary to release the residual water pressure in STANDBY Mode. Open the top and bottom latches of the door on the front of the Milli-Q system cabinet. Fully open the door. Remove the Quantum Cartridge from the Milli-Q. - Page 69 (i.e. STANDBY or PRE OPERATE Mode). The Milli-Q will now go to STANDBY Mode and will remind you to close the POU Dispenser Valve. Move the POU Dispenser Trigger back (its upright position). The Milli-Q will now go to PRE OPERATE Mode.
- Page 70 (The next morning) Bring the POU Dispenser Trigger forward to put the Milli-Q into PRODUCT Mode. Allow about 10 to 15 Litres (7 to 10 minutes of PRODUCT Mode) of water to be dispensed from the Milli-Q. Bring the POU Dispenser Trigger upright. The Milli-Q will go into PRE OPERATE Mode after 90 seconds.
- Page 71 AINTENANCE INSTALLATION OF THE QUANTUM CARTRIDGE Milli-Q Synthesis/Synthesis A10...
- Page 72 AINTENANCE INSTALLATION OF BARBED FITTING AND TYGON TUBING PURGING AIR FROM THE QUANTUM CARTRIDGE INSTALLATION AND AIR PURGE OF THE MILLIPAK Milli-Q Synthesis/Synthesis A10...
-
Page 73: How To Replace The Millipak
Millipak, then a reduction in Product Water flowrate can result. Move the POU Dispenser Trigger back to the upright position. The Milli-Q will go into PRE OPERATE Mode after 90 seconds. Leave the Milli-Q in PRE OPERATE Mode. -
Page 74: How To Sanitise And Clean The Uf Cartridge
Q-Gard Pack and Quantum Cartridge were air purged and hydrated). 4. The Milli-Q system will not be able to make Product Water for a minimum of 421 minutes while the UF is sanitised and cleaned. It is best to plan to perform the Sanitisation of the UF Cartridge during an overnight or weekend time frame. - Page 75 S A N . C Y C L E : 4 0 0 m n S A N . C Y C L E : 3 9 9 m n C L O S E T H E V A L V E Milli-Q Synthesis/Synthesis A10...
- Page 76 The Sanitisation and Cleaning of the UF Cartridge is now finished. The water inside the Milli-Q will be recirculated for 5 minutes every hour of PRE OPERATE Mode. When you use the system (i.e. the morning after the UF was Sanitised), dispense enough water until the Resistivity (and TOC) values are satisfactory.
- Page 77 AINTENANCE SANITISATION OF THE UF Milli-Q Synthesis/Synthesis A10...
-
Page 78: How To Clean The Screen Filter
The purpose of the Screen Filter is to prevent a large particle or other debris from entering the Inlet Solenoid Valve of the Milli-Q System. This will allow the Inlet Solenoid Valve to open and close correctly. If the Screen Filter becomes blocked with debris (’clogged’), then feedwater will not flow freely to the Milli-Q. - Page 79 AINTENANCE SCREEN FILTER CLEANING TIGHTENING OF THE POU DISPENSER ARM Milli-Q Synthesis/Synthesis A10...
-
Page 80: How To Tighten The Pou Dispenser Arm
OW TO TIGHTEN THE ISPENSER The POU Dispenser Arm is moved up and down during the times that water is dispensed from the Milli-Q System. Follow these instructions to tighten the POU Dispenser Arm Locate the ‘Allen’ Wrench (6-sided black wrench) from the Accessories Bag (from the Shipping Box). -
Page 81: How Do Ido An A10 Cleaning
Follow these steps below to perform an A10 CLEANING. If the Milli-Q is in STANDBY Mode, then press the OPERATE/STANDBY Keypad Button for about 2 seconds. This will change the Milli-Q from STANDBY Mode to PRE OPERATE Mode. See the drawing below for more information. -
Page 82: How Do I Cancel The A10 Cleaning Once It Is Started
C L E A N I N G : 5 9 Wait for the A10 CLEANING Mode to finish. The Milli-Q will automatically go to PRE OPERATE Mode at the end of the A10 CLEANING Mode. You have finished performing an A10 CLEANING. -
Page 83: How To Perform An Air Purge
An Air Purge is performed when there is trapped air in the UF Cartridge. Trapped air will reduce the Product Water flowrate from the Milli-Q. An Air Purge will allow the trapped air to be sent out of the Milli-Q system via the UF Reject tubing. -
Page 84: How To Replace The Uv Lamp
UF Cartridge Reject Solenoid Valve. Water will begin to flow through the UF Cartridge Reject tubing. The AIR PURGE will last for 5 minutes. When the timer reaches 0 minutes, the Milli-Q will go into STANDBY Mode. The LCD will prompt you to “CLOSE THE VALVE”. -
Page 85: Chapter 7 Troubleshooting
Remove the Feedwater Tubing from the Milli-Q. • Fitting on bottom of Reservoir is too tight; gasket on Confirm that there is water coming to the Milli-Q. fitting is flattened and restricts water flow. • Reservoir is located lower than the Milli-Q. -
Page 86: The Problem Is Low Resistivity Of The Product Water
Resistivity is low immediately following the completion • Perform an AIR PURGE and then go to PRODUCT of a Sanitisation and Cleaning of the UF. Mode for several minutes to rinse the UF Cartridge. Repeat the AIR PURGE if necessary. Milli-Q Synthesis/Synthesis A10... -
Page 87: The Problem Is There Is No Power To The Milli-Q System
SYSTEM CAUSE REMEDY No voltage at Wall Electrical Outlet. • Check Voltage at Wall Electrical Outlet. Powercord not plugged into Milli-Q. • Confirm that the Powercord is plugged in. System not turned on. • Confirm Power Switch is turned on. -
Page 88: Continuation Of "Error Number" Alarm Displayed
> 6 minutes. If the message continues contact Millipore. A10 ERROR 3 Problem occurred with temperature compensation. Turn off/on the Milli-Q and dispense water for > 6 minutes. If the message continues contact Millipore. The water entering the A10 is < 4 °C. Contact A10 ERROR 4 Millipore. -
Page 89: The Problem Is A Message Is Displayed With A Flashing Service Or Alarm Led
TOC Analysis unsuccessfully for 15 minutes. • Turn off then on the electrical power to the Milli-Q. • Contact Millipore if this frequently occurs. EXCHANGE A10 UV • The small UV Lamp on the A10 TOC Monitoring Device has been installed for 365 Days. -
Page 90: Other Troubleshooting Items
• Wrong Baud Setting on Milli-Q – Contact Millipore. • The Printer is not plugged into the Milli-Q system. System stops dispensing water after 30 minutes. • Perfectly normal. The Milli-Q will stop dispensing water from the POU after 30 continuous minutes. - Page 91 Millipak Express 20 per box. Millipak 40 (Sterile) MPGL04SK2 2/box, used Life Science Applications. Millipak 20 Express (Non-sterile) MPGP02001 1/box, see Section 2-3 for more information. A10 UV Lamp ZFA10UV01 1/box. UV Lamp ZMQUVLP01 1/box (gloves included). Milli-Q Synthesis/Synthesis A10...
-
Page 92: Q S
NOTE: 1. A Milli-Q System with a Front Arm comes with a POU Dispenser. 2. A Milli-Q System without a Front Arm does not come with a POU Dispenser. A Remote POU Dispenser would be needed. 3. Milli-Q Synthesis / Synthesis A10 / Gradient and Gradient A10 Systems have a UV Lamp inside. -
Page 93: Chapter 9
Place the Milli-Q into STANDBY Mode if it is in PRE OPERATE or PRODUCT Mode. See Section 5-1 for more information. 1. Turn off the Milli-Q Power Switch. It is located on the back of the Milli-Q cabinet just above the location where the Powercord is plugged into the Milli-Q. -
Page 94: Milli-Q
PPENDIXES REPLACEMENT OF MAIN POWER FUSE Milli-Q Synthesis/Synthesis A10... -
Page 95: Ppendix Ow To Transfer Information To Arinter
The installation instructions come with the Printer Cable. Make sure the Printer is ‘on-line’ and has paper and so forth. Make sure the Milli-Q is in PRODUCT Mode. It is not possible to print while the Milli-Q is in PRE OPERATE or STANDBY Mode. - Page 96 RINTOUT LOOK LIKE An example Printout is shown here. ************************* MILLIPORE ************************* SYSTEM: SYNTHESIS A10 SERIAL N°: F1JW8765A PROGR.VERSION: V3.01 * QUALITY REPORT * DATE: JUL-13/01 USER NAME: TEMPERATURE: 17.8°C @25°C CORRECTION ON PRODUCT: 18.2 MΩ.cm TOC: 3ppb Milli-Q Synthesis/Synthesis A10...
-
Page 97: Appendix 3 How To Transfer Information To A Computer
EQUIREMENTS NEEDED A cable is needed to connect between the Milli-Q and a computer. The Millipore Catalogue number for this cable is C0MPCBL01. This Computer Cable is an accessory for the Milli-Q and needs to be ordered separately. The computer end of this cable has a 9 pin connection. It installs into either the COM1 or COM2 Port of your computer. -
Page 98: Product M Ode
Elixdata.txt is an example file name shown below Make sure the Milli-Q is in PRODUCT Mode. It is not possible to download to a computer while the Milli-Q is in PRE OPERATE or STANDBY Mode. Press the MENU Keypad Button for about 2 seconds. The LCD will change as shown here. - Page 99 MEASURE CLEANING MENU Press MENU Press the MEASURE Keypad Button. Information will be sent to the Computer. The Milli-Q will return to PRODUCT Mode automatically. S E R V I C E P R I N T E R 1 8 . 2 M Ω . c m @2 5 °...
-
Page 100: Aemoteppendix 4 How To Use Aemote
Milli-Q system. The Remote POU Dispenser uses the same POU Device found on the front of the Milli-Q. The Remote POU Dispenser Arm is fixed to a Base. The Base can be wall mounted or the Base can be fitted with a metal weight for placement on a table or countertop. -
Page 101: Appendix 6 Comp Mode
COMP MODE 2 is a setting that gives the actual temperature compensated Resistivity or Conductivity values. In some operating conditions the feed water can be warmer or cooler than the water temperature inside the Milli-Q. This can cause small fluctuations of the resistivity and Conductivity values. Resistivity values could fluctuate between 18.0 MΩ.cm and 18.4 MΩ.cm @ 25 °C while the actual resistivity value is 18.2 MΩ.cm @ 25 °C.
Need help?
Do you have a question about the milli-q and is the answer not in the manual?
Questions and answers