Sign In
Upload
Download
Table of Contents
Contents
Add to my manuals
Delete from my manuals
Share
URL of this page:
HTML Link:
Bookmark this page
Add
Manual will be automatically added to "My Manuals"
Print this page
×
Bookmark added
×
Added to my manuals
Manuals
Brands
Millipore Manuals
Laboratory Equipment
Milliflex Oasis
User manual
Millipore Milliflex Oasis User Manual
Hide thumbs
1
Table Of Contents
2
3
4
5
6
7
8
9
10
11
12
13
14
15
16
17
18
19
20
21
22
23
24
25
26
27
28
29
30
31
32
page
of
32
Go
/
32
Contents
Table of Contents
Troubleshooting
Bookmarks
Table of Contents
Table of Contents
Introduction
Components
Required Items
Description of Items
Touch Switch
Hardware Installation
Testing
Filtration Units
Media Plates
Testing
Waste
Cleaning & Maintenance
Cleaning & Maintenance Table
Surface Sanitizers and Internal Flow
Filtration Head Cleaning
Pump Surface Cleaning
Pump Rinsing
Filtration Head External Gasket Cleaning
Pump Internal Flow Sanitization
Filtration Head Complete Cleaning
Replacement
Performance Verification
Use of Multiple Pumps
Material Needed
Two Pumps Connected
Three Pumps Connected
Installation
Culture Media Growth Promotion Test
Cassettes
System Specifications
Ordering Information
Troubleshooting
Operator & Equipment Safety Instructions
Technical Assistance
Advertisement
Quick Links
1
Testing
2
Cleaning & Maintenance Table
3
Cleaning & Maintenance
4
Pump Internal Flow Sanitization
5
Performance Verification
6
Troubleshooting
Download this manual
User Guide
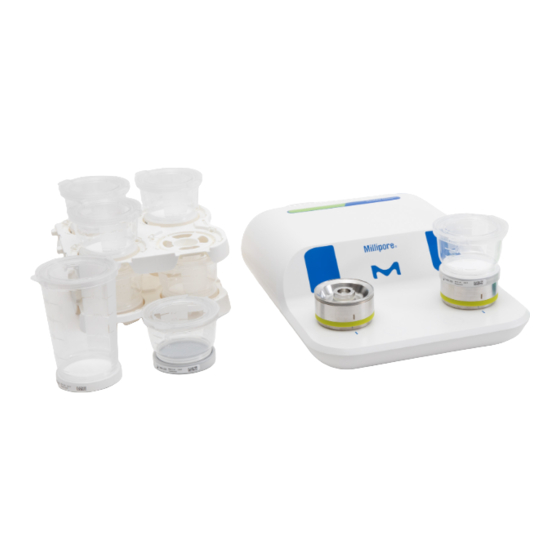
Milliflex Oasis
system
®
Important:
For an animated interactive user guide, visit
SigmaAldrich.com/Milliflex-Oasis for a visual
understanding of the different operations.
The life science business of
Merck operates as MilliporeSigma
in the US and Canada.
SigmaAldrich.com
Table of
Contents
Previous
Page
Next
Page
1
2
3
4
5
Advertisement
Table of Contents
Need help?
Do you have a question about the Milliflex Oasis and is the answer not in the manual?
Ask a question
Questions and answers
Related Manuals for Millipore Milliflex Oasis
Laboratory Equipment Millipore milli-q User Manual
(101 pages)
Laboratory Equipment Millipore M Air T User Manual
Compressed gas and air sampling kit (12 pages)
Laboratory Equipment Millipore Milli-Q Advantage A10 User Manual
(122 pages)
Laboratory Equipment Millipore Millicell MDCI10000 User Manual
Digital cell imager (17 pages)
Laboratory Equipment Millipore MERCK EZ-Pak User Manual
Dispenser curve (34 pages)
Laboratory Equipment Millipore MMSYSTMM1 User Manual
(32 pages)
Laboratory Equipment Millipore MERS00002 User Manual
(11 pages)
Laboratory Equipment Millipore mPAGE Lux Quick Start Manual
Bis-tris gel casting system (3 pages)
Laboratory Equipment Millipore mPAGE TurboMix Quick Start Manual
Bis-tris gel casting kit (3 pages)
Laboratory Equipment Millipore Spectroquant Multy Operating Manual
Colorimeter (276 pages)
Laboratory Equipment Millipore Amicon Ultra-4 Series User Manual
Centrifugal filter devices (7 pages)
Laboratory Equipment Millipore Amicon Ultra-2 User Manual
Centrifugal filter devices for volumes up to 2 ml (11 pages)
Laboratory Equipment Millipore XX4004700 User Manual
Stainless steel 47 mm pressure filter holder (2 pages)
Laboratory Equipment Millipore Labscale User Manual
Tangential flow filtration system (60 pages)
Laboratory Equipment Millipore Millicell ERS-2 User Manual
(11 pages)
Laboratory Equipment Millipore Steritest Symbio Installation Manual
Flex pump (110 pages)
This manual is also suitable for:
Mmsystmm1
Mmsankit1
Table of Contents
Save PDF
Print
Rename the bookmark
Delete bookmark?
Delete from my manuals?
Login
Sign In
OR
Sign in with Facebook
Sign in with Google
Upload manual
Upload from disk
Upload from URL


Need help?
Do you have a question about the Milliflex Oasis and is the answer not in the manual?
Questions and answers