
Related Manuals for Charder MS3400-1


Summary of Contents for Charder MS3400-1
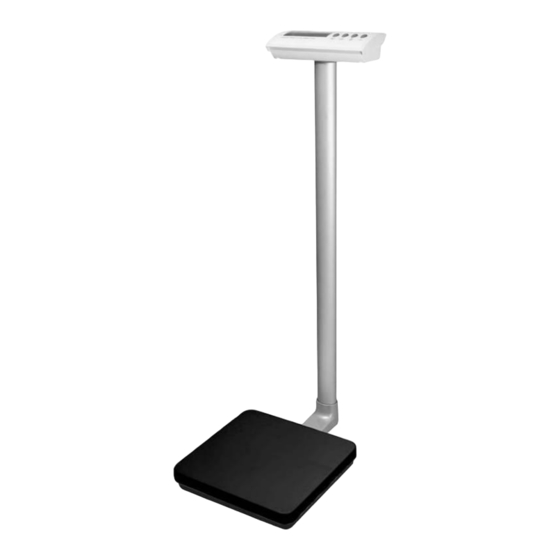
- Page 1 USER MANUAL MS3400-1 Stand-on Floor Scale Please keep the instruction manual at hand all the time for future reference.
- Page 2 Explanation of Text/Symbols on Device Label/Packaging Text/Symbol Meaning Caution, consult accompanying documents before use Separate collection for waste of electrical and electronic equipment, in accordance with Directive 2002/96/EC. Do not dispose of device with everyday waste Name and address of device manufacturer, and year/country of manufacture Carefully read user manual before installation and usage, and follow instructions for use.
- Page 3 Copyright© Charder Electronic Co., Ltd. All rights reserved. This user manual is protected by international copyright law. All content is licensed, and usage is subject to written authorization from Charder Electronic Co., Ltd. (hereinafter Charder) Charder is not liable for any damage caused by a failure to adhere to requirements stated in this manual.
-
Page 4: Table Of Contents
CONTENTS I. Safety Notes ................5 A. General Information ............5 B. EMC Guidance and Manufacturer's Declaration ......8 II. Installation ................. 12 A. Assembly ................. 12 B. Replacing Batteries ............15 C. Using Adapter ..............16 D. Attaching Height Stadiometer to Column ......17 E. -
Page 5: Safety Notes
I. Safety Notes A. General Information Thank you for choosing this Charder Medical device. It is designed to be easy and straightforward to operate, but if you encounter any problems not addressed in this manual, please contact your local Charder service partner. - Page 6 If results are inaccurate, please contact local distributor. Warranty/Liability If Charder is responsible for a fault or defect present upon receipt of the unit, Charder shall either repair the fault, or supply a replacement unit. Should the repairs or replacement delivery fail, statutory provisions shall be valid.
- Page 7 Charder service partner, using original Charder accessories and spare parts. Charder is not liable for any damages arising from improper maintenance or usage. Disposal This product is not to be treated as regular household waste, but ...
-
Page 8: Emc Guidance And Manufacturer's Declaration
B. EMC Guidance and Manufacturer's Declaration Guidance and manufacturer’s declaration-electromagnetic emissions The MS3400-1 Stand-on Floor Scale is intended for use in the electromagnetic environment specified below. The customer or the user of the device should assure that it is used in such an environment. - Page 9 NOTE UT is the a.c. mains voltage prior to application of the test level. Guidance and manufacturer’s declaration-electromagnetic immunity The MS3400-1 Stand-on Floor Scale is intended for use in the electromagnetic environment specified below. The customer or the user of the device should assure that is used in such an environment.
- Page 10 80MHz to 2,7 GHz the frequency of the transmitter. 3 V/m 80MHz to 2,7 Recommended separation distance: d = 1,2 √P d = 1,2 √P 80MHz to 800 MHz d = 2,3 √P 800MHz to 2,5 GHz Where P is the maximum output power rating of the transmitter in watts (W) according to the transmitter manufacturer and d...
- Page 11 Recommended separation distance between portable and mobile RF communications equipment and the MS3400-1 Stand-on Floor Scale The device is intended for use in an electromagnetic environment in which radiated RF disturbances are controlled. The customer or the user of the device can help prevent...
-
Page 12: Installation
II. Installation A. Assembly 1. Insert column into column seat. 2. Insert and fasten 3 x M4*0.7*15 screws at the bottom of the base... - Page 13 3.Route the cable along the gap in the column seat. 4. Place bottom cover in position. Insert and fasten 4 x M4*0.7*8 screws.
- Page 14 Using wheel castor (optional) 1. If installed on device, wheel castor is located behind column 2. Press the brake down to lock the castor wheel...
-
Page 15: Replacing Batteries
B. Replacing Batteries 1. Open battery housing cover, and remove battery holder from compartment. 2. Disconnect rechargeable battery cable from connector in the battery compartment Connector in the battery housing 3. Connect cable with connector, and insert rechargeable battery pack in battery compartment. -
Page 16: Using Adapter
4. Place battery cover in place The rechargeable battery should be recharged at least once every 3 months, regardless of if the device has been used. Battery can be charged by plugging device's exclusive adapter into AC Connector Port. After a long period in storage (e.g. >3 months), the battery should run a full cycle (charge/discharge) to allow it to restore full capacity. -
Page 17: Attaching Height Stadiometer To Column
D. Attaching Height Stadiometer to Column Step 1. Attach two fixing blocks to Step 2. Attach height rod to blocks column using four flat-head using two flat-head screws screws Item Name Quantity Fixing block screws Fixing blocks Height Rod to fixing block screws * Photo of display for reference only. -
Page 18: Using Hm201M Height Stadiometer
E. Using HM201M Height Stadiometer Measurement over 121 cm 1. Pull out rod 2. Unfold head piece to horizontal position 3. Height reading found at point A... - Page 19 Measurement under 121 cm 1. Fold head piece and press buckle 2. While pressing on buckle, pull down head piece 3. Height reading found at point...
-
Page 20: Indicator
III. Indicator Indicator Key Function 1. HOLD/BMI: Determine stable weighing value - used when weight is unstable. Press and hold for 3 seconds to enter BMI mode. 2. UNIT/WEIGHT: Switch between kg/lb. Change height value when indicator is in BMI mode. 3. -
Page 21: Using Device
IV. Using Device A. Basic Operation Switch on the device using [ON/ZERO/OFF] key. The device will automatically perform self-calibration, displaying software version. Once "0.0 kg" appears on indicator, device is ready for measurement. Note: If "0.0 kg" does not display on indicator, press [ON/ZERO/OFF] key to zero the device. -
Page 22: Tare
3. Press [UNIT/WEIGHT] key to change height value. Press [HOLD/BMI] key to manually move to next digit. 4. After inputting height, press [TARE] to confirm. 5. Proceed to weigh subject as usual. Indicator will alternate between weight and BMI display. NOTE: Hold function can be used at this time if weight is unstable 6. -
Page 23: Troubleshooting
V. Troubleshooting Before contacting your local Charder distributor for repair service, we recommend considering the following troubleshooting procedures: Self-inspection 1. Device will not power on If battery power is depleted, replace with new batteries If batteries are not used, check if the power adapter is plugged into ... - Page 24 Counting Error (too Error normally caused low) by faulty loadcell or Signal from loadcells too wiring. Please contact local dealer of Charder. Zero count over If problem persists, calibration zero range re-calibration +10% while power on required. Please contact local dealer of Charder.
-
Page 25: Product Specifications
VI. Product Specifications Model MS3400-1 Display DP2701 Capacity 300 kg x 0.1kg Accuracy ±2e Weight Measurement Unit kg / lb LCD Screen 1.0-inch LCD screen Overall 310(W) x 460(D) x 1070(H) mm Platform 310(W) x 310(D) Dimensions Column 900 mm Device 5.3 kg... - Page 26 Notes _______________________________________________________ _______________________________________________________ _______________________________________________________ _______________________________________________________ _______________________________________________________ _______________________________________________________ _______________________________________________________ _______________________________________________________ _______________________________________________________ _______________________________________________________ _______________________________________________________ _______________________________________________________ _______________________________________________________ _______________________________________________________ _______________________________________________________ _______________________________________________________ _______________________________________________________ _______________________________________________________ _______________________________________________________ _______________________________________________________...
- Page 27 Notes _______________________________________________________ _______________________________________________________ _______________________________________________________ _______________________________________________________ _______________________________________________________ _______________________________________________________ _______________________________________________________ _______________________________________________________ _______________________________________________________ _______________________________________________________ _______________________________________________________ _______________________________________________________ _______________________________________________________ _______________________________________________________ _______________________________________________________ _______________________________________________________ _______________________________________________________ _______________________________________________________ _______________________________________________________ _______________________________________________________...
-
Page 28: Declaration Of Conformity
2014/31/EU Non-automatic Weighing Instruments Directive RoHS Directive 2011/65/EU and Delegated Directive (EU) 2015/863 Authorized EU Representative: Manufactured by: Charder Electronic Co., Ltd. No.103, Guozhong Rd., Dali Dist., Taichung City, 41262 Taiwan (R.O.C.) CD-IN-00116 REV 006 2022/06...
Need help?
Do you have a question about the MS3400-1 and is the answer not in the manual?
Questions and answers