Table of Contents
Advertisement
Quick Links
Advertisement
Table of Contents

Related Manuals for BODYMAX CF485+


Summary of Contents for BODYMAX CF485+
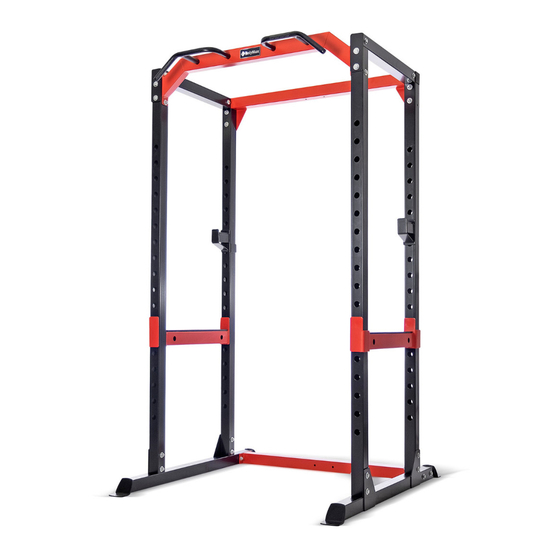
- Page 1 Heavy Power Rack CF485+ SEBR2706 ASSEMBLY INSTRUCTIONS...
-
Page 2: Safety Precaution
SAFETY PRECAUTION Safety First Regardless of how enthusiastic you may be about getting on your equipment and exercising, take the time to ensure that your safety is not jeopardized. A moment’s lack of attention can result in an accident, as can failure to observe certain simple safety precautions. -
Page 3: Assembly Instruction
ASSEMBLY INSTRUCTION I . Notice of assembly * An enough dimension will be required to assemble and properly use the machine. * Please use floor padding, such as cardboard, to avoid scratching your floor during assembly. * The nuts and bolts have a little grease on them to protect them from corrosion. Please keep a rag handy to wipe your hands. -
Page 4: Part List
PART LIST NUMBER DESCRIPTION QUANTITY Vertical Frame Left Base Frame Right Base Frame Cross Brace Upper Frame Top Beam Chin Up Bar Left Handle Right Handle Left Safety Catch Right Safety Catch Left Adjustment Bar Right Adjustment Bar Bolt M10*16 Bolt M10*20 Bolt M10*80 Big Washer 10... -
Page 5: Exploded View
Exploded View... -
Page 6: Assembly Steps
ASSEMBLY STEPS STEP 01 1. Attach Cross Brace (4) to Left Base Frame & Right Base Frame (2&3) with four Bolts M10*80 (16), eight Big Washers 10 (17) and four Lock Nuts M10 (18). - Page 7 STEP 02 1. Attach four Vertical Frames (1) to Left Base Frame & Right Base Frame (2&3) with eight Bolts M10*80 (16), sixteen Big Washers 10 (17) and eight Lock Nuts M10 (18).
- Page 8 STEP 03 1. Attach Upper Frame (5) to Vertical Frame (1) with four Bolts M10*80 (16), eight Big Washers 10 (17) and four Lock Nuts M10 (18). 2. Attach two Top Beams (6) to Vertical Frame (1) with four Bolts M10*80 (16), eight Big Washers 10 (17) and four Lock Nuts M10 (18).
- Page 9 STEP 04 1. Attach Left Handle & Right Handle (8&9) to Chin Up Bar (7) with four Bolts M10*20 (15) and four Big Washers 10 (17). 2. Attach Chin Up Bar (7) to Top Beam (6) and Vertical Frame (1) with four Bolts M10*80 (16), eight Big Washers 10 (17) and four Lock Nuts M10 (18).
Need help?
Do you have a question about the CF485+ and is the answer not in the manual?
Questions and answers