
Related Manuals for BODYMAX FXB20 X-Bike


Summary of Contents for BODYMAX FXB20 X-Bike
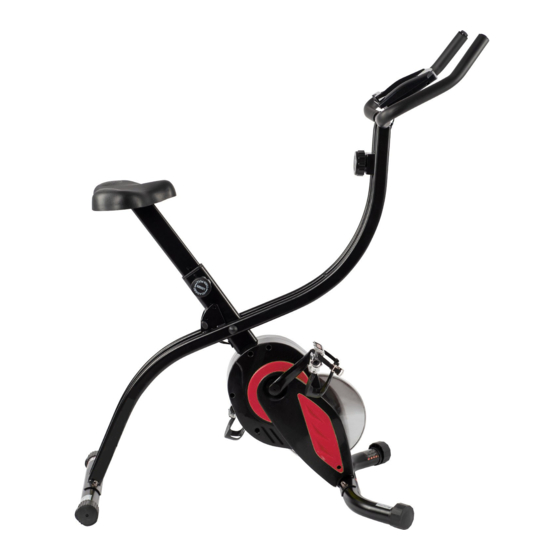
- Page 1 Assembly and operating instructions 120 kg A 67.1 cm B 165.7 cm C133.3 cm ~ 30 min. 2020.08 FXB20 X-Bike Item number CVEB2706...
- Page 2 FXB20 FOLDING EXERCISE BIKE...
- Page 3 Dear Customer, Thank you for deciding for a high-quality training equipment of the brand BODYMAX, the brand that makes athlete‘s hearts beat faster. BODYMAX offers a wide range of home fitness equipment like elliptical cross trainers, ergometers, treadmills and rowing machines. BODYMAX equipment is the optimal equipment for all those who want to train at home independent of goals and fitness level.
-
Page 4: Table Of Contents
CONTENTS IMPORTANT SAFETY NOTICE GENERAL INFORMATION Technical data Personal safety Set-up place ASSEMBLY INSTRUCTIONS, MAINTENANCE AND CARE General instructions Faults and Troubleshooting Maintenance, service calendar and storage ASSEMBLY Scope of Delivery Assembly Step Adjusting the Seat Height Adjusting the Resistance OPERATING INSTRUCTIONS Console Display Button Function... -
Page 5: Important Safety Notice
IMPORTANT SAFETY NOTICE We thank you for choosing our product. To ensure your safety and health, please use this equipment correctly. It is important to read this entire manual before assembling and using the equipment. Safe and effective use can only be achieved if the equipment is assembled, maintained and used properly. -
Page 6: General Information
GENERAL INFORMATION Technical data Weight and dimensions: Article weight (gross, including packaging) : 22.5 kg Packaging dimensions (L x W x H) : Parcel - 132 cm x 53 cm x 23 cm Set-up dimensions (L x W x H) : approximately 165.7 cm x 67.1 cm x 133.3 cm Maximum user weight : 120 kg Personal safety + Before you start using the equipment, you should consult your physician that this type of... -
Page 7: Set-Up Place
+ Make sure that the cables are always in the wheel guide. If the cables are stuck while you are training, stop training immediately and check the cable run. + If you adjust the seat, make sure that it fully locks in its new position, because otherwise it may slide and lead to injuries. -
Page 8: Faults And Troubleshooting
You should therefore immediately replace damaged or worn components. Please contact your contract partner in such a case. The equipment should no longer be used until it has been repaired. When needed, only use original BodyMax spare parts. + Check the tightness of all screw connections once a month. -
Page 9: Assembly
ASSEMBLY Scope of Delivery The scope of delivery consist of the following parts. At the beginning, check whether all parts and tools belonging to the device are included in the scope of delivery and whether damage has occurred. In the event of complaints, the contractual partner must be contacted directly. CAUTION If parts of the scope of delivery are missing or damaged, the assembly must not be carried out. -
Page 10: 4.2 Assembly Step
ASSEMBLY 4.2 Assembly Step Before assembly, take a close look at the individual assembly steps shown and carry out the assembly in the order given. NOTICE First loosely screw all parts together and check that they fit properly. Tighten the screws using the tool only when you are instructed to do so. - Page 11 ASSEMBLY Assembly Step Step 2: Mounting the front and rear stabilizer Remove the four domed nuts (8) and the four curve washers (7) from the front and rear stabilizer (5 & 6). Mount the rear stabilizer (6) with the transportation wheels outwards to the rear stabilizer (2) with the previously removed two curve washers (7) and two domed nuts (8).
- Page 12 ASSEMBLY Assembly Step Step 3: Mounting the seat Remove the three nylon nuts (17) and the three flat washers (18) from the seat (19). Mount the seat (19) to the seat post (3) with the previously removed three flat washers (18) and three nylon nuts (17).
- Page 13 ASSEMBLY Assembly Step Step 3: Mounting the pedals NOTICE The pedals are marked with "R" for right and «L" for left. The sides of the equipment are determined by the seat direction. Left pedal: Stand in front of the left side of the equipment and screw the left pedal (10L) counterclockwise to the left crank (9L).
- Page 14 ASSEMBLY Assembly Step Step 5: Mounting the handlebar and the computer Remove the two curved washers (7) and two bolts (22) from the handlebar (4). Mount the handlebar (4) to the rear frame (2) with two curve washer (7) and two bolts (22). Insert the provided 1.5 V batteries (2 pcs.) into the battery comparment of the computer (23).
-
Page 15: Adjusting The Seat Height
ASSEMBLY Adjusting the Seat Height Turn the adjustment knob (11) counter-clockwise and pull it out slightly until the seat post (3) can be moved up and down. Slide the seat post (3) into a suitable position. To refasten the seat post (3) in the selected position, turn the adjustment knob (11) clockwise. -
Page 16: Operating Instructions
OPERATING INSTRUCTIONS NOTICE Familiarise yourself with all the functions and setting options of the device before starting training. Have the proper use of this product explained to you by a specialist. Console Display Display Description Display of the current training time TIME Display of the total training time SPEED... -
Page 17: Storage And Transport
STORAGE AND TRANSPORT General Instructions WARNING The storage location should be chosen so that improper use by third parties or children can be prevented. If your equipment does not have transportation wheels, the equipment must be disassembled before transportation. ► ATTENTION Make sure that the equipment is protected from moisture, dust and dirt in the selected storage location. -
Page 18: Folding Mechine
STORAGE AND TRANSPORT Folding Mechanism NOTICE The equipment is foldable and thus saves space when it is stored. It also makes it easier to transport. The upper angle adjustment (position 1) on the main frame is recommended for the storage. ►... -
Page 19: Troubleshooting, Care And Maintenance
TROUBLESHOOTING, CARE AND MAINTENANCE General Instructions WARNING + Do not make any improper changes to the equipment. CAUTION + Damaged or worn components may affect your safety and the life of the equipment. Therefore, immediately replace damaged or worn components. In such a case, contact the contract partner. -
Page 20: Disposal
The materials can be recycled as per their symbols. Through the reuse, recycling of materials or other forms of recovery of old equipment, you make an important contribution to the protection of the environment. OPTION ACCESSORIES BODYMAX Dumbbell Set FXB20 FOLDING EXERCISE BIKE... -
Page 21: Workout Instructions
WORKOUT INSTRUCTIONS 10.1 Stretching exercises for leg and chest muscles Exercise: Stretching of front thigh / leg extension (quadriceps) • Stable position, grab arches of feet • Pull heel towards buttocks, knee points downwards (no abduction) • Straight upper body, avoid tilting the pelvic forward (hollow back) by tensing the abdominal muscles •... - Page 22 WORKOUT INSTRUCTIONS Exercise: Stretching the calf muscles (gastrocnemius) • Place feet parallel to each other pointing forward, the heels touch the floor • Support yourself on a chair coming from a lunge • Move your body weight to the front leg, press your heel from the rear leg towards the floor and hold the contact •...
-
Page 23: Workout Journal
WORKOUT INSTRUCTIONS 10.2 Workout journal Date Time (min.) Training weight Calories burnt Body weight... -
Page 24: Ordering Spare Parts
ORDERING SPARE PARTS 11.1 Exploded Drawing (A) FXB20 FOLDING EXERCISE BIKE... - Page 25 ORDERING SPARE PARTS 11.1 Exploded Drawing (B)
-
Page 26: Parts List
ORDERING SPARE PARTS 11.2 Parts list Name Qty. No.. Name Qty. Main Frame Plastic Washer (ø17) Rear Frame Bearing Seat Post Spring Handlebar Tension Cable Front Stabilizer Wire Plug Rear Sstabilizer Bushing Curve Washer (ø8) Bearing Domed Nut (M8) Flat Washer (ø20.2) Crank (L &... -
Page 27: Garantie Informationen
GARANTIE INFORMATIONEN BODYMAX training fitness equipment is subject to strict quality controls. However, if a fitness equipment purchased from us does not work perfectly, we take it very seriously and ask you to contact our customer service as indicated. We are happy to help you by phone via our service hotline. - Page 28 GARANTIE INFORMATIONEN Warranty conditions For the warranty to be valid, the following steps must be taken: Please contact our customer service by email or phone. If the product under warranty has to be sent in for repair, the seller bears costs. After expiry of the warranty, the buyer bears the costs of transport and insurance.
-
Page 29: Ordering Spare Parts
10:00 - 17:00 13.2 Serial number and model name Before assembling your equipment, find the serial number on the white sticker and enter it in the appropriate space. Serial number: Brand / category: Model name: BODYMAX FXB20 FOLDING EXERCISE BIKE... -
Page 30: Conact
14.2 Disclaimer ©2019 Bodymax is a registered brand of the company Sport-Tiedje GmbH. All rights reserved. Any use of this trademark without the explicit written permission of Sport-Tiedje is prohibited. Product and instructions are subject to change. Technical data can be changed without advance notice.
Need help?
Do you have a question about the FXB20 X-Bike and is the answer not in the manual?
Questions and answers