
Related Manuals for HindlePower AT10.1 Series


Summary of Contents for HindlePower AT10.1 Series
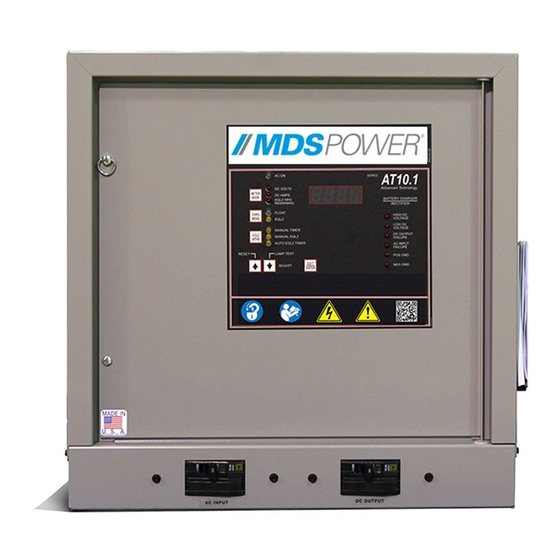
- Page 1 Operating Instructions AT10.1/AT30 SERIES MICROPROCESSOR-CONTROLLED FLOAT BATTERY CHARGER COMMUNICATIONS MODULE (DNP3 Level 2 / Modbus Protocols) JA0102-04...
- Page 2 AT SERIES COMMUNICATIONS MODULE DNP3 LEVEL 2 / MODBUS COMMUNICATIONS FOR AT10.1 AND AT30 SERIES BATTERY CHARGERS • The AT Communications Module allows the user to remotely monitor and control the AT Series Battery Charger over a serial connection. • Supports DNP3 Level 2 and Modbus protocols over RS-232 or RS-485 half- duplex.
-
Page 3: Table Of Contents
TABLE OF CONTENTS SECTION PAGE 1 Introduction..................... 2 2 Protocols......................2 2.1 Modbus........................2 2.2 DNP3......................... 2 3 Hardware ......................3 3.1 Installation ......................... 3 3.2 Serial Connections....................5 3.2.1 RS-232 ......................5 3.2.2 RS-485 ......................8 3.3 Ethernet Connection (optional) ................12 3.4 Serial Fiber Optics Modem .................. -
Page 4: Introduction
INTRODUCTION / PROTOCOLS 1 Introduction The AT Series Communications Module option allows users to remotely monitor and control an AT Series Battery Charger over a serial connection. With this option, users may perform remotely everything that is accessible at the charger's front panel display. The AT Communications option supports DNP3 Level 2 and Modbus protocols over RS-232, RS-485, and Ethernet (when Ethernet option is ordered). -
Page 5: Hardware
HARDWARE 3 Hardware 3.1 Installation WARNING Disconnect and lock out all power to the AT10.1/AT30 battery charger before starting any maintenance procedures. Turn off power at the ac distribution panel, upstream from the charger. Disconnect the battery from the charger dc output terminals. This includes remote sense wires if they were installed. - Page 6 HARDWARE Figure 1 EN5004-0# AT Series Communications PC Board (A12) - left connected to EN5002-00 Main Control PC Board (A1) - right Step 5 Connect the communications module ballast resistor(s) (R29) to the power supply connection plug (J20). Pin 2 on J20 is +Vdc, and pin 4 is common. For wiring details, see assembly drawing (JE5107-00).
-
Page 7: Serial Connections
HARDWARE COMPONENT LISTING AT Communications PC Board (A12) INDICATOR LIGHTS: Status LED - SPI Communication RXD - Serial Receive LED TXD - Serial Transmit LED ACT - Ethernet Activity LED SPEED - Ethernet 10/100 LED LINK - Ethernet Link Status LED CONNECTORS / JUMPERS: Power Supply Connection Factory Connection... - Page 8 HARDWARE 3.2.1.1 RS-232 3-Wire For a RS-232 3-wire operation, the hardware handshaking lines are disabled. Disable the hardware handshaking lines by setting configuration switch S1-6 to the OFF position. RS-232 PC Connection DB25 DB9 JUMPER NOT REQUIRED, IF HANDSHAKING IS TURNED OFF ON HOST COMPUTER.
- Page 9 HARDWARE 3.2.1.2 RS-232 5-Wire For a RS-232 5-wire operation, the hardware handshaking lines are enabled. Enable the hardware handshaking lines by setting configuration switch S1-6 to the ON position. RS-232 PC Connection DB25 DB9 Figure 4 RS-232 5-Wire Connection...
- Page 10 HARDWARE 3.2.2 RS-485 The AT Communications Board (A12) supports half-duplex RS-485 communications. Set configuration switch S1-5 to ON to select RS-485. TB10 terminal block is for the RS-485 connections. The next two (2) sections describe a single connection and multi-drop connection.
- Page 11 HARDWARE 3.2.2.1 RS-485 Single Connection When a single device is connected using RS-485, and a terminating resistor is required, move the jumper on J22 to pins 1 and 2 to enable the terminating resistor. The device communicating with the charger needs its own terminating resistor installed. RS-485 Single Connection POSITIVE (+) NEGATIVE (--)
- Page 12 HARDWARE 3.2.2.2 RS-485 Multi-Drop When multiple chargers are connected using RS-485, and termination resistors are required, the termination resistors should only be installed (enabled) on the ends of the network. Move the jumper on J22 between pins 1 and 2 to enable the terminating resistor. The devices in the middle of the network do not require the terminating resistor.
- Page 13 HARDWARE Charger No. 1 Charger No. 2 Charger No. 3 RS-485 Multi-Drop 3 Chargers POSITIVE (+) NEGATIVE (--) COMMON SHIELD Figure 7 RS-485 Multi-Drop 3 Chargers * Typical RS-485 applications tie the shield to earth ground at only one (1) location along the network.
-
Page 14: Ethernet Connection (Optional)
HARDWARE Ethernet Connection (optional) A special AT Series Communications Module (p/n EJ5037-2#) can also be supplied, which supports both 10/100 MB copper Ethernet connections. These options have an RJ45 Ethernet socket (J1) installed onto a special A12 Communications PC Board (p/n EN5004-01). See Figure 2 on page 5 for details. - Page 15 HARDWARE If using Modbus protocol, use ASCII mode. RTU mode has tighter timing requirements that might prevent communications while using the modem. ASCII mode is enabled by configuration switch S1-4 in the ON position. Enable the RS-232 handshaking lines by setting the configuration switch S1-6 to the ON position.
-
Page 16: Configuration
CONFIGURATION Configuration All user configurable items are controlled by two (2) groups of switches, and a setup program to modify additional configuration parameters. The AT Series Communications Module must be reset, after changes have been made, for them to take effect. To reset communications, either press the RESET button (SW10) on the A12 pc board, or turn off then turn on, both the ac input (CB1) and dc output (CB2) circuit breakers. -
Page 17: Setup Program
CONFIGURATION Setup Program The setup program may only be used with an RS-232 serial connection. See Figure 3. Use a terminal mode program such as HyperTerminal with the baud rate set to 9600 bps, 8 data bits, no parity, 2 stop bits, and no hardware handshaking. To enable the setup program, set switch S1-1 to ON. -
Page 18: Factory Defaults
CONFIGURATION If S1-2 is set to OFF for using factory default values, the parameters can be viewed. The parameters can be modified, but if S1-2 is still OFF (set to factory default values) when the Communications board is reset, all values will be changed back to factory defaults. Setting S1-2 to ON will allow user values to be used. -
Page 19: Communication Leds - Troubleshooting
CONFIGURATION 5 Communication LEDs - Troubleshooting The AT Communications Module pc board (A12) features LEDs to indicate the status of communications with the Main Control board (A1), the serial ports, and the optional Ethernet port. Reference Figure 2 on Page 5 for the location of the following LEDs. Main Control Board STATUS LED The STATUS LED (D1) is a red indicator located to the left of dipswitch (S1). -
Page 20: Reset Button
CONFIGURATION 6 RESET Button The RESET switch (SW10) is a small push-button, located directly below dipswitch (S2). See the image to the right, and/or Figure 2 on page 5 for location of the RESET button. The RESET switch, when pushed, will restart the AT Series Communication Module without resetting the charger's Main Control PC Board (A1). -
Page 21: Dnp V3.00
DNP V3.00 DEVICE PROFILE DOCUMENT (Also see the Implementation Table in Section 7.3 on page 22.) Vendor Name: HindlePower, Inc. - 1075 Saint John Street - Easton, PA 18042 Device Name: Communications Module interface (manufacturer's p/n EJ5037-##) Highest DNP Level Supported:... - Page 22 DNP V3.00 DNP V3.00 DEVICE PROFILE DOCUMENT (Also see the Implementation Table in Section 7.3 on page 22.) Requires Application Layer Confirmation: Never Always When reporting Event Data When sending multi-fragment responses Sometimes Configurable Timeouts while waiting for: Data Link Confirm: None Fixed at 2000 Variable...
- Page 23 DNP V3.00 DNP V3.00 DEVICE PROFILE DOCUMENT (Also see the Implementation Table in Section 7.3 on page 22.) Reports Binary Input Change Events when no Reports time-tagged Binary Input Change Events specific variation requested: when no specific variation requested: Never Never Only time-tagged Binary Input Change With Time...
-
Page 24: Implementation Table
DNP V3.00 Implementation Table The following table identifies the variations, function codes, and qualifiers supported by the AT Series Communications Module PC Board (A12) in both request messages and in response messages. For static (non-change-event) objects, requests sent with qualifiers 00, 01, 06, 07, or 08, will be responded with qualifiers 00 or 01. - Page 25 DNP V3.00 REQUEST RESPONSE OBJECT (Library will parse) (Library will respond with) Object Variation Function Qualifier Codes Function Qualifier Codes Description Number Number Codes (dec) (hex) Codes (dec) (hex) 16-Bit Analog Input 00, 01 00, 01 (read) (start-stop) (response) (start-stop) (default - 17, 28 (assign class)
- Page 26 DNP V3.00 REQUEST RESPONSE OBJECT (Library will parse) (Library will respond with) Object Variation Function Qualifier Codes Function Qualifier Codes Description Number Number Codes (dec) (hex) Codes (dec) (hex) Time and Date 00, 01 00, 01 (read) (start-stop) (response) (start-stop) 17, 28 (no range, or all) (index –...
-
Page 27: Point List
DNP V3.00 Point List The tables in the following sections identify all the individual data points provided by this implementation of DNP3. 7.4.1 Binary Inputs Binary Input Points Static (Steady-State) Object Number: Change Event Object Number: Request Function Codes supported: 1 (read) 22 (assign class) Static Variation reported... -
Page 28: Binary Output Status Points
DNP V3.00 7.4.2 Binary Output Status Points The following table lists both the Binary Output Status Points (Object 10). Binary Output Status Points Object Number: Request Function Codes supported: 1 (read) Default Variation reported when variation 0 requested: 2 (Binary Output Status) Control Relay Output Blocks Object Number: Request Function Codes supported:... -
Page 29: Analog Inputs
DNP V3.00 7.4.3 Analog Inputs The following table lists Analog Inputs (Object 30). It is important to note that 16-bit and 32-bit variations of Analog Inputs, Analog Output Control Blocks, and Analog Output Statuses are transmitted through DNP as signed numbers. Even for analog input points that are not valid as negative values, the maximum positive representation is 32767. -
Page 30: Analog Output Status Points
DNP V3.00 7.4.4 Analog Output Status Points Analog Output Status Points Object Number: Request Function Codes supported: 1 (read) Default Variation reported when variation 0 requested: 2 (16-Bit Analog Output Status) Analog Output Blocks Object Number: Request Function Codes supported: 3 (select), 4 (operate), 5 (direct operate), 6 (direct operate, noack) Point... -
Page 31: Internal Indications
DNP V3.00 7.4.5 Internal Indications Internal Indications Object Number: Request Function Codes supported: 1 (read), 2 (write) Default Variation reported when variation 0 requested: Point Descriptions and Conditions Writable? Index IIN1-0 All Stations – set after a broadcast message (any message using a destination address of 0xfff0 or above) has been received. -
Page 32: Modbus
MODBUS 8 Modbus Introduction This manual section describes the specific implementation of the Modbus protocol via the AT Series Battery Charger Communications Module interface (p/n EJ5037-##). The Modbus protocol was implemented using the Modicon Modbus Protocol Reference Guide PI-MBUS-300, Rev. J. Supported Function Codes Below is the list of supported function codes. -
Page 33: Register Definitions
MODBUS Register Definitions 8.3.1 Binary Outputs Address Name Description 00001 Equalize Mode 1=Equalize Mode, 0=Float Mode Equalize Method (see notice below) 00002 Manual Timer Method Equalize Method (see notice below) 00003 Manual Equalize Method 00004 Auto-Equalize Timer Method Equalize Method (see notice below) 00005 HVDC Shutdown Enable Enables High Voltage DC Shutdown... -
Page 34: Input Registers
MODBUS 8.3.3 Input Registers Address Name Description Multiplier 30001 Communication Firmware Rev. Software Revision 30002 DNP Rev Software Revision 30003 AT10.1 Firmware Rev Software Revision 30004 Voltage Rating Charger Voltage Rating 30005 Current Rating Charger Current Rating 30006 Voltage Output Voltage 30007 Current Output Current... -
Page 35: At Series Charger Data Ranges
AT SERIES CHARGER DATA RANGES 9 AT Series Charger Data Ranges Voltage Ranges Voltage Float Voltage Equalize Voltage HVDC LVDC Rating (Volts) 11.5 14.5 11.7 16.0 12.0 19.0 13.0 22.0 29.5 23.4 32.0 24.0 38.0 15.0 25.0 44.0 58.0 46.8 61.0 48.0 76.0... -
Page 36: Appendix A: Frequently Asked Questions (Faq)
APPENDIX A AT Series Communications Module FREQUENTLY ASKED QUESTIONS http://www.ATSeries.net/PDFs/JF5026-00.pdf What is the AT Communications Module? The AT Communications Module (ordering p/n EJ5037-##) allows an AT10.1 or AT30 Series microprocessor-controlled charger to interact with a computer system. With this option, a remote operator can read and change the parameters of the charger. Everything a user can do at the charger’s front panel display is accessible remotely. - Page 37 APPENDIX A How do I configure the AT Communications Module control board? For simple applications, the Communications pc board (A12) can be configured using DIP switches. The DIP switches set the Protocol, media type (RS-232, RS-485, or Ethernet), serial speed (baud rate), Modbus protocol type (ASCCI or RTU), and the Modbus slave address.
- Page 38 APPENDIX A What is the difference between Modbus and DNP3? Modbus is an industrial protocol that has been used for many years. There are two (2) variations of the Modbus protocol: ASCII and RTU DNP3 is a newer protocol developed specifically for the utility industry. DNP3 can be configured so that if an event occurs, the charger will send a message to the computer system of any changes.
- Page 39 APPENDIX A Can a previously-purchased AT Series charger be field-upgraded with Ethernet Communications capability? Yes, a field kit (ordering p/n EJ5037-3#) can be provided. Please contact the factory with the AT Series battery charger serial number. That way, we can determine what components are required, and if any components need to be upgraded.
-
Page 40: Appendix B: Field Installation Instructions
APPENDIX B AT Series Communications Module FIELD INSTALLATION INSTRUCTIONS http://www.ATSeries.net/PDFs/JD5008-00.pdf BACKGROUND The AT Series Communications Module is a product accessory, compatible with AT10.1 Group I, AT10.1 Group II, and AT30 Series microprocessor-controlled float battery chargers. This document (JD5008-00) is a service procedure for FIELD INSTALLATION of the EJ5037-1# communications kit (p/n ) into an existing charger. - Page 41 APPENDIX B PRECAUTIONS WARNING- -- DISCONNECT ALL AC AND DC POWER SOURCES FROM THE BATTERY CHARGER BEFORE PROCEEDING. ONLY QUALIFIED SERVICE TECHNICIANS SHOULD PERFORM THIS PROCEDURE. FOLLOW THE SITE AND YOUR EMPLOYER'S STANDARD SAFETY PROCEDURES. WARNING- -- OPENING CIRCUIT BREAKERS DOES NOT REMOVE ALL DANGEROUS VOLTAGES FROM INSIDE THE CHARGER.
-
Page 42: Manual Specifications (Document Control Information)
MANUAL SPECIFICATIONS DOCUMENT NUMBER The text and graphics contained within this manual are controlled by the battery charger manufacturer's internal part number (JA5026-00). The revision level and dates of this manual's text and graphics are listed below. These controls supercede all other available dates. The first two (2) and last two (2) pages of this manual are reserved for company-specific front and back cover artwork. - Page 43 RELATED DOCUMENTS Doc. No Online Hyperlink Description http://www.ATSeries.net/PDFs/JA0102-01.pdf JA0102-01 AT10.1 G1 Manual (unlabeled) http://www.ATSeries.net/PDFs/JA0102-02.pdf JA0102-02 AT10.1 G2 Manual (unlabeled) http://www.ATSeries.net/PDFs/JA0102-03.pdf JA0102-03 AT30 Manual (unlabeled) http://www.ATSeries.net/PDFs/JA0102-04.pdf JA0102-04 AT Comm. Module Manual (unlabeled) http://www.ATSeries.net/PDFs/JA0102-05.pdf JA0102-05 AT-DC Dist. Panel Manual (unlabeled) http://www.ATSeries.net/PDFs/JA5015-00.pdf JA5015-00 AT TempCo Probe Acsy.
- Page 44 JA0102-04 TYPICAL APPLICATIONS FOR SCADA SYSTEMS (http://www.atseries.net/PDFs/JA0102-04.pdf) JA0102-04 - Rev. 06-2021...
Need help?
Do you have a question about the AT10.1 Series and is the answer not in the manual?
Questions and answers