Table of Contents
Advertisement
Quick Links
Advertisement
Table of Contents

Related Manuals for Sentera Controls RDCV


Summary of Contents for Sentera Controls RDCV
- Page 1 RDCV RESIDENTIAL HVAC CONTROLLER Mounting and operating instructions...
-
Page 2: Table Of Contents
MOUNTING INSTRUCTIONS IN STEPS OPTIONAL MOUNTING INSTRUCTIONS VERIFICATION OF INSTALLATION INSTRUCTIONS OPERATING INSTRUCTIONS MENU STRUCTURE 7-SEGMENT DISPLAY INDICATION MODBUS REGISTER MAPS TRANSPORT AND STOCK KEEPING INFORMATION WARRANTY INFORMATION AND RESTRICTIONS MAINTENANCE MIW-RDCV-EN-002 - 27 / 04 / 2017 2 - 17 www.sentera.eu... -
Page 3: Safety And Precautions
In case there are any questions that are not answered, please contact your technical support or consult a professional. MIW-RDCV-EN-002 - 27 / 04 / 2017 3 - 17 www.sentera.eu back to the table of contents... -
Page 4: Product Description
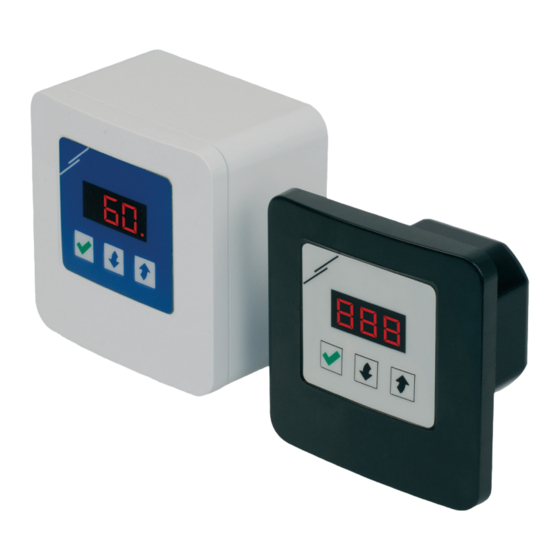
The controller can work in 2 modes. In Automatic mode it is a demand-based controller with adjustable setpoint that can be connected to a broad range of Sentera sensors. In Manual mode, the RDCV works as a full-featured potentiometer. The settings are easily adjustable either via a 3-button interface equipped with a 7-Segment LED display, via our 3SModbus software application or via the Sensistant configurator. -
Page 5: Standards
* PI control can require adjustment of parameters, depending on the local circumstances. (°C, ppm, %) Manual mode Stepless operational diagram 5 steps operational diagram Out [%] Out [%] indication indication (Stand- (Stand-by) MIW-RDCV-EN-002 - 27 / 04 / 2017 5 - 17 www.sentera.eu back to the table of contents... -
Page 6: Wiring And Connections
Precautions”. Then proceed with the following steps: For inset mounting Disconnect the power supply. Remove the frame cover of the enclosure and take the RDCV controller out, so that it can be easily connected. Do the wiring according to the wiring diagram (see Fig. 1). - Page 7 Put the internal enclosure into the external one and fix it using the delivered screws and washers. (Fig. 3). Put back the frame cover of the enclosure. MIW-RDCV-EN-002 - 27 / 04 / 2017 7 - 17 www.sentera.eu back to the table of contents...
-
Page 8: Optional Mounting Instructions
The EC motor will run at maximum speed. Press the button for 4 seconds until the display shows a decimal point ‘.’. The RDCV is now in Stand-by mode, the output is 0, and the motor will stop. If this is not the case, check the connections. -
Page 9: Operating Instructions
Modbus RTU in order to operate and control the environment based on the information received by the sensor. If no sensor is connected, the display will show “...” and the RDCV will not work. The sensor needs a few seconds in order to take samples from the environment. - Page 10 You can now manually adjust the output to the desired level. After a predefined period of time (from 10 minutes to 24 h), the RDCV returns to automatic mode. The setting of this duration is only accessible via Modbus. The I-O adjustable parameter should be set to “Output”...
- Page 11 The setpoint settings depend on the sensor. The connected sensor is automatically detected Depending on the connected sensor the Heating - Cooling control can be interpreted according to Table 4 Normal ‑ Inverse function below. MIW-RDCV-EN-002 - 27 / 04 / 2017 11 - 17 www.sentera.eu...
- Page 12 1. Table 4 Normal - Inverse function Temperature sensor Heat Cool Humidity sensor Humidify Air quality / CO sensor Obtain Drain MIW-RDCV-EN-002 - 27 / 04 / 2017 12 - 17 www.sentera.eu back to the table of contents...
-
Page 13: Menu Structure
RESET TO DEFAULT Press for 8 s Press To return Press To reset RESET TO DEFAULT Press for 8 s To return Press MIW-RDCV-EN-002 - 27 / 04 / 2017 13 - 17 www.sentera.eu back to the table of contents... -
Page 14: 7-Segment Display Indication
Manual / overwrite mode 0—1 Overwrite mode 30009- Reserved, return “0” 30010 Note: The input registers can be read via the Modbus command: “Read input registers”. MIW-RDCV-EN-002 - 27 / 04 / 2017 14 - 17 www.sentera.eu back to the table of contents... - Page 15 Note: The holding registers can be managed via the following Modbus commands: “Read Holding Registers”, “Write Single Register” or “Write Multiple Registers”. If you want to find out more about Modbus over serial line, please visit: http://www.modbus.org/docs/Modbus_over_serial_line_V1_02.pdf MIW-RDCV-EN-002 - 27 / 04 / 2017 15 - 17 www.sentera.eu...
- Page 16 Note: The holding registers can be managed via the following Modbus commands: “Read Holding Registers”, “Write Single Register” or “Write Multiple Registers”. If you want to find out more about Modbus over serial line, please visit: http://www.modbus.org/docs/Modbus_over_serial_line_V1_02.pdf MIW-RDCV-EN-002 - 27 / 04 / 2017 16 - 17 www.sentera.eu...
-
Page 17: Transport And Stock Keeping Information
In case of heavy pollution, clean with a non-aggressive product. In these circumstances the unit should be disconnected from the supply. Pay attention that no fluids enter the unit. Only reconnect it to the supply when it is completely dry. MIW-RDCV-EN-002 - 27 / 04 / 2017 17 - 17 www.sentera.eu...
Need help?
Do you have a question about the RDCV and is the answer not in the manual?
Questions and answers