Advertisement
Table of Contents
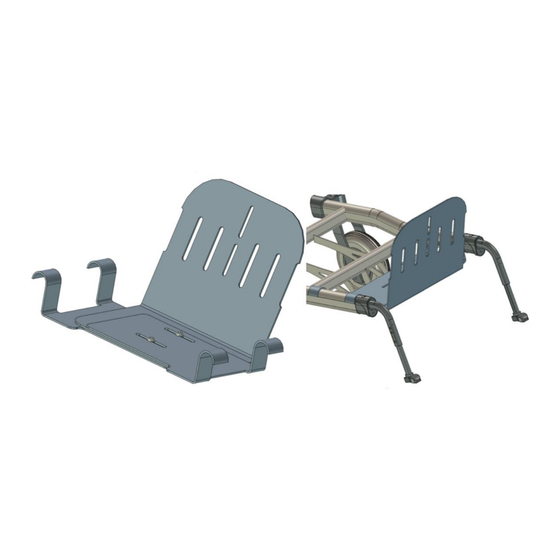
Assembly instructions for Rea Dahlia
1. Check if you have the right type.
2. Check if it is possible to place the battery bag on the back of the seat, if so you can use
a back placed battery bag, if else you need to have the Invacare part Accessory Tray
with Part No: 1574433. The part is needed for assembly the battery. But if you use this
alternative you are not able to use the tilt peddle.
3. Remove wheel, brake, adapter bracket, brake handle on both sides.
4. The easiest way to remove the parts is to loosen the screws that hold the adapter
bracket. Do this on both sides and just lift up the wheelchair. After that you loosen the
screws that hold the brake handles. Remember too save the screws and (bracket) for
recycling, they are for assembling of the new brackets.
MED3163
Recycled parts
2022-02-14
Advertisement
Table of Contents

Related Manuals for Decon wheel MED3163


Summary of Contents for Decon wheel MED3163
- Page 1 Assembly instructions for Rea Dahlia MED3163 1. Check if you have the right type. 2. Check if it is possible to place the battery bag on the back of the seat, if so you can use a back placed battery bag, if else you need to have the Invacare part Accessory Tray with Part No: 1574433.
- Page 2 5. Check the correct placement for the stop 2022-02-14...
- Page 3 Assembly of the Battery onto the Accessory Tray 6. Follow the instructions of assemble the Accessory Tray from Invacare. Item No. Part Number Description XSM6ML Lock nut M6 XSFM6X16 Screw Countersunk M6 x 16 XSM8ML Lock nut M8 XSSM8X16 Bolt Round-Square M8 x 16 MED5001 Battery plate eDrive/ eMove 2022-02-14...
- Page 4 7. Assembly the plate (right side) according to picture. Parts pair mountingset: Item No. Part Number Description MED3123-06 Bracket Dahlia MED2000 Bracket 100 400 017 Spacer XSM8X35 Screw Round M8 x 35 405239 Nordlock Washer M16 XSM8ML Nut Self-Locking M8 XSM16M Nut M16X1 Low HW069...
- Page 5 Assembler the Joystick MED4025 9. For assembly of joystick see pictures above. Item No. Part Number Description MED3123-05 Fix Plate MED1505 Bracket XSM4BR Washer Plain M4 MC6SM4X20 Screw Socket M4 x 20 XOC-48160-B0 Upper holder assembly 2 2022-02-14...
- Page 6 Attendant control with joystick (left and right side) Move this too the other side, if you assemble the joystick on the left side. Item No. Part Number Description MED1317 Bracket XSM6X45 Screw M6 x 45 XSM6X20 Screw M6 x 20 XSM6BR Plain Washer M6 XSM6ML...
- Page 7 MED1223 Alternative attendant control (only right side) Item No. Part Number Description XA2-2612E-00 Sheet Metal Bracket XA2-2612K-00 Bracket 91902-06200 Plain Washer 91312-06050 Screw M6 XSM6TG Turn Washer M6 2022-02-14...
- Page 8 Åtdragningsmoment / Tightening torque Metriska grovgängor, stål. Metric coarse threads, steel. Gänga / Thread Åtdragningsmoment / Tightening torque 1,2 Nm 3 Nm 6 Nm 10 Nm 25 Nm 50 Nm 85 Nm Navhylsor. Sleeves. Gänga / Thread Åtdragningsmoment / Tightening torque M16x1 30 Nm M18x1...
Need help?
Do you have a question about the MED3163 and is the answer not in the manual?
Questions and answers