Table of Contents
Advertisement
Quick Links
Advertisement
Table of Contents

Related Manuals for Daikin homecontrols EKRSIBDI1V3


Summary of Contents for Daikin homecontrols EKRSIBDI1V3
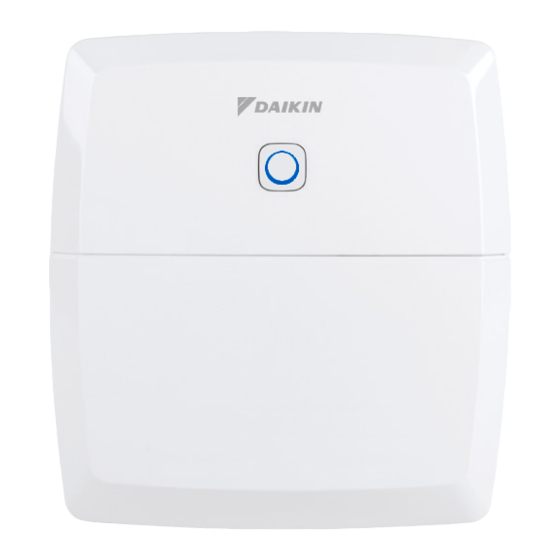
- Page 1 Installation and operation manual Daikin Home Controls Basic IO Box EKRSIBDI1V3...
- Page 5 Plugs 5 mm Installation and operation manual Documentation © 2022 Daikin Europe N.V., Belgium All rights reserved. This manual may not be reproduced in any format, either in whole or in part, nor may it be duplicated or edited by electronic, mechanical or chemical means, without the written consent of the publisher.
-
Page 6: Table Of Contents
Table of contents Information about this manual........4 Hazard information............5 Daikin Home Controls ............ 8 Function and accessory overview ........9 Mounting ..............10 Start-up ................ 11 Installation instructions ........11 Installation............14 Connections to the indoor unit ......15 Connecting further DHC accessories .... -
Page 7: Information About This Manual
Information about this manual Read this manual carefully before beginning operation with your Daikin Home Controls (DHC) accessories. Keep the manual so you can refer to it at a later date if you need to. If you hand over the accessory to other persons for use, hand over this manual as well. -
Page 8: Hazard Information
Hazard information Hazard information Do not open the accessory. It does not contain any parts that can be maintained by the user. In the event of an error, have the accessory checked by an expert. For safety and licensing reasons (CE), unauthorized change and/or modification of the accessory is not per- mitted. - Page 9 Hazard information The accessory may only be used for fixed installations and must be securely attached. The accessory is part of the building installation. The relevant national standards and directives must be tak- en into consideration during planning and set-up. The accessory has been designed solely for operation on a 230 V/50 Hz AC supply. Only qualified electricians (to VDE 0100) are permitted to carry out work on the 230 V mains.
- Page 10 Hazard information The accessory has not been designed to support safety disconnection. Exceeding the maximum capacity could lead to the de- struction of the accessory, fires or electric shocks. Before the accessory is connected, remove the fuse from the fuse box. Observe the installation instructions for installation in distribution systems (DIN VDE 0100-410).
-
Page 11: Daikin Home Controls
Daikin Home Controls Daikin Home Controls This accessory is part of the DHC ecosystem and communi- cates with a dedicated wireless connection. All accessories of the ecosystem can be configured comfortably and individually via the ONECTA app. The available functions provided by the DHC ecosystem in combination with other ac- cessories are described in the DHC Application Guide. -
Page 12: Function And Accessory Overview
Function and accessory overview Function and accessory overview The DHC Basic IO Box is used to connect your Daikin Altherma system to the ONECTA app. The accessory allows comfortable and demand-based regulation of the room temperature for heating according to your personal needs. -
Page 13: Mounting
Mounting Mounting You can flexibly mount the DHC Basic IO Box on walls using the supplied screws and plugs. To do so, proceed as follows: Select a suitable mounting location close to your heat- ing system. Make sure that no electricity or similar lines run in the wall at this location! Unscrew both lower screws of the cover (B) with an appropriate screwdriver and remove it (see figure 2+3). -
Page 14: Start-Up
Start-up Start-up Installation instructions Read this entire section before starting installation. If changes or works have to be made on the house in- stallation (e.g. extension, bypass of switch or socket inserts) or the low-voltage distribution for mounting or installing the accessory, the following safety instruction must be considered: Only to be installed by persons with the relevant electro-technical knowledge and experience!*... - Page 15 Start-up • The “5 safety rules” to be used: Disconnect from mains; Safeguard from switching on again; Check that system is de-energised; Earth and short circuit; Cover or cordon off neighbouring live parts; • Select suitable tools, measuring equipment and, if nec- essary, personal safety equipment; •...
- Page 16 Start-up Observe the hazard information in „2 Hazard informa- tion“ on page 5 during installation. Permitted cable cross sections for the connecting terminals C-F: Rigid cable Flexible cable with/ without ferrule 1.0 - 2.5 mm² 1.0 - 2.5 mm² Permitted cable cross sections for the connecting terminals G: Rigid cable Flexible cable with/ without ferrule...
-
Page 17: Installation
Start-up Installation For comfortable installation you can pull the cable through the cable inlets after having removed the break- out openings. To install the DHC Basic IO Box, proceed as follows: Unscrew both lower screws of the cover (B) with an appropriate screwdriver and remove it (see figure 2+3). -
Page 18: Connections To The Indoor Unit
Start-up Connections to the indoor unit L▲ 1▼ 2▼ 1▼ L▲ OUT1 OUT2 Terminal Connection to Phase conductor Neutral conductor Protective earthing conductor OUT1 Thermo ON for underfloor heating OUT2 Thermo ON for thermostatic radiator valves For further information regarding the connections, see the DHC Application Guide. -
Page 19: Connecting Further Dhc Accessories
DHC Access Point. To do so, proceed as follows: Open the ONECTA app. Click on the plus symbol. Select the menu item Add Daikin Home Controls. Select Add DHC Accessory. Briefly press the system button (A) (see figure 5). The LED quickly starts flashing orange. Connection mode remains activated for 3 minutes. -
Page 20: Troubleshooting
Troubleshooting Troubleshooting Duty cycle The wireless DHC accessories operate in the following frequen- cy bands: • 868,000~868,600 MHz • 869,400~869,650 MHz In order to safeguard operation of all devices working in this range, it is legally required to limit the transmission time of de- vices. -
Page 21: Error Codes And Flashing Sequences
Troubleshooting during start-up or during a fresh installation of a system. In this case, the LED of the accessory lights up red. It may be non-re- sponsive for a short period (max. 1 hour), until the time restric- tion for transmission has expired. After this period, it will operate normal again. -
Page 22: Restore Factory Settings
Restore factory settings Flashing code Meaning Solution 1x long red Transmission failed Try again (see „7.1 lighting or duty cycle limit is Duty cycle“ on page reached 17). 6x long red Accessory defective Contact your reseller. flashing 1x orange Test LED After the test LED and 1 x green has stopped, you can... -
Page 23: Maintenance And Cleaning
Maintenance and cleaning » The accessory will perform a restart. After the restart, you can again integrate your accessory into your DHC ecosystem. Maintenance and cleaning The accessory does not require you to carry out any maintenance. Enlist the help of an expert to carry out any maintenance or repairs. -
Page 24: General Information About Radio Operation
Hereby, Daikin Europe N.V. declares that the radio equipment type DHC EKRSIBDI1V3 is in compliance with the Directive 2014/53/EU. The original declaration of conformity is available from the EKRSIBDI1V3 product pages. -
Page 25: 11 Technical Specifications
Technical specifications 11 Technical specifications Device name: EKRSIBDI1V3 Supply voltage: 230V / 50Hz Current consumption: 16 A max. Standby power consumption: < 0.2 W Degree of protection: IP20 Ambient temperature: 0 to 50 °C Load type: ohmic load Max. switching capacity: Switching channel 1: 3680 W Switching channel 2: 1150 W... - Page 26 Technical specifications Protection class: Dimensions (W x H x D): 120 x 130 x 30 mm Weight: 165 g Radio frequency band: 868.0-868.6 MHz 869.4-869.65 MHz Maximum radiated power: 10 dBm Receiver category: SRD category 2 Typ. open area RF range: 250 m Duty cycle: <...
- Page 27 Technical specifications Instructions for disposal Do not dispose of the device with regular domestic waste! Electronic equipment must be disposed of at lo- cal collection points for waste electronic equipment in compliance with the Waste Electrical and Electronic Equipment Directive. Information about conformity The CE sign is a free trading sign addressed exclusive- ly to the authorities and does not include any warranty of any properties.
- Page 28 Free download of the ONECTA app! 4P687174-1 - 2022.04...
Need help?
Do you have a question about the homecontrols EKRSIBDI1V3 and is the answer not in the manual?
Questions and answers