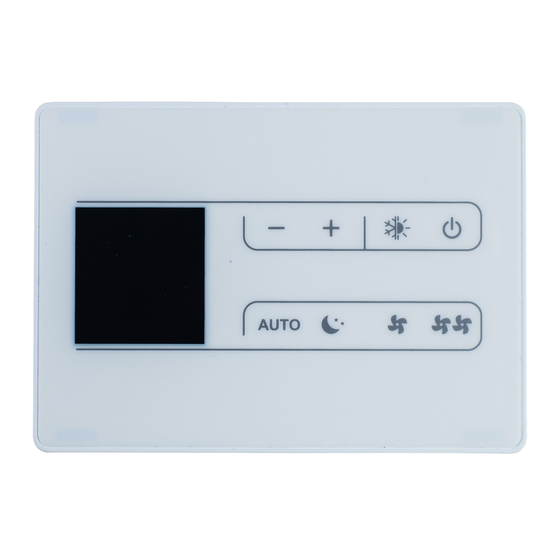
Daikin EKWHCTRL1 Installation, Connection And Settings
Wall mounted control for use in a modbus rtu serial network
Hide thumbs
Also See for EKWHCTRL1:
- Installation manual (24 pages) ,
- User manual (24 pages) ,
- Installation manual (28 pages)
Advertisement
Quick Links
INSTALLATION, CONNECTION AND SETTINGS WALL MOUNTED
CONTROL EKWHCTRL1, EKRTCTRL1 FOR USE IN A MODBUS RTU
Warnings
This instruction manual forms an integral part of the de-
vice and therefore must be carefully preserved and must
ALWAYS travel with it, even if you transfer the device to
another owner or relocate it to other premises.
If the manual gets damaged or lost, download a copy
from the website.
Description
The terminal board +AB- of the INN-FR-B32 Printed circuit
board allows the connection of the same present in the con-
trol panels EKRTCTRL1, EKWHCTRL1 and EKWHCTRL0 to a se-
rial communication network "Modicon ModBus" RTU.
The EKWHCTRL0 kit can only be installed in combination
with the electronic controls EKWHCTRL1. In this case the
connection from the electronic board INN-FR_B32 is not
necessary because the electronic controls EKWHCTRL1
have a specific serial port to connect.
Electric connections
Preliminary warnings
Before each intervention:
• disconnect the device from the power mains by turning
the system master switch to "OFF"
• wait for the components to cool down in order to avoid
any burns
1
SERIAL NETWORK
For a rapid and right assembly of the components follow
carefully the sequences described in the various sections.
All the operations must be performed by qualified person-
nel using the required Personal Protective Equipment.
This document is restricted in use to the terms of the law
and may not be copied or transferred to third parties with-
out the express authorization of the manufacturer.
A
Make sure that there is no voltage before operating.
Any technical intervention before disconnecting the unit
from the power supply is forbidden.
INN-FR-B32 board
Advertisement

Subscribe to Our Youtube Channel
Summary of Contents for Daikin EKWHCTRL1
- Page 1 INSTALLATION, CONNECTION AND SETTINGS WALL MOUNTED CONTROL EKWHCTRL1, EKRTCTRL1 FOR USE IN A MODBUS RTU SERIAL NETWORK Warnings This instruction manual forms an integral part of the de- For a rapid and right assembly of the components follow vice and therefore must be carefully preserved and must carefully the sequences described in the various sections.
- Page 2 Access to the printed circuit board Cover of the electrical box To access the electrical connection area: Fixing screws – follow the instructions in the installation manual of the appliance To access the Printed circuit board: – access the electrical connection area –...
- Page 3 Electrical connections EKWHCTRL1 with on-board Printed circuit board EKWHCTRL0 ModBus RTU Serial Connection For connection of the electronic board to a "Modicon Mod- Serial connection for fancoil Bus" RTU serial communication network: – connect to the terminal block on the wall control unit For all other connections, refer to the diagrams and in- structions in the installation manual.
-
Page 4: Configuration Registers
Note 1: The device address can be set individually on various devices by writing it on register 200 or set manually via the keyboard of the EKRTCTRL1 - EKWHCTRL1 kits (see paragraph 6). Note 2: Absolute setpoint value from 5 to 40. For the setpoint, write the value within the selected scale. - Page 5 Status and configuration flag registers: You can set the mode and view the alarms and status of the controller via the relevant flags of some registers. Operation mode setting register PRG, address 201 Stby LOCK PRG: 000=Sutomatic; 001=Silent; 010=Night; 011=Maximum –...
-
Page 6: Device Address Setting
SPL-SPH or SPL_W and SPH_W with Flag 5=1. lected scale in register 231 SP. Device address setting From the keyboards of the EKRTCTRL1, EKWHCTRL1 and the peripheral address (associated with register 200) can be EDB649 kits (or using a “detachable” one for the ESD659 kits) displayed and modified. -
Page 7: Troubleshooting
SPL_W (245) and SPH_W values (246) registers The technical data and aesthetic characteristics of the products are subject to change. DAIKIN reserves the right to modify them at any time without notice.


Need help?
Do you have a question about the EKWHCTRL1 and is the answer not in the manual?
Questions and answers