Table of Contents
Advertisement
Advertisement
Table of Contents

Related Manuals for Minolta QuickScan 35


Summary of Contents for Minolta QuickScan 35
- Page 3 The Minolta QuickScan 35 Plus is packaged with TWAIN driver software and stand-alone Utility software. Before using the QuickScan 35 Plus, we recommend you have a working knowledge of the PC and its operating conventions. Familiarity with the mouse and standard PC menus and commands is necessary before operating the QuickScan 35 Plus.
-
Page 4: End User License Agreement
DFARS; and (ii) if the Software is supplied to any unit or agency of the United States Government other than DoD, the Government's rights in the Software will be as defined in Clause 52.227-19(c)(2) of the FAR or, in the case of NASA, in Clause 18-52.227-86(d) of the NASA Supplement to FAR QuickScan 35... -
Page 5: For Proper And Safe Use
FOR PROPER AND SAFE USE Various symbols are used throughout this instruction manual and on the product itself for your proper and safe use of this product, and to prevent personal injury, injury to others, or property damage. An explanation of the symbols follows. - Page 6 Use under these conditions may result in fire or electric shock. Immediately unplug, discontinue use, and contact a Minolta Service facility. RISK OF FIRE Do not place the product in dusty or very humid area. QuickScan 35 WARNING • Pull • Modify • Bend...
- Page 7 WARNING RISK OF FIRE This product must have sufficient ventilation while in use. If the ventilation ducts are blocked, the temperature of the interior may become hot to the extent that fire will occur. Do not perform the following: • Place the product on its side or upside down. •...
-
Page 8: Table Of Contents
HARDWARE Names of Parts ...11 Setting the SCSI ID...12 Connecting the Scanner ...13 SOFTWARE Software for the QuickScan 35 Plus...19 Installing the Software ...20 Control Panel and Dialog Boxes ...24 Scan Flow Chart ...27 Launching the Software...28 Loading the Film ...33 Setting the Preferences ...37... -
Page 9: Before You Begin
• Instruction Manual • Warranty card System Requirements To use the QuickScan 35 Plus with your PC, you will need the following: • A PC with a 486 CPU or better. • Microsoft Windows version 3.1 or newer. • A minimum of 8 MB of RAM is required. -
Page 10: Hardware
HARDWARE QuickScan 35... -
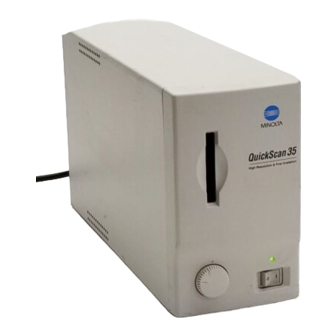
Page 11: Names Of Parts
NAMES OF PARTS Scanner Front Film slot Focus dial Bottom Indicator lamp Power switch Back SCSI port AC inlet SCSI ID dial Terminator power switch QuickScan35... -
Page 12: Setting The Scsi Id
The QuickScan 35 Plus communicates with your PC through a SCSI (pronounced "Scuzzy") connection. As with all SCSI devices, you will need to set a unique SCSI ID for the QuickScan 35 Plus. The SCSI ID range of your PC is from 0 to 7. SCSI ID 7 is usually reserved for the SCSI board. The QuickScan's SCSI ID is set to 5 when the unit is shipped. -
Page 13: Connecting The Scanner
Terminator If the QuickScan 35 Plus will be the last or only device in your SCSI chain, plug the supplied terminator into an open SCSI port on the back of the QuickScan 35 Plus. Either SCSI port can be used, there is no dedicated IN or OUT port. -
Page 14: Connecting The Scsi Cable
Connecting the SCSI Cable Your QuickScan 35 Plus scanner comes equipped with the SC-6 SCSI cable. If you require a different connector to link the QuickScan 35 Plus to your SCSI chain, see your dealer for the appropriate SCSI connector. - Page 15 3. Plug the power cord into the scanner's AC socket, then plug it into a grounded outlet. QuickScan35...
- Page 16 1. Plug the 50 pin half pitch end of the SCSI cable into the open SCSI port on the rear panel of your QuickScan 35 Plus, then plug the other end of the SCSI cable into the SCSI port on the rear of the PC, or the next device in the SCSI chain.
- Page 17 3. Plug the power cord into the scanner's AC socket, then plug it into a grounded outlet. QuickScan35...
-
Page 18: Software
SOFTWARE... -
Page 19: Software For The Quickscan 35 Plus
The TWAIN driver software is on the disk marked TWAIN Driver for Windows. QS Utility Use the QS Utility software to operate the QuickScan 35 Plus if you do not have Adobe Photoshop or you have many images you want to scan at a specific file size. -
Page 20: Installing The Software
3. Select Run... from the File menu. 4. Type A:\SETUP and click on OK. • If your 3.5" disk drive is drive B, type B:\SETUP. • The dialog box "Setup Initializing" will appear. • The Install Directory dialog box will appear next. QuickScan 35... - Page 21 5. Enter the install directory and click on OK. • The default install directory is C:\QS35. If you want to change the directory, click on Browse... 6. When the install is complete, the "Install Successful" dialog box will appear. Click on OK. QuickScan35...
- Page 22 3. Select Run... from the Start button pulldown menu. 4. Type A:\SETUP and click on OK. • If your 3.5" disk drive is drive B, type B:\SETUP • The dialog box "Setup Initializing" will appear. • The Install Directory dialog box will appear next. QuickScan 35...
- Page 23 5. Enter the install directory and click on OK. • The default install directory is C:\QS35. If you want to change the directory, click on Browse... 6. When the install is complete, the "Install Successful" dialog box will appear. Click on OK. QuickScan35...
-
Page 24: Control Panel And Dialog Boxes
5. Film Type pop-up menu 6. Rotate button 7. Flip button 8. Color correction button 9. Focus button 10. Scan mode pop-up menu QuickScan 35 Cropping Frame 11. Scan pitch pop-up menu 12. Pixel box 13. Reset button 14. PreScan button 15. - Page 25 Preference Dialog Box Click on the preference button to display the preference dialog box. Here, you can select the desired color correction mode and turn the Auto Brightness and Auto Eject functions on and off. Curves Dialog Box With the curves dialog box, you can control the brightness and color of the scanned image. Changes to all curves are automatically applied to the image in the scanning window.
- Page 26 Click on the reset button to return the levels to their original settings. 10. Load button Click on the load button to load previously saved settings. 11. Save button Click on the save button to save the settings currently displayed in the histogram palette window. QuickScan 35...
-
Page 27: Scan Flow Chart
SCAN FLOW CHART Insert Film Specify Film Type Preview Focus and Framing Color Correct Scan Save the File Film Eject Place film in the film holder emulsion side down. Insert the film holder to the scanner as indicated on the holder. Select the type of film you are scanning in the Film Type pop-up menu. -
Page 28: Launching The Software
• This manual has been written using Adobe Photoshop 3.0 as the example imaging application. However, any imaging application capable of using TWAIN sources can be used with the QuickScan 35. 1. Turn on the QuickScan 35 Plus, then turn on your PC. - Page 29 4. From the Sources menu, select QuickScan 35. 5. Select TWAIN... from Acquire in the File menu. 6. The following dialog box will appear. Click on OK. QuickScan35...
- Page 30 The QuickScan 35 Plus dialog box and preview window appear after setup. QuickScan 35...
- Page 31 QS Utility 1. Turn on the QuickScan 35 Plus, then turn on your PC. 2. Double-click on the QS Utility icon. 3. The software will launch automatically. QuickScan35...
- Page 32 Interface can not be Confirmed If the computer cannot confirm interface because the QuickScan 35 Plus power is off or there is a problem with the SCSI connection or the SCSI ID number, the following dialog box will appear. Correct the problem and click on OK.
-
Page 33: Loading The Film
LOADING THE FILM The QuickScan 35 Plus can scan 35mm color and black & white, positive and negative film. Mounted film and film strips can be scanned. Loading Film Strips Film strips must be placed in the film holder before insertion into the scanner. The film holder will only accept film strips up to 6 frames long. - Page 34 When scanning frames 4 through 6, place the filmstrip into the film holder with the image upside down. The preview image will be upside down; click on the Rotate button to correct the image. QuickScan 35...
- Page 35 Inserting the Film Holder into the Scanner Insert the film holder into the scanner film slot with the white lettering facing left. Slide the film holder in until resistance is met. The white line on the film holder should be aligned with the front of the film slot. Be careful not to scratch the film not protected by the film holder.
-
Page 36: Loading Mounted Slides
Load the slide into the scanner narrow end first with the emulsion side facing to the right. Insert vertical images into the scanner horizontally. Click on the Rotate button to return the image to a vertical orientation after prescan. Clean the slide before loading it into the scanner. QuickScan 35... -
Page 37: Setting The Preferences
SETTING THE PREFERENCES In the preference dialog box, you can select the desired color correction mode and turn the auto brightness and auto eject functions on and off. Color Correction Modes Standard Mode In standard mode, the color balance, black level, and brightness are adjusted with slider bars. Professional Mode In professional mode, the curves dialogue box and histogram dialogue boxes give you precise image correction capability. - Page 38 Standard Mode Select your preferences before scanning. If the color correction mode is changed or auto brightness is selected after the image is prescanned, the preview image will disappear and you will need to prescan again. QuickScan 35 Professional Mode...
-
Page 39: Specifying The Film Type
SPECIFYING THE FILM TYPE Specifying the type of film you are scanning is necessary to accurately reproduce the image. There are four types of film to choose from: • Color Negative • Color Positive • Black & white negative • Black & white positive Select the type of film you are scanning in the Film Type pop-up menu. -
Page 40: Prescan
Click on PreScan to preview the image. The preview image will appear in the preview window. • Grab the title bar to move the QuickScan 35 Plus dialog box to any convenient location on the screen. Do not insert another mount or anything metallic into the film slot while scanning or preview scanning film in slide mounts. -
Page 41: Focus And Framing
2. Position the focus icon over the area you want to focus and click the mouse button. • The focus indicator window will appear. 3. Turn the focus dial on the front of the QuickScan 35 Plus until the black box and the red bar are their longest. - Page 42 Horizontal orientation is the default position. Click on the image orientation button to rotate the picture 90° clockwise. The preview image will reflect this change. • To change the rotation to counter-clockwise, press and hold the option key while you click on the image orientation button. QuickScan 35...
- Page 43 Cropping and Zoom Preview The cropping frame surrounds the image area that will be scanned. Click on a corner of the cropping frame to enlarge or reduce the size frame proportionally. Click on the sides to expand or reduce the height or width of the cropping frame.
- Page 44 The flip button lets you reverse the image before scanning. The default position is the image viewed from the film base side. Click on the flip button to flip the image left-to-right horizontally. The preview image will reflect this change. QuickScan 35...
-
Page 45: Selecting The Scan Mode
SELECTING THE SCAN MODE The QuickScan 35 Plus lets you select from three convenient scan modes: Quick Mode Quick mode is the fast and easy way to make a scan. You select the scan pitch to determine output size (see Scan Pitch and Resolution on page 48). - Page 46 2. Select a scan pitch from the Scan Pitch pop-up menu. • The lower the scan pitch number the greater the resolution. See "Scan Pitch And Resolution" on page 48. • The number of pixels (W x H) will change to compensate for the changes in scan pitch. QuickScan 35...
- Page 47 3. Click on and drag the cropping handles until the cropping frame surrounds the image area you want to scan. • The number of pixels will change to compensate for the changes in scan pitch, but the final output size will not change.
- Page 48 The resolution of most printers will vary from 140~ 360 dpi. The maximum scan resolution of the QuickScan 35 is 1200 dpi. Most monitors have a screen resolution of 72 dpi (Flexscan monitors vary). Changing the scan pitch changes the size of the image displayed on the monitor.
- Page 49 Pixel Mode Pixel Mode lets you specify the final size of the image you are scanning. This is helpful when you want to make sure the image fills the display it will be viewed on. For example, to fill the screen on a VGA monitor, the image size would need to be 640 by 480 pixels.
- Page 50 • If you change the size of the cropping frame, the scan pitch will change to compensate for the changes in the scanning area. If the file size is not locked, the number of pixels will change to compensate for the changes in the scanning area. • Click on Reset to return all settings to their default position. QuickScan 35...
- Page 51 2. Enter the desired output resolution. • The QuickScan 35 Plus is capable of scanning resolutions from 36 - 1200 dpi. If a resolution outside of this range is entered, a resolution of either 36 or 1200 will be set.
- Page 52 • Changing the scan pitch will not affect the standard mode settings unless the scanners limits have been breached. If breached, the image dimensions will change to compensate. • Click on Reset to return all settings to default position. QuickScan 35...
- Page 53 6 x 4 inch image is 600 dpi, scan using those settings. As all the image adjustments are made before scanning, there is no need for QuickScan 35 Plus users to worry about pixel resampling or interpolation (two computer functions that can result in loss of image quality).
-
Page 54: Brightness, Contrast, & Color Balance
BRIGHTNESS, CONTRAST, & COLOR BALANCE The Minolta QuickScan 35 Plus gives you both Standard and Professional options to adjust your image before scanning. The Standard mode is intuitive and ideal for hobbyists. The Professional mode gives you all the image information and tools necessary to control the output quality of your scan. - Page 55 PROFESSIONAL CORRECTION MODE 1. Before scanning, click on the Professional check box in the preference dialog box. 2. Click on the Color Correction button in the data panel. • The Curves and Histogram dialog boxes will appear. HINT: Correcting the brightness and contrast first may eliminate the need for color corrections. •...
- Page 56 2. Click on and drag the portion of the curve you want to change. The change will be reflected in the preview image. • Pull the curve up to increase the output level. • Pull the curve down to decrease the output level. 3. Click on the Reset button to return the selected curve to its default setting. QuickScan 35...
- Page 57 Saving Tone Curve Settings 1. Click on Save in the curves dialog box. • The standard Windows Save dialog box will appear. Loading Tone Curve Settings 1. Click on Load in the curves dialog box. • The standard Windows Load dialog box will appear. The Tone Curve files for black and white and color film are not interchangeable.
- Page 58 2. Click on and move the upper or lower input limit triangles to the desired locations. 3. Click to view the changes to the histogram. • The preview image will reflect the adjustments. QuickScan 35 White Point Black Point RGBSynchro...
- Page 59 Saving Histogram Settings 1. Click on Save in the Histogram dialog box. • The standard Windows Save dialog box will appear. Loading Histogram Settings 1. Click on Load in the Histogram dialog box. • The standard Windows Load dialog box will appear. The Tone Curve files for black and white and color film are not interchangeable.
-
Page 60: Save And Load
Saving 1. Click on Save in the QuickScan's control panel. • The standard Windows Save dialog box will appear. Loading 1. Click on Load in the QuickScan's control panel. • The standard Windows Load dialog box will appear. QuickScan 35... -
Page 61: Scanning & Saving
SCANNING & SAVING Scanning the Image When you have finished making all the adjustments to the image, you are ready to scan the film. Click on Scan. The control panel disappears and scanning begins. • If you are using the TWAIN driver software, the image will appear in your imaging application's main window when the scan is complete. - Page 62 The fluorescent light source automatically turns off if the PC has not been operated for two hours. The lamp will come on again the next time you use the QuickScan. Set-up will take about 30 to 60 seconds before the fluorescent lamp glows again. QuickScan 35...
-
Page 63: Trouble Shooting
Q After connecting the QuickScan 35, Windows does not operate correctly. A Turn the power switch OFF, check the SCSI ID and connections. A Disconnect only the QuickScan 35. Check the other SCSI devices with the Windows ASPI check command. -
Page 64: User Technical Support
• The frequency of occurrence of the problem. To Determine the Version Number of Your Driver Software Click on the Minolta logo in the upper left hand corner of the control panel. The QuickScan 35 information window will appear. QuickScan 35...
Need help?
Do you have a question about the QuickScan 35 and is the answer not in the manual?
Questions and answers