Table of Contents
Advertisement
Quick Links
Thank you for purchasing the Minolta QuickScan 35. The QuickScan 35 enables you to scan both
negative and positive, color and monochrome (black & white) 35mm film using the Macintosh.
The main features of the QuickScan 35 are as follows:
• High-speed scanning with 3-line sensors
• High-quality images with a maximum of 2820 dpi
• Easy, versatile software
The Minolta QuickScan 35 is packaged with an Adobe Photoshop plug-in software and an
independent Utility software. Before beginning to use the QuickScan 35, you should have a working
knowledge of the Macintosh and its operating conventions. You should know how to use the mouse
and standard Macintosh menus and commands.
Adobe Photoshop™ is a registered trademark of Adobe Systems Inc.
Macintosh™ is a registered trademark of Apple Computer, Inc.
Other corporate names and product names are also registered trademarks
Changes or modifications not approved by the party responsible for compliance could void the user's
authority to operate the equipment.
This equipment has been tested and found to comply with the limits for a Class B digital device,
pursuant to Part 15 of the FCC rules. These limits are designed to provide reasonable protection
against harmful interference in a residential installation. This equipment generates, uses and can
radiate radio frequency energy and, if not installed and used in accordance with the instructions, may
cause harmful interference to radio communications. However, there is no guarantee that interference
will not occur in a particular installation. If this equipment does cause harmful interference to radio or
television reception, which can be determined by turning the equipment off and on, the user is
encouraged to try to correct the interference by one or more of the following measures:
• Reorient or relocate the receiving antenna.
• Increase the separation between the equipment and receiver.
• Connect the equipment into an outlet on a circuit different from that to which the receiver is
connected.
• Consult the dealer or an experienced radio/TV technician for help.
1
Advertisement
Table of Contents

Related Manuals for Minolta QUICKSCAN35


Summary of Contents for Minolta QUICKSCAN35
-
Page 1: Introduction
Thank you for purchasing the Minolta QuickScan 35. The QuickScan 35 enables you to scan both negative and positive, color and monochrome (black & white) 35mm film using the Macintosh. The main features of the QuickScan 35 are as follows: •... -
Page 2: End-User License Agreement
Software, provided that (i) you must, at the same time, either transfer to such other party or destroy all your other copies of the Software. (ii) Such transfer of possession terminates you license from Minolta, and (iii) such other party shall accept and be bound by these license terms by their initial use of the Software. -
Page 3: For Proper And Safe Use
FOR PROPER AND SAFE USE Various symbols are used throughout this instruction manual and on the product itself for your proper and safe use of this product, and to prevent personal injury, injury to others, or property damage. An explanation of the symbols follows. Read and understand each caution thoroughly before reading this main text of this instruction manual. - Page 4 Do not place a container of water or other liquid on the product. If water or other liquid gets inside the product, it may cause a short resulting in fire or electric shock. Immediately unplug, discontinue use, and contact a Minolta Service facility.
- Page 5 Do not touch the power cord with wet hands. RISK OF ELECTRIC SHOCK Do not attempt to disassemble this product. It contains high-voltage circuits. For repairs, contact a Minolta Service facility. RISK OF ELECTRIC SHOCK Connect the ground before use. If the ground is not connected, an electricity leak may result in electric shock.
-
Page 6: Table Of Contents
TABLE OF CONTENTS INTRODUCTION END-USER LICENSE AGREEMENT FOR PROPER AND SAFE USE TABLE OF CONTENTS BEFORE YOU BEGIN 1. Package Contents 2. System Requirements NAMES OF PARTS 1.SCANNER 2.PREVIEW SCAN WINDOW GETTING STARTED 1. SETTING THE SCSI ID NUMBER 2. CONNECTING THE SCANNER 3. -
Page 7: Before You Begin
BEFORE YOU BEGIN The following contents should be included in this package. • QuickScan 35 1. Package Contents • SCSI cable SC-1 • Power cord • SCSI terminator ST-1 • QuickScan 35 Control for Macintosh • Instruction manual • Warranty card 2. -
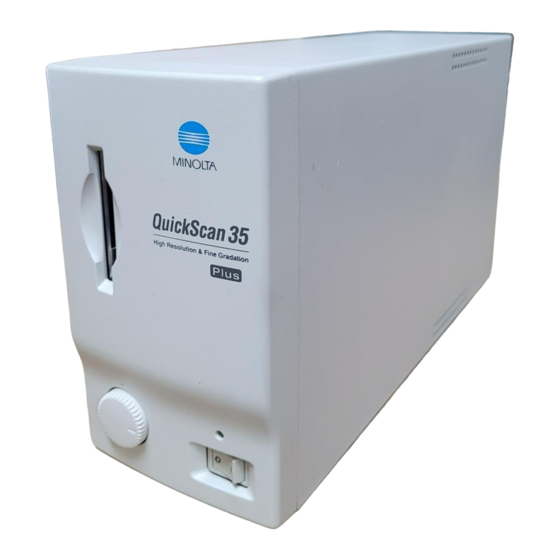
Page 8: Names Of Parts
NAMES OF PARTS 1.SCANNER... -
Page 9: Preview Scan Window
PREVIEW SCAN WINDOW 1. Auto eject check box 10. Scan mode pop-up menu 2. Film eject button 11. Scan pitch pop-up menu 3. Save button 12. Pixel box 4. Load button 13. Reset button 5. Film type pop-up menu 14. Preview scan button 6. -
Page 10: Getting Started
GETTING STARTED You will need to set an SCSI identification (ID) number for the scanner. Each SCSI device connected to your computer must have a different SCSI ID number. Your Macintosh uses number 1. SETTING THE SCSI ID 7, the internal hard disk uses number 0, and the internal CD-ROM NUMBER uses number 3. -
Page 11: Connecting The Scanner
2. CONNECTING THE 1. Connect one end of the SCSI cable to one of the two SCSI ports on the rear panel of the QuickScan 35 and the other end to SCANNER the SCSI port on the rear of the Macintosh. 2. -
Page 12: Installing The Software
3. INSTALLING THE The QuickScan 35 comes with Photoshop Plug-in software and Utility software. If you do not have Photoshop or if you want to SOFTWARE scan film using a fixed file size, use the Utility software. 1. Insert the QuickScan 35 disk to the Macintosh. 2. -
Page 13: Scan Flow Chart
5. SCAN FLOW CHART Place film in the film holder emulsion side down; then insert the 1. Insert Film film holder to the scanner as indicated on the holder. Choose the type of film you are using from the film type pop-up 2. -
Page 14: Scanning Images
SCANNING IMAGES Before you start Photoshop or the Utility software, turn on the QuickScan 35. Start Adobe Photoshop. Then choose Acquire from the File menu 1. START UP and select QS35 Plug-in. If you are using the Utility software, double click on the Utility icon. Select Scan from the File menu. - Page 15 QuickScan 35 dialog box and preview window appear, after setup. If the computer cannot confirm interface because the QuickScan 35 power is off or there is a problem with the SCSI connection or the SCSI ID number, a dialog box will appear. Correct the problem and click OK.
-
Page 16: Inserting The Film
2.INSERTING THE FILM The QuickScan 35 can scan both color and monochrome (black & white), positive and negative 35mm film. Both film in slide mounts and film strips cut to a maximum of 6 frames can be scanned. The surface of the front and back of the film is different. The front is the base which has a glossy surface and the back is the emulsion which has a slight matte surface. -
Page 17: Specifying The Film Type
3. SPECIFYING THE FILM Specifying the type of film you are scanning is necessary for an accurate reproduction of the image. There are four types of film to TYPE choose from: color negative, color positive, monochrome (black & white) negative, and monochrome (black & white) positive. Click PreScan to preview the image. -
Page 18: Scan Setting
5. SCAN SETTINGS 5.1. Image Orientation The image orientation button enables you to specify the correct orientation of your image before scanning. The image in a Button horizontal orientation is the default position. Click the image orientation button to rotate the picture 90 clockwise. The preview image will reflect this change.To change the rotation to counter- clockwise, press and hold the Option key while you click the image orientation button. -
Page 19: Standard Mode
6.1. Standard Mode 1. Choose Standard Mode from the scan mode pop-up menu. 2. Choose the scan pitch from the scan pitch pop-up menu. Scan Pitch Hint Scan Pitch: 1 300 dpi printer produces an A4 size image Scan Pitch: 2 300 dpi printer produces an A6 size image Scan Pitch: 4... -
Page 20: Pixel Mode
6.2. Pixel Mode 1. Choose Pixel Mode from the scan mode pop-up menu. 2. Enter the number of pixels in the W (width) and H (height) boxes, then select the Lock check box. 3. Crop the image as desired. The scan pitch changes automatically from 1 to 24 to maintain the pixel number. -
Page 21: Print Mode
1. Choose Print Mode from the scan mode pop-up menu. 6.3. Print Mode 2. Enter the resolution you want for the final image in the output resolution box. 3. Select the units of measure for the final image size using the units pop-up menu. -
Page 22: Scanning The Image
7. SCANNING THE When you have finished making all the adjustments to the image, you are ready to scan the film. Click Scan. The control panel IMAGE disappears and scanning begins. If you are using the Photoshop Plug-in software, the image will appear in a Photoshop window when the scan is complete. -
Page 23: Image Adjustment
IMAGE ADJUSTMENT You can adjust the color balance, brightness, and black level of the image. Click the image adjustment button to display the controls. 1. COLOR BALANCE The primary colors used in scanners, as well as photography, are red, green, and blue. The QuickScan 35's red, green, and blue ADJUSTMENT controls enable you to adjust the color of image before scanning. -
Page 24: Brightness Adjustment
3. BRIGHTNESS This control allows you to adjust the overall brightness of the image. Drag the slider to the right to increase brightness and to the ADJUSTMENT left to decrease brightness. Clicking one of the arrows moves the slider one step. •... -
Page 25: Manual Focus
MANUAL FOCUS Normally, focusing is not necessary with the QuickScan 35, however, it is recommended when your final image will be large and if the film strip is curled or a paper slide mount is warped. 1. Click the focus button. The curser changes to the focus icon. 2. -
Page 26: Save/Load Settings Buttons
The fluorescent light source automatically turns off if the FLUORESCENT LAMP Macintosh has not been operated for two hours. AUTOMATIC SHUT OFF • The lamp will come on again the next time youuse The setting-up takes QuickScan35. approximately 30 - 60 seconds before the flourescent lamp glows again. -
Page 27: Color Sync
COLOR SYNC Color Sync compensates for the different color characteristics of each instrument (i.e., monitor or printer) connected to the Macintosh. 1. INSTALLATION 1. If you have never used Color Sync, insert the QuickScan 35 disk to the Macintosh. 2. Double click on the disk icon. 3. -
Page 28: Operation
1. When the scanned image appears in the Photoshop window, choose Color Sync from Others in the Filter menu. 2. The Color Sync dialog box appears with the following information: Source Profile: MINOLTA QuickScan 35 Destination Profile: Monitor in use Matching Option: Photographic... -
Page 29: Trouble Shooting
A:Scan again or correct the color using the color adjustment function. Q:"Change the flourescent lamp" message appears. A:Change the fluorescent lamp. Contact a Minolta Service facility. Q:Film is not inserted, but "Film loaded or Scanner Error detected.." message appears. -
Page 30: Specifications
Type:Film transport type SPECIFICATIONS Usable Film:35mm negative/positive, color/monochrome (black & white) films Scanning Dimensions:24.2mm x 36.3mm; Maximum 2820 dpi (2688 x 4032 pixels) Pixel Density:110 pixels/mm, 2828 dpi (on film) Interface:SCSI2 Scanning Time:Scanning:approx. 12 sec. (1000 x 1000 pixels) approx. 60 sec. (2688 x 4032 pixels) Preview:approx. - Page 31 9223-2880-11(P9506-A506)
- Page 32 INSTRUCTION MANUAL...
Need help?
Do you have a question about the QUICKSCAN35 and is the answer not in the manual?
Questions and answers