Table of Contents
Advertisement
Quick Links
Advertisement
Table of Contents

Related Manuals for Minolta Film Scanner II


Summary of Contents for Minolta Film Scanner II
- Page 1 Hardware Manual...
- Page 2 Thank you for purchasing the Minolta Dimâge Scan Multi II. The Dimâge Scan Multi II is a multiple format film scanner capable of scanning medium format, 35mm, 16mm, and sleeved APS film. With the optional APS adapter, advanced photo system film in the cassette can also be scanned. Your new scanner has extraordinary features, including: •...
-
Page 3: For Proper And Safe Use
FOR PROPER AND SAFE USE Please read and understand each caution before using this product. To avoid fire or electric shock: • Only use the voltage specified for this unit. • Do not expose this unit to liquids. • Do not insert metal objects into this unit. •... -
Page 4: Table Of Contents
TABLE OF CONTENTS FOR PROPER AND SAFE USE ...1 BEFORE YOU BEGIN Package Contents...4 System Requirements ...5 NAMES OF PARTS Front...6 Back ...7 Important: Locking Pin Information ...7 SETTING THE SCSI ID ...8 CONNECTING TO THE COMPUTER If the Scanner is the Only or Last Device in the Chain ...9 If the Scanner is Inside the Chain ...11 GETTING STARTED Film Emulsion ...14... - Page 5 INDICATOR LAMP...33 TECHNICAL DETAILS...34 CUSTOMER SERVICE...35 Minolta ...36...
-
Page 6: Before You Begin
BEFORE YOU BEGIN PACKAGE CONTENTS CHECK THIS PACKING LIST BEFORE YOU BEGIN. IF SOME PARTS ARE MISSING, CONTACT YOUR DEALER OR A MINOLTA SERVICE FACILITY. • Minolta Dimâge Scan Multi II scanner • 35mm Film Holder FH-M1 • 35mm Slide Mount Holder SH-M1 •... -
Page 7: System Requirements
SYSTEM REQUIREMENTS MACINTOSH CPU: Power PC, Power Macintosh G3, Blue & White Power Macintosh G3 and Power Macintosh G4 (Except for 68 K Macintosh and Mac OS compatible unit). Power Macintosh G4 is recommended when loading with 16 bit and using the Digital ROC/GEM functions. -
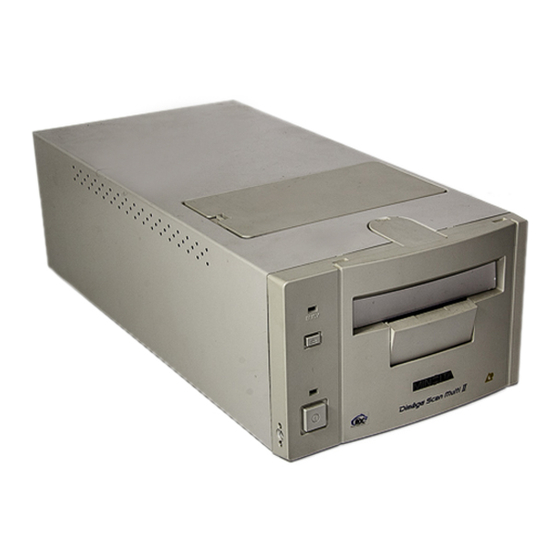
Page 8: Names Of Parts
NAMES OF PARTS FRONT Connector cover Fluorescent lamp unit cover Indicator lamp Accessory panel Eject button Film-slot door Power lamp Power switch... -
Page 9: Back
BACK SCSI ID switch Terminator dip switch IMPORTANT: LOCKING PIN INFORMATION AC socket Centronics D-sub-25 port UNLOCK THE OPTICS BEFORE USING THE SCANNER FOR THE FIRST TIME. The optics inside the scanner have been parked and locked before shipment for their protection. Before using the scanner for the first time, unlock the locking pin. -
Page 10: Setting The Scsi Id
The Dimâge Scan Multi II’s SCSI ID is factory preset to 5. If 5 is not being used by another operating SCSI device in the SCSI chain, it is not necessary to change the SCSI ID. A SCSI ID is a unique address you assign to each SCSI device connected to your computer. The SCSI ID range of your computer is from 0 to 7, however some IDs are already occupied by your computer. -
Page 11: Connecting To The Computer
CONNECTING TO THE COMPUTER IF THE SCANNER IS THE ONLY OR LAST DEVICE IN THE CHAIN… TURN OFF THE COMPUTER AND ALL THE SCSI DEVICES BEFORE CHANGING SCSI IDS, CONNECTING SCSI CABLES, OR DISCONNECTING SCSI CABLES. One D-sub-25 to Centronics 50 cable is included with your scanner. Please see your dealer if you require a different cable. - Page 12 CONNECTING TO THE COMPUTER 4. Plug the power cord into the scanner’s AC socket. 5. Plug the other end of the power cord into a grounded outlet.
-
Page 13: If The Scanner Is Inside The Chain
IF THE SCANNER IS INSIDE THE CHAIN… TURN OFF THE COMPUTER AND ALL THE SCSI DEVICES BEFORE CHANGING SCSI IDS, CONNECTING SCSI CABLES, OR DISCONNECTING SCSI CABLES. One D-sub-25 to Centronics 50 cable is included with your scanner. Please see your dealer if you require additional cables. - Page 14 CONNECTING TO THE COMPUTER 3. Connect one end of SCSI cable B into the remaining SCSI port on the back of the scanner. 4. Connect the other end of SCSI cable B into the next device in the chain. 5. Flip the dip switch marked 1 down to turn the terminator off.
- Page 15 7. Plug the other end of the power cord into a grounded outlet.
-
Page 16: Getting Started
FILM EMULSION The emulsion side of the film is the side coated with the photographic material. The base side of the film has no photographic material and its surface is smooth and shiny. The emulsion side of slide film has raised areas at subject contrast. -
Page 17: Loading 35Mm Film Holders
LOADING 35MM FILM HOLDERS SLIDE MOUNT HOLDER SH-M1 • The slide mount holder can hold up to 4 mounted slides (35mm or APS). • Slide mounts must be thicker than 1mm and thinner than 2mm to fit properly into the holder. •... -
Page 18: 35Mm Film Holder Fh-M1
35MM FILM HOLDER FH-M1 Use the FH-M1 for 35mm negatives and unmounted 35mm slide film. • The 35mm Film Holder FH-M1 can hold film strips up to 6 frames long. • Blow dust off the film before placing it into the film holder. 1. - Page 19 4. Press the cover firmly closed until it clicks.
-
Page 20: Loading The Medium Format Film Holder Mh-M1
LOADING THE MEDIUM FORMAT HOLDER MH-M1 USING THE MEDIUM FORMAT HOLDER MH-M1 Use the MH-M1 for 120/220 film frames in 6x4.5, 6x6, 6x7, and 6x9 formats. The MH-M1 should also be used for sleeved APS film, 16mm film, and TEM* film. Use the appropriate film mask for each film format. The glass in the Medium Format Film Holder MH-M1 has been treated to prevent the appearance of Newton’s rings (coloured rings) when scanning. - Page 21 Secure the film by placing it flush against the rail on the film holder. 3. Place the film in the film holder. • Secure the film by placing it flush against the rail on the film holder. • Place the film emulsion side down (p 14).
-
Page 22: 16Mm And Aps Sleeve Film
16mm AND APS SLEEVE FILM Align the slot in the mask with the rail on the film holder. Align the holes in the mask with the pins on the film holder. 1. Press on the lever marked “PUSH”, then lift open the holder. - Page 23 Make sure the film lies flat between the film guides. Make sure the film lies flat between the film guides. 3. Place the film in the mask using the film guides. • Place the film emulsion side down (p 14). 4.
-
Page 24: Rotating The Frame
ROTATING THE FRAME The image area of the Medium Format Holder MH-M1 can rotate 10 degrees in either direction to compensate for a tilted image composition. By rotating the frame before scanning, the need to rotate the scanned image, thus resampling the pixels, is eliminated. 1. -
Page 25: Inserting The Holder Into The Scanner
INSERTING THE HOLDER INTO THE SCANNER EJECTING 1. Press the power switch to turn the scanner on. Turn on your computer, then launch the Dimâge Scan Multi II software. • The green indicator lamp will blink slowly while the scanner is setting up. 2. -
Page 26: Aps Adapter Ad-100 (Sold Separately)
APS ADAPTER AD-100 (SOLD SEPARATELY) • The APS Adapter AD-100 (optional accessory) is required to scan APS film in the cassette with the Dimâge Scan Multi II. Only processed film with the VEI set to can be inserted into the APS Adapter AD-100. APS ADAPTER –... -
Page 27: Loading The Cassette
LOADING THE CASSETTE 1. Slide the film-chamber release as shown. • The film chamber door will open. 2. Insert the film cassette into the film chamber with the VEI on top. • Only load cassettes displaying the 3. Close the film-chamber door. •... -
Page 28: Inserting The Adapter
INSERTING THE ADAPTER 1. Press the power switch to turn the scanner on. Turn on your computer, then launch the Dimâge Scan Multi II software. • The green indicator lamp will blink slowly while the scanner is setting up. 2. Pull the accessory panel on the scanner straight out, then open it all the way pushing it until it clicks. -
Page 29: Ejecting The Adapter
EJECTING THE ADAPTER • When the Eject button on the front of the scanner is used, the film will rewind into the cassette before the adapter is ejected, regardless of the software Preference settings. Please refer to the Preferences section in the software manual. -
Page 30: Changing The Fluorescent Lamp
CHANGING THE FLUORESCENT LAMP When the indicator light is red and blinks rapidly, check to see of the fluorescent lamp is operational. Replace the fluorescent lamp when it burns out. See your dealer to purchase a replacement lamp unit. CAUTION: Turn off the scanner and allow the unit to cool for 10 minutes before removing the fluorescent lamp. - Page 31 4. Connect the new lamp. • Snap the connectors together until they click. 5. Place the lamp unit in the scanner by aligning the raised edge of the lamp unit 1 with the rectangular notch 2 on the scanner. • The arrows on the lamp and scanner should be lined up.
-
Page 32: Important: Before Transporting The Scanner
IMPORTANT: BEFORE TRANSPORTING THE SCANNER Before transporting the scanner the optics must be parked and locked into place to prevent damage. 1. With the Dimâge Scan Multi II software active (utility, TWAIN driver, or plug-in): Windows: press Ctrl + Shift + L. Macintosh: press Command + Shift + L. -
Page 33: Troubleshooting
Symptom The computer will not start after connecting the scanner. The computer does not recognize the scanner. The scanner does not pull in the film holder when loading The scanned image is very green or blown- out white when using the Medium-format holder. - Page 34 Symptom The indicator lamp is red and blinks rapidly The scanned image is black. The scanned image colour is strange. TROUBLESHOOTING Cause/Action 1. Turn off the computer, then the scanner. Check that the fluorescent lamp cover is closed. 2. Turn on the scanner. If the fluorescent lamp does not glow, replace the lamp.
-
Page 35: Indicator Lamp
The indicator lamp on the front of the scanner reveals the status of the scanner. Indicator Lamp Green – blinking slowly Green – blinking quickly Green – glows steadily Red – glows steadily Red – blinks quickly INDICATOR LAMP Scanner Status Set up is complete and there is no holder inserted in the scanner. -
Page 36: Technical Details
TECHNICAL DETAILS Type: Film transport, fixed sensor, 1 pass scan film scanner Usable Film: Medium format film (6x4.5, 6x6, 6x7, 6x8, 6x9) – positive/negative, colour/B&W; 35mm film - positive/negative, colour/B&W; Transmission Electron Microscope film – (5.9 x 8.2cm) positive/negative, colour/B&W; 16mm film –... -
Page 37: Customer Service
Please contact your dealer regarding installation, SCSI interface recommendations, or application compatibility. If your dealer is unable to help you, contact us toll free. Technical Support 1-800-808-4888 Monday – Friday 8:30-5:00 (EST) Minolta Corporation 101 Williams Dr. Ramsey, NJ 07446 (201) 825-4000i Please have the following information ready when calling Minolta Technical Support: Make and model of your computer:... -
Page 38: Minolta
Minolta Austria Ges.m.b.H Amalienstr. 59-61, A-1131 Wien, Österreich Tel:01 87868 176 Fax:01 87868 153 http://www.minoltaeurope.com Minolta Belgium Branch Prins Boudewijnlaan 1 B-2550 Kontich, België Tel: 03 451 07 00 Fax: 03 458 50 48 http://www.minolta.be en http://www.minolta.nl CAN Minolta Canada Inc., Head Office 369 Britannia Road East, Mississauga, Ontario L4Z 2H5, Canada Tel.0905 890 66 00...
Need help?
Do you have a question about the Film Scanner II and is the answer not in the manual?
Questions and answers
i want a driver for windows 11
@Jan M MELISSEN
No, there is no driver mentioned for the Minolta Film Scanner II that is compatible with Windows 11. The supported operating systems listed are Windows 98 and Windows 2000.
This answer is automatically generated
software for windows 11