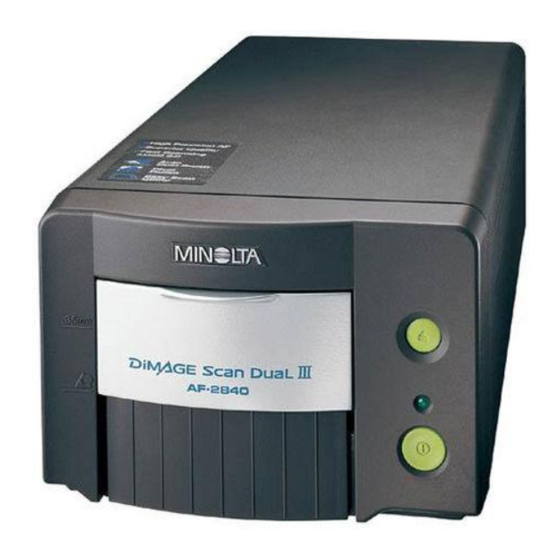
Minolta DIMAGE Scan Dual III Instruction Manual

Minolta DIMAGE Scan Dual III Instruction Manual

Hide thumbs Also See for DIMAGE Scan Dual III:
Table of Contents

Advertisement

E
INSTRUCTION MANUAL

Advertisement

Table of Contents
loading
Need help?

Need help?

Do you have a question about the DIMAGE Scan Dual III and is the answer not in the manual?

Questions and answers

Summary of Contents for Minolta DIMAGE Scan Dual III

  • Page 1 INSTRUCTION MANUAL...
  • Page 2: Color Examples

    EFORE YOU BEGIN Tone-curve corrections Thank you for purchasing this Minolta product. Please take the time to read through this instruction manual so you can enjoy all the features of your new scanner. By selecting individual color channels on the tone curve, adjustments to the overall color of an image can be made.
  • Page 3: Table Of Contents

    Getting started ......... . . 10 DiMAGE Scan Dual III Utility ....... . 30 The package contents .
  • Page 4 DiMAGE Scan Dual III Utility – Advanced scanning ....44 DiMAGE Scan Dual III Utility – Image processing....64 Setting scanner preferences .
  • Page 5: For Proper And Safe Use

    • Do not disassemble this product. Electric shock may cause injury if a high-voltage • Do not move, obstruct, or touch the film holder when scanning. The product or circuit inside the product is touched. Take the product to a Minolta Service Facility scanned images can be damaged.
  • Page 6: Getting Started

    * The RAM requirements refer to the physical memory available without the use of memory man- 6 Turn on the scanner (p. 19) agement tools or virtual memory. * Check the Minolta web site for the latest compatibility information: The package contents North America: http://www.minoltausa.com Europe: http://www.minoltaeurope.com/pe/digital/languages_stage.html...
  • Page 7: Installation

    TWAIN-data-source. Professional or XP should log on with the administrator privilege. Insert the DiMAGE Scan Dual III CD-ROM into the CD- ROM drive. The setup screen will open. Click the “Starting up the DiMAGE Scan Dual III installer”...
  • Page 8: Installing The Utility Software - Macintosh

    To make addi- tional installations, click the continue button. After the computer restarts, confirm the DS Dual3 (DiMAGE Scan Dual III) folder is installed in the designated location. If the easy-install option was chosen, the folder will contain the following items: DS Dual3 Utility, DS Dual3 Easy, DS Dual3 Plug-in, The end-user license agreement will appear.
  • Page 9: Installing Adobe Photoshop Elements

    ETTING STARTED Installing Adobe Photoshop Elements Names of parts The scanner utility software contains a plug-in module that can be installed in the 35 mm film-holder mark (p. 22) Photoshop Elements import/export folder located in the plug-in folder. This will allow Pull the front door down to this position when inserting a 35mm film the scanner utility software to be opened from Photoshop Elements.
  • Page 10: Before Scanner Setup

    Connecting the AC adapter Connect the output plug of the AC Before connecting the DiMAGE Scan Dual III to a computer, the scanner utility soft- adapter to the scanner’s DC ter- ware must first be installed; if the scanner is connected to the computer before the minal (1).
  • Page 11: Loading The Film Holders

    Replace the cover. Slide the two protrusions on the left side of the With the DiMAGE Scan Dual III, two film formats can be scanned: 35 mm and APS. cover into the two slots in the Two supplied film holders and one optional holder are available.
  • Page 12: Loading A Film Holder Into The Scanner

    Use the eject button on the scanner body or in Using the APS Adapter AD-10 (sold separately) the DiMAGE Scan Dual III Utility window to APS (Advanced Photo System) cassette film can be scanned using the APS Adapter remove the holder; the scanner automatically AD-10.
  • Page 13: Easy Scan Utility

    Turn on the scanner and close the front door before launching the Easy Scan Utility. When launching the utility, the scanner front door must be closed and the film holder removed. Do not launch the Easy Scan Utility if the DiMAGE Scan Dual III Utility has already been opened through an image-processing application.
  • Page 14 ASY SCAN UTILITY When scanning with 35mm film strips or mounted slides, the film type must be speci- When the index scan is complete, thumbnails of all the images in the holder are dis- fied on this screen. Color negative, B&W negative, color positive, B&W positive film played.
  • Page 15 ASY SCAN UTILITY If the adjust-image option was selected by checking the box in the previous screen, On the save-as screen, specify the file name, file format, and destination of the the adjust-image screen will be displayed. After making adjustments to the image, image data.
  • Page 16: Dimage Scan Dual Iii Utility

    IMAGE SCAN DUAL III UTILITY BASIC SCANNING The DiMAGE Scan Dual III Utility provides a variety of tools to optimize the repro- Launching the DiMAGE Scan Dual III Utility duction of a film image. This section covers basic scanning, advanced scanning, and Turn on the scanner before launching the DiMAGE Scan Dual III Utility.
  • Page 17: Index Scan

    IMAGE SCAN DUAL III UTILITY BASIC SCANNING Index scan Making an index scan The index scan is a low-resolution scan used to show thumbnail images of all the With a loaded film holder in the scanner, frames in the film holder. Index scans are particularly useful when selecting images click the index-scan button in the main from negative films.
  • Page 18: Flip And Rotate Images

    IMAGE SCAN DUAL III UTILITY BASIC SCANNING Flip and rotate images Fit-to-window button Normally, index thumbnails and prescan The orientation of the index thumbnails images are displayed based on their size and prescan images can be changed and resolution. When the number of with the flip and rotate buttons on the thumbnails or the size of the prescan is tool bar.
  • Page 19: Prescan

    IMAGE SCAN DUAL III UTILITY BASIC SCANNING Prescan Making a prescan Prescan tab allows image orientation, cropping, focus, and exposure to be optimized When using an index scan, select the index frame(s) to be before the final scan. Images can be scanned without making a prescan. prescanned.
  • Page 20: Manual Cropping

    IMAGE SCAN DUAL III UTILITY BASIC SCANNING CHP button (APS film) Auto Dust Brush - Removing the affect of dust Clicking the CHP button cycles the cropping frame The Auto Dust Brush reduces the visibility of fine dust particles on the film surface through the “C,”...
  • Page 21: Pixel Polish - Correcting Images Automatically

    IMAGE SCAN DUAL III UTILITY BASIC SCANNING Pixel Polish - Correcting images automatically Clicking the Pixel Polish button on the main win- dow automatically corrects all the images in the Pixel Polish makes automatic image corrections or custom corrections using film holder replacing any previous corrections.
  • Page 22: Making The Final Scan Using Jobs

    Quitting the DiMAGE Scan Dual III Utility Select a Job category from the drop-down list. For To quit the DiMAGE Scan Dual III Utility, click the close button on the upper right details, see the Job file list on page 82.
  • Page 23: Dimage Scan Dual Iii Utility - Advanced Scanning

    IMAGE SCAN DUAL III UTILITY ADVANCED SCANNING This section covers the advanced scanning tools in the DiMAGE Scan Dual III Utility. Color-depth list box: this option specifies the color depth of the scanned image. The basic scanning section on pages 31 through 43 should be read before continu- The default setting is 8 bit for each RGB channel.
  • Page 24: Exposure-Control Tab

    IMAGE SCAN DUAL III UTILITY ADVANCED SCANNING Exposure-control tab Adjust the sliders or enter values between ±2 in 0.1 increments in the text boxes. Press the The exposure control is not an image-processing tool. No gamma or contrast apply button to view the effect on the preview changes can be made.
  • Page 25: More Index Scan Functions

    IMAGE SCAN DUAL III UTILITY ADVANCED SCANNING More index scan functions Saving the index images The displayed thumbnail images can be saved in one image file. An index scan of all Index scan button (p. 33) the frames in the film holder, including empty frames, must be made before the index thumbnails can be saved.
  • Page 26: Autoexposure Control - More Prescan Functions

    IMAGE SCAN DUAL III UTILITY ADVANCED SCANNING Autoexposure control - More prescan functions AE area selection Click the AE-area-selection button Autoexposure adjusts the scanner exposure to compensate for the density of the after prescanning the image. film. To use the autoexposure function with color slides, the auto-expose-for-slides option must be checked in the preferences box.
  • Page 27: Focusing The Scanner - More Prescan Functions

    IMAGE SCAN DUAL III UTILITY ADVANCED SCANNING Focusing the scanner - More prescan functions Manual focus Use the focusing functions if the film is warped or curled. Three options are avail- The scanner can be focused manually using the focus meter. For best results, select able: autofocus, Point AF, and manual focus.
  • Page 28: Inputting Scan Settings Manually

    IMAGE SCAN DUAL III UTILITY ADVANCED SCANNING Inputting scan settings manually lock. The input-size lock button cannot be used if pixel is selected in the unit list box. Settings for the final scan such as input or output resolution and size can be manu- Magnification text box: to set image magnification.
  • Page 29: Scan Setting Examples

    IMAGE SCAN DUAL III UTILITY ADVANCED SCANNING Scan setting examples Saving scan settings as a Job Example 1: setting the scanner output by pixels. This example creates an image Frequently used scan settings can be saved. with the pixel dimension of 1024 X 768. With the settings to be saved in the scan setting win- dow, click the save Job button.
  • Page 30: Custom Wizard

    IMAGE SCAN DUAL III UTILITY ADVANCED SCANNING Custom Wizard Make any adjustments to the scanner exposure. Previously saved settings can be loaded. See page 46 for more information. Click the next button to con- The Custom Wizard is an automated tinue.
  • Page 31: Color Matching

    63. The DiMAGE Scan Dual III color matching function matches the scanned color with sRGB: the color space promoted by Hewlett Packard and Microsoft. Since it reflects specified color spaces.
  • Page 32: Setting The Monitor Icc Profile

    IMAGE SCAN DUAL III UTILITY ADVANCED SCANNING Setting the monitor ICC profile Color matching recommendations The ICC profile for a specific monitor can be The following are recommendations for output color space and monitor ICC-profile used. Refer to the monitor instruction manual settings with image-processing applications.
  • Page 33: Dimage Scan Dual Iii Utility - Image Processing

    IMAGE SCAN DUAL III UTILITY IMAGE PROCESSING Image processing tools Guide to image processing tool This section contains details on the image-processing tools as well as functions to There are multiple tools that will result in the same effect. One may be easier or view and save image corrections.
  • Page 34: Undoing And Redoing Image Corrections

    IMAGE SCAN DUAL III UTILITY IMAGE PROCESSING Undoing and redoing image corrections Comparing pre and post correction images Clicking the comparison display button divides the image display area in two. The original image is on the left and the corrected image is on the right. To display the corrected image only, click the comparison display button again.
  • Page 35: Loading Image-Correction Jobs

    IMAGE SCAN DUAL III UTILITY IMAGE PROCESSING Loading image-correction Jobs Variation palette Display the image to be corrected in the image- The variation palette allows an image to be corrected by comparing it to other slight- correction window. Click the load image-correc- ly corrected images surrounding it.
  • Page 36: Brightness, Contrast, And Color Balance Palette

    IMAGE SCAN DUAL III UTILITY IMAGE PROCESSING Brightness, contrast, and color balance palette Tone curve and histogram corrections The tone curve is a graphic repre- Click the brightness, contrast, color-balance sentation of the brightness and color button to display the palette. levels of the image.
  • Page 37: Tone Curve And Histogram Palette

    IMAGE SCAN DUAL III UTILITY IMAGE PROCESSING Tone curve and histogram palette Place the mouse pointer over the tone curve. Click and drag the curve. Any corrections made Click the tone-curve/histogram button to display the palette. on the tone curve are immediately applied to the displayed image.
  • Page 38: A Short Guide To Tone Curve Corrections

    IMAGE SCAN DUAL III UTILITY IMAGE PROCESSING A short guide to tone curve corrections Increasing image contrast Image processing is a highly specialized and difficult field that takes years of prac- tice to master. This basic guide to using tone curves covers a few simple procedures to improve your pictures.
  • Page 39: Histogram Corrections

    IMAGE SCAN DUAL III UTILITY IMAGE PROCESSING Histogram corrections The input shadow slider sets the black level. As the slider is moved to the right, an apparent increase in contrast can be seen in the displayed image. All pixels to the left of the slider are set to 0 and any image detail they may contain will be lost.
  • Page 40: White, Gray, And Black Point Corrections

    IMAGE SCAN DUAL III UTILITY IMAGE PROCESSING White, gray, and black point corrections Setting the white and black-point values On the tone curve / histogram palette, corrections can be made by specifying a The white and black-point values are set to 255 and 0 for each RGB level. Changing white, black, and gray point within the image.
  • Page 41: Unsharp Mask

    IMAGE SCAN DUAL III UTILITY IMAGE PROCESSING Unsharp mask Hue, saturation, and lightness palette The unsharp mask sharpens edges in the image without affecting overall image con- This palette adjusts the image in reference to the HSB color model. These controls trast.
  • Page 42: Job File Lists

    OB FILE LISTS APS film Jobs can be used to make scan settings based on the final use of the image. See making-the-final-scan using Job section in page 42. The following charts list the parameters of the scanner’s Job files based on the film format selected in the main window: 35mm film...
  • Page 43: Installed Files And Folders

    NSTALLED FILES AND FOLDERS When installing the utility software, the following files and folders are installed: Windows Mac OS 8.6, 9.2.2 Mac OS X DS Dual3 folder /(root) Program Files DS Dual3 Utility Applications DS_Dual3 folder DS Dual3 Easy DS Dual3 folder DS_Dual3.exe DS Dual3 Plug-in DS Dual3 Utility...
  • Page 44: Troubleshooting And Technical Support

    1 Windows 98, 2000, Me: right click on the my-computer icon. Select “properties” from the drop-down menu. The holder-does-not-match-selected-film mes- Set the correct film format in the DiMAGE Scan Dual III Windows XP: from the start menu go to the control panel. Click on the perfor- sage appears.
  • Page 45: Technical Support

    4 The name and model of the USB port used to connect the scanner. Windows Macintosh 5 DiMAGE Scan Dual III Utility version number. The version number is displayed by Prescan placing the mouse pointer on the status bar in the main window.
  • Page 46: An Introduction To Color

    N INTRODUCTION TO COLOR OLOR EXAMPLES Primary (RGB) and secondary (CMY) colors Complementary colors (p. 90) HSB color model (p. 81) The RGB color model is an additive process that uses the primary colors of light: red, green, and blue. An additive color system mixes the three colors to recreate the Saturation entire spectrum of light.
  • Page 47 7 Tanners Drive, Blakelands, Milton Keynes, MK14 5BU, England Minolta Austria Ges. m.b.H. Amalienstrasse 59-61, A-1131 Wien, Austria Minolta Camera Benelux B.V. Zonnebaan 39, P.O. Box 6000, NL-3600 HA Maarssen, The Netherlands Belgian Branch Prins Boudewijnlaan 1, B-2550 Kontich, Belgium...

This manual is also suitable for:

Af-2840

Table of Contents