Siemens SITRANS F Instruction Manual
Ultrasonic flowmeters
Hide thumbs
Also See for SITRANS F:
- Function manual (350 pages) ,
- Operating instructions manual (278 pages) ,
- Programming manual (218 pages)

Related Manuals for Siemens SITRANS F


Summary of Contents for Siemens SITRANS F
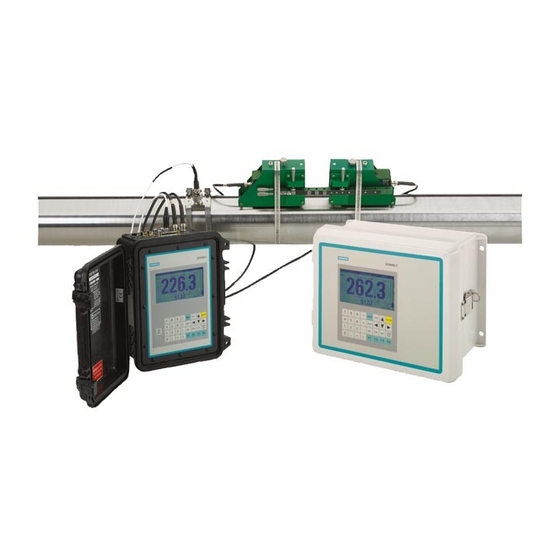
- Page 1 Ultrasonic flowmeters SITRANS FUE1010 IP65 NEMA 4X Instruction Manual - September 2008 SITRANS F...
- Page 3 Field Manual CQO:1010ENFM-3 July 2008 For use with Operating System Software Version 3.02.00 or later Prepared By Date Engineering Date Copyright©2008 Siemens Energy & Automation, Inc. All Rights Reserved Made in the USA Printed July 2008...
- Page 4 Manual Changes NOTE: For the latest updates and revisions to the FUE1010ENFM-3B field manual go to: http://support.automation.siemens.com/ and check the Product Manual listing.
- Page 5 1010FMA-56 MANUAL ADDENDUM Operating System Software Version Update Manual Addendum September 2008 Copyright © 2008 Siemens Energy & Automation, Inc. All rights reserved Made in the USA...
- Page 7 1010FMA-56 Manual Addendum Operating System Software Version Update INTRODUCTION The following software operating system version update is for Version 3 flowmeters. Please refer to this addendum when using this technical manual with Version 3 operating system software and flowmeters that have been updated to Version 5. Operating System Software Changes 1.
- Page 8 Gas Flowmeter Flow and VoS Unit Changes 1. Flowmeter Types Flowmeter configurations included with this change include all SITRANS F Gas Flowmeters (7ME361*). 2. Flow Units The table below describes the translation from the current gas flow units to the new gas flow units, where only Cubic Feet and Cubic Meter volume units are affected.
- Page 9 1010FMA-56 Manual Addendum 3. Total Units Total units are similar to flow units. TOTALIZE UNITS For STD VOLUME disabled Version 3 Version 5 CU FT KCU FT MACF MCU FT MMACF KCU M E3 M3 MCU M E6 M3 TOTALIZE UNITS For STD VOLUME enabled Version 3 Version 5...
- Page 11 1010FMA-58 MANUAL ADDENDUM Digital Damping Procedure Update For Gas & Liquid Flowmeters Manual Addendum September 2008 Copyright © 2008 Siemens Energy & Automation, Inc. All rights reserved Made in the USA...
- Page 13 Digital Damping Procedure Update for Gas & Liquid Flowmeters INTRODUCTION The following Digital Damping procedure updates are for SITRANS F gas and liquid clamp-on flowmeters.Replace the Digital Damping Control: (Hot Key 1 and 2) procedure in the “Detection Modes” section (sub-paragraph: Command Modes) in the appropriate gas and liquid STIRANS F flowmeter manuals.
- Page 14 1010FMA-58 Manual Addendum To access the Digital Damping Control using the Test Facilities Graph Screen, proceed as follows: 1. To use the Test Facilities Graph Screen you must have a working site. 2. To activate the Test Facilities Graph Screen: In the main menu, scroll to the [Diagnostic Data] menu and select [Test Facilities].
- Page 15 1010FMA-58 Manual Addendum To INCREASE the Digital Damping: 1. Press the <1> key while viewing the Test Facilities Graph Screen as shown above. The damping control [MinDamp #] should appear on the command line at the lower left-hand corner of the screen.
- Page 16 1010FMA-58 Manual Addendum Liquid Clamp-on Flowmeter Manuals Replace the Digital Damping Control: (Hot Key 1 and 2) procedure in the “Detection Modes” section (sub-paragraph: Command Modes) in the following flowmeter manuals: FUS1010 IP 65 (NEMA 4X) Clamp-On Flowmeter manual (CQO:1010NFM-3) FUE1010 IP 65 (NEMA 4X) Clamp-On Flowmeter manual (CQO:1010ENFM-3) FUH1010 IP 65 (NEMA 4X) Clamp-On Flowmeter manual (CQO:1010DVNFM-3) FUH1010 IP 65 (NEMA 4X) Clamp-On Flowmeter manual (CQO:1010PVNFM-3)
- Page 17 1010FMA-58 Manual Addendum To access the Digital Damping Control using the Test Facilities Graph Screen, proceed as follows: 1. To use the Test Facilities Graph Screen you must have a working site. 2. To activate the Test Facilities Graph Screen: In the main menu, scroll to the [Diagnostic Data] menu and select [Test Facilities].
- Page 18 1010FMA-58 Manual Addendum To INCREASE the Digital Damping: 1. Press the <1> key while viewing the Test Facilities Graph Screen as shown above. The damping control [MinDamp #] should appear on the command line at the lower left-hand corner of the screen.
- Page 19 1010FMA-4 MANUAL ADDENDUM SETUP PROCEDURE FOR WET-FLOW CALIBRATED 1010 SYSTEMS System 1010 Uniflow Portable & NEMA Flowmeter Systems Manual Addendum July 2002 Copyright©2008 Siemens Energy & Automation, Inc. All Rights Reserved Made in the USA...
- Page 21 Manual Addendum 1010FMA-4 SETUP PROCEDURE FOR “WET-FLOW CALIBRATED” 1010 SYSTEM Caution: DO NOT use the field manual installation procedure to startup a wet-flow calibrated system. Doing so could void the calibration by corrupting es- sential data. This addendum contains the only authorized instructions to be used when commissioning a wet-flow calibrated 1010 system.
- Page 22 2.2.11 When measurements are completed, simply turn off the meter. DO NOT save the site. This might contaminate the wet-flow calibration data already stored. NOTE: Contact your Siemens representative if any flow calibration data is accidentally removed or overwritten (www.siemens.com).
- Page 23 Manual Addendum 1010FMA-4 TRANSFER INSTALL FUNCTION All 1010 flowmeter operating systems (version 3.00.20 and greater) include the installation facil- ity called “Transfer Install.” This function permits the transducers to be repositioned while main- taining all calibration parameters and operation established during the water calibration. The Transfer Install function allows the transducers to be optimally positioned for a different fluid, without the need for a new Initial Makeup procedure.
- Page 25 1010FMA-14 MANUAL ADDENDUM SYSTEM 1010 EXPANDED I/O OPTION (For Systems Equipped With 1010N-7 Modules) Manual Addendum May 2002 Copyright©2008 Siemens Energy & Automation, Inc. All Rights Reserved Made in the USA...
- Page 27 In addition, refer to Installation Drawings 1010N-2-7 and 1010N-7-7 in the field manual appendices for additional connection information and terminal block numerical designators. NOTE: All meters in the System 1010N and DN product family can accept the Expanded I/O Module Option except 4-Channel meters. Siemens Dual Path SITE1 Use this menu to...
- Page 28 Manual Addendum 1010FMA-14 1010N-2 I/O Module The conventional 1010N-2 I/O module provides the following: Two self-powered, isolated 4-20 mA current loops (signals Io1 and Io2) that are assignable and spannable by the user to many flowmeter variables such as flow, sonic velocity, signal strength, etc.
- Page 29 Manual Addendum 1010FMA-14 EXPANDED I/O MODULE OPTION PROGRAMMING The diagram below illustrates the Expanded I/O Module Option programming for a Single Channel meter with a 1010N-7 Expanded I/O Module. FLOW COMPUTER INTERNAL OUTPUT CONNECTIONS TERMINAL STRIP Pgen1 Aux Io1 Pgen2 Aux Io2 Aux Io3 Aux Io4...
-
Page 31: Table Of Contents
Table Of Contents 1010ENFM-3B TABLE OF CONTENTS Sect./Page Section 1 Getting Started .................... 1-1 Introduction ....................1-1 Important Safety Considerations ..............1-1 Energy Meter Installation Steps ..............1-1 Typical System Layout ................. 1-2 The Keypad Enable Switch ................1-2 The FUE1010EN Keypad ................1-3 Introduction To The FUE1010EN Menu Screens .......... - Page 32 Table Of Contents 1010ENFM-3B 2.3.1 How To Select A Liquid Class ..............2-12 How to Edit the Estimated Vs (liquid sonic velocity)....... 2-13 How to Edit the Viscosity (cS) Setting ........... 2-13 How to Edit the Density (SG) Setting ............ 2-14 Steam Condensate Measurement ............
- Page 33 Table Of Contents 1010ENFM-3B 2.6.7 Energy Total Mode ..................2-39 2.6.8 CE Method ....................2-40 2.6.9 Flow Volume Units ..................2-41 2.6.10 Flow Time Units ..................2-41 2.6.11 Flow Display Range ................... 2-42 2.6.12 Flow Display Scale ..................2-42 2.6.13 Total Volume Units ..................
- Page 34 Table Of Contents 1010ENFM-3B I/O Data Control Menu Structure ............2-61 2.10.1 Analog Out Setup ..................2-62 FUE1010EN Analog Outputs ............... 2-62 Analog Out Setup Data Categories ............2-62 Table To Determine Proper I/O Installation Drawings ......2-62 Assigning Io Output Functions ............. 2-62 Assigning Vo Output Functions ............
- Page 35 Table Of Contents 1010ENFM-3B Using the “F4” Reset Sequence ............2-83 Troubleshooting With Transducer Test Blocks ........2-85 2.11.10 Using The 1012TB-1 And 2 Test Blocks ............2-85 2.11.11 Using The 996PSP Pipe Simulator ............. 2-87 If a Pipe Simulator/Test - Block Test Fails ..........2-88 2.12 Guide To A Smooth Installation ..............
- Page 36 Table Of Contents 1010ENFM-3B 4.5.2 Current Output Trim (Io1 & Io2) ..............4-9 4.5.3 Voltage Output Trim (Vo1 & Vo2) ..............4-9 4.5.4 Pgen Output Trim (Pgen 1 & Pgen 2) ............4-10 The RTD Calibrate Menu (optional) ............4-10 4.6.1 RTD Calibration by Data Entry ..............
- Page 37 Selection of Liquid Composition ..............7-9 7.16 Other Menu Entries..................7-9 APPENDICES Appendix A - Couplant Installation Instructions (if applicable) Site Setup Consideration For Sitrans F 1010/1010N Blind Systems Appendix B - Appendix C - Engineering Drawings Index Pipe Table...
-
Page 39: Getting Started
It is solely the user’s responsibility to operate this equipment safely. Siemens cannot accept responsibility for any damage that may occur due to failure to observe any local safety rules. -
Page 40: The Keypad Enable Switch
Section 1 1010ENFM-3B RTD Temperature Sensor RTD Temperature Sensor THE KEYPAD ENABLE SWITCH All FUE1010EN models provide a keypad enable/disable switch to prevent unauthorized access to the Installation Menu. In addition, a password entry option is available (see Channel Setup). The keypad enable/disable switch is located inside the lockable enclosure just above the I/O wiring terminal. -
Page 41: The Fue1010En Keypad
Current Selected Measurement Current Selected Site Name Identified Channel Meter Type Menu Prompt Line (Reverse Video) Highlighted Data Siemens 2 Channel Select Pipe Class from Pipe Table Select Pipe Class Manual Entry Highlighted Select Pipe Size No Pipes Menu Cell Pipe OD <in>... -
Page 42: Explanation Of The Call-Outs
(menu cells) that store site data. For convenience, this manual refers to sub-menus simply as menus (e.g., the Pipe Data Menu). Shown below is the clamp-on setup screen for Channel 1 of a dual- channel meter. Single channel systems are identical. Siemens 2 Channel [1] Create-Name-Recall-Enable & Delete Site... -
Page 43: Accessing And Leaving The Menu
1.7.1 ACCESSING AND LEAVING THE MENU Upon first turning the meter on you see a Siemens graphic. This means that there is no active site setup currently stored in memory. Note that this screen identifies the software version of the meter on the upper right-hand corner of the display. -
Page 44: Selecting Items From An Option List
[Application Data] appears highlighted on lower left of the screen. Note also that the menu cell [Liquid Class] is highlighted and what is shown in the right-hand column is the current answer: [20% Ethyl Glycl]. Siemens 2 Channel [1] Select Liquid Class from Liquid Table... -
Page 45: Multiple Select Option Lists
Section 1 1010ENFM-3B Siemens 2 Channel [1] Access Liquid Option List Select Liquid 20% Ethyl Glycl Estimated Vs m/s 1600 Viscosity cS 2.00 Density S.G. 1.030 Liquid Class Multiple Select Option Lists Certain option lists allow you to make more than one selection. For example, the Datalogger Data option list allows you to select any or all of the available data items for your reports. -
Page 46: Entering Alphanumeric Strings
<Up or Down Arrows> to scroll through a single-character list. For example, as shown below, an <Up Arrow> at the first character position produces the letter: upper-case [A]. Pressing the <Right Arrow> moves the cursor to the second position. Siemens 2 Channel [1] Channel 1 Right Arrow &... -
Page 47: Dual Channel Energy
Section 1 1010ENFM-3B Dual Channel Energy Dual Channel Energy provides two independent measurement channels that operate simultaneously. Depending on the specific model, Dual Channel Energy supports: Clamp-on Transit-time, In-line transit- time and Reflexor. NOTE: A Reflexor-enabled channel does not provide energy data. Channel 1 Pipe 'A' Flow Rate Flow... -
Page 48: Selecting A Meter Type
[Meter Type] screen. Refer to the figure below. Note that on the left-hand column, [Meter Type] is high- lighted as are all the available meter types on the right-hand column. Press <Right Arrow>. This places a cursor next to [Dual-Channel Energy]. Siemens 2 Channel [1] Channel 1... -
Page 49: Creating A New Site Setup
Section 1 1010ENFM-3B Siemens 2 Channel [1] Channel 1 Choose Channel 1 Flowmeter Type Channel 1 >Clamp-on Channel 2 FlowTube Reflexor Dual Channel Energy To select [Clamp-On] press the <Right Arrow>. This selects the Clamp-On installation menu for Measurement Channel 1. Note that the first menu, [Channel Setup] is highlighted. - Page 50 Continue to scroll until the block cursor shows [S]. Press the <Right Arrow>. [S] remains at first position and the cursor moves to the second character position. Siemens 2 Channel [1] Channel 1 Right Arrow & Enter Creates a new Site...
-
Page 51: Using Faststart Setup
Press <Right Arrow> to access the [Pipe Class] option list. Note that although [Manual Entry] exists on this list, it is inactive for FastStart Setup (see paragraph 2.2.1). Siemens In this example, we will pick the pipe class: [ASA Carbon Steel] by moving the cursor to the selection and then pressing <ENT>. -
Page 52: Picking And Installing The Transducers
<ENT>. This is all there is to setting up the pipe parameters. Now, we will select and install the transducers. Siemens 1.8.2 PICKING AND INSTALLING THE TRANSDUCERS Press <Right Arrow> to access the Pick/Install Xdcr menu, then select the appropriate Transducer Model. - Page 53 Section 1 1010ENFM-3B Siemens NOTE: You are allowed to override the transducer type and size mounting mode and spacing offset. See paragraph 1.7. Now you have to mount the transducers in accordance with the data recommended on the screen. Refer to the Section 3 for detailed instructions.
- Page 54 Press <Right Arrow> and select [YES], or [NO] if you do not want to register this transducer and then, press <ENT>. Siemens The flowmeter is now ready to report flow. Press the <MENU> key. The meter will then ask you to save the Site.
-
Page 55: The Fue1010En Installation Menu
The following paragraphs present a generic menu reference that applies to all configurations of Sitrans F 1010 NEMA flowmeters. Please refer to the Reflexor and Flow Tube sections for instructions specific to those operating modes. -
Page 56: The Channel Setup Menu
*Site Name Entry/Edit operating with Channel 1 active. This shows that the site setup [XYZ] is the active site. Siemens 2 Channel [1] Scroll saved Site Setup list and Enter Recall Site Setup Channel Enable This cell shows that Create/Name Site... -
Page 57: How To Enable And Disable A Measurement Channel
Section 2 1010ENFM-3B the list is the currently active Site Setup. The system will be ready for operation after you install the trans- ducers and make the required hardware connections. Note that the installed transducers must comply with the recalled site parameters. To recall a Saved Site Setup: (Where a visual of the key is shown;... -
Page 58: How To Create/Name A Site Setup
Therefore, it is essential that you never forget or mis-place the password. The only way to deactivate Site Security without knowing the password is to return the unit to Siemens. However, the process the factory uses to remove Site Security will eliminate any existing Site Data as well. The flow- meter will allow a <F4>... -
Page 59: How To Delete A Site Setup
Section 2 1010ENFM-3B To scroll the option list to [On] press then . [Enter Code?] appears at the top of the Display Screen. To select the first character, use the numeric keys or . To move the cursor to the first character position press To move the cursor to the second character position Repeat the selection process for the second character. -
Page 60: The Pipe Data Menu
(8 max.). To save the site data present in Active Memory press If the Siemens Flowtalk software is used to save or restore sites, you can avoid creating illegal file names by not using spaces or decimal points (.) in your site names. -
Page 61: The Pipe Data Menu Structure
Section 2 1010ENFM-3B THE PIPE DATA MENU STRUCTURE Ö Pipe Data Select Pipe Class Ö Manual Entry ASA Stainless Steel ASA Carbon Steel ASA Plastic Ú Metric DN Steel Metric SGP Steel Cast Iron Table Ductile Iron Table Copper Tube Table Ö... -
Page 62: How To Select A Pipe Class
Section 2 1010ENFM-3B THE PIPE DATA MENU STRUCTURE (cont.) Ö Ö Pipe Material Steel Ú Pipe Data (cont.) Aluminum Black Iron Brass Cast Iron CuNi (70/50) CuNi (90/10) Copper Ductile Iron Ú Glass Hastelloy Inconel Kynar (PVDF) Monel Ú Nickel Polyethylene PVC (Plastic) Teflon... -
Page 63: How To Enter The Pipe Od (In. Or Mm)
Section 2 1010ENFM-3B This option is not applicable if the Pipe Class is [Manual Entry]. After selecting a pipe class: To access the pipe size option list press To scroll to the required pipe press To register selection press 2.2.3 HOW TO ENTER THE PIPE OD (in. or mm.) Use this menu cell to edit the pipe outer diameter. -
Page 64: Liner Material
Section 2 1010ENFM-3B NOTE: Do not use ASA schedule code to specify the wall thickness. You must enter actual di- mensions. To enter the Pipe Wall Thickness: To enable numeric entry press Use the keypad’s numeric keys to type wall thickness in inches or millimeters. To register the pipe wall thickness press 2.2.6 LINER MATERIAL For lined pipes, select a pipe liner from the material option list. -
Page 65: Application Data Menu Structure
1011H. For higher pipe temperatures, selecting the proper temperature range allows the flow computer to recommend the appropriate transducers. Use this menu cell to define where the Siemens 2 Channel [1] Channel 1 flow transducers... -
Page 66: How To Select A Liquid Class
[Other]. This selection will not provide a liquid name or automatic parameter entry. Only Ethylene Glycol (10, 20, 30, 40 & 50%), CaCl Brine (27%) and all water entries provide energy metering services. Siemens 2 Channel [1] Use this menu cell to edit the... -
Page 67: How To Edit The Estimated Vs (Liquid Sonic Velocity)
Section 2 1010ENFM-3B To select a Liquid Class: To access the option list press Scroll through the list to find the closest match to the application’s liquid. To register selection press How to Edit the Estimated Vs (liquid sonic velocity) During transducer installation, the flow computer bases its initial transducer spacing recommendation on the value stored in this menu cell. -
Page 68: How To Edit The Density (Sg) Setting
To set up the FUE1010EN Energy flowmeter for measurement of steam condensate, select à à [Stm Condensate] from the “Application Data Liquid Class Select Liquid” menu as shown below. Siemens 2 Channel [1] Channel 1 Access Liquid Option List Select Liquid >Stm Condensate Estimated Vs m/s... -
Page 69: Selecting The Location Option (Supply/Return)
Service type is forced to [Heating] (as shown below). These menus are locked, so they cannot be altered without first changing the selected liquid to something other than [Stm Condensate]. Siemens 2 Channel [1] Channel 1 Select Liquid Class from Liquid Table... -
Page 70: How To Select A Pipe Temperature Range
Section 2 1010ENFM-3B Note that the flowmeter computes energy taking into account the signs of both flow and Td. Thermal energy applications are expected to exhibit positive liquid flow rates from the supply to the return loca- tion. You may use either Flow or Energy deadbands (see next page) to prevent “nuisance totalization” during non-flowing periods. -
Page 71: Pipe Configuration Menu Structure
Section 2 1010ENFM-3B Siemens 2 Channel [1] Channel 1 Designate Pipe Shape Near Transducers Liquid Class Water 20C/68F Location Return Service Heating Temperature Range -40F to 250F Pipe Configuration Fully Developed Anomaly Diams 1 Elbow Use this menu cell to select... -
Page 72: Pick/Install Xdcr Menu Structure
Use this menu cell to type, use this menu select the type of cell to specify the transducer to be transducer type. installed. Siemens 2 Channel FLOW1 This menu cell Scroll List and select desired Model allows you to select This menu cell a mounting mode. -
Page 73: How To Select A Transducer Model
Section 2 1010ENFM-3B PICK/INSTALL XDCR MENU STRUCTURE (continued) Pick/Install Xdcr Spacing Offset Ö Ú Minimum Nominal Ú Maximum Number Index Ö 4 (generated) Spacing Method Spacer Bar [P/N] *auto P/N generation Ö Ö Ltn value Ö 2.00 (generated) Install Completed? No [Yes] *[Yes] indicates successful install Ú... -
Page 74: How To Select A Xdcr Mount Mode
Section 2 1010ENFM-3B To move the cursor to the desired transducer size press To select the transducer press 2.4.3 HOW TO SELECT A XDCR MOUNT MODE The flowmeter recommends the transducer mounting mode [Direct or Reflect]. In almost all cases it will be Reflect, since this is the most desirable configuration. -
Page 75: The Number Index Menu Cell
Section 2 1010ENFM-3B If the flowmeter reports [Use Ltn], you have to measure the distance between the upstream and down- stream transducers. The flow computer issues the actual distance between the transducers in inches or millimeters (See Ltn). Please consult Section 3 for details on how to use the Ltn measurement. Note that, even though using Ltn does not call for the physical use of the Number Index, you can still change the Spacing Offset to influence the strength of the transmit signal. - Page 76 Press <Down Arrow> and scroll to the [InstallCompleted?] menu cell and then press <ENT> (unless otherwise directed to do so by the Technical Service Department). Press <ENT>. The [Install Completed?] menu cell will indicate [Yes] after the FUE1010EN is successfully installed. Siemens 2 Channel SITE1 Siemens...
-
Page 77: Force Transmit Procedure
To initiate the Force Transmit function, refer to the example shown below. 1. After [Install] is selected press <ENT>. While the meter is going through the drives (see menu screen below), press the <ALT> and <MENU> keys simultaneously. Siemens 2 Channel SITE1... - Page 78 1010ENFM-3B 2. A typical menu screen will appear as shown below and indicate the current ALC (e.g., 50). This ALC number indicates the current receive signal strength and can be used for further diagnostic purposes. Siemens 2 Channel SITE1 ForceN...
- Page 79 Section 2 1010ENFM-3B Immediately after you press <ENT>, the computer starts an internal process called an Initial Makeup. The current Initial Makeup activity, for example: Drive 14 m 10 [——] appears at the top of Display Screen. During the Initial Makeup, the flow computer verifies your site data, records the sonic characteristics of the pipe and liquid and then adjusts internal parameters to optimize flow measurement.
-
Page 80: The Empty Pipe Set Menu
Section 2 1010ENFM-3B To repeat the Initial Makeup process press After the flow computer completes its Initial Makeup command, the [Install Completed?] option list changes Install Completed? New Makeup If you want to redo the Initial Makeup, move cursor to [New Makeup], then press <ENT>. This resets the option list. -
Page 81: How To Use The Set Empty Command
Consequently some flow offset (or zero offset) may be present in any installation. To eliminate this residual zero offset Siemens has developed several different methods to insure proper zero flow compensation. The following paragraphs describe each method and when they should be used. -
Page 82: Zeromatic
Section 2 1010ENFM-3B ZeroMatic (not present in MultiPulse operation) When ZeroMatic is invoked the flowmeter first performs the same analysis as described above in the AutoZero routine. However, after this analysis is complete the flowmeter continues to interrogate the pipe wall signal and update the zero offset value under normal operation, such that the flowmeter dy- namically compensates for changing conditions which would normally result in zero drift. -
Page 83: Zeromatic (Optional Function)
Section 2 1010ENFM-3B The meter begins to measure the positive flow rate. “Positive” flow refers to flow moving from up- stream transducer location to the downstream transducer location. Note top prompt line shows: Reversamatic Action Upon completion, the meter beeps and the display screen shows: Reverse Xdcrs/Press ENT Now remove then remount the upstream and downstream transducers in their reversed positions. - Page 84 Section 2 1010ENFM-3B Siemens Dual Path SITE1 Conformans Indicated flow to Actual Zero Transducer Model 1011 Universal Transducer Size Xdcr Mount Mode Reflect Spacing Offset Minimum Flow Number Index Spacing Method Track 1012TP Ltn Value (in) ReversaMatic Install Completed? ZeroMatic...
-
Page 85: The Operation Adjust Menu
You can also select the meter response to a continuous Fault condition. Use this menu cell to select either SmartSlew™ or Time Siemens 2 Channel [1] Average output Use this menu cell to Determine Fault Memory Delay damping. -
Page 86: Damping Control
Section 2 1010ENFM-3B 2.5.1 DAMPING CONTROL FUE1010EN provides two different data output filter types, SmartSlew and Time Average. SmartSlew (recommended) provides the best combination of data smoothing and quick response to sudden rate changes. It performs data scatter damping during steady flow periods while maintaining the ability to respond instantaneously to changing flow rates. -
Page 87: Memory/Fault Set
Section 2 1010ENFM-3B Use the numeric keys to type in the desired rate (using selected flow rate units). To register the new value press Note that each deadband setting is independent of the other. For example, if the Volume flow rate falls below the deadband setting for the volume flow, the Volume flow rate will be reported as zero. -
Page 88: Reflexor Zero/Fault Set Option (Reflexor Mode Only)
Fault. b. ZERO – When selected the Reflexor channel will be declared to be at Zero Flow instead of in Fault and the flowmeter will indicate 0.00 on the display screen. Siemens 2 Channel [1] Select Zero or Fault display... -
Page 89: Totalizer Controls
Section 2 1010ENFM-3B TOTALIZER CONTROLS (the ‘n’ in <Fn> = channel number)* Resetting the Totalizer registers clears all total data ac- CLEAR cumulated during operation. (also clears overflow) NOTE: In Dual-Beam mode, the Totalizer operates only on the virtual system channel (Ch 3). Therefore in this case, the CLEAR trigger would be <F3>... - Page 90 Section 2 1010ENFM-3B THE FLOW/TOTAL UNITS MENU STRUCTURE Ú Flow/Total Units Ö Energy Units Ö Energy Rate Units Ö BTU/HR BTU/MIN BTU/DAY Ú TONS WATTS KILOWATTS CALORIES/MIN* Energy Rate Scale BTU/HR Ö Ú KBTU/HR Ú MBTU/HR Ú Energy Total Units Ö...
-
Page 91: Flow/Total Units Menu Structure
Ú NETFLOW Ú POSFLOW Ö Batch/Sample Total x.xxx (numeric entry) Use this menu cell Use this menu cell Siemens 2 Channel [1] to select thermal to select energy Select Energy Rate Units energy units. totalizer units. Energy Rate Units BTU/HR... -
Page 92: Energy Rate Scale
Section 2 1010ENFM-3B To select Energy Rate Units: To access [Energy Rate Units] press To move the cursor to the required units press To store selection press 2.6.3 ENERGY RATE SCALE The [Energy Rate Scale] menu cell shows the units (with the appropriate multiplier) that the energy/flow computer selects for the energy rate display (e.g., MBTU/HR). -
Page 93: Energy Resolution
Section 2 1010ENFM-3B Move the cursor to the desired display scale by pressing To register selection press 2.6.6 ENERGY RESOLUTION The flowmeter assigns multiplier prefixes for the energy total units you selected (e.g., MBTU). It provides three resolution (or capacity) levels. Therefore, actual Totalizer display units depend on the selected multiplier. -
Page 94: Ce Method
1010ENFM-3B 2.6.8 CE Method (optional) (refer to www.Engineering Toolbox.com) Siemens FUE1010EN ultrasonic energy flowmeters can be configured to provide an Energy Efficiency output. Modifications were implemented using the standard FUE1010EN analog input spanning methods in an effort to simplify operator monitoring of air conditioning efficiency data. These changes allow the flowmeter to calculate chiller efficiency. -
Page 95: Flow Volume Units
1010ENFM-3B Use this menu cell to select either volumetric or mass flow rate units . Use this menu cell to select a Siemens 2 Channel [1] FLOW1 time base for the flow rate Choose desired Flow rate volume units units. -
Page 96: Flow Display Range
Section 2 1010ENFM-3B 2.6.11 FLOW DISPLAY RANGE The [Display Range] option list offers a choice of Autorange (default), or High Range. The Autorange selection increases resolution automatically at low flow rates and reduces resolution at high flow rates as required to prevent data overflow. If you select Hi range, the flowmeter controls its screen resolution to prevent data overflow at the highest possible flow. -
Page 97: Totalizer Scale
Section 2 1010ENFM-3B 2.6.14 TOTALIZER SCALE After you select totalizer units, the meter automatically computes a prefix to provide the best combina- tion of capacity and resolution (e.g. MGAL/MIN). The [Totalizer Scale] menu cell shows the results. If the displayed scaling is not suitable, you can edit it by accessing the option list. Note that this scaling applies to all flow total data displayed on the flow display screen, even if the units do not appear next to the data (because there may not be room on the screen). -
Page 98: Totalizer Mode
Section 2 1010ENFM-3B 2.6.16 TOTALIZER MODE The Totalizer function operates in any of the modes listed below: MODE FLOW DIRECTION NOTES POSFLOW positive flow Accumulates flow in positive direction only NEGFLOW negative flow Accumulates flow in reverse direction only NETFLOW positive or negative Adds to positive total;... -
Page 99: Data Span/Set/Cal Menu Structure
Indicated Rate x.xxx (numeric entry) Ú % Correction x.xxx (numeric entry) *Only available on units equipped with Analog Input capability. Siemens 2 Channel [1] Channel 1 Use this menu to define Use this menu to set the Define data Alarm thresholds... -
Page 100: Span Data
Section 2 1010ENFM-3B 2.7.1 SPAN DATA The Span Data menu allows you to set 0% and 100% output limits for energy rate (Ve), volumetric flow (Vfo), absolute flow (Vfab) and sonic velocity (Vs). Each menu cell shows appropriate rate units and time base. -
Page 101: Max Energy Flow
Section 2 1010ENFM-3B Max Energy Flow The [Max Energy Flow] menu cell stores the maximum range for the energy rate output (Ve). It can have a negative sign. Enter the data using the flow rate units you selected. To enter the Maximum Energy Flow Range setting: To activate numeric entry press Use the numeric keys to type the maximum flow rate (100% of range). -
Page 102: Max Ce
Section 2 1010ENFM-3B Max CE (Available with units equipped with Analog Inputs only.) The [Max CE] menu cell stores the maximum range for the Chiller Efficiency output. Enter the data for the CE Method you have selected. Min CE (Available with units equipped with Analog Inputs only.) The [Min CE] menu cell stores the minimum range for the Chiller Efficiency output. -
Page 103: Low Energy Rate
Section 2 1010ENFM-3B Low Energy Rate The [Low Energy Rate] menu cell allows you to set the LO Alarm relay trip-point and the position of the LO Alarm cursor on the Energy Stripchart Display. The entered value must fall within the Energy Flow Rate (Ve) analog span for the HI Alarm cursor to appear on the Graphic Screen. -
Page 104: Temperature Alarms (High Td, Ts And Low Td, Ts)
Section 2 1010ENFM-3B Temperature Alarms (High Td, Ts and Low Td, Ts) The FUE1010EN thermal energy meter provides 4 alarm set points which will help you monitor and diagnose temperature limits. The meter executes dynamic tracking of the temperature difference (Td) between the supply and return lines as well as the absolute value of the supply temperature. -
Page 105: Calibrate Flow Rate
Section 2 1010ENFM-3B To Enable (or Disable) the Makeup Latch: To access the [Makeup Latch] option list press To move the cursor to select either [On or Off] press To turn Makeup Latch [On] or [Off] press 2.7.3 CALIBRATE FLOW RATE The FUE1010EN intrinsic calibration is excellent as confirmed by numerous laboratory and field trials under diverse application conditions. -
Page 106: Multipoint Calibration
Section 2 1010ENFM-3B MultiPoint Calibration MultiPoint calibration serves applications that require a non-linear flowmeter calibration. You can enter correction factors for up to ten significant points over the entire measurement range. This is accom- plished by: Selecting up to 10 separate calibration points by entering a raw (uncalibrated) flow rate. Entering a negative or positive correction for each calibration point that you select. -
Page 107: The Stripchart Setup Menu
Use Stripchart Setup to select a data category, the type of scaling and the update interval for the on- screen stripchart display. You can also clear the stripchart screen. Use this menu cell Siemens 2 Channel [1] SITE1 to select a data... -
Page 108: Stripchart Setup Menu Structure
Section 2 1010ENFM-3B THE STRIPCHART SETUP MENU STRUCTURE Ö Stripchart Setup Select Data Ú Ö Vfo2 Vfab Ú Valc Vaer Ö Data Display Ö Data Rate Units Ú Ú Ú Percent of Span Ö Ö Time Base 1 Second Ú 3 seconds 6 seconds 12 seconds... -
Page 109: Data Display
Section 2 1010ENFM-3B To select a data item for the stripchart: To access the [Select Data] option list press To move the cursor to the desired item press To store your selection press 2.8.2 DATA DISPLAY The [Data Display] option list allows you to select a format for the stripchart plot. It offers the choice of displaying data either in the current data rate units or as a percent of span defined in the Data Span/Set/ Cal menu. -
Page 110: The Datalogger Setup Menu
Section 2 1010ENFM-3B THE DATALOGGER SETUP MENU This menu becomes available after picking Meter Type and Measurement Channel. The integral Datalogger records data for eventual display on Graphics Screen, or for connection to an RS-232 compatible exter- nal device (printer, computer, network, etc.). Use Datalogger Setup to select data items and real-time events for datalogger reports. -
Page 111: Datalogger Setup Menu Structure
Ö Display Datalogger Ö Ú No Line Wrap Ú Line Wrap Use this menu cell to Siemens Dual Path Path 1 pick a destination for Select datalogger destination Datalogger reports. Use this menu cell to select a logging Datalogger Mode... - Page 112 Section 2 1010ENFM-3B None Default – Datalogging is disabled. Site ID You entered this site name when you created the site. Date The report date according to the meter’s real time clock. (Format: MM.DD.YYYY) Time The report time according to the meter’s real time clock. (Format: HH.MM)* Flow The instantaneous flow measured at the time of the report.
-
Page 113: Log Time Interval
Section 2 1010ENFM-3B To de-select Datalogger Data: Move the cursor to the data item then press <CLR>. Note that this removes the plus sign (+) from the item. After selecting/deselecting all desired items press the <Left Arrow> to leave the Datalogger Data option list. -
Page 114: The I/O Data Control Menu
The Analog Out Setup assigns functions to the meter’s current, voltage and pulse rate outputs. Each menu cell presents an option list of the available data items. In addition, you can set up the alarm relays, enable and span the analog input ports. Siemens Dual Path SITE1... -
Page 115: I/O Data Control Menu Structure
Section 2 1010ENFM-3B THE I/O DATA CONTROL MENU STRUCTURE Ú Ö Ö Ö I/O Data Control Analog Output Setup Vfo2 Vfab Valc Ú Vaer Ú Ö Ö See Io option list Ö Ö Pgen1 See Io option list Ö Ú Ö... -
Page 116: Analog Out Setup
Section 2 1010ENFM-3B 2.10.1 ANALOG OUT SETUP FUE1010EN provides current, voltage and pulse-rate analog outputs. Analog Out Setup allows you to assign data functions for these signals. The flow computer’s terminal strip contains the analog output terminals. FUE1010EN ANALOG OUTPUTS Io (Isolated current) 4 to 20 mA varies in proportion to an assigned data function. -
Page 117: Assigning Pgen Output Functions
Section 2 1010ENFM-3B To move the cursor to the desired data function press To store selection press Assigning Pgen Output Functions The Pgen analog output is a buffered TTL-compliant pulse rate signal, similar to the pulse outputs of flow- meters such as turbines. It varies linearly from 0-5000 Hz in relation to a selected data function. To assign a function to the Pgen output: To access the [Pgen] option list press To move the cursor to the desired data function press... -
Page 118: Relay Option List
Section 2 1010ENFM-3B RELAY OPTION LIST Not Used Not Active Power Off Power Off alarm occurs when power fails High Flow Flow rate exceeds high flow setpoint. Low Flow Flow rate falls below low flow setpoint. Flow Alarm Flow rate exceeds or falls below flow setpoints. Fault Alarm System loses receive signal. -
Page 119: [Pc Kw] Menu Cell
Section 2 1010ENFM-3B I/O Data Control Ö Analog Input Setup Ö Iin1 Ö Input Ú Ts Deg F Ts Deg C Ú Tr Deg F Ú Ú Tr Deg C Pc kW (used with CE Method only) Ö 4 mA numeric entry Ö... -
Page 120: Diagnostic Data Menu Structure
Section 2 1010ENFM-3B DIAGNOSTIC DATA MENU STRUCTURE Diagnostic Data Energy Data Ú Energy Rate Ö Ö Energy Total Ú CE Method (option) Energy AnCal Ö Flow Data Ö Flow Ú Velocity F/S Total Vs m/s Signal mV Ú Valc % Vaer % Alarm Status Ancal... -
Page 121: Main Diagnostics Screen
This is the main Diagnostics Data screen. It provides menus that show Energy, Flow, Application, Liquid, Site Setup information. The Test Facilities menu provides test/control functions to optimize operation, analyze application conditions and to recover system operation. Siemens 2 Channel [1] Real-time energy-related data... -
Page 122: Energy Data Menu Items
RTU’s. To test the Totalizer function, leave Energy AnCal active long enough for an accumulation to appear on the diagnostic data screen shown below. Moving the cursor from the menu cell cancels the AnCal function. Siemens 2 Channel [1] Note that the [Energy... -
Page 123: Flow Data Menu Items
Section 2 1010ENFM-3B Siemens 2 Channel [1] SITE1 Current Flow Rate and Units Flow GAL/MIN -2.26 Velocity F/S 0.00 Total KGAL 0.0000 Vs m/s 1273.21 Signal mV Valc % Vaer % Alarm Status ---R----- AnCal GAL/MIN 0.0000 HiFlow GAL/MIN 1576.8 LoFlow GAL/MIN -1576.8... -
Page 124: Hiflow And Loflow
Under normal circumstances, you should never need to change these settings. It is possible, however, that a Siemens customer service engineer may ask you to edit these settings during a support session. In such a case, a <Right Arrow> at the menu cell enables numeric entry. -
Page 125: The Application Info Menu
To move the cursor away from the menu cell press to turn AnCal off. 2.11.5 THE APPLICATION INFO MENU This menu provides a live display of the basic timing data used by meter during operation. Siemens 2 Channel [1] Time between transit and receive TN uSec 75.193... -
Page 126: Liquid Data Items
Section 2 1010ENFM-3B Siemens Dual Path SITE1 Current Reynolds number Reynolds # 310017 Liquid Data LIQUID DATA MENU ITEMS Reynolds # FUE1010EN corrects the current flow rate in accordance with this Reynolds n u m - ber. This number is determined from pipe I.D., current flow rate and liquid kinematic viscosity. -
Page 127: Introduction To [Hf] Menu Item
1011 clamp-on or insert transducers, thereby extending the upper flow limit of all Sitrans F 1010 flowmeters. This algorithm provides the most benefit for clamp-on gas meters where high flow velocities and low sound velocities create the most challenging conditions for digital signal processing routines. -
Page 128: Manual" Adjustment Procedure
Section 2 1010ENFM-3B Siemens Dual Path 4SS10G Siemens Dual Path 4SS10G Access Path/Channel Diagnostic Data Transducer Setup Data Path Select Channel/Path Setup Path Enable Pipe Data Flow Rate Application Data Application Info Pick/Install Xdcr Liquid Data Operation Adjust Site Seup Data... -
Page 129: Automatic" Adjustment Procedure
Section 2 1010ENFM-3B Siemens Dual Path 4SS10G fx (drive) N (burst length) Ltn in 5.316 Vf max CU Vs max m/s Vs min m/s 1355.00 Samples/Cycle Max Damping Min Damping >-0.120 Site Setup Data “Automatic” Adjustment Procedure In the [Site Setup Data] Menu, press the <Down Arrow> and scroll to the [HF] menu cell. Press the <Right Arrow>... -
Page 130: The Test Facilities Menu
The Test Facilities menu provides commands for system analysis and recovery. The most useful for the end-user are Makeup and Graph. Using these routines under the supervision of our technical support staff will help us to provide technical analysis and solutions. Siemens 2 Channel [1] Channel 1... -
Page 131: Detection Modes
1010ENFM-3B Detection Modes FUE1010EN flowmeters, Version 3 or higher, are equipped with a Test Facilities Graph Screen. The following paragraphs explain how the Test Facilities Graph Screen is used for troubleshooting Sitrans F 1010 flowmeters. The Test Facilities Graph Screen NOTE: The following is intended for 1010 VFMT systems with Graphic Displays only. -
Page 132: Entering The Diagnostic Graph Screen
Before you can view the Diagnostic Graph Screen the FUE1010EN flow channel must first be properly installed and operating in a non-empty condition (refer to the appropriate Sitrans F 1010 field manual). If a previously installed channel is in a “Fault” condition, but not reporting “Empty”, you can still access the Graph Screen to aid in troubleshooting the cause of the failure to measure flow. -
Page 133: Command Modes
Section 2 1010ENFM-3B ditions. In the unlikely situation where the two images appear to be offset by one or more receive cycles then the flow readings should be considered questionable. Command Modes Although the 1010 signal processing algorithms are capable of accommodating a very wide range of signal conditions, it may be desirable to override these default settings under extremely difficult operat- ing conditions. - Page 134 Section 2 1010ENFM-3B Zero Crossover Adjustment: (Hot Key 4) Observe the small “X” mark located on the zero crossing line near the middle of the receive signal in the Graph Screen above. This “X” indicates the central crossover which the 1010 is using to measure the transit-time delta.
-
Page 135: Description Of Graph Screen Text Display Parameters
Section 2 1010ENFM-3B Signal Masking Function: (Hot Key 7) Under conditions of extremely low signal amplitude, a noise spike associated with 1010’s receive signal window may be present on the extreme left side of the graph display. If this spike is large enough it may interfere with the signal detection routines. -
Page 136: Troubleshooting Tips
The Diagnostic menu shows how the sys- tem interprets a problem. The test functions and alarm indicators identify “hidden” problems automati- cally. If a problem seems unsolvable, call our Technical Service Department or your local Siemens Rep- resentative for expert help. -
Page 137: Using The "F4" Reset Sequence
Section 2 1010ENFM-3B MESSAGE DESCRIPTION Low Signal Press [ENT] During the Initial Makeup, the meter decides that the level of the receive signal is insufficient for proper operation. Some reasons for low signal are: • Invoking [Install Completed?] on an empty pipe. •... - Page 138 Section 2 1010ENFM-3B Procedure to clear Active Memory only: Turn off power (if it is currently on). Press <F4> and keep it pressed while you turn on power. The prompt: [Clr Active Memory? No] appears at the top of the screen To access the [F4 Reset] option list press <Right Arrow>.
-
Page 139: Troubleshooting With Transducer Test Blocks
1011 High Precision transducers. The 996PSP-pipe simulator allows you to test a Sitrans F 1010 flowmeter and 991 transducers from size 0 to size 3. Note that although our flowmeter operates with our 991 size 4 and 5 transducers, testing of these sizes with our flowmeter is not currently supported. - Page 140 Section 2 1010ENFM-3B 4. Access the Installation Menu. Select [Meter Type] [Single, Dual or Quad Channel] depending on flow- meter type. Select the meter channel (1,2,3, or 4) depending on which measurement channel you intend to test. Select [Clamp-On] and then [Channel Setup]. 5.
-
Page 141: Using The 996Psp Pipe Simulator
Section 2 1010ENFM-3B 2.11.11 USING THE 996PSP PIPE SIMULATOR Using the proper coupling compound, mount the transducers on the pipe simulator as shown below. Slide each transducer until it presses against a pin-stop. Use the clamping screws to hold the transducers in place. -
Page 142: If A Pipe Simulator/Test- Block Test Fails
If the system functions properly, then the original transducers under test are defective. Please return any defective transducers to Siemens for repair. 3. If you replace the transducers and cables, and the system still fails to function correctly, then it is likely that the computer has a malfunctioning circuit module. -
Page 143: Guide To A Smooth Installation
Section 2 1010ENFM-3B 2.12 GUIDE TO A SMOOTH INSTALLATION NOTE: The following should be used in conjunction with the FUE1010EN Field Manual Di- agnostic and Troubleshooting procedures. 2.12.1 CHECKLIST FOR 1010 STARTUP & PERFORMANCE PROGRAMMING ‰ Select appropriate meter type: Clamp-On, Reflexor, Dual Beam, Flow Tube, etc. ‰... -
Page 144: Optimization/Correction Of Problems
Section 2 1010ENFM-3B START-UP ‰ Ensure pipe is FULL (flowing or not). ‰ Select “Install Complete?”…..INSTALL to Invoke “Initial Makeup” routine. ‰ Verify “Measured Vs” is accurate for liquid type & temperature (Consult Vs Database) ‰ Set Zero appropriately (AutoZero or ZeroMatic for Reflect, Actual Zero or ReversaMatic for Direct). ‰... - Page 145 Section 2 1010ENFM-3B ‰ Verify Liquid chemistry is as expected. (Ask about additives, Pressure, Temp.) ‰ Try “1-Cycle” Vs Correction in Diagnostics if error remains for a liquid with well defined Vs data Low Valc ‰ Clean and condition pipe surface. ‰...
-
Page 146: Official" Coupling Compounds
Section 2 1010ENFM-3B Poor Signal ‰ Check that actual pipe dimensions and material match programmed data. ‰ Consult X-Select; Choose first recommended transducer. ‰ Relocate transducers. “Official” COUPLING COMPOUNDS Part# Name Application Max Temp. Remarks CC-102 Ultragel Portable, Short Term (< 24 Hours) 110°F, 43°C Water Soluble CC-110... -
Page 147: Hardware Installation Guide
Section 3 1010ENFM-3B HARDWARE INSTALLATION GUIDE PREPARING TO MOUNT THE TRANSDUCERS Installing the transducers is fairly straightforward. However, careful planning will avoid any snags that may delay the installation. Previously, based on the input you fed into the meter’s computer, it had recommended the transducers size, mounting option and spacing. -
Page 148: Clamp-On Transducer Mounting Modes
(Horizontal Plane) 3.1.3 CLAMP-ON TRANSDUCER MOUNTING MODES Siemens clamp-on transducers support Direct or Reflect mounting modes. The flow computer recom- mends a mounting mode after analyzing your pipe and liquid data entries. However, you can install clamp-on transducers in the way that best suits your application and the transducer type you purchased. -
Page 149: Preparing The Pipe
Section 3 1010ENFM-3B We recommend Reflect mount whenever possible. This is the simplest way to mount the transducers. Also, Reflect mount resists abnormal flow profile conditions such as cross-flow within the flow stream. Reflect mode supports the AutoZero function, which zeroes the meter automatically without user-partici- pation. -
Page 150: Reflect Mode With Ez Clamp And Spacer Bar Only
Section 3 1010ENFM-3B 3.1.5 REFLECT MODE WITH EZ CLAMP AND SPACER BAR ONLY The EZ Clamp is a quick and easy way to securely mount transducers on any pipe. The spacer bar eliminates manual spacing measurements and provides rigidity for mounting the transducers while maintaining axial alignment. -
Page 151: Direct Mode With Ez Clamp And Spacer Bar Only
Section 3 1010ENFM-3B Adjusting Nut Chain Extension Sections Mate Bit Snap and 'S' Hook EZ CLAMPING TRANSDUCER TO PIPE 6. Apply a 1/8-inch continuous bead of couplant compound along the center (the long way) of the contact surface of the transducer. Place transducer on the pipe center in the middle of one of the areas you have cleaned with the cable connector facing away from where the other transducer will be placed. - Page 152 Section 3 1010ENFM-3B Chain Tension Transducers PIPE VIEW FROM TOP OF PIPE Chain INSTALLATION - DIRECT MOUNT WITH EZ CLAMP AND SPACER BAR 1. Perform all required menu steps until the flow computer issues the number index and prompts you to press [ENT] to finish the transducer install routine.
- Page 153 Section 3 1010ENFM-3B 5. Apply a 1/8-inch continuous bead of couplant compound along the center (the long way) of the contact surface of the transducer. Position this transducer on the center of the pipe in the middle of area you have cleaned. The cable connector should be facing away from where the other transducer will go.
- Page 154 Section 3 1010ENFM-3B 10. Realign the left edge of the guide with the transducer edge mark. Line up both vertical edges of the guide and ensuring that it is snug around the pipe, mark along the overlapping edge. 11. Remove the Mylar spacing guide and lay it out on a flat surface. Either, measure the exact distance halfway between the overlap edge and the mark at the overlap or fold the guide from the overlap edge to the overlap mark and draw a line at the fold or half way point.
-
Page 155: Reflect Mode-Mounting Frames And Spacer Bar
Section 3 1010ENFM-3B 3.1.7 REFLECT MODE - MOUNTING FRAMES AND SPACER BAR The combination of a spacer bar with mounting frames is the easiest way to mount in Reflect Mode. The result is a rigid structure that eliminates spacing measurements, and maintains the transducer-to-trans- ducer geometry. -
Page 156: Reflect Mode With Spacer Bar Only
Section 3 1010ENFM-3B 2. On a flat surface, attach the spacer bar to a mounting frame so that the reference hole on the spacer bar fits over the post on the platform of the frame; tighten the securing screw. Slide the second mounting frame onto the other end of the spacer bar, align the number index hole with the post on the platform;... - Page 157 Section 3 1010ENFM-3B 1011 Series Spring Clip Transducer Spacer Bar Spacer Bar Number Index Spacer Bar Reference Securing Screw Index Securing Screw Mounting Strap 1. Perform all required menu steps until the flow computer issues the number index and prompts you to press <ENT>...
- Page 158 Section 3 1010ENFM-3B tighten as in Step 5. Sight along spacer bar to ensure axial alignment to the pipe. Adjust if necessary and do not overtighten. Ensure that the transducers do not move while tightening. 7. Connect the transducer cable, ensuring that you have observed the upstream/downstream orienta- tion in respect to the cable and the input jack on the flow computer.
- Page 159 Section 3 1010ENFM-3B MYLAR SPACING GUIDE 1. Perform all the required menu steps up until the point where the flow computer issues the number index and prompts you to press <ENT> to finish the transducer install routine. Make a note of the number index displayed in the Pick/Install menu. Check to ensure that you have a matched set of transducers.
- Page 160 Section 3 1010ENFM-3B Pipe Transducer Transducer Pipe Transducer Transducer Transducer Edge Line Spacer Bar Spacer Bar Transducer Line Line Spacer Bar Spacer Bar Mylar Mylar Spacing Spacing Guide Guide 7. Disassemble the spacer bar and the unmounted frame. Use the bar as a straight edge and, with one edge against the mounted frames tapered roller center and the other crossing the dot you drew, draw a line crossing the dot (see “B”...
- Page 161 Section 3 1010ENFM-3B SPACING GUIDE Mark (or fold) exactly Overlap Edge at half-way point CIRCUMFERENCE FINDING THE HALFWAY DISTANCE 11. Reinstall the spacing guide; its left edge abutting the transducers edge mark on the pipe and the overlapping edge in line with the dot (now a line) on the pipe (see “C” on previous page). Tape it in this position on the pipe.
-
Page 162: Using 1012T Mounting Tracks
Examine the figure below, which shows a typical Pick/Install Xdcr menu screen. Note the automatic assignment of model numbers for the transducer and mounting track, plus the designation of the number index. Siemens 2 Channel SITE1... - Page 163 Section 3 1010ENFM-3B Transducer Clamping Screw Transducer Bracket Upstream Transducer Downstream Transducer Number Index Pin Track Rail FLOW Ö Strap Tension Screw Pipe Mounting Strap Track Rail Strap Tension Screw Transducer Pipe Transducer Clamping Screw Mounting Strap Transducer Bracket INSTALLATION - REFLECT MOUNT WITH MOUNTING TRACK 2.
-
Page 164: Installing A 1012T Mounting Track In Direct Mode
B3 universal transducers. Examine the figure below which shows a typical Pick/Install Xdcr menu screen. Note the automatic assignment of model numbers for the transducer and mounting track, plus the designation of number index. Siemens 2 Channel SITE1 Key [Install] after mounting transducers... -
Page 165: Mounting Temperature Sensors
STRAP TENSIONING SCREW MOUNTING TEMPERATURE SENSORS In order to accurately measure temperature differential in energy flow loops, Siemens Energy Flowmeters are designed to work with a pair of matched temperature sensors. These are available in clamp-on style 991T, or in insert (thermowell) style 991TW. Both styles incorporate 1000 ohm platinum RTD’s for high precision. -
Page 166: Wiring Temperature Sensor To The Analog Input Module
Section 3 1010ENFM-3B The 991TW insert sensors are designed to be used in pipes equipped with Thermowells. These are spring-loaded, 1/4” diameter sensors with 1/2” NPT integral connection heads, available in several lengths to accommodate a range of pipe sizes. Thermowells for new installations are available from Alloy Engi- neering Company in Bridgeport, Connecticut. -
Page 167: Fue1010En Supply And Return Connections
Section 3 1010ENFM-3B Using a flat-blade screwdriver, loosen Terminal Block TB1 and TB2 screws. Connect the wires of the 1012EC Series cable as follows: 1. Connect the RTD liquid temperature cable (1012EC) as shown in the table below: 1012EC SERIES TERMINAL TB1 CABLE WIRE #1 (Black) -
Page 168: Paralleling Rtd Inputs For Dual-Channel Energy Measurement
Section 3 1010ENFM-3B FUE1010EN Dual Channel Temperature Sensor Inputs Keep the RTDs out of direct sunlight or other non-pipe sources of heat or cold which may affect their “ temperature sensing. The foam insulator supplied helps in this regard, but consider using additional pipe insulation for all installations exposed to extreme ambient conditions. -
Page 169: The Meter Facilities Menu And Graphic Display Screens
Verify/Adjust the analog pulse output using a frequency counter. Calibrate the RTD temperature sensors. Set the system clock/calendar. Obtain detailed software/hardware identification. This menu allows you Siemens Dual Path SITE 1 to specify default Select Default Units for all Menus measurement units. -
Page 170: The Table Setups Menu
Section 4 1010ENFM-3B THE TABLE SETUPS MENU The Table Setups menu allows you to pre-condition your pipe table and transducer types. The edits made in Table Setups become the default settings for creating a new site. Transducers “marked” in the Transducer Types menu will be preferentially selected when the meter recommends transducers during the automatic Pick/Install Transducer routine. -
Page 171: Create/Edit Pipe
1010ENFM-3B Section 4 PIPE TABLE MENU (continued) Ú Ö Ö Ú Choose Pipe Name Ú Create/Edit Pipe 100 DN 10CS XS 10P XS 150 DN 12CS STD 12P STD 200 DN 12CS XS 12P XS 250 DN 16CS STD 16P STD 300 DN 16CS XS 16P XS... -
Page 172: Delete Pipe
Section 4 1010ENFM-3B Scroll the option list to a class that provides the closest match to your pipe To select the Pipe Class press . Highlight moves to [Choose Pipe Name]. To access the [Pipe Name] option list press Scroll the option list by pressing to a pipe name and press to select it. -
Page 173: Transducer Type Menu Structure
1010ENFM-3B Section 4 consider preferentially during its recommendation routine. These transducers will be included on the recommended list, which appears on the reverse-video prompt line at the top of the display screen. The left-most transducer on the list is the most applicable while the right-most transducer on the list is the least applicable. -
Page 174: The Datalogger Control Menu
Section 4 1010ENFM-3B THE DATALOGGER CONTROL MENU The Datalogger Setup menu in the Channel Setup menu provides the Datalogger controls for the meter’s measurement channels. It allows you to enable usage, select data items/ alarm events, a logging inter- val and a destination for your Datalogger reports. While the Datalogger Setup menu is measurement channel specific, this Datalogger Control menu provides global control functions. -
Page 175: Output Datalogger
[Site ID] (current site setup name), [Date] and [Time] in your report so that you can identify the source of each report. The flowmeter interfaces with most serial printers or personal computers. Siemens offers the model 996P portable serial printer. You must use the proper cabling between the flow computer and the exter- nal device. -
Page 176: Est Log Time Left
Section 4 1010ENFM-3B All active channels in the Channel Setup menu must be disabled. To disable active channels, select the [Channel Enable] menu cell and then [No].In the Datalogger Control menu, select [Circular Memory]. Press to access the [Circular Memory] option list. Move the cursor to [Yes] by pressing To store selection press Lastly, re-enable the channels that you disabled earlier to begin logging. -
Page 177: The Analog Output Trim Menu
1010ENFM-3B Section 4 Defragment: Selecting YES for this item consolidates memory data blocks into contiguous storage; collapsing the filler regions. You may be able to use an additional block for site or datalogger storage as a result. Use this command if you seem to be out of memory even though the Data Memory Left item indicates free capacity. -
Page 178: Pgen Output Trim (Pgen 1 & Pgen 2)
Section 4 1010ENFM-3B Move the highlight to the port to be tested , press ,then press to move the cursor Trim @ 2V. Press . This triggers a 2.00 Volts pop-up window. The multimeter should now be reading 2.00 Volts. If the multimeter reading does not match, use the numeric keys to type in the multi-meter read- ing. -
Page 179: Ice Bath Rtd Calibration
C (32 F) equilibrium for an ice bath. Ensure tem- perature with a reference thermometer. Siemens can not assume responsibility for the incorrect design, construction or operation of an ice bath. CAUTION: DO NOT ALLOW AN RTD SENSOR TO MAKE DIRECT CONTACT WITH ICE DURING AN ICE BATH CALIBRATION. -
Page 180: The Clock Set Menu
(time entry) Notice: All Siemens flowmeters include a real-time clock to provide a convenient date/time stamp for display screens and datalogger reports. The operating system does not rely on the date and time-of-day for any flowmeter operation. Therefore, the “Turn Of The Century” will have no effect on the proper functioning of any of our systems. Although we limit the year to 2 digits in all our displays, 1010’s datalogger reports are Y2K complaint using an industry... -
Page 181: Setup
1010ENFM-3B Section 4 To Set the Clock: To enable numeric entry press Use the numeric keys to type the time (HH.MM). To store the time press . This moves the cursor to RS-232 Setup. RS-232 SETUP Use the RS-232 Setup menu to set the operating parameters of the serial I/O port. Settings include baud rate, parity, data bits, line feed, network ID number and waiting period before a RTS time-out. -
Page 182: Parity
Section 4 1010ENFM-3B To change the Baud Rate: To access the [Baud Rate] option list press Move the cursor to the required baud rate by pressing To store selection press . This moves the cursor to [Parity]. 4.8.2 PARITY Parity is a simple method to check the accuracy of an asynchronous serial data transfer. The parity setting tells the meter how to format the data words it sends to an external device. -
Page 183: Network Id
1010ENFM-3B Section 4 To enable (or disable) Line Feed: To access the [Line Feed] option list press to move the asterisk to [Yes] Line feed enabled, or [No] Line feed disabled. To store the data press . This moves the cursor to Network ID. 4.8.5 NETWORK ID The Network ID menu cell stores an identification number to facilitate host computer polling when you use this system in a network environment. -
Page 184: Backlight
Section 4 1010ENFM-3B BACKLIGHT This menu cell allows you to specify how long you want the LCD Display backlighting to remain on. Select [On] for continuous illumination. Press the <Right Arrow> to access the option list and then scroll to desired time delay (before turn-off). - Page 185 Selected Measured Sonic Measurement Velocity (in m/s) Channel Signal Strength Select Meter Type Site Name (Dual Channel Flow) Percent of Digital Average Siemens 2 Channel [1] Unit #1 Aeration Volumetric Flow Detected FLOW: GAL/MIN 1286 Totalizer Mode 11.03 HI/LO TOTAL: GAL...
- Page 186 11.01 0.74 TOTAL TOTAL KBTU 97.04 -5.30 - - - - - - - - - 17.12 09/28 Dual Display Screen Siemens 2 Channel [1] Channel 1 89.68 FLOW GAL/MIN 0.20 TOTAL KGAL 1474 0.12 0.00 The flow display uses the first (prompt) line display for the purpose of identifying the type of...
-
Page 187: Fue1010En Application Notes
The meter’s computer provides comprehensive diagnostics data. Using this data, our engineers can analyze the system in relation to the application. Proper analysis will provide solutions to virtually any application problem. For technical assistance, please contact your local Siemens representative for expert help (www.siemens.com). -
Page 188: Pipe Considerations For Clamp-On Transducers
5.3.1 PIPE DIMENSIONS Siemens manufactures transducer assemblies to service pipes from 0.25" to 360" in outer diameter. During the transducer install procedure, the flow computer will recommend transducer sizes based on the site data that you enter. Pipes with OD-to-Wall thickness (OD/W) ratios greater than 10 to 1 are ideal applications. -
Page 189: Accuracy
Section 5 1010ENFM-3B within specifications depends primarily on the receive signal’s signal-to-noise ratio and amplitude. The information below may point to application conditions that could reduce system performance below its normally high level. 5.3.5 ACCURACY Although system accuracy is exceptional over a wide turndown ratio, at extremely low flow rates, a small zero offset becomes a high percentage of actual flow. -
Page 190: Flow Conditions
Section 5 1010ENFM-3B FLOW CONDITIONS Very rarely are real-world flow conditions uniform and predictable. Therefore, the FUE1010EN operating system provides a considerable degree of control over the stability/agility of the flow rate output. The FUE1010EN is significantly more agile in tracking pressure wave induced Vs transients, and will recover from mistracking more quickly and smoothly than any other competing transit-time flowmeter. -
Page 191: Erroneous Liquid Parameter Specification
Section 5 1010ENFM-3B However, these liquids are perfectly suitable for Reflexor flowmetering. Liquids containing dissolved gas- ses or dissolved organic solids will not cause any problems for transit-time operation. Most liquids are excellent sonic conductors, regardless of their electrical or optical properties. Although highly viscous liquids exhibit a greater degree of sonic attenuation, the FUE1010EN operates perfectly with the vast majority of these liquids. -
Page 192: Viscous Liquids
Section 5 1010ENFM-3B 5.4.8 TWO-PHASE LIQUIDS Two-phase liquids (e.g., oil and water) cause some sonic beam scattering. However, these usually con- duct sonic beams sufficiently for proper operation (unless heavy aeration is present also). Two-phase liquids with large quantities of different components, such as sand or free gas, could prove to be too attenuative for transit-time operation. -
Page 193: Reference Tables
Section 5 1010ENFM-3B If you receive a [Memory Full!] message when you try to save a Site Setup, then you will have to delete an obsolete Site Setup or clear the Datalogger Memory to make room. Another Datalogger memory consideration applies to dual-channel systems, when both measurement channels are actively logging data. - Page 194 Section 5 1010ENFM-3B SONIC VELOCITY FOR PURE WATER @ VARIOUS TEMP. (meters/sec) Liquid Deg. C Deg. F Vs (m/s) Liquid Deg. C Deg. F Vs (m/s) Water 1402 Water 1519 1447 1503 1482 1485 1509 1466 1529 1440 1543 1412 1551 1390 1555...
-
Page 195: Recommended Sonic Coupling Compounds
Notice: Siemens holds US Patent Number 4,929,368 on the CC#122 Coupling Compound and all compounds of this type. Its use is restricted to Siemens products only, unless a special license has been obtained. Licenses for use with other products are available through the Siemens Sales Department. - Page 196 Section 5 1010ENFM-3B FUE1010EN REYNOLDS COMPENSATION FACTOR Reynolds # Positive Comp Negative Comp 0.7808 0.7808 1277 0.7869 0.7869 1566 0.7930 0.7930 1694 0.7991 0.7991 1830 0.8052 0.8052 1930 0.8113 0.8113 1986 0.8174 0.8174 2044 0.8234 0.8234 2104 0.8295 0.8295 2166 0.8356 0.8356 2227...
-
Page 197: Terminology Chart
Section 5 1010ENFM-3B TERMINOLOGY CHART This chart provides explanations for uncommon terms used in this manual. TERM EXPLANATION Active Memory Section of RAM allocated for active site parameters (all current values). The flow computer receives site-specific operating instructions from Active Memory. Alphanumeric Field An 8-character data entry field that allows you to specify a Site Name or a Security code. - Page 198 Section 5 1010ENFM-3B TERM EXPLANATION Local Display Refers to the FUE1010EN integral display screen. Menu Sub-sections of the Installation Menu that you to define specific operational functions (e.g., RS-232 Setup). Menu Cell A location within a Menu where you define either a single numeric value or option list selection that supports the Sub-Menu’s function.
-
Page 199: The Nema Dual-Channel Menu Chart
Section 5 1010ENFM-3B THE NEMA DUAL-CHANNEL MENU CHART This section includes the FUE1010EN Permanent Dual Channel Menu Chart. The Dual Path Flow, Ch 1+2 Flow, Ch 1-2 Flow Channel Setup menus, which are virtually identical. The Reflexor and Flow Tube menus repeat the Clamp-On menu (Full Site Setup), except for the exclusion of menu cells only appro- priate for clamp-on transducers. - Page 200 Section 5 1010ENFM-3B THE METER FACILITIES MENU (continued) Ö Ú Ú Meter Facilities RTD Calibrate Ch 1 Ts - RTD-1 Factory Ö User Cal Ö RTD Calibrate Ch 1 Tr - RTD-2 Factory User Cal Ö RTD Calibrate Ch 1 Ts - RTD-3 Factory User Cal Ö...
- Page 201 Section 5 1010ENFM-3B THE CLAMP-ON MENU Ö Ú Ö Clamp-On Channel Setup Recall Site Setup Channel Enable Create/Name Site Ú Site Security Delete Site Setup Save/Rename Site Ö Pipe Data Ö Select Pipe Class Ú Select Pipe Size Pipe OD (in / mm) Ú...
- Page 202 Section 5 1010ENFM-3B THE CLAMP-ON MENU (continued) Clamp-On Ö Flow/Total Units Volume Units Flow Display Scale Ö Ö Ú Total Volume Units Totalizer Scale Ú Ú Total Resolution Totalizer Mode Batch/Sample Total Ö Data Span/Set/Cal Span Data Max Energy Flow Ö...
- Page 203 Section 5 1010ENFM-3B THE CLAMP-ON MENU (continued) Ö Ö Ú Clamp-On Ö Diagnostic Data Flow Data Flow Velocity F/S Total Vs m/s Signal mV Ú Valc % Vaer % Alarm Status AnCal HiFlow Low Flow Ö Ö Application Data Ú TN uSec TL uSec DeltaT nSec...
-
Page 205: Operating Fue1010En With Flow Tubes
1010ENFM-3B OPERATING FUE1010EN WITH FLOW TUBES Models 1010EN1 and 3 and EDN1 and 3 support the use of Siemens 992DFT or 1011FT Flow Tubes. This extremely versatile in-line transit-time flowmeter system has proven to be a valuable tool for servic- ing the following applications. -
Page 206: Selecting The Right Flow Tube
Section 6 1010ENFM-3B Siemens flow tubes are constructed from CPVC, Teflon, (PFA), Kynar (PVDF) or stainless steel. Ensure that the liquid to be measured is compatible with the flow tube material. 6.1.2 SELECTING THE RIGHT FLOW TUBE Select the appropriate body material: Consider liquid compatibility, operating temperature, and pres- sure. -
Page 207: Flow Data Scatter And Damping
The operating program provides comprehensive diagnostics data. Using this data, our engineers can analyze your system in relation to the application usage. A detailed analysis will provide solutions to virtually any adverse application problem. If you need technical assistance, contact your local Siemens representative for expert help (www.siemens.com). -
Page 208: How To Set Up Fue1010En For Flow Tube Operation
Complete the Flow Tube install procedure. 6.3.2 SETUP PROCEDURE From the Channel Select screen, press to access the option list, then press to move the cursor to [FlowTube] (if required). Siemens 2 Channel [1] Channel 1 Choose Channel 1 Flowmeter Type Channel 1 Clamp-on Channel 2 >FlowTube... - Page 209 Section 6 1010ENFM-3B Siemens 2 Channel Scroll saved Site Setup list and Enter Recall Site Setup No Sites Channel Enable Create/Name Site Site SecurityF Delete Site Setup No Sites Save/Rename Site Channel Setup Move Highlight up and down by pressing to [Create/Name Site].
- Page 210 Note that the Technical Service Group may be able to provide the viscosity data for the liquid to be measured. To move the highlight to [Install Flow Tube] press . Press to access the Install Flow Tube menu. Siemens 2 Channel FLOW1 Pick Flow Tube size and Type Select FlowTube Install Completed?
- Page 211 After filling the flow tube with liquid, press to access the [Install Completed?] option list and then move the cursor by pressing to [Install]. Siemens 2 Channel FLOW1 Key Install to start operation Select FlowTube Install Completed? >Yes...
- Page 212 (see below). You can accept the default zero setting: [0.000] or enter a zero offset by typing it with the numeric keys. In either case, the flow through the Flow Tube MUST BE EQUAL TO ZERO FLOW OR YOUR DESIRED OFFSET. Siemens 2 Channel FLOW1...
-
Page 213: Specifications - Cpvc Flow Tube
Section 6 1010ENFM-3B SPECIFICATIONS – CPVC FLOW TUBE *Typical values, subject to change without notice. Size 1 Size 2 Liquid Must be compatible with CPVC under Must be compatible with CPVC under operating conditions and free of sus- operating conditions and free of sus- pended gasses or solids. -
Page 214: Specifications - Teflon Pfa Flow Tube
Section 6 1010ENFM-3B SPECIFICATIONS – TEFLON PFA FLOW TUBE *Typical values, subject to change without notice Size 1 Size 2 Liquid Must be compatible with PFA under Must be compatible with PFA under operating conditions and free of sus- operating conditions and free of pended gasses or solids. -
Page 215: Additional Installation Notes
1010ENFM-3B ADDITIONAL INSTALLATION NOTES All Siemens Flow Tubes are supplied with integral line connections. The end-user must supply any adapters, etc. required for line connection. When connecting a screwed fitting to a Kynar, Teflon (PFA) or CPVC Flow Tube, please start the thread carefully to avoid cross threading. -
Page 216: 992Dft Series Teflon Pfa Flow Tube
Section 6 1010ENFM-3B 992DFT Series CPVC or Kynar PDFA Flow Tube 992DFT Series CPVC or Kynar PDFA Flow Tube Flow Direction Inlet Mounting Indicator (FPT) Bracket Outlet (FPT) Model Identification Calibration factor (valid for indicated flow direction only) 992DFT Series Teflon PFA Flow Tube Flow OUTLET Direction... -
Page 217: The Fue1010En Reflexor Flowmeter
Section 7 1010ENFM-3B THE FUE1010EN REFLEXOR FLOWMETER Reflexor is one of the operating modes available on certain flowmeter models. The Reflexor operating mode utilizes Doppler flow detection along with digital signal processing techniques to successfully mea- sure flow under conditions that may not be suitable for transit-time flow measurement. The Reflexor samples the flow stream as it detects Doppler shift. -
Page 218: Select The Transducer Mounting Location
Section 7 1010ENFM-3B SELECT THE TRANSDUCER MOUNTING LOCATION Select a mounting location that has a fully developed flow profile. Do not locate the transducer so that sonic energy enters a region that is not representative of the flow velocities at the measuring location. Use the figure below as a guide to select the proper mounting location. -
Page 219: Mounting The Transducers
Section 7 1010ENFM-3B MOUNTING THE TRANSDUCERS Two mounting configurations are available. Adjacent mounting locates the two transducers alongside each other using a single mounting chain or strap. In-Line mounting locates the two transducers axially along the pipe using two mounting chains or straps. On metal pipes the Receive Transducer is always located behind the Transmit Transducer. -
Page 220: Connection Of Transducer Cables
Access [Channel Setup] and “Create or Recall” a previous Saved Site setup. If a previous Saved Site is recalled, and the same transducer and location is used, then no other installation steps are required. Access [Pipe Data] and enter the required pipe data. Siemens 2 Channel [1] Channel 1... -
Page 221: The Spectra Display Screen
Section 7 1010ENFM-3B Siemens 2 Channel [1] Channel 1 Key Install to start flow measurement Transducer Model Transducer Size Flow Range GAL/MIN 6.71 Install Completed? Spectra Graph Install Xdcr THE SPECTRA DISPLAY SCREEN The Spectra Graph provides a powerful tool to determine if the installation has achieved an adequate margin of operation. -
Page 222: Cursor Use On The Spectra Graph
Section 7 1010ENFM-3B 7.10 CURSOR USE ON THE SPECTRA GRAPH CURSOR USAGE TIPS This cursor appears as a vertical line on the right side of the Spectra High Limit Cursor Graph. All signals to the right of this line will be excluded from the flow calculation. -
Page 223: Available Adjustments To Spectra Graph
Section 7 1010ENFM-3B Press the <Down Arrow> from High Limit to advance to the Low Limit cursor control. The <+> and <-> keys are active in this position. Refer to the “Available Adjustments To Spectra Graph” table found in paragraph 7.12. Press the <Down Arrow>... -
Page 224: Reflexor Diagnostic Data
Section 7 1010ENFM-3B 7.13 REFLEXOR DIAGNOSTIC DATA The Diagnostic Data menu screen provides one location where all diagnostic data can be viewed. Please note, adjustments can not be made on this screen. Adjustments can only be made on the Spectra Graph. -
Page 225: Selection Of Liquid Composition
Section 7 1010ENFM-3B Siemens 2 Channel [1] Channel 1 Shows range of flow rates detected Low Limit GAL/MIN 0.00 High Limit GAL/MIN 16.75 Noise Level Set Doppler Freq <Hz> 8571 % Deviation > 100.00 Signal Pk-Pk mV FFTs/Sec FFT Peak Carrier fx <drive>... - Page 227 APPENDIX A Couplant Installation Instructions Copyright©2008 Siemens Energy & Automation, Inc. All Rights Reserved Made in the USA...
- Page 228 NOTE Currently there are no Couplant Installation Instructions included in this field manual for this unit.
- Page 229 APPENDIX B SITE SETUP CONSIDERATIONS FOR SITRANS F 1010/1020N BLIND SYSTEMS Siemens offers an economical “blind” 1010/1020 NEMA system (without a local keypad and graphic display screen). This supplement describes the hardware and software requirements for programming these models. Site setup for a blind unit requires a PC connected to the RS-232 serial port. These models include a serial interface cable for this purpose.
- Page 230 1010ENFM-3B Appendix Due to the different SITRANS F 1010/1020 flowmeter configurations, there are 3 types of RS-232 com- munication cables employed. You can determine which cable is required for the your model flowmeter from the table below. Be sure you have the appropriate cable available for use.
- Page 231 Appendix 1010ENFM-3B Signal PC DB-9 1010P/1020N 1010WP 1010N 1010X Name Terminal Terminal Terminal Terminal Terminal Ground Pin 5 Pin 5 Pin E TB1- pin 6 TB2-pin 16 Pin 2 Pin 3 Pin C TB1- pin 1 TB2-pin 11 Pin 3 Pin 2 Pin B TB1- pin 4...
- Page 232 1010ENFM-3B Appendix None 6. You will now see a blank terminal screen. Next left-click [File] on the top menu bar. Drag the highlight down to [Properties] and then left-click. 7. Left-click the [Settings] tab. Expand the [Emulation] box by left-clicking the <Down Arrow> on the right-hand side.
- Page 233 Appendix 1010ENFM-3B 9. You are now ready to communicate with the 1010 flowmeter. But first, save your settings by moving the mouse cursor to [File], sliding the cursor to [Save], then clicking [OK] on the Save dialog box. 10. The next time you want to use HyperTerminal: Click on Start.
- Page 234 1010ENFM-3B Appendix Siemens Site Select Meter Type Meter Type Single Channel Meter Facilities NOTE: To facilitate connecting through modems, the [Menu] command times out after three minutes of inactivity. To maintain a longer connection type: Menu 1000 and press <ENT>.
- Page 235 Appendix 1010ENFM-3B Navigating Through the Installation Menu After accessing the Installation Menu, you can begin to setup your flowmeter according to the instruc- tions in this manual. The chart below shows the PC keyboard equivalents to the 1010 keypad keys while you are in the menu.
- Page 236 1010ENFM-3B Appendix Transfer of Information from a SITRANS F 1010/1020 Flowmeter to the PC With HyperTerminal active: 1. Point to Transfers, and click. 2. Select Capture Text. 3. Select desired drive path or directory, enter a file name, and click the Start button.
- Page 237 1010ENFM-3B RESET PROCEDURE FOR BLIND SYSTEMS SITRANS F 1010 Blind systems allow you to perform a system reset via the RS-232 interface. The follow- ing instructions require the flowmeter to be connected serially to a PC. NOTE: Custom RS-232 settings for baud rate, parity and data bits may not be preserved. There- fore, be prepared to set your communications program back to the default (9600, Odd, 7) settings.
- Page 239 Appendices 1010ENFM-3B Appendix C Engineering Drawings Flow Computer Drawings 1010EN-7 Installation Drawing, 1010 Series Single Channel Energy Flow Computer 1010EN-8 Outline Dimensions, 1010 Series Single Channel Energy Flow Computer 1010EDN-7 Installation Drawing, Dual Channel Energy Flow Computer 1010EDN-8 Outline Dimensions, Dual Channel Energy Flow Computer 1010N-5-7 Installation Drawing, Analog Input Module 1010N-5D-7...
- Page 241 1010EN - 7 21614...
- Page 242 MOUNTING HOLE PATTERN 7 8 9 4 5 6 1 2 3 OUTLINE DIMENSIONS 1010EN - 8 21614...
- Page 243 1010EDN - 7 21614...
- Page 244 MOUNTING HOLE PATTERN 7 8 9 4 5 6 1 2 3 1010EDN - 8 21614...
- Page 245 INSTALLATION DRAWING ANALOG INPUT MODULE 1010N - 5 - 7 21614...
- Page 246 INSTALLATION DRAWING ANALOG INPUT MODULE 1010N - 5D - 7...
- Page 247 INSTALLATION WIRING I/O MODULE 1010N-2-7 21614...
- Page 248 TERMINAL BLOCK WIRING CONNECTIONS INSTALLATION DRAWING I/O MODULE 1010N - 2 - 7 21614...
- Page 252 +1)6 21614...
- Page 253 +1)6 C 21614...
- Page 254 75$16'8&(5 6,=( $ 75$16'8&(5 6,=( & 75$16'8&(5 6,=( & 75$16'8&(5 6,=( $ 75$16'8&(5 6,=( $ 75$16'8&(5 6,=( & +1)6 C 21614...
- Page 256 REFLECT MODE OPERATION PREFERRED MOUNTING PLANE SECURING MOUNTING FRAMES TO THE PIPE SURFACE USING THE SPACER BAR TO SET TRANSDUCER MOUNTING FRAME SPACING 1011NFPS - 7 21614...
- Page 257 PREFERRED MOUNTING PLANE DIRECT MODE OPERATION USING THE SPACER BAR TO SET TRANSDUCER MOUNTING FRAME SPACING SECURING MOUNTING FRAMES TO THE PIPE SURFACE 1011NFPS - 7 21614...
- Page 258 INSTALLING TRANSDUCERS IN MOUNTING FRAMES MATING 1012CNF SERIES TRANSDUCER CABLES WITH 1011NFPS SERIES TRANSDUCERS USE OF FLEXIBLE CONDUIT WITH TRANSDUCERS 1011NFPS - 7 21614...
- Page 259 REFLECT MODE OPERATION DIRECT MODE OPERATION AUXILIARY VIEW 1011NFPS - 7 C 21614...
- Page 260 1)36 21614...
- Page 261 1012BN-1 " L" " L" SPACER BAR USED WITH TRANSDUCERS ALONE SPACER BAR PIPE O.D.RANGE " L" PART NUMBER (SEE NOTE 2) SPACER BAR USED WITH MOUNTING FRAMES-REFLECT MODE SHOWN OUTLINE DIMENSIONS 1010 SERIES SPACER BAR 1012BN-8 21614...
- Page 262 DIRECT MODE REFLECT MODE INSTALLED ON PIPE OUTLINE DIMENSIONS 1011 SERIES DEDICATED 1012FN-8 21614...
- Page 263 MOUNTING FRAME PART NUMBER REFLECT MODE DIRECT MODE INSTALLED ON PIPE 1012FNH-8 21614...
- Page 264 INSTALLATION PROCEDURE TRANSDUCERS INSTALLED WITH SPACER BARS ONLY TRANSDUCERS INSTALLED WITH MOUNTING FRAMES 1012MS - 8 21614...
- Page 265 1012MS - 8 21614...
- Page 266 INSTALLATION/OUTLINE 1011 SERIES TEST BLOCK 1012TB - 8 21614...
- Page 267 REFLECT MODE INSTALLATION 1011N UNIVERSAL TRANSDUCER AND TRACK INSTALLATION DRAWING 1010 SERIES TRANSDUCERS AND MOUNTING TRACKS 1012TN-7 21614...
- Page 268 DIRECT MODE INSTALLATION 1011N UNIVERSAL TRANSDUCER AND TRACK INSTALLATION DRAWING 1010 SERIES TRANSDUCERS AND MOUNTING TRACKS 1012TN-7 21614...
- Page 269 REFLECT MODE DIRECT MODE OUTLINE DIMENSIONS 1012TN SERIES MOUNTING TRACK 1012TN - 8 21614...
- Page 270 ,167$//$7,21 '5$:,1* 6(5,(6 75$16'8&(56 $1' 02817,1* 75$&.6 21614...
- Page 271 ,167$//$7,21 '5$:,1* 6(5,(6 75$16'8&(56 $1' 02817,1* 75$&.6 21614...
- Page 272 REFLECT MODE DIRECT MODE OUTLINE DIMENSIONS 1012TNH SERIES MOUNTING TRACK 1012TNH - 8 21614...
- Page 273 INSTALLATION/OUTLINE 1010 SERIES FLOWTUBE 1011FTN-7 21614...
- Page 274 INSTALLATION/OUTLINE 1010 SERIES FLOWTUBE 1011FTN-7 21614...
- Page 275 1011FTNF-8 21614...
- Page 276 INSTALLATION / OUTLINE 992 SERIES EXTENDED FLOWTUBE 992DFTN - 8 21614...
- Page 277 INSTALLATION / OUTLINE PFA-DFT FLOWTUBE 992DFTP-T-8 21614...
- Page 282 PART No. GLAND SUPPLIED WITH CABLE IS SUITABLE FOR AMBIENT TEMPERATURE TEMPERATURE BELOW 225°F ONLY INSTALLATION/OUTLINE 991TW - 8 21614...
- Page 289 FLOW IN-LINE CONFIGURATION IN-LINE CONFIGURATION IN-LINE FLOW DUAL HEAD DUAL HEAD CONFIGURATION PIPE PREPARATION INSTALLATION DRAWING 191N1H TRANSDUCER HIGH TEMP., NEMA 4 191N1H - 7 21614 USE OF COUPLANT COMPOUND...
- Page 290 191N1 TRANSDUCER SET FLOW IN-LINE CONFIGURATION FLOW DUAL HEAD CONFIGURATION OUTLINE DIMENSIONS 191N1H TRANSDUCER HIGH TEMP., NEMA 4 191N1H - 8 21614...
- Page 291 Index 1010ENFM-3B Index Symbols 1011 Series Transducers 3-1 1011 Universal Transducer 2-18 1011H High Precision Transducer 2-18 991 Universal Transducer 2-18 Absolute Flow 2-46 Vfab, Vfo, Vs 2-46 Accuracy 5-3, 6-3 Active Memory 2-1, 5-6 Actual Zero 2-27 Procedure 2-28 Additional Installation Notes 6-11 Adjacent Mounting Method 7-3 Aeration 5-5...
- Page 292 Index 1010ENFM-3B Backlight 4-16 Selecting 4-16 Batch/Sample Total 2-44 Batch/Sample Volume 2-44 Entering 2-44 Calibrating Flow Rate 2-51 Kc Calibration 2-51 MultiPoint Calibration 2-52 Cavitation 6-2 Channel 1+2 Energy 1-9 Channel 1-2 Energy 1-10 [Channel Setup] 1-11 Channel Setup Menu 2-2 Channel Setup Menu Structure 2-2 Character Entry Field 1-8 Checklist For 1010 Start-Up &...
- Page 293 Index 1010ENFM-3B SmartSlew 2-32 Time Average 2-32 Datalogger 1-3 Control 5-13 Data 2-57 Data Option Lists 1-7 Events 2-59 Memory 5-6, 5-7 Mode 2-57 Setup 5-15 Datalogger Control Menu 4-6 Datalogger Setup Menu 2-56 Menu Structure 2-56 Data Bits 4-14 Setting The Data Word Length 4-14 Data Scatter 2-32, 5-3 Data Span/Set/Cal 5-15...
- Page 294 Index 1010ENFM-3B Editing The Estimated Vs (Liquid Sonic Velocity) 2-13 Editing The Viscosity (cS) Setting 2-13 Empty Pipe Set Menu 2-26 Entering Alphanumeric Strings 1-8 Entering Numeric Data 1-7 Establishing The Correct Distance Between The Tracks 2-25, 3-15 Estimated Vs (m/s) 2-13 Estimating Log Time Left 4-8 EZ Clamp Clamping to Pipe 3-5...
- Page 295 Index 1010ENFM-3B Four-function Calculator 1-7 Function Keys 1-3 Getting Started 2-1 Graphic Display Screens 4-1, 4-16 Guide to A Smooth Installation 2-89 Hardware Installation Guide 3-1 Hazardous Applications 1-1 High Limit Cursor 7-6 How To Recall A Site Setup 2-2 How To Use Spectra Screen Data and Controls 7-6 Hot Key Summary 2-81 I/O Data Control 5-16...
- Page 296 Index 1010ENFM-3B Log Time Interval 2-59 Low Limit Cursor 7-6 Ltn Menu 2-18 Ltn Menu Cell 2-21 Makeup Latch 2-50 Disable, Enable 2-51 Managing Site Setups 2-2 Marking Transducers 4-5 Mass Flow 2-14 Matching Serial Numbers 3-1, 5-2 Max CE 2-48 Max Energy Flow 2-47 Range Setting 2-47 Max Flow 2-47...
- Page 297 Index 1010ENFM-3B Mylar Spacing Guide 3-13 Wrapping Guide Around Pipe 3-13 Network ID 4-15 Assigning ID Number 4-15 RST Key Time 4-15 NEGFLOW 2-34, 2-39 NEMA Flowmeters 6-3 New Site Setup, Creating 1-11 Nuclear Power Applications 2-19 Number Index Menu Cell 2-21 Number Index 3-4 Numeric Entry 1-7 Operating System 5-6, 6-1...
- Page 298 Index 1010ENFM-3B Accessing Menu 4-2 Pipe Temperature Range Selecting 2-16 Pipe Wall Thickness 4-3 POSFLOW 2-34, 2-39 Power Failure 2-1 Preparing The Pipe Surface 3-3 Pressure Drop 6-9 Print Site Setup 5-16 Recall Site Command 2-2 Recall Site Setup 2-1 Recommended Mounting 7-2 Reference Hole 3-4, 3-11, 3-18 Reference Tables 5-7...
- Page 299 Index 1010ENFM-3B Meter Type 1-11 Reflexor Mode 7-2 Time Average 2-32 Transducer Model 2-19 Transducer Mount Mode 2-20 Direct, Reflect 2-20 Transducer Size 2-19 Serial Data Port 1-3 (see also RS-232) Set Empty Command 2-27 Empty Pipe Alarm Threshold 2-27 Setting Clock 4-13 Setting The Log Time Interval 2-59 Setting Up The Reflexor Flowmeter 7-2, 7-3...
- Page 300 Index 1010ENFM-3B The FFT Spectra Screen 7-5 The Flow/Total Units Menu Structure 2-36 Time Average 5-4 Time Base Control 2-78 Total Resolution 2-43 Total Volume Units 2-42 To Change Default 2-42 Totalizer 1-3, 2-43 Totalizer Controls 2-35 Totalizer Display Modes 2-44 NEGFLOW, NETFLOW, POSFLOW 2-39, 2-44 Totalizer Mode 2-44 Selecting 2-44...
- Page 301 Index 1010ENFM-3B Volumetric Flow Rate 2-46 Vfab, Vfo, Vs 2-46 Vps Values (in inches/sec) For Some Common Metals 5-8 Vs (Sonic Velocity) 5-7, 5-8 Wall Thickness 2-9 Entering 2-10 ASA Schedule 2-10 Zero Acquisition Routine 6-8 ZeroClr 2-28 Zero/Fault Set Option, Reflexor 2-34 Zero Flow Adjust Menu 2-27 Actual Zero 2-27 Auto Zero 2-27...
- Page 303 Siemens Flow Instruments 155 Plant Avenue, Hauppauge, New York 11788-3801 Tel. +1 (631) 231-3600 Fax. +1 (631) 231-3334 Web: www.siemens.com DUCTILE IRON PIPE Nominal Actual CLASS 50 CLASS 51 CLASS 52 CLASS 53 CLASS 54 CLASS 55 CLASS 56 Liner (Cement) Diameter O.D.
- Page 304 These do not conform to American Standard B36. 10. PIPE WEIGHT FORMULA FOR STEEL PIPE (lbs per foot) 10.68 (D-t) t, where D=Outside Diameter and t=Wall Thickness Siemens Energy & Automation, Inc. 155 Plant Avenue, Hauppauge, New York 11788-3801 Tel. +1 (631) 231-3600 Toll Free.
- Page 306 We have reviewed the contents of this publication to ensure consistency with the hardware and software described. Since variance cannot be precluded Siemens Energy & Automation, Inc. Subject to change without prior notice entirely, we cannot guarantee full consistency. However, the information in PI BU - CoC Ultrasonic Flow Order No.: CQO:1010ENFM-3 Rev B...
Need help?
Do you have a question about the SITRANS F and is the answer not in the manual?
Questions and answers