Yealink One Talk CP925 User Manual
Conference phone for verizon
Hide thumbs
Also See for One Talk CP925:
- User manual (93 pages) ,
- Quick start manual (10 pages) ,
- Recovery manual (18 pages)

Related Manuals for Yealink One Talk CP925


Summary of Contents for Yealink One Talk CP925
- Page 1 One Talk CP925 Conference phone user guide verizon.com/support/one-talk/ verizon.com/support/yealink/ CP925...
-
Page 2: Table Of Contents
User guide Table of contents Table of contents ..........................2 Before you begin ..........................5 Getting started ..........................5 Hardware overview ................................... 5 Screen and icons ..................................6 Control center ................................... 6 Idle screen ....................................7 The DSSKey screen ................................. 8 Calls screen .................................. - Page 3 User guide Answering an intercom call ..............................22 Voice mail ....................................22 Setting the voice mail code ..............................22 Leaving voice mails ................................23 Listening to voice mails............................... 23 Directory ............................23 Local directory..................................23 Managing the local directory groups ........................... 23 Managing the Local Directory contacts..........................
- Page 4 User guide Syncing the mobile contacts to the phone .......................... 43 Enabling the phone audio ..............................44 Enabling the phone media ..............................44 Handling a mobile phone call on the phone ........................44 Editing device name of your phone ............................ 44 Making the phone discoverable ............................
-
Page 5: Before You Begin
User guide Before you begin This guide provides information you need to quickly use your new phone. Firstly, verify with your system administrator that the IP network is ready for phone configuration. Also, be sure to read the Quick Start Guide which can be found in your phone package before you set up and use the phone. -
Page 6: Screen And Icons
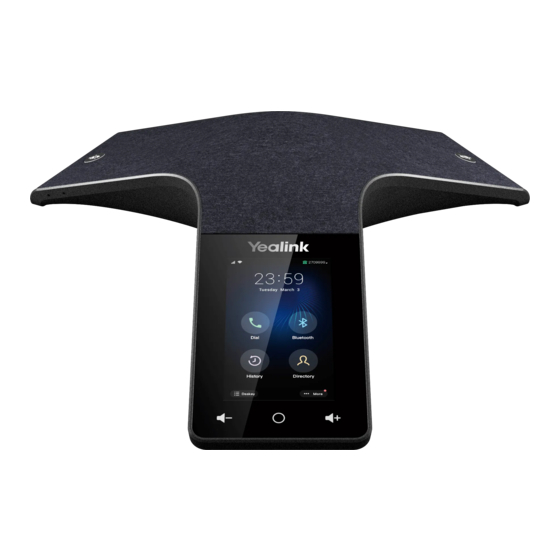
User guide • Increases the volume of the speaker, ringer, or media Volume (+) touch key • Returns to the idle screen Home touch Key • USB Type-C Port Allows you to connect a USB flash drive (optional) to your phone so you can record calls/conferences and play back recorded files •... -
Page 7: Idle Screen
User guide Name Description • Drag the slider to adjust the screen brightness quickly Control Backlight slider center • Tap to turn Bluetooth on or off quickly Bluetooth • Long tap to enter the Bluetooth setting screen • Tap to turn Wi-Fi on or off quickly Wi-Fi •... -
Page 8: The Dsskey Screen
User guide Name Description Status Bar Displays the label of the current account and icons. Icons Icons are displayed on the left of the status bar. Current account Displays the current registered account. If there is no account registered on the phone, No Service appears. -
Page 9: Calls Screen
User guide Application Description Tap to add a line key. Line Key List Shows the line key labels. You can customize the line keys. Page Keys Tap to turn to the corresponding page. Calls screen All of your active and held calls are displayed on the calls screen. When there is an active call and a held call, the calls screen is shown below: You can tap the Previous/Next to switch between multiple calls. -
Page 10: Call Features
User guide Call features You can use the phone to place and answer calls, ignore incoming calls, transfer a call to someone else, conduct a conference call and perform other basic call features. Placing calls You can use your phone like a regular phone to place calls in many ways. Placing a call from the Dialer The Dialer enables you to enter a number to place a call, and it displays a list of previously placed calls or contacts in your directory. -
Page 11: Placing An International Call
User guide Placing an international call You can place calls to international phone numbers on your phone (make sure your line is allowed to place International calls) Procedure Long press digit key 0 on the phone keypad until the plus sign (+) appears. Enter the phone number with the country code. -
Page 12: Answering A Call Automatically
User guide Note: You can disable the call waiting feature to reject the incoming call automatically during a call. Answering a call automatically Auto answer enables you to automatically answer an incoming call from speakerphone (hands-free) mode when your phone is idle. You can also enable auto answer mute to mute the local microphone when an incoming call is answered automatically. - Page 13 User guide...
-
Page 14: Rejecting Anonymous Calls
User guide Rejecting anonymous calls You can reject incoming calls from the callers who have hidden their identities. As a result, your phone will not ring and you will not be notified of an attempted call. Before you begin Check with your system administrator if the anonymous call rejection on code or off code is required. If required, get it from your system administrator. -
Page 15: Mute
User guide Procedure Tap the mute touch key during a call. The mute touch key LED glows red. Tap the mute touch key again to unmute the call. The mute touch key LED glows green. Tip: You can also mute the microphone while the phone is dialing so that the other party cannot hear you when the call is set up. -
Page 16: Resuming A Held Call
User guide The phone will beep softly every 30 seconds to remind you that you still have a call on hold. Note: When you have multiple calls on the phone and the current call is held, you can select Previous/Next to swap to the active call. Resuming a held call You can view and resume a held call on the phone. -
Page 17: Deactivating Call Forward
User guide Enter the contact number you want to forward incoming calls to in the Forward to field. Select and select the desired contact. If you select the No Answer Forward option, select the desired ring time to wait before forwarding from the After Ring Time field. (Optional) Enter the always/busy/no answer forward on code or off code respectively in the On Code or Off Code field. -
Page 18: Performing A Semi-Attended/Attended Transfer
User guide Procedure Select Transfer. Enter the number you want to transfer to. Select Transfer to complete the transfer. Performing a semi-attended/attended transfer You can transfer calls to other contacts immediately when receiving ringback or after consulting with them first. Procedure Select Transfer during a call. -
Page 19: Initiating A Conference By Inviting Participants
User guide Note: The value under the icon indicates the number of parties you have added and the maximum number of the parties you can add. For example, indicates you can add up to 4 parties and you have added 1 party. Initiating a conference by inviting participants You can invite one or multiple members at a time to join the conference. -
Page 20: Advanced Call Features
User guide Advanced call features You can perform some server-dependent tasks on the phone. Contact your system administrator to find out if your phone supports these advanced call features. Call park and call retrieve You can park a call, and then retrieve the call either from your phone or another phone. After parked, the call is placed on hold, you can continue the conversation after retrieving it. -
Page 21: Intercom
User guide Tap DSSKey. Long tap the desired line key. Select Retrieve Park from the Type field. (Optional) Select the desired line from the Account ID field. Do one of the following: (Optional) Enter the string that will appear on the phone screen in the Label field. Enter the parked extension or the retrieve lot in the Value field. -
Page 22: Answering An Intercom Call
User guide You can pick up the target extension's incoming call by pressing the Intercom key. Before picking up an incoming call, make sure that the directed call pickup code has been configured either for an Intercom key or for Call Pickup feature in advance. -
Page 23: Leaving Voice Mails
User guide Before you begin Get the voice mail code from your system administrator. Procedure Go to More > Message > Set Voice Mail Code. Enter the voice mail code (for example, *4) in the desired account field. Select Leaving voice mails You can leave a voice mail to someone who is busy or inconvenient to answer the call. -
Page 24: Managing The Local Directory Contacts
User guide You can change or add the group's information. Procedure Go to Local Directory. Select after the desired group and then select Rename. Edit the group name. Select OK. Deleting contact groups When you delete a contact group, the contacts in the group will not be deleted. You can view the contacts in All Contacts (Local Directory) list. Procedure Go to Local Directory. -
Page 25: Moving A Local Directory Contact To Blacklist
User guide Procedure Select If you want to view a contact to the specified contact group, select Local Directory to select the desired contact group. Tap the desired contact and select Edit the contact information. Select Done. Deleting a contact You can delete any contact from the Local Directory. -
Page 26: Searching For Contacts
User guide Searching for contacts In the Local Directory, you can enter search criteria to find your desired contact quickly. Procedure Select Do one of the following: Select Enter your search criteria in the search field. Select the desired letter (for example, T) along the right side to jump to contacts whose names start with T or t. Favorites Favorites are the contacts in your Local Directory that you call most often. - Page 27 User guide...
-
Page 28: Viewing Favorites
User guide Adding a new contact to your favorites You can add a new contact as a favorite by designating an index number. Procedure Select If you want to add a contact to the specified contact group, select Local Directory to select the desired contact group. Select Enter the contact information. -
Page 29: Viewing Blacklist Contacts
User guide Procedure Go to Local Directory > Blacklist. Select Enter the Blacklist contact’s information. Select Done. Viewing Blacklist Contacts You can view the Blacklist contacts from the Blacklist on your phone. Procedure Go to > Local Directory > Blacklist. Editing a Blacklist contact You can update your Blacklist contacts' information. -
Page 30: Moving A Blacklist Contact To The Local Directory
User guide Moving a Blacklist contact to the Local Directory You can move a Blacklist contact to a Local Directory. Incoming calls from this contact will not be rejected automatically. Procedure Go to. Local Directory > Blacklist. Tap the desired Blacklist contact and select Select Local Directory from the Group field. -
Page 31: Remote Phone Book
User guide Before you begin Make sure your Bluetooth-enabled mobile phone has been paired with and connected to your phones, and mobile contact sync feature is enabled. Procedure Go to > Local Directory > Mobile Contacts. Select The phone prompts “Updating, please wait…”. Note: If you disconnect the mobile phone from the phone when the phone is updating the Mobile Contacts, the phone screen will prompt “Fail to download mobile contacts!”, and the mobile contacts disappear from the phone directory list. -
Page 32: Call History
User guide Procedure Select > Local Directory > Remote Directory. Select the desired remote phone book. Tap the desired contact and select Select Add. Select Blacklist from the Group field. Select Done. Call history The call history list includes Missed Calls, Placed Calls, Received Calls and Forwarded Calls, and each list holds 100 entries. Call history icons Each icon in the call history Icons... -
Page 33: Deleting History Records
User guide Procedure Tap All Calls to select the desired list. Select > Blacklist. Edit the contact information. Select Done. Deleting history records You can delete one or all call records from the call history list. Deleting a call record You can delete any call record from the call history list. -
Page 34: Wallpaper
User guide Wallpaper You can change the background picture that is displayed on your phone. The phone comes with a default background picture, you can change it to another built-in picture. You can also use a custom picture uploaded by your system administrator as the wallpaper. Changing wallpaper on idle screen You can set one of your pictures as the background image on your phone's idle screen. -
Page 35: Changing The Backlight And Time
User guide Procedure Go to More > Basic > Display > Screensaver. Select the desired screen saver type from the Screensaver Type field. • If you select System. The phone automatically sets the built-in picture as the screen saver. • If you select Custom. -
Page 36: Changing The Time And Date Format
User guide Procedure Go to More > Basic > Time & Date > General. Select Manual Setting from the Type drop-down menu. Edit the date and time. Select The time and date set on the phone will be changed accordingly. Note: After the phone reboots, it will be forcibly switched to obtain the time and date from the NTP server Changing the time and date format You can set the phone to display the time in 12-hour format or 24-hour format. -
Page 37: Locking Your Phone Manually
User guide Select Locking your phone manually You can lock the phone manually before the phone is automatically locked. Before you begin Make sure that the phone lock is set and you have set a phone lock key. Procedure Tap the phone lock key. The lock icon appears on the phone screen. -
Page 38: Disabling The Key Tone
User guide Select Setting a ring tone for an Account You can select a unique ring tone for an individual account. Procedure Go to More > Basic > Sound > Ring Tones. Select the desired account. Select the desired ring tone. If Common is selected, this account will use the ring tone selected for the phone. -
Page 39: Using The Cp Wireless Microphone Cpw25
Using the CP Wireless Microphone CPW25 The Yealink CPW25 is a CP Wireless Expansion Mic which works as an audio input device for CP925 phone. It features superior audio technology and supports 360-degree voice pickup range at a radius of up to 10 feet (3 meters) without any wiring troubles. -
Page 40: Turning The Cpw25 On Or Off
User guide Put the CPW25 on the charging cradle. Connect the charging cradle to the USB port on the phone using a USB cable. During charging, the battery LED indicator on the CPW25 glows solid red. When the battery capacity reaches 100%, the battery LED indicator on the CPW25 will glow solid green. -
Page 41: Registering The Cpw25 With Another Phone
User guide Registering the CPW25 with another phone When you no longer want to register with the current phone, you can register the CPW25 with another phone. CPW25 can only be registered with one phone at a time, if you register the CPW25 to another phone, the CPW25 will deregister from the previous phone automatically. -
Page 42: Viewing Cpw25 Information
User guide Procedure to mute the call. The mute LED indicator glows red. And the icon appears in the status bar of the phone. again to unmute the call. The mute LED indicator glows green. And the icon disappears from the status bar of the phone. Viewing CPW25 information When the CPW25 is registered with the phones, you can view CPW25 status on the phone. -
Page 43: Pairing And Connecting The Bluetooth-Enabled Mobile Phone
User guide Pairing and connecting the Bluetooth-enabled mobile phone After pairing and connecting the Bluetooth-enabled mobile phone, you can use the sync feature. You can pair with countless mobile phones with your IP phones but only one mobile phone can be connected at a time. Before you begin Make sure that the Bluetooth-enabled mobile phone is discoverable. -
Page 44: Enabling The Phone Audio
User guide Procedure after the connected Bluetooth-enabled mobile phone name. Turn off Mobile Contacts Sync. The mobile contacts directory disappears from the phone directory list. Tip: The mobile contacts directory also disappears from the phone directory list after deactivating the Bluetooth mode. Enabling the phone audio When you enable the phone audio, the phone can act as a speaker and microphone for your connected mobile phone. -
Page 45: Making The Phone Discoverable
User guide Procedure > Edit My Device Information. The phone screen displays the device name. Enter the desired name in the Device Name field. Select Making the phone discoverable If you make your phone discoverable to other Bluetooth devices, other Bluetooth devices can scan and find your IP phone. Before you begin Make sure that the Bluetooth mode is activated. - Page 46 User guide...
-
Page 47: Activating The Wi-Fi Mode
User guide Activating the Wi-Fi mode You can activate the Wi-Fi mode to connect your phone to an available wireless network. Procedure Go to More > Basic > Wi-Fi. Turn on Wi-Fi. The phone scans the available wireless networks in your area. Connecting to the wireless network After you have activated the Wi-Fi mode, you can connect the phone to the wireless network. -
Page 48: Viewing The Wireless Network Information
User guide Get the available wireless network information from your system administrator. Make sure that the Wi-Fi mode is activated. Procedure Go to More > Basic > Wi-Fi. Tap Known Network(s) and select Enter the desired SSID in the SSID field. Do the following: •... -
Page 49: Rebooting Your Phone
User guide Investigating warnings The warning icon lets you know that your phone has one or more important issues. You can view details about warnings on the Status screen. Procedure Go to More > Status > General. The Warnings screen is displayed listing any issues. Clearing warnings You can temporarily remove the warning icon from the status bar. -
Page 50: Notices
User guide Your system administrator has enabled the phone to keep the user's personalized settings after auto provisioning. Procedure Go to More > Basic > Reset local settings> Reset local settings. The phone prompts you to reset the local settings or not. Select OK. -
Page 51: Important 911 Emergency Response Information
Yealink Network Technology CO., LTD., makes no warranty of any kind with regard to this guide, including, but not limited to, the implied warranties of merchantability and fitness for a particular purpose. Yealink Network Technology CO., LTD., shall not be liable for errors contained herein nor for incidental or consequential damages in connection with the furnishing, performance, or use of this guide. -
Page 52: Class B Digital Device Or Peripheral
User guide Class B digital device or peripheral Note: This equipment has been tested and found to comply with the limits for a Class B digital device, pursuant to Part 15 of the FCC Rules. These limits are designed to provide reasonable protection against harmful interference in a residential installation. This equipment generates, uses and can radiate radio frequency energy and, if not installed and used in accordance with the instructions, may cause harmful interference to radio communications.
Need help?
Do you have a question about the One Talk CP925 and is the answer not in the manual?
Questions and answers