Table of Contents
Advertisement
Quick Links
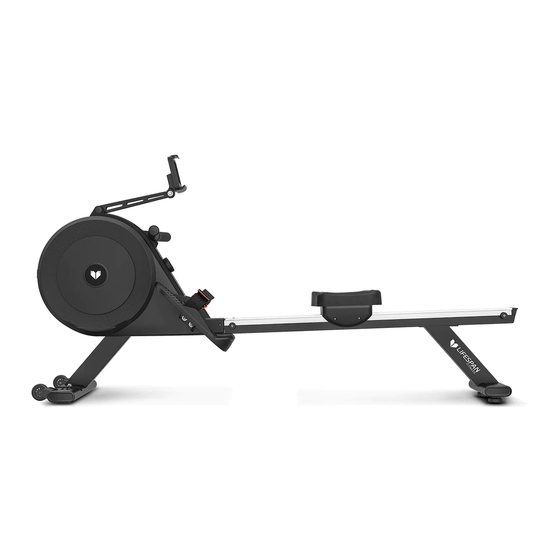
ROWER-500D Dual Air/Magnetic
Read all instructions carefully before using this product.
Retain this owner's manual for future reference.
IMPORTANT
All nuts and bolts are to be checked and tightened on a regular basis. This includes pedals and
other moving parts. Failure to do so may cause damage to your threads and void your warranty.
NOTE:
Product may vary slightly from the item pictured due to model upgrades. This manual may be subject to updates or changes.
Up to date manuals are available through our website at www.lifespanfitness.com.au
Rowing Machine
USER MANUAL
Advertisement
Table of Contents

Subscribe to Our Youtube Channel
Related Manuals for LifeSpan ROWER-500D


Summary of Contents for LifeSpan ROWER-500D
- Page 1 ROWER-500D Dual Air/Magnetic Rowing Machine USER MANUAL Read all instructions carefully before using this product. Retain this owner’s manual for future reference. IMPORTANT All nuts and bolts are to be checked and tightened on a regular basis. This includes pedals and other moving parts.
-
Page 2: Table Of Contents
TABLE OF CONTENTS Important Safety Instructions ....... 03 II. Care Instructions ..........04 III. -
Page 3: Important Safety Instructions
I. IMPORTANT SAFETY INSTRUCTIONS WARNING: Read all instructions before using this machine. It is important your machine receives regular maintenance to prolong its useful life. Failing to regularly maintain your machine may void your warranty. Please keep this manual with you at all times. •... -
Page 4: Care Instructions
• Always keep this instruction manual and assembly tools at hand for reference. • The equipment is not suitable for therapeutic use. • The pulse or heart rate sensors are not medical devices. Various factors, including the user’s movement, may affect the accuracy of heart rate readings. The pulse sensors are intended only as exercise aids in determining heart rate trends in general. -
Page 5: Exploded Diagram
38 37 15 16 23 24 18 19... - Page 6 42 41 57 56 42 41...
-
Page 7: Parts List
IV. PARTS LIST Description Qty. Description Qty. Bolt M5*12*Φ10 Tablet holder Bolt M5*20 Seat cover Roller Φ35*Φ8*11 Computer holder Nylon nut M8*H7.5*S13 SpacerΦ12.5*Φ8.2*4.5 Bolt M8*28*10*S5 Washer d8*Φ20*2 Bolt M8*35*18*S5 Adjustable bolt M6*40 Handlebar Adjustable U seat Round end cap Φ28*15 Nylon nut M6*H6*S10 Foam grip Seat plate... - Page 8 Description Qty. Description Qty. Steel plate Sensor Screw ST4.2*16*Φ10 Screw ST4.2*8*Φ8 Bolt M5*10 Computer Magnet plate Motor Spring Belt Main frame Trunk wire Screw ST4.2x16xФ8 Power trunk wire Sticker Adapter Turntable Tension wire Chain cover LED light trunk wire Upper cover LED light Screw ST4.8*19*Φ8 Screw ST2.0*5...
-
Page 9: Assembly Instructions
V. ASSEMBLY INSTRUCTIONS NOTE: Some nuts and bolts are attached on the parts, and you will need to remove and re-attach it to the connecting parts. #B S5 1PC 2PCS M8*20*S5 #22 d8 2PCS #5 d8*Φ20*2 2PCS STEP 1 Attach front stabilizer (21) to main frame (74) using bolts (13), spring washers (22), and washers (5). - Page 10 #23 M6*20*S5 4pcs. Φ Φ23*16*Φ6 4pcs. Φ #25 M5*10* 2pcs. Φ #29 D6* 16*1.5 4pcs. #30 M6*15*S5 4pcs. #B S5 1pc. #C S13-14-15 1pc. STEP 3 a. Attach sliding rail (27) to main frame (74) using bolts (30) and washers (29). Tighten and secure with Allen wrench (B).
- Page 11 #5 d8*Φ20*2 4PCS #13 M8*20*S5 4PCS #22 d8 4PCS #23 M6*20*S5 2PCS #24 Φ27*Φ23*16*Φ6 2PCS #B S5 1PC STEP 4 a. Insert seat (48) into sliding rail (27). b. Secure rubber pad (24) in sliding rail (27) using bolts (23) with Allen wrench (B). C.
- Page 12 #2 M5*20 4pcs. #4 M8*H7.5*S13 1pc. #5 d8*Φ20*2 1pc. #6 M8*35*S5 1PC #B S5 1pc. #C S13-14-15 1pc. STEP 5 a. Secure computer holder (3) with computer post (60) with nylon nut (4) and washer (5) by Allen wrench (B) and wrench (C). b.
-
Page 13: Display Guide
VI. DISPLAY GUIDE Description of instrument window: • Scanning mode: Displays in the following order for every 1800 seconds: Time---Distance---Resistance Level---Strokes---Calories---Bluetooth---Pulse • Press the knob of Display to select and fix a certain function, and then display it on the main window. •... - Page 14 B. Stop: During workout, press the knob 3 seconds to stop display counting until it displays "PAU" to pause the workout; Press the knob again for 1 second to un-pause and continue the counting. - In the paused state, press and hold for 3 seconds and the previous data will be cleared. •...
-
Page 15: Adjustment Guide
VII. ADJUSTMENTS GUIDE 1. PEDAL ADJUSTMENT The pedal strap (10) is adjustable and can be personalized to fit the user’s foot size. 2. COMPUTER ANGLE ADJUSTMENT The rotation angle of Table holder (1) and computer post (60) can be adjusted to obtain the best view of the computer LCD screen. - Page 16 4. LED VOICE CONTROL LIGHT LED Voice control light in both side of turntable (77). If in lower speed, the light will be turn green. If in higher speed, the light will be turn red. 5. STORAGE When not in use, you can store the machine in an upright position.
-
Page 17: Exercise Guide
VIII. EXERCISE GUIDE PLEASE NOTE: Before beginning any exercise program, consult your physician. This is important especially if you are over the age of 45 or individuals with pre-existing health problems. The pulse sensors are not medical devices. Various factors, including the user’s movement, may affect the accuracy of heart rate readings. - Page 18 COOL DOWN Finish each workout with a light jog or walk for at least 1 minute. Then complete 5 to 10 minutes of stretching to cool down. This will increase the flexibility of your muscles and will help prevent post- exercise problems.
-
Page 19: Warranty
Any claim against this warranty must be made through your original place of purchase. Proof of purchase is required before a warranty claim may be processed. If you have purchased this product from the Official Lifespan Fitness website, please visit https://lifespanfitness.com.au/warranty-form For support outside of warranty, if you wish to purchase replacement parts or request a repair or service, please visit https://lifespanfitness.com.au/warranty-form and fill in our Repair/Service... - Page 20 WWW.L IFES PA N FI TN E S S . C OM .A U...
Need help?
Do you have a question about the ROWER-500D and is the answer not in the manual?
Questions and answers