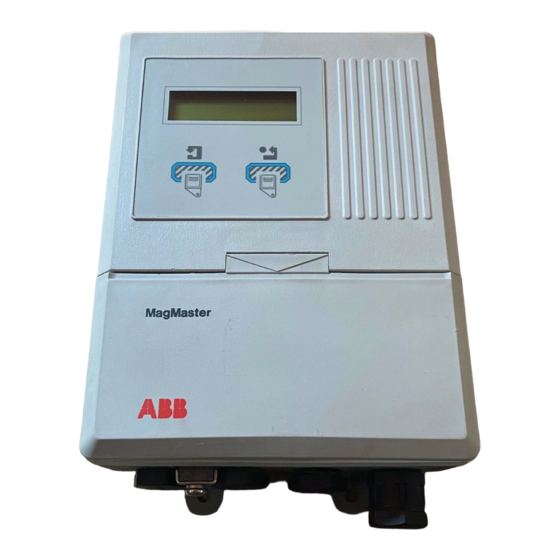
ABB MagMaster Instruction Manual
Electromagnetic
Hide thumbs
Also See for MagMaster:
- Instruction manual (32 pages) ,
- Configuration manual (28 pages) ,
- User manual (16 pages)

Subscribe to Our Youtube Channel
Related Manuals for ABB MagMaster


Summary of Contents for ABB MagMaster
- Page 1 Instruction Manual Electromagnetic Flowmeters IM/MM–SF_5 MagMaster F ac t a t ry Cenelec/ATEX M utua l S y t s e m y s t em Approved...
- Page 2 Cert. No. Q5907 As a part of ABB, a world leader in process automation technology, we offer customers application expertise, service and support worldwide. We are committed to teamwork, high quality manufacturing, advanced EN 29001 (ISO 9001) technology and unrivalled service and support.
-
Page 3: Table Of Contents
Startup ..........17 environment must taken into consideration. APPENDIX A – ENVIRONMENTAL PROTECTION ..........19 • The installation this equipment must be in accordance with APPENDIX B – MAGMASTER BLOCK relevant national and local standards. DIAGRAM ............20... -
Page 4: Mechanical Installation
2 MECHANICAL INSTALLATION 2.1 Unpacking Fig. 2.5 Vibration Fig. 2.1 Unpacking 2.2 Installation Conditions Fig. 2.6 Localised Heat >2 x pipe dia. >5 x pipe dia. minimum minimum Flow Direction Fig. 2.2 Spillage Fig. 2.7 Straight Pipe Requirements Fig. 2.8 Fluid Level Fig. -
Page 5: Mechanical Installation
2 MECHANICAL INSTALLATION… Supports 80°C (176°F) Maximum ! Fig. 2.13 Above Ground –10°C (14°F) Minimum Fig. 2.10 Cable Routing IP65 (NEMA 4) Fig. 2.14 Temperature Difference Fig. 2.11 Within Environmental Rating Metal Protection Plate Backfill Fig. 2.15 Shade Supports Fig. 2.12 Underground... - Page 6 …2 MECHANICAL INSTALLATION 2.3 Mechanical Installation Metal face 2.3.1 Transmitters Metal face 162mm (6.35in) PTFE Gasket PTFE Gasket 232mm (9.13in) 214mm (Fixing Centres) (8.43in) <15mm bore sensors 32mm (1.26in) Allowance for 69mm (2.72in) cable bends (Fixing Centres) 200mm (8in) 3 Fixing Holes, 6.5mm (1/4in) Diameter Caution.
-
Page 7: Electrical Installation
3 ELECTRICAL INSTALLATION 3.1 Grounding (Fig. 3.1, 3.2) Supplied Bonding Cables Wafer Type Sensors >4mm (<10AWG) Copper Wire Common Ground (Plant bonding) Fig. 3.1 Pipelines Insulated connecting wire (not included). Must be Supplied Bonding Cables adequately rated to carry cathodic currents. Insulating Sleeve and Washer >4mm... -
Page 8: Cables
…3 ELECTRICAL INSTALLATION 3.2 Cables 3.2.1 Cable (Remote Versions only) Ground Wire (ESCREEN) White Coaxial Core (Sig1) Grey Coaxial Core (SIG2) Inner Conductor (Sig 1) Inner Conductor (SIG2) Inner Insulation (Blue) Inner Insulation (Pink) Conductive Layer (Black) Conductive Layer (Black) Primary Screen (DS2) Primary Screen (DS1) Insulation (Grey) -
Page 9: Cable
3 ELECTRICAL INSTALLATION… 3.2.2 Cable (Alternative Type – North American Wiring Practice) Black Coaxial Core/Wires White Coaxial Core/Wires Signal Core/Wires Signal Core/Wires Inner Insulation (Natural/White) Inner Insulation (Natural/White) Conductive Layer (Black) Conductive Layer (Black) Screen Screen Insulation (Black) Insulation (White) Foil Screen Foil Screen Cable - Part No. -
Page 10: Cable Glands
…3 ELECTRICAL INSTALLATION 3.2.4 Conduit Adapters and Cable Glands (North American – 0.5in) Alternative Alternative Face Seal Face Seal Face Seal Face Seal Ferrule Illustration Fittings vary Seal typical for slightly for (Present in O.Z.Gedney different makes O.Z. Gedney Fittings) Outer Nut Outer Nut Conduit Adapters... - Page 11 3 ELECTRICAL INSTALLATION… Caution. (Remote versions) • Remove any exposed black conductive layer from under coaxial screens. • Make connections only as shown. • Sleeve all bare wiring. • Twist RED and YELLOW cores lightly together. • Twist WHITE and GREY coaxial cables lightly together. •...
-
Page 12: Transmitters
…3 ELECTRICAL INSTALLATION 3.3.2 Transmitters (All versions) Remove Protection Cover Caution. Unused cable entries must be blanked with Slide permanent down blanking plugs Pull out supplied with the slightly... transmitters. Slacken ...and captive slide off screws Fig. 3.12 Transmitter Connection Terminal access Caution. - Page 13 Fig. 3.14 Sensor Cable Connections at the Transmitter (North American Wiring Practice) 3.3.3 MagMaster-CalMaster Adapter When a MagMaster Transmitter is fitted with an adaptor board for use with a CalMaster Verification Unit, wiring from the sensor to this adaptor board is shown in the following diagram.
-
Page 14: Input/Output Connections
However, the supply connection in the former is made using a non-reversible plug (provided). 3.4.1 Frequency Outputs – Fig. 3.16 3.4.2 PLC Interface – Fig. 3.17 Counter/Totalisers MagMaster Transmitter d.c. Typically supply 1kΩ 1W Forward Flow d.c. - Page 15 • Operation of outputs is programmable – see Configuration Manual for details. • Frequency and Alarm outputs share a common return with contact input. • External isolators not normally required, as the pulse, alarm and contact circuits are electrically separated from all other Magmaster connections. Timer MagMaster Transmitter d.c.
- Page 16 3.4.5 Current Output – Fig. 3.20 and 3.21 Information. • Output is fully programmable – see Programming Guide. • Output is electrically separated from all other MagMaster connections. • External isolators are not normally required and may significantly limit accuracy if used. MagMaster Transmitter HART link IC –...
- Page 17 3 ELECTRICAL INSTALLATION… 3.4.6 Computer Connection – Fig. 3.22 and 3.23 Information. RS422/423 option is electrically isolated from all other MagMaster connections. MagMaster RS422 Connection APPLE Connector TERMINALS NAME (8 Pin MC) TX-SIG RX DATA - TX+SIG RX DATA +...
-
Page 18: Power Supply
…3 ELECTRICAL INSTALLATION 3.4.7 Power Supply Connections – Fig. 3.24 and 3.25 Warning. • DISCONNECT THE SUPPLY FROM ANY CABLES BEING TERMINATED ON THE TRANSMITTER. • Electrical installation and earthing (grounding) must be in accordance with relevant national and local standards. •... -
Page 19: Startup And Operation
Quick Reference Programming Guide or the main MagMaster manual. 4.1 Startup Switch on the power supply to the flowmeter, and • For all versions supporting HART , see if a transmitter with display has been ordered, the the main MagMaster manual. - Page 20 …4 STARTUP AND OPERATION 12.328 Ltr/s >43567 MagMaster 32.8 Ltr/s >42315 Fig. 4.2 Location of Controls (Keypad Versions)
-
Page 21: Appendix A - Environmental Protection
APPENDIX A – ENVIRONMENTAL PROTECTION Warning. • Potting materials are toxic – use suitable safety precautions. • Read the manufacturers instructions carefully before preparing the potting material. • The remote sensor terminal box connections must be potted immediately on completion to prevent the ingress of moisture. - Page 23 – Food & Beverage and Repair Centre. – Manufacturing – Metals and Minerals United Kingdom – Oil, Gas & Petrochemical ABB Limited – Pulp and Paper Tel: +44 (0)1453 826661 Fax: +44 (0)1453 829671 Drives and Motors • AC and DC Drives, AC and DC Machines,...
- Page 24 ABB has Sales & Customer Support expertise The Company’s policy is one of continuous product improvement in over 100 countries worldwide and the right is reserved to modify the information contained herein without notice. www.abb.com Printed in UK (07.04) © ABB 2004 ABB Limited ABB Inc.
Need help?
Do you have a question about the MagMaster and is the answer not in the manual?
Questions and answers