Table of Contents
Advertisement
Available languages
Available languages
Quick Links
DS1093-144
DVR H.264 CON HDMI / H.264 WITH HDMI DVR / H.264 DVR MIT HDMI /
4 CANALI SCH. 1093/002AHD / 4 CH Ref. 1093/002AHD / 4 KANAL Typ 1093/002AHD
8 CANALI SCH. 1093/003AHD / 8 CH Ref. 1093/003AHD / 8 KANAL Typ 1093/003AHD
4CANALI SCH. 1093/524 / 4CH Ref. 1093/524 / 4KANAL Typ 1093/524
8 CANALI SCH. 1093/525 / 8 CH Ref. 1093/525 / 8 KANAL Typ 1093/525
8 CANALI SCH. 1093/527 / 8 CH Ref. 1093/527 / 8 KANAL Typ 1093/527
16 CANALI SCH. 1093/526 / 16 CH Ref. 1093/526 / 16 KANAL Typ 1093/526
16CANALI SCH. 1093/528 / 16CH Ref. 1093/528 / 16KANAL Typ 1093/528
DVR H.264 CON HDMI
AHD DVR Dynamic 2.0 Series
4 CANALES Ref. 1093/002AHD
8 CANALES Ref. 1093/003AHD
4 CANALES Ref. 1093/524
8 CANALES Ref. 1093/525
8 CANALES Ref. 1093/527
16 CANALES Ref. 1093/526
16 CANALES Ref. 1093/528
GUIDA RAPIDA
QUICK GUIDE
SCHNELLANLEITUNG
GUÍA RÁPIDA
Mod.
1093
Advertisement
Chapters
Table of Contents

Related Manuals for urmet domus 1093/002AHD


Summary of Contents for urmet domus 1093/002AHD
- Page 1 DVR H.264 CON HDMI AHD DVR Dynamic 2.0 Series 4 CANALI SCH. 1093/002AHD / 4 CH Ref. 1093/002AHD / 4 KANAL Typ 1093/002AHD 4 CANALES Ref. 1093/002AHD 8 CANALI SCH. 1093/003AHD / 8 CH Ref. 1093/003AHD / 8 KANAL Typ 1093/003AHD 8 CANALES Ref.
-
Page 2: Table Of Contents
Privacy e Copyright ............................5 Descrizioni delle parti ..........................6 Pannello Anteriore ........................6 2.1.1 Pannello Anteriore DVR Sch. 1093/002AHD e Sch. 1093/524 ..............6 2.1.2 Pannello Anteriore DVR Sch. 1093/003AHD Sch. 1093/525 Sch. 1093/527 ..........7 2.1.3 Pannello Anteriore DVR Sch. 1093/526 e Sch. 1093/528 ................8 Pannello Posteriore ........................ -
Page 3: Informazioni Generali
Il presente documento vuole essere una semplice guida rapida che le permetterà una rapida messa in funzione dei modelli di DVR URMET S.p.A Serie DVR AHD Dynamic 2.0, Sch.1093/002AHD - Sch.1093/003AHD - Sch.1093/524 - Sch. 1093/525 – Sch. 1093/526 - Sch.1093/527 - Sch.1093/528. -
Page 4: Apertura Della Confezione
INPUT 100-240 Vac 50/60Hz 1.5 A max ⇒ • OUTPUT ⇒ 12Vcc 2A per Sch. 1093/002AHD-003AHD - Sch. 1093/524 – Sch. 1093/525-527 • 12Vcc 5A per Sch. 1093/526 e Sch. 1093/528 ⇒ Guida Rapida MINI CD-ROM contenente software Urmet di visualizzazione e Manuali Utente Urmet Un mouse Un telecomando I.R. -
Page 5: Pulizia Del Dispositivo
1.3.7 PRIVACY E COPYRIGHT Il videoregistratore digitale Serie AHD Sch. 1093/002AHD - Sch. 1093/003AHD - Sch. 1093/524 – Sch. 1093/525 – Sch. 1093/527 – Sch. 1093/526 – Sch. 1093/528 è un dispositivo per sistemi TVCC. La registrazione delle immagini è subordinata alle leggi vigenti nel paese di utilizzo. È inoltre vietata la registrazione di immagini protette da Copyright. -
Page 6: Descrizioni Delle Parti
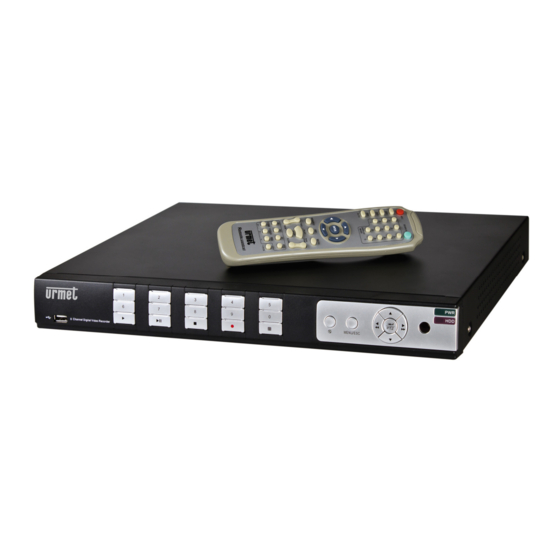
DESCRIZIONI DELLE PARTI PANNELLO ANTERIORE Si ricorda che DVR è l’acronimo di Digital Video Recorder Equipment (Dispositivo di video registrazione digitale) 2.1.1 PANNELLO ANTERIORE DVR SCH. 1093/002AHD E SCH. 1093/524 14 15 Funzione Tasto Descrizione Indicatore Se l’indicatore è “verde” il sistema è regolarmente alimentato... -
Page 7: Pannello Anteriore Dvr Sch. 1093/003Ahd Sch. 1093/525 Sch. 1093/527
2.1.2 PANNELLO ANTERIORE DVR SCH. 1093/003AHD SCH. 1093/525 SCH. 1093/527 16 17 Funzione Tasto Descrizione Indicatore Se l’indicatore è “verde” il sistema è regolarmente alimentato. accensione Riceve il segnale IR dal telecomando Ricevitore IR Quando l'indicatore "rosso" lampeggia significa che è in corso la lettura o la Indicatore HDD scrittura sul disco rigido. -
Page 8: Pannello Anteriore Dvr Sch. 1093/526 E Sch. 1093/528
2.1.3 PANNELLO ANTERIORE DVR SCH. 1093/526 E SCH. 1093/528 Tipo Funzione Tasto Descrizione Quando l'indicatore "rosso" lampeggia significa che è in corso la lettura o la Indicatore HDD scrittura sul disco rigido. Indicatori Indicatore Se l’indicatore è “verde” il sistema è Power regolarmente alimentato. -
Page 9: Pannello Posteriore
2.2.1 PANNELLO POSTERIORE DVR SCH. 1093/002AHD 2.2.2 PANNELLO POSTERIORE DVR SCH. 1093/003AHD Porta fisica Descrizione Connettori CH1-CH4 per DVR Sch. 1093/002AHD, CH1- Ingresso video CH8 per DVR Sch. 1093/003AHD ingressi video (BNC) Ingressi audio Ingressi audio (RCA) Uscita audio Uscita audio (RCA) -
Page 10: Pannello Posteriore Dvr Sch. 1093/524
2.2.3 PANNELLO POSTERIORE DVR SCH. 1093/524 2.2.4 PANNELLO POSTERIORE DVR SCH. 1093/525-527 Porta fisica Descrizione Connettori CH1-CH4 per DVR Sch. 1093/524, CH1-CH8 Ingresso video per DVR Sch. 1093/525 e Sch. 1093/527 ingressi video (BNC) Ingressi audio Ingressi audio (RCA) Uscita audio Uscita audio (RCA) IR-EXT Per telecomando esterno (usi futuri) -
Page 11: Pannello Posteriore Dvr Sch. 1093/526-528
2.2.5 PANNELLO POSTERIORE DVR SCH. 1093/526-528 Porta fisica Descrizione Connettori CH1-CH16 per DVR Sch. 1093/526 e Sch. 1093/528 ingressi video (BNC) Ingresso video Ingressi audio Ingressi audio CH1-CH8 (RCA) Ingressi audio Connettore per cavo con ingressi audio CH9-CH16 (RCA) Uscita audio Uscita audio (RCA) Connettore USB per mouse Porta USB... -
Page 12: Telecomando Per Modelli 4 Canali E 8 Canali Ahd Dvrs
TELECOMANDO PER MODELLI 4 CANALI E 8 CANALI AHD DVRS Nome Funzione del tasto tasto Selezione canali 1-8; tasto numerico Tasto numerico; premendo 0 si passa alla funzione 9、 、 、 、 0 GUI (Graphical user Interface) Modalità di visualizzazione multipla Menu Entrata/uscita dal menu principale Freccia verso l’alto, regolazione volume... -
Page 13: Telecomando Sch. 1093/526 E Sch. 1093/528
TELECOMANDO SCH. 1093/526 E SCH. 1093/528 Nome tasto Funzione tasto Premere il tasto per avviare la registrazione manuale Premere il tasto per accedere al menu di ricerca SEARCH record 2× × × × 2 Per accedere alla modalità di visualizzazione Quad Per accedere alla modalità... -
Page 14: Funzionamento Con Il Mouse
FUNZIONAMENTO CON IL MOUSE Oltre ai tasti del pannello anteriore e del telecomando, per operare sul sistema è possible utilizzare il mouse. TIPO Funzione In modalità menu bloccato, entrare nel menu pop-up e cliccare su qualsiasi sottomenu per far apparire la finestra di login; in modalità menu sbloccato, entrare nel menu pop- up e cliccare con il tasto sinistro del mouse per entrare direttamente in qualsiasi sottomenu. -
Page 15: Messa In Servizio Base Del Dispositivo
MESSA IN SERVIZIO BASE DEL DISPOSITIVO ATTENZIONE! ATTENZIONE! ATTENZIONE! ATTENZIONE! La Serie Dynamic 2.0 DVR AHD supporta anche Telecamere Analogiche Standard. Nel caso di installazioni miste, ovvero in cui siano presenti sia telecamere di tipo analogico standard che di tipo AHD, le telecamere devono essere connesse agli ingressi del DVR secondo il seguente criterio di ingressi a coppie: Collegando una telecamera di una determinata tecnologia (Analogica Standard oppure AHD) su un ingresso video dispari, l'ingresso video immediatamente successivo accetterà... -
Page 16: Configurazioni Di Base
CONFIGURAZIONI DI BASE SELEZIONE MONITOR Tale funzione permette di controllare il menù OSD sul monitor con uscita tipo HDMI e/o VGA. Impostando la risoluzione VGA/HDMI pari a 1920x1080 e collegando entrambe le uscite video VGA e HDMI, su alcuni tipi di monitor, è possibile visualizzare a schermo il menù OSD del DVR su entrambe le uscite video, se il monitor supporta in VGA la risoluzione 1920x1080. -
Page 17: Parametri Di Registrazione
PARAMETRI DI REGISTRAZIONE Selezionare [Menu Principale] [Registra] per entrare nel menu [Registra]. Si elencano le seguenti funzioni: Il menu [Programmazione] permette l’impostazione delle registrazioni: 24 ore o Normale, su Motion/Allarme e si possono personalizzare per fasce orarie stabilite. E’ anche possibile programmare entrambe le registrazioni Normale/Allarmata sulle stesse fasce orarie. -
Page 18: Configurazioni Avanzate
CONFIGURAZIONI AVANZATE CONFIGURAZIONE HARD DISK Selezionare [Menu Principale] [HDD] [HDD] e procedere con la configurazione dell’Hard Disk in funzione dell’utilizzo del Cliente, controllando le seguenti opzioni: SOVRASCRITTURA: Selezionando “AUTO”, nel momento in cui l’Hard Disk è pieno il sistema sovrascriverà automaticamente le registrazioni più... -
Page 19: Connessione Di Rete Del Dvr
CONNESSIONE DI RETE DEL DVR E’ possibile raggiungere il proprio DVR attraverso internet (con o senza DDNS) solo se il fornitore del servizio internet assegna al router un indirizzo IP pubblico (statico o dinamico) per cui si consiglia di verificare preventivamente tale informazione fondamentale con il proprio operatore telefonico fornitore del servizio internet. - Page 20 Impostazione delle porte A questo punto è necessario l’inoltro delle porte esterne del router verso il DVR. Nei menu di configurazione dei router tale funzionalità viene solitamente definita “Port-forwarding” o “Virtual Server”. Le porte impostate sul router devono coincidere con quelle del DVR. Se i valori di default delle porte del DVR (80, 9000, 18600) sono già...
-
Page 21: Accesso All'interfaccia Web Del Dispositivo Via Indirizzo Ip, Url O Portale Urmet Ddns
NOTA BENE: E’ sempre possibile utilizzare un server DDNS diverso da URMETDDNS, selezionando tra quelli disponibili nella lista. Per maggiori dettagli seguire le istruzioni su manuale utente del dispositivo e le istruzioni della Guida Rapida DDNS “DDNS Configuration Guide it_en” disponibili sul Sito Web Urmet. A questo punto salvare le modifiche cliccando sul Tasto [Applica], uscire dal Menu OSD del DVR e riavviare il dispositivo come notificato, attendere il completo riavvio. - Page 22 Selezionare l’area “Siti attendibili”. Cliccare su “Livello Personalizzato” e assicurarsi che il livello di protezione sia impostato su “Bassa”. Se non è impostato selezionare il livello di protezione basso e poi cliccare su “Reimposta” come mostrato in figura. Selezionare OK per confermare. Cliccare sulla voce “Siti”.
- Page 23 Cliccare sul pulsante “Aggiungi”. NOTA BENE Non selezionare la voce “Richiedi verifica server (https:) per tutti i siti dell’area”. Dopodiché chiudere la finestra cliccando su “Chiudi” Confermare cliccando su “Applica” e “OK” Chiudere Internet Explorer. Dopo aver installato l’Active X, in base al tipo di accesso effettuato, apparirà...
-
Page 24: Software Mobile Iuvs
SOFTWARE MOBILE IUVS URMET iUVS è un’applicazione TVCC per cellulare sviluppata per le piattaforme iOS e Android. È compatibile con i modelli di DVR URMET H.264 della Serie New Dynamic & Video Smart, Evolution 2.0, DVR HD-SDI, NVR Boost 2.0 e DVR AHD Dynamic 2.0 che utilizzano versioni Firmware V3.1 o superiore. - Page 25 Schermo live Nel menu principale selezionare “Live Monitor”; comparirà l’interfaccia Live completa delle funzioni di flusso video, registrazione, istantanea e PTZ, etc. 1. Apertura di un dispositivo Selezionare per aprire la lista dei dispositivi, come mostrato sotto; selezionando uno dei dispositivi si apriranno automaticamente tutti i suoi canali.
-
Page 26: Funzione P2P
FUNZIONE P2P Connettere ai BNC dei canali di ingresso le relative telecamere desiderate. Connettere il mouse alla porta USB. Connettere l’uscita video “VGA” e/o “HDMI” al relativo monitor VGA/HDMI per la visualizzazione delle telecamere precedentemente connesse. Connettere il cavo di rete alla porta LAN del DVR. Alimentare il DVR utilizzando il trasformatore che trovi nella confezione. - Page 27 Compilare i campi “Nome dispositivo” e “Tipo -> Device ID” Selezionare il codice QR vicino alla stringa “Device ID” (installare la App per catturare i codici QR se mancante) e inquadra il codice QR posto sul case del DVR. Compilare il campo “Password” inserita precedentemente sul DVR e selezionare su “Salva” e attendere una decina di secondi per il caricamento del LIVE del DVR.
- Page 28 Privacy and copyright ..........................31 Descriptions of the Parts ........................32 Front Panel ........................... 32 2.1.1 Ref. 1093/002AHD and Ref. 1093/524 DVR Front Panel ................32 2.1.2 Ref. 1093/003AHD and Ref. 1093/525-527 DVR Front Panel ..............33 2.1.3 Ref. 1093/526-528 DVR Front Panel ......................34 Rear Panel ..........................
-
Page 29: General Information
Thank you for having purchased this Urmet product. This document describes how to install and use the URMET AHD DVR Dynamic 2.0 Series Ref. 1093/002AHD – Ref. 1093/003AHD - Ref. 1093/524 – Ref. 1093/525 – Ref. 1093/526 - Ref. 1093/527 - Ref. 1093/528 Read this quick guide which contains information for correct, safe use carefully. -
Page 30: Opening The Box
INPUT 100-240 Vac 50/60Hz 1.5 A max. ⇒ • OUTPUT ⇒ 12Vdc 2A for Ref. 1093/002AHD-003AHD – Ref. 1093/524 – Ref. 1093/525-527 • 12Vdc 5A for Ref. 1093/526 and Ref. 1093/528 ⇒ Quick Guide CD-ROM containing Urmet software and user manuals... -
Page 31: Warnings
1.3.7 PRIVACY AND COPYRIGHT The 1093/002AHD – 1093/003AHD - 1093/524 – 1093/525 – 1093/526 – 1093/527 – 1093/528 digital video recorder is a device for CCTV systems. Recording of images is subject to the laws in force in your country. -
Page 32: Descriptions Of The Parts
DESCRIPTIONS OF THE PARTS FRONT PANEL 2.1.1 REF. 1093/002AHD AND REF. 1093/524 DVR FRONT PANEL 14 15 Function Button Description The indicator will turn green to indicate that the system is correctly Power powered IR receiver This receives the IR signal from the remote control... -
Page 33: Ref. 1093/003Ahd And Ref. 1093/525-527 Dvr Front Panel
2.1.2 REF. 1093/003AHD AND REF. 1093/525-527 DVR FRONT PANEL 15 16 17 19 18 Key title Item Remark Function & Description Indicator If the “Green” indicator is on the system is getting power Power Indicator normally. IR Receiver Receives IR signal from Remote Controller When the “Red”... -
Page 34: Ref. 1093/526-528 Dvr Front Panel
2.1.3 REF. 1093/526-528 DVR FRONT PANEL Key title Item Type Marks Function /Indicator When the “Red” indicator flashes it means HDD indicator the hard drive is being read or written to. Indicator If the “Green” indicator is on the system is Power indicator getting power normally. -
Page 35: Rear Panel
REF. 1093/002AHD DVR BACK PANEL 2.2.2 REF. 1093/003AHD DVR BACK PANEL Item Physical port Connection method Connect CH1-CH4 for DVR Ref. 1093/002AHD, CH1-CH8 for DVR Ref. 1093/003AHD (Virtual) video input device Video inputs (BNC interface) Audio Inputs 4 CH audio input (RCA interface);... -
Page 36: Ref. 1093/524 Dvr Back Panel
2.2.3 REF. 1093/524 DVR BACK PANEL 2.2.4 REF. 1093/525-527 DVR BACK PANEL Item Physical port Connection method Connect CH1-CH4 for DVR Ref. 1093/524, CH1-CH8 for DVR Ref. 1093/525-527 (Virtual) video input device (BNC Video inputs interface) 4CH audio input (RCA interface) for Ref. 1093/524; Audio Inputs 8CH audio input (RCA interface) for Ref. -
Page 37: Ref. 1093/526-528 Dvr Back Panel
2.2.5 REF. 1093/526-528 DVR BACK PANEL Item Physical port Connection method Connect CH1-CH16 (Virtual) video input device (BNC Video inputs interface) Audio Inputs 8CH audio input CH1-CH8 (RCA interface) Connector for audio cable with audio inputs CH9-CH16 Audio Inputs (RCA) Audio Output Audio output (RCA interface);... -
Page 38: Remote Controller For Ahd Dvrs 4Ch And 8Ch Models
REMOTE CONTROLLER FOR AHD DVRS 4CH AND 8CH MODELS Item Key title Key function Channel select 1-8; Numeric key Numeric key; Clicking numeric “0” allow you switch 9、 、 、 、 0 to GUI (Graphical user Interface) function Multiple display mode Menu Enter into Main menu/Exit Up arrow key, Volume adjust... -
Page 39: Remote Controller For Ref. 1093/526 And Ref. 1093/528
REMOTE CONTROLLER FOR REF. 1093/526 AND REF. 1093/528 Key Title Key Function Press the button to enter into manual record. SEARCH Press the button to enter into record search menu 2× × × × 2 Enter into Quad display 3× × × × 3 Enter into 9-split display 4×... -
Page 40: Mouse Operation
MOUSE OPERATION Except using buttons of front panel or remote controller, you also can use mouse to perform system operation. TYPE Function In menu lock mode, Enter into pop-up menu and clicking any sub menu to pop up Log- in window; on menu unlock mode, enter into pop-up menu, and then clicking left key to enter into any sub menu directly. -
Page 41: Device Basic Startup
DEVICE BASIC STARTUP WARNING WARNING! ! ! ! WARNING WARNING Dynamic 2.0 AHD DVR Series is compatible with both AHD cameras and standard analog cameras. If the installation is mixed so it includes both AHD and standard analog cameras, the cameras have to be connected to the DVR's inputs according to the following "input pair"... -
Page 42: Basic Configuration
BASIC CONFIGURATION MONITOR SELECTION This Function allows to control the OSD Menu, switching HDMI and/or VGA Video Output. Set the HDMI/VGA Resolution to 1920x1080 and connecting both video output (i.e. VGA and HDMI) on DVR, it is possible to display the OSD DVR Menu for both video output on monitor, if monitor model supports the 1080P resolution in VGA video output. -
Page 43: Recording Parameters
RECORDING PARAMETERS Select [Main Menu Record] to access the menu [Record]. The following functions are available: The menu [Schedule] allows to set recording options: 24 hours or Normal, on Motion/Alarm; recording time tables can be customized. It is also possible to program both recording options, Normal/Alarm within the same time tables. -
Page 44: Advanced Configurations
ADVANCED CONFIGURATIONS HARD DISK CONFIGURATION Select [Main Menu Device HDD] and start with the Hard Disk configuration, according to the user’s needings, checking the following options: OVERWRITE: If selecting “AUTO”, when the Hard Disk is full, the system will automatically overwrite the oldest records, so it is possible to define how many days the records will remain in the hard disk. -
Page 45: Dvr Web Connection
DVR WEB CONNECTION Your DVR can be reached on the Internet (with or without DDNS) only if the Internet service supplier assigns a public IP address (static or dynamic) to the router. It is therefore advisable to check this crucial detail with your Internet provider beforehand. - Page 46 Set the ports on the DVR and port-forward of the same ports to the router. There are two different ways to do this: Automatic mode: If the UPnP function is supported and enabled on the router, simply enable the function also on the DVR on the bottom of the “Menu Network”...
-
Page 47: Web Interface Dvr Accessing Via Ip Address, Url Or Urmet Ddns Account
IMPORTANT NOTE: A DDNS server other than URMETDDNS can be used. Select from the available options in the list. See the instructions on the user manual of the device and those of the DDNS quick guide (“DDNS Configuration Guide it_en”) which can be downloaded from the Urmet website for more information. - Page 48 Select the “Trusted Sites” area. Click on “Custom Level” and make sure that the security level is set to “Low”. If it is not, select low security and click on “Reset” as shown in the figure. Press OK to confirm. Click on “Sites”.
- Page 49 Click on “Add”. IMPORTANT NOTE Do not check “Require server verification (https:) for all sites in the zone”. Then click on “Close” to close the window. Confirm by clicking on “Apply” and the “OK”. Close Internet Explorer. One of the two pages will appear below after having installed Active X according to the type of access: Direct access to the device Access via URMET DDNS portal Fill in the required fields in both cases: User Name, Password and Client Port.
-
Page 50: Iuvs Software Mobile
IUVS SOFTWARE MOBILE URMET iUVS is a mobile phone CCTV application developed for iOS and Android Platform. It's compatible with the URMET H.264 New Dynamic & Video Smart Series, Evolution 2.0 DVR Series, HD-SDI DVR Series, NVR Boost 2.0 Series and Dynamic 2.0 AHD DVR Series for Firmware V3.1 or upper version. Features Here follow the main features of the application: Live audio/video streaming of up to 4 channels... - Page 51 To delete a device from list, swipe the device name you want to delete, then tap the delete button next to the device name. Live video monitor Tab Live Monitor on Main Menu will bring up Live interface, which provides stream video, record, snapshot and PTZ, etc. 1.
-
Page 52: P2P Function
P2P FUNCTION Connect the respective required cameras to the input channel BNCs. Plug the mouse into the USB port. Connect the “VGA” and/or “HDMI” video output to the respective VGA/HDMI monitor to view the previously connected cameras. Plug the network cable into the LAN port. Power the DVR using the transformer contained in the box. - Page 53 Fill in the “Device name” and “Type -> Device ID” fields. Select the QR code near the “Device ID” string (install the app to acquire the missing QR codes, if any) and scan the QR code on the DVR case Type in the “Password”...
- Page 54 Vertraulichkeit und Copyright ........................57 Beschreibung der Teile ........................58 Geräte Vorerseite ......................... 58 2.1.1 Typ 1093/002AHD und Typ 1093/524 DVR Geräte Vorerseite ..............58 2.1.2 Typ 1093/003AHD und Typ 1093/525-527 DVR Geräte Vorerseite ............59 2.1.3 Typ 1093/526-528 DVR Geräte Vorderseite ....................60 Geräte Rückseite ........................
-
Page 55: Allgemeine Hinweise
Ihnen für den Kauf dieses Produkts. In dieser Schnellanleitung finden Sie Beschreibungen über die Aufstellung und den Gebrauch der digitalen Videorekorder AHD DVR Dynamic 2.0 Serie URMET Typ.1093/002AHD - Typ.1093/003AHD - Typ.1093/524 - Typ. 1093/525 – Typ. 1093/526 - Typ.1093/527 - Typ.1093/528. -
Page 56: Öffnen Der Verpackung
Netzteil EINGANG ⇒ 100-240 V (AC), 50/60Hz, 1.5 A max. • AUSGANG⇒ 12V (DC) 2A für Typ 1093/002AHD-003AHD – Typ 1093/524 – Typ 1093/525-527 • 12V (DC) 5A für Typ 1093/526 und Typ 1093/528 ⇒ Bedienungsanleitung CD-ROM mit Urmet Software und Bedienungsanleitungen Maus Fernbedienung, (incl. -
Page 57: Reinigung Des Geräts
1.3.7 VERTRAULICHKEIT UND COPYRIGHT Die digitalen Videorekorder 1093/002AHD – 1093/003AHD - 1093/524 - 1093/525 - 1093/526 – 1093/527 – 1093/528 sind Geräte für CCTV-Systeme. Bildaufnahmen unterliegen den geltenden gesetzlichen Bestimmungen in Ihrem Land. Bildaufnahmen von durch Copyright geschützten Objekten sind verboten. -
Page 58: Beschreibung Der Teile
BESCHREIBUNG DER TEILE GERÄTE VORERSEITE 2.1.1 TYP 1093/002AHD UND TYP 1093/524 DVR GERÄTE VORERSEITE 14 15 Taste/Anzei Funktion Beschreibung Leuchtet die Anzeige “Grün” ist das Gerät im Normalzustand Power eingeschaltet. IR receiver Empfängt das IR Signal von der Fernbedienung. HDD indicator Blinkt die Anzeige “Rot”, ist die Festplatte aktiv (lesen/schreiben). -
Page 59: Typ 1093/003Ahd Und Typ 1093/525-527 Dvr Geräte Vorerseite
2.1.2 TYP 1093/003AHD UND TYP 1093/525-527 DVR GERÄTE VORERSEITE 16 17 Taste/Anzeige/Anschluss Symbol Funktion & Beschreibung Leuchtet die Anzeige “Grün” ist das Gerät im Spannungsanzeige Normalzustand eingeschaltet. IR Empfänger Receives IR signal from Remote Controller When the “Red” indicator flashes it means the hard HDD Anzeige drive is being read or written to. -
Page 60: Typ 1093/526-528 Dvr Geräte Vorderseite
2.1.3 TYP 1093/526-528 DVR GERÄTE VORDERSEITE Tastenname/Bezeichnung Symbol Funktion Blinkt die Anzeige “Rot”, ist HDD Anzeige Festplatte aktiv (lesen/schreiben). Anzeigen Leuchtet die Anzeige “Grün” Spannungsanzeige Gerät Normalzustand eingeschaltet. Empfängt das IR Signal von IR Empfänger der Fernbedienung. Enter into main menu / Exit Menü... -
Page 61: Geräte Rückseite
TYP 1093/002AHD DVR RÜCKSEITE 2.2.2 TYP 1093/003AHD DVR RÜCKSEITE Pos. Anschluss Anschlussart Anschluss CH1-CH4 für DVR Typ 1093/002AHD, CH1- Videoeingänge CH8 für DVR Typ 1093/003AHD (BNC Schnittstelle). Audioeingänge 4 Kanal Audioeingang (RCA Schnittstelle); Audioausgang Audioausgang (RCA-Schnittstelle). Schnittstelle für USB-Geräte wie z. B. eine USB-Maus. -
Page 62: Typ 1093/524 Dvr Rückseite
2.2.3 TYP 1093/524 DVR RÜCKSEITE 2.2.4 TYP 1093/525-527 DVR RÜCKSEITE Pos. Anschluss Anschlussart Anschluss CH1-CH4 für DVR Typ 1093/524, CH1-CH8 für DVR Videoeingänge Typ 1093/525-527 (BNC Schnittstelle). 4 Kanal Audioeingang (RCA Schnittstelle) für Typ 1093/524; Audioeingänge 8 Kanal Audioeingang (RCA Schnittstelle) für Typ 1093/525-527; Audioausgang Audioausgang (RCA-Schnittstelle). -
Page 63: Typ 1093/526-528 Dvr Rückseite
2.2.5 TYP 1093/526-528 DVR RÜCKSEITE Pos. Anschluss Anschlussart Videoeingänge Anschluss CH1-CH16 (BNC Schnittstelle). Audioeingänge 8CH Audioeingänge CH1-CH8 (RCA Schnittstelle) Anschlussbuchse für Audiokabel mit Anschlüssen CH9-CH16 Audioeingänge (RCA) Audioausgang Audioausgang (RCA Schnittstelle); Schnittstelle für USB-Geräte wie z. B. eine USB-Maus. USB Port Hochauflösender HDMI-Ausgang. -
Page 64: Fernsteuerung Für Ahd Dvrs 4 Kanäle Und 8 Kanäle
FERNSTEUERUNG FÜR AHD DVRS 4 KANÄLE UND 8 KANÄLE Taste Beschreibung Kanalwahl 1-8 ; Numerische Tasten Numerische Tasten; Durch Betätigen der Taste “0” besteht die Möglichkeit zur Umschaltung, 9、 、 、 、 0 der OSD-Menü-Anzeige zwischen VGA- und BNC Ausgang. Vorschau aller Kanäle Menu Zugang/Verlassen des Hauptmenüs... -
Page 65: Fernbedienung Typ 1093/526 Und Typ 1093/528
FERNBEDIENUNG TYP 1093/526 UND TYP 1093/528 Key Title Key Function Starten der manuellen Aufnahme. SEARCH Zugang zum Aufnahme-Suchmenü 2× × × × 2 Quad-Anzeige 3× × × × 3 9 Kanal-Anzeige 4× × × × 4 16 Kanal-Anzeige AUTO Sequenz-Anzeige Kanalauswahl;... - Page 66 TYPE Function Gehen Sie im Menü Verriegelungsmodus in das Dialogmenü und klicken auf irgendein Untermenü, Anmeldefenster anzuzeigen. Gehen Menü Entriegelungsmodus in das Dialogmenü und klicken dann die linke Taste, um direkt in irgendein Untermenü zu gelangen. Nachdem Sie im Hauptmenü sind, kommen Sie durch Klicken der linken Taste in jedes Untermenü.
-
Page 67: Einfache Startprozedur
EINFACHE STARTPROZEDUR WARNUNG WARNUNG! ! ! ! WARNUNG WARNUNG Dynamic 2.0 AHD DVR Series ist kompatibel mit AHD Kameras und Standard Analog Kameras. Besteht eine gemischte Installation von AHD und Analogen Kameras, müssen die Kameras nach folgender Regel angeschlossen werden: Je nach angeschlossener Kamera (AHD oder Analog-Technologie) an den jeweiligen Kanaleingängen (Kanal1, Kanal3, Kanal5,..) unterstützt der nachfolgende Kanal (Kanal2, Kanal4, Kanal6,..) nur eine angeschlossene Kamara gleicher Technologie. -
Page 68: Basis Konfiguration
BASIS KONFIGURATION MONITOR AUSWAHL Diese Funktion erlaubt die Umschaltung des OSD-Menüs zwischen dem HDMI und/oder des VGA Ausgangs. HDMI/VGA Auflösung auf 1920x1080 pixel einstellen und Monitore an beide Ausgänge am DVR anschließen. Nun besteht die Möglichkeit das OSD-Menü auf beiden Monitoren darzustellen, wenn der Monitor der an den VGA.-Ausgang angeschlossen ist die Auflösung 1920x1080pixel unterstützt. -
Page 69: Aufnahmeparameter
AUFNAHMEPARAMETER Auswahl [Hauptmenü Aufnahme] um in das Aufnahmemenü zu gelangen. Folgende Funktionen stehen zur Verfügung: Das Menü [Zeitplan] erlaubt die Aufnahmeoptionen: 24 Stunden im Normalmodus, bei Bewegung, Alarm; der Zeitplan kann dabei benutzerdefiniert angelegt werden. Ebenfalls ist es möglich Aufnahmeoptionen zu mischen, das heißt in der selben Zeitleiste eine normale Aufnahmezeit mit zum Beispiel einer Alarmaufnahme. -
Page 70: Erweiterte Konfigurationen
ERWEITERTE KONFIGURATIONEN FESTPLATTENKONFIGURATION Auswahl [Hauptmenü Gerät HDD] um die Konfiguration der Festplatte auszuführen, überprüfen Sie dabei folgende Optionen: ÜBERSCHREIBEN: Bei Auswahl “AUTO”, werden wenn die Festplatte voll ist, die ältesten Aufnahmen automatisch überschrieben. Ebenfalls besteht die Möglichkeit Tage (1, 2, 3 7, 30 oder nur am Wochendende) vorzugeben, nach welchen die Festplatte wieder überschrieben werden soll. -
Page 71: Dvr-Verbindung Zum Web
BEACHTEN: Es wird dringend empfohlen, die auf der Festplatte gespeicherten Dateien zu sichern (Backup) bevor ein Firmware-Upgrade durchgeführt wird. Nach Abschluss des Upgrades sollten die Dateien mit der Player- Software aus der alten Firmware Version abgespielt werden können. Nach Rücksetzung auf die Werkseinstellungen bitte die Basis-Konfigurationen (Sprache, Datum, Zeit, Videoausgang und Aufnahmeparameter) neu ausführen! DVR-VERBINDUNG ZUM WEB Der DVR kann nur Verbindung zum Internet (mit oder ohne DDNS)wenn der Internet Provider eine öffentliche IP-... - Page 72 Automatischer Modus: Wird die UPnP Funktion unterstützt und ist im Router freigegeben, einfach im DVR unter “Menü Netzwerk” diese Funktion unter UPnP freigeben. Manueller Modus: Wird die UPnP nicht unterstützt, muss die Port-Weiterleitung (oder der Virtuelle Server) manuell im Router eingestellt werden. WICHTIGER HINWEIS: Die Firewall einiger Router kann die Port-Weiterleitung blockieren.
-
Page 73: Zugriff Auf Den Dvr Über Den Ie Via Ip-Adresse, Url Oder Das Urmet Ddns Portal
ZUGRIFF AUF DEN DVR ÜBER DEN IE VIA IP-ADRESSE, URL ODER DAS URMET DDNS PORTAL Befolgen sie die wie nachfolgend beschrieben die Konfigurierung und den Zugriff des DVRs über den Internet Explorer. Der Zugriff kann über drei Arten erfolgen: Direkter Zugriff über das LAN: Den Internet Explorer starten, Eingabe der IP-Adresse und des Ports des DVRin der Adressleiste: http://IP Adresse:HTTP Port (z. - Page 74 Klicken Sie auf “Seiten (Sites)…” Das folgende Fenster erscheint. Fügen Sie die IP Adresse des Gerätes (um die Adresse anzuzeigen drücken Sie “F2” auf der Vorderseite des Gerätes) in dem Feld “Diese Webseite zur Zone hinzufügen” hinzu. Klicken Sie auf “Hinzufügen”. Das folgende Bestätigungsfenster erscheint.
- Page 75 WICHTIGER HINWEIS Wählen Sie nicht “Für Seiten dieser Zone ist eine Serverüberprüfung (https:) erforderlich“. Klicken Sie mehrmals auf “OK” um diese Eingabe zu beenden. Fahren Sie mit der Installation von “ActiveX” fort. Schliessen Sie nach erfolgreicher Installation den Internet Explorer und öffnen Sie diesen wieder. WICHTIGER HINWEIS Sie können nach der Installation von “ActiveX “...
-
Page 76: Iuvs Software Mobile
IUVS SOFTWARE MOBILE URMET iUVS ist eine Mobiltelefon CCTV Applikation entwickelt für das iOS und Android Betriebssystem. Diese App ist kompatibel zu URMET H.264 DVRs New Dynamic & Video Smart Serie, Evolution 2.0 DVR Serie, HD-SDI DVR Serie, NVR Boost 2.0 Serie and Dynamic 2.0 AHD DVR Serie mit der Firmware 3.1 oder höher. Hauptmerkmale Nachfolgend die Hauptmerkmale der App iUVS: Live Audio/Video Darstellung von bis zu 4 Kanälen... - Page 77 HINWEIS: Es muss der Datenport (z.B 9000) eingetragen werden, damit die App ordnungsgemäß arbeitet. Wird in der App der Mobile Port eingegeben, kann die App keine Verbidnung zum DVR aufbauen. Um ein Gerät zu löschen, das Gerät auswählen und mit Löschen (Delete) bestätigen. Live Videoanzeige Anklicken der Schaltfläche Live Monitor im Hauptmenü...
-
Page 78: P2P Funktion
P2P FUNKTION Schließen Sie bitte die gewünschte Kamera an den jeweiligen BNC Eingangskanal an Schließen Sie die Maus an die USB-Schnittstelle an. Schließen Sie den VGA-/HDMI-Monitor an den VGA- bzw. HDMI-Videoausgang an, um die angeschalteten Kameras anzuzeigen. Stecken Sie das Netzwerkkabel in die LAN-Buchse. Schließen Sie den DVR mit dem mitgelieferten Netzteil an das Stromnetz an und schalten Sie das Gerät ein. - Page 79 Füllen Sie die Felder „Gerätename“ und „Typ“ → „Device ID“ aus. Tippen Sie auf den QR-Code neben „Device ID“ (installieren Sie eine entsprechende App zum Einlesen von QR- Codes, falls nicht vorhanden), und lesen Sie den QR-Code auf dem Gehäuse des DVR ein. Tragen Sie unter „Password“...
- Page 80 Privacidad y Copyright ..........................83 Descripción de los componente ......................84 Panel Frontal ........................84 2.1.1 Panel frontal de los DVR 1093/002AHD y 1093/524 ................... 84 2.1.2 Panel frontal de los DVR 1093/525-527 ...................... 85 2.1.3 Panel frontal de los DVR 1093/526-528 ...................... 86 Panel posterior ........................
-
Page 81: Información General
En este documento se describe cómo instalar y utilizar los grabadores de vídeo digital Dynamic 2.0 Serie Ref. 1093/002AHD, 1093/003AHD, 1093/524, 1093/525, 1093/526, 1093/527 y 1093/528 de URMET. Lea con atención esta guía rápida, ya que contiene información sobre el uso correcto y seguro de los dispositivos. -
Page 82: Comprobación Del Paquete
Alimentador ENTRADA 100-240 VAC, 50/60 Hz 1,5 A máx. ⇒ • SALIDA 12 VDC, 2 A, para 1093/002AHD-003AHD, 1093/524, 1093/525-527 ⇒ • 12 VDC, 5 A, para 1093/526 y 1093/528 ⇒ Guía rápida CD-ROM que incluye el software Urmet y manuales de usuario Ratón... -
Page 83: Disco Duro
1.3.7 PRIVACIDAD Y COPYRIGHT Los grabadores de vídeo digital 1093/002AHD, 1093/003AHD, 1093/524, 1093/525, 1093/526, 1093/527 y 1093/528 son equipos para sistemas CCTV. La grabación de imágenes está sujeta a la legislación vigente en cada país. No se permite grabar imágenes que estén protegidas por derechos de autor. -
Page 84: Descripción De Los Componente
DESCRIPCIÓN DE LOS COMPONENTE PANEL FRONTAL 2.1.1 PANEL FRONTAL DE LOS DVR 1093/002AHD Y 1093/524 14 15 17 16 N.º Función Tecla Descripción El indicador se ilumina de color verde para indicar que el sistema está Encendido correctamente alimentado Receptor Recibe las señales de infrarrojos desde el mando a distancia... -
Page 85: Panel Frontal De Los Dvr 1093/525-527
2.1.2 PANEL FRONTAL DE LOS DVR 1093/525-527 15 16 17 19 18 N.º Rótulo o indicador Símbolo Función y descripción Indicador Si el indicador se ilumina en color verde, el sistema se ha encendido encendido correctamente Receptor Recibe la señal de IR del mando a distancia infrarrojos Indicador de disco Cuando parpadea en color rojo, indica que se está... -
Page 86: Panel Frontal De Los Dvr 1093/526-528
2.1.3 PANEL FRONTAL DE LOS DVR 1093/526-528 Rótulo o N.º Tipo Símbolo Función indicador Cuando parpadea en color rojo, indica Indicador de que se está leyendo o grabando en el disco duro disco duro Indicador Si el indicador se ilumina en color verde, Indicador de sistema encendido... -
Page 87: Panel Posterior
N.º Conector Método de conexión Conexión de entrada desde el equipo de vídeo: canales 1 a 4 para DVR 1093/002AHD, o canales 1 a 8 para DVR Entradas de vídeo 1093/003AHD (virtual) (conectores BNC). Entradas de audio 4 canales de entrada de audio (conector RCA) -
Page 88: Panel Posterior Del Dvr 1093/524
2.2.3 PANEL POSTERIOR DEL DVR 1093/524 2.2.4 PANEL POSTERIOR DEL DVR 1093/525-527 N.º Conector Método de conexión Conexión de entrada desde el equipo de vídeo: canales 1 a 4 para DVR 1093/524, o canales 1 a 8 para DVR 1093/525-527 (virtual) Entradas de vídeo (conectores BNC). -
Page 89: Panel Posterior Del Dvr 1093/526-528
2.2.5 PANEL POSTERIOR DEL DVR 1093/526-528 N.º Conector Método de conexión Entradas de vídeo Conexión de la entrada de vídeo a CH1-CH16 (conector BNC) Entradas de audio 8 canales de entrada de audio CH1-CH8 (conector RCA) Entradas de audio Conector para cable de audio CH9-CH16 (conector RCA) Salida de audio Salida de audio (conector RCA) Conexión de un ratón USB... -
Page 90: Mando A Distancia Para Los Dvr Ahd De 4 Y 8 Canales
MANDO A DISTANCIA PARA LOS DVR AHD DE 4 Y 8 CANALES N.º Botón Función del botón Seleccionar canales 1 a 8; botones numéricos Botones numéricos. Pulsar “0” para cambiar el menú de salida de monitor Modo de visualización múltiple Menu Entrar o salir del menú... -
Page 91: Mando A Distancia Del Dvr 1093/526 Y 1093/528
MANDO A DISTANCIA DEL DVR 1093/526 Y 1093/528 Botón Función del botón Pulsar el botón para iniciar manualmente la grabación. Pulsar el botón para entrar en el menú de SEARCH búsqueda de grabaciones. 2×2 Visualización de 4 imágenes en pantalla 3×3 Visualización de 9 imágenes en pantalla 4×4... -
Page 92: Funcionamiento Con El Ratón
FUNCIONAMIENTO CON EL RATÓN Además de los botones del panel frontal o del mando a distancia, también puede emplear el ratón para realizar operaciones del sistema. TIPO Función En el modo bloqueado, permite acceder al menú emergente y seleccionar cualquiera de los submenús para abrir el menú... -
Page 93: Instalación Básica Del Equipo
INSTALACIÓN BÁSICA DEL EQUIPO ATENCIÓN ATENCIÓN! ! ! ! ATENCIÓN ATENCIÓN Esta Dynamic 2.0 DVR AHD Serie soporta también cámaras analógicas con resolución estándar. En el caso de instalaciones mixtas, las cámaras deben conectarse a las entradas del grabador teniendo en cuenta la siguiente regla: Si se conecta una cámara en un canal impar (sea tecnología AHD o analógica estándar) el canal sucesivo debe tener conectada una cámara con la misma tecnología. -
Page 94: Configuración Básica
CONFIGURACIÓN BÁSICA SELECCIÓN DEL MONITOR Esta función permite llevar el menú OSD a la salida de vídeo HDMI y/o a la salida de vídeo VGA. Al configurar la resolución HDMI/VGA a 1920x1080 y conectar las dos salidas de vídeo (VGA y HDMI) del DVR, se podrá... -
Page 95: Parámetros De Grabación
PARÁMETROS DE GRABACIÓN Seleccione [Menú principal Grabar] para entrar en el menú [Grabar]. Las posibles funciones son las siguientes: El menú [Horario] permite seleccionar las opciones de grabación: 24 horas o Normal, grabación por detección de movimiento, o disparo de alarma. Se pueden personalizar los horarios. También es posible programar las opciones de grabación Normal y Alarma con el mismo horario. -
Page 96: Configuración Avanzada
CONFIGURACIÓN AVANZADA CONFIGURACIÓN DEL DISCO DURO (HDD) Seleccione [Menú principal Equipo HDD], configure el disco duro de acuerdo con sus necesidades y compruebe las siguientes opciones: SOBRESCRIBIR: Si selecciona la opción “AUTO”, el sistema sobrescribirá automáticamente las grabaciones más antiguas cuando se llena el disco duro; de esta manera, podrá establecerse el número de días que las grabaciones se guardarán en el disco duro. -
Page 97: Conexiòn Del Dvr A La Web
CONEXIÒN DEL DVR A LA WEB Puede accederse al DVR a través de internet (con o sin DDNS) sólo si el proveedor de servicios de internet asigna al router una dirección IP pública (estática o dinámica). Por tanto, es recomendable que primero compruebe este importante detalle con su proveedor de internet. - Page 98 Configuración del puerto En este punto, deben reenviarse las puertas exteriores del router al DVR. La función suele aparecer como "Port- forwarding" o "Servidor Virtual" en el menú de configuración del router. Los puertos establecidos en el router deben coincidir con los del DVR. Establezca otros valores en el DVR si los puertos por defecto del DVR (80, 9000, 18600) ya están ocupados en la tabla de reenvío de puertos del router.
- Page 99 Verifique que la función DDNS está activada y que ha seleccionado el servidor URMETDDNS. Haga clic en el botón Get y espere unos diez segundos para que se genere el ID de DVR. Este ID es necesario para acceder en remoto a través del portal web URMET (ver siguiente figura).
-
Page 100: Acceso A Ie A Travès De La Direccìon Ip, Url O El Portal Ddns De Urmet
ACCESO A IE A TRAVÈS DE LA DIRECCÌON IP, URL O EL PORTAL DDNS DE URMET Siga estas instrucciones para configurar y acceder a las páginas web del dispositivo en el navegador Internet Explorer. Puede accederse a la web de 3 maneras: Acceso directo por la LAN: inicie Internet Explorer y escriba en la barra de direcciones la dirección IP del DVR y el puerto HTTP del DVR con el siguiente formato: http://dirección IP:Puerto http (p. - Page 101 Seleccione "Sitios de confianza". Haga clic en "Nivel personalizado" y compruebe que el nivel de protección sea "Bajo". Si no es así, seleccione "Bajo" y haga clic en "Restablecer", tal y como se muestra en la figura. Pulse Aceptar para confirmar. Haga clic en "Sitios".
-
Page 102: Iuvs Software Mobile
Después de instalar el control ActiveX, se mostrará una de las dos pantallas siguientes, en función del tipo de acceso: Acceso directo al dispositivo Acceso a través del portal DDNS de URMET Para cualquiera de los dos casos, rellene los campos necesarios: User Name, Password y Client Port. A continuación, seleccione el idioma y el tipo de stream. - Page 103 Añadir o quitar dispositivos El administrador de dispositivos (Device manager) le permite añadir, quitar dispositivos, y también modificar las propiedades de un dispositivo. Seleccione "Device Manager" del menú principal para abrir esta ventana: Para añadir un nuevo dispositivo, pulse el botón "Add" de la esquina superior derecha. Ahora podrá introducir el nombre del dispositivo, la dirección (Device ID de cuenta DDNS de Urmet , IP o nombre de dominio), el puerto, el nombre de usuario y la contraseña, etc.
-
Page 104: Función P2P
Pulse para abrir la lista de dispositivos, como se muestra en la figura siguiente. Al seleccionar un dispositivo, se abrirán todos sus canales automáticamente. 2. Abrir un canal Pulse el botón de aspa en la ventana para entrar en la ventana de lista de canales; a continuación, seleccione un canal para abrirlo en la ventana anterior. - Page 105 En el menú principal del DVR, seleccione Sistema > Usuarios para habilitar y personalizar la contraseña de admin y/o un usuario. Descargue e instale la aplicación iUVS desde Google Play. Ejecute la aplicación iUVS y seleccione Devices > Add (Dispositivo > Añadir). DS1093-144...
- Page 106 Rellene los campos Device name (Nombre de dispositivo) y Type > Device ID (Tipo > Id. de dispositivo). Seleccione el código QR cerca de Device ID (si es necesario, instale la aplicación necesaria para leer códigos QR) y escanee el código QR de la carcasa del DVR Escriba en el campo Password la contraseña ya introducida en el DVR, y seleccione Save (Guardar).
- Page 107 DS1093-144...
- Page 108 DS1093-144 Area tecnica URMET S.p.A. servizio clienti +39 011.23.39.810 10154 TORINO (ITALY) http://www.urmet.com VIA BOLOGNA 188/C e-mail: info@urmet.com Telef. +39 011.24.00.000 (RIC.AUT.) +39 011.24.00.300 - 323 MADE IN CINA DS1093-144...
Need help?
Do you have a question about the 1093/002AHD and is the answer not in the manual?
Questions and answers