Intermec EasyCoder 3400 User Manual
Bar code label printer
Hide thumbs
Also See for EasyCoder 3400:
- User manual (160 pages) ,
- Getting started manual (15 pages) ,
- Quick start manual (14 pages)
Table of Contents
Advertisement
Advertisement
Table of Contents
Troubleshooting

Related Manuals for Intermec EasyCoder 3400


Summary of Contents for Intermec EasyCoder 3400
- Page 1 User's Manual 3400, 3440, and 3600 Bar Code Label Printer...
- Page 2 The information contained herein is proprietary and is provided solely for the purpose of allowing customers to operate and service Intermec-manufactured equipment and is not to be released, reproduced, or used for any other purpose without written permission of Intermec.
- Page 3 This page records changes to this document. The document was originally released as version 001. Version Date Description of Change 10/2003 Updated the user’s manual to include the EasyLAN 10i2 adapter accessory. 3400, 3440, and 3600 Bar Code Label Printer User’s Manual...
- Page 4 3400, 3440, and 3600 Bar Code Label Printer User’s Manual...
-
Page 5: Table Of Contents
Loading Roll Media for Straight-Through Printing ...18 Loading Media for Self-Strip Printing ...20 3400, 3440, and 3600 Bar Code Label Printer User’s Manual What the Hardware Configuration Test Label Tells You ...8 If a Hardware Configuration Test Label Does Not Print ...8 Connecting the Printer to a PC Serial Port ...9... - Page 6 Contents Loading Thermal Transfer Ribbon ...22 Setting the Media Sensitivity Number ...25 Setting the MSN for Intermec Media and Ribbon...26 Setting the MSN for Other Media and Ribbon ...26 Communicating With the Printer...28 Using the PrintSet Software...29 Using Third-Party Software...29 Using Intermec Printer Language (IPL) Commands ...29...
- Page 7 Using Forms Adjust...65 Specifications ... 69 Printer Specifications ...70 3400 Specifications...71 3440 Specifications...74 3600 Specifications...76 3400, 3440, and 3600 Bar Code Label Printer User’s Manual ... 55 X Forms Adjust ...66 Y Forms Adjust...67 Electrical Requirements ...70 Environment ...70 Communications ...70 Printing Method...70...
- Page 8 Media ...77 3400 Printer ...78 3440 Printer ...78 3600 Printer ...78 Twinax Interface...79 Coax Interface ...79 Centronics Parallel Interface ...79 EasyLAN 10i2 Adapter...79 Cutter...79 Batch Takeup ...80 Self-Strip Printing...80 ... 93 3400, 3440, and 3600 Bar Code Label Printer User’s Manual...
- Page 9 Full ASCII Table ... 103 Full ASCII Table ...104 Full ASCII Control Characters Table ...106 Glossary ... 107 Index ... 115 3400, 3440, and 3600 Bar Code Label Printer User’s Manual Helv Condensed Contents...
- Page 10 *1233* Contents 3400, 3440, and 3600 Bar Code Label Printer User’s Manual...
-
Page 11: Before You Begin
Safety Summary Your safety is extremely important. Read and follow all warnings and cautions in this document before handling and operating Intermec equipment. You can be seriously injured, and equipment and data can be damaged if you do not follow the safety warnings and cautions. -
Page 12: Global Services And Support
Web Support Visit the Intermec web site at http://www.intermec.com to download our current manuals in PDF format. To order printed versions of the Intermec manuals, contact your local Intermec representative or distributor. Visit the Intermec technical knowledge base (Knowledge Central) at http://intermec.custhelp.com to review technical information or to request... -
Page 13: Who Should Read This Document
The Intermec web site at http://www.intermec.com contains our documents that you can download in PDF format. To order printed versions of the Intermec manuals, contact your local Intermec representative or distributor. 3400, 3440, and 3600 Bar Code Label Printer User’s Manual Helvetica Condensed Helvetica In the U.S.A. - Page 14 *1233* Before You Begin 3400, 3440, and 3600 Bar Code Label Printer User’s Manual...
-
Page 15: Getting Started
Getting Started This chapter introduces the 3400 (A, B, C, and D), 3440, and 3600 printer and explains how to get your new printer running for the first time. This chapter covers these topics: • Learning about the printer • Preparing the printer for installation •... -
Page 16: Using This Manual
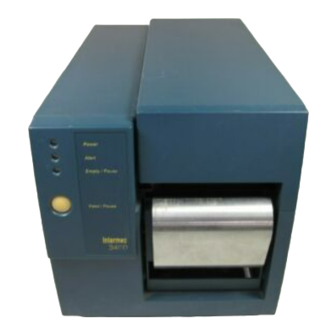
Chapter 1— Getting Started Using This Manual Use this manual to learn about your Intermec 3400, 3440, or 3600 printer. Although the three printers are almost identical in form and function, they do have some small differences. Throughout this manual you will find these icons next to information that pertains to a specific printer model. - Page 17 Empty/Pause button Feed/Pause button Printer front view: This illustration shows the features on the front of the printer. Media window Printer back view: This illustration shows the features on the back of the printer. Several options are available for use with your printer. See Appendix A, “Specifications,”...
-
Page 18: Preparing The Printer For Installation
• open the printer and load media. • print a configuration test label. Plugging In the Printer The back of your printer contains the AC power receptacle, the serial communications port, the On/Off switch, and two banks of DIP switches. To plug in the printer 1 Turn the On/Off switch to the off position. -
Page 19: Opening The Printer
3 Plug the AC power cord into the receptacle at the rear of the printer. Plug the other end of the power cord into a grounded wall outlet or surge protector. 4 Turn the On/Off switch to the on position. When you power on the printer, the Power On LED lights, the Empty/Pause LED flashes, and the platen roller advances. - Page 20 3 Move the supply roll retainer by turning it counterclockwise and sliding it to the outer end of the supply post. 4 Place the fanfold media slightly lower than the slot in the printer back cover. Line the (box of) fanfold media up with the label path through the printer.
-
Page 21: Printing The Hardware Configuration Test Label
10 Close the printer by reversing the directions for removing the cover. 11 Press Feed/Pause to advance one label through the printer and out the label opening in the front cover. The printer is now ready to print the configuration test label. The yellow Empty/Pause LED goes out. -
Page 22: What The Hardware Configuration Test Label Tells You
Chapter 1— Getting Started 4 Turn the printer power off and then on. You are now ready to connect your 3400, 3440, or 3600 printer to your system. What the Hardware Configuration Test Label Tells You The hardware test label provides these statistics: •... -
Page 23: Connecting Your Printer To A Pc
• 25-pin printer to 25-pin serial port null modem (P/N 048668) • 25-pin printer to 9-pin serial port null modem (P/N 048693) You cannot order an Intermec cable for the RS-422 interface, but there is a schematic on page 101 that you can use to purchase or make your own cable. -
Page 24: Connecting The Printer To A Pc Parallel Port
If you are using a parallel port to communicate with your printer, you need a parallel cable to run between the printer and the PC. You can purchase a parallel cable from Intermec (P/N 051211) or from your local computer store. See “Parallel Interface Pin Descriptions” on page 80 for pin descriptions of the parallel cable connector. -
Page 25: Connecting The Printer To A Mainframe
• Connect the printer chassis ground to the building ground. You will find the chassis ground on the ground pin of the printer power cord. If you need help eliminating noise, ask your Intermec representative for assistance. Configuring the Serial Port for Communications You need to configure the serial port of the printer to match the configuration of your PC or network controlling device. - Page 26 For example, if you want to change the media type to thermal transfer, set DIP switch 8 on the bottom bank of switches to the on position. 3 Turn the printer power off and then on for the configuration changes to take effect.
-
Page 27: Verifying Printer Communications With Your System
After connecting the printer to your system, you need to test communications. The easiest way to test communications is to set the printer to Data Line Print mode, which is part of Test and Service mode, and send a character string down from your system. - Page 28 Note: An example of using DOS to verify printer communications follows this procedure. 6 To enter normal Print mode, turn the printer power off and then on again. If this procedure does not work, make sure that the DIP switches match the serial port configuration of the system and that you have the printer cable securely plugged into the correct port of your system.
-
Page 29: Operating The Printer
Operating the Printer Use this chapter to understand how to use the printer front panel, load roll media and media for self-strip printing, set the media sensitivity number, and communicate with the printer. This chapter covers these topics: • Understanding the front panel •... -
Page 30: Learning How To Operate The Printer
Feed/Pause button. Front panel: This illustration shows the front panel LEDs and the Feed/Pause button. Understanding the Front Panel LEDs You can use the front panel LEDs to monitor the status of the printer and troubleshoot the printer. Helvetica Condensed Helvetica... -
Page 31: Using The Feed/Pause Button
Green LED Orange LED Yellow LED LED states: This illustration shows what each LED state indicates. Note: The green LED on the 3600 printer front panel reads Power. It does not flash to indicate receiving data. LED States for Problems Problem... -
Page 32: Loading Media Into The Printer
• Self-strip printing with roll media • Fanfold printing (See “Loading Media for Fanfold Printing” on page 5.) You can load media with the printer power turned on or off. The following procedures for loading media assume that you have turned the... - Page 33 If you are using a narrow roll of media, less than 7.62 centimeters (3 inches), insert the media support between the roll of media and the supply roll retainer before securing it. Note: The 3600 printer does not require the use of the media support. Media Media...
-
Page 34: Loading Media For Self-Strip Printing
066396) for help. 10 Press Feed/Pause to advance several inches of media through the printer and out the label opening in the front cover. Your printer is now ready to print labels. Note: Refer to the label located on the inside of the media cover for directions on loading media. - Page 35 If you are using a narrow roll of media, less than 7.62 centimeters (3 inches), insert the media support between the roll of media and the supply roll retainer before securing it. Note: The 3600 printer does not require the use of the media support. Media liner...
-
Page 36: Loading Thermal Transfer Ribbon
Refer to the next section, “Setting the Media Sensitivity Number,” for more information. If you have a 3400 printer, the core of your thermal transfer ribbon is either made of cardboard or plastic. You need to use the correct core- locking brackets for your ribbon core. - Page 37 1 Raise the printhead by rotating the head lift lever clockwise until the printhead disengages. 2 Place the empty ribbon core that came with the printer onto the ribbon rewind hub. 3 Detach the leader from the new thermal transfer ribbon roll and unwind the end of the ribbon approximately 20.32 centimeters (8 inches).
- Page 38 Chapter 2— Operating the Printer Thermal transfer 5 Route the ribbon leader through the printer mechanism as shown in the above illustration. Make sure the ribbon runs above the upper media guide. The shiny side of the ribbon must come in contact with the printhead.
-
Page 39: Setting The Media Sensitivity Number
Intermec has developed heating schedules (the amount of heat required to image a label) to produce the highest possible print quality for Intermec media and ribbon combinations on Intermec printers. Look for the three-digit media sensitivity number on: •... -
Page 40: Setting The Msn For Intermec Media And Ribbon
Thermal transfer ribbon Setting the MSN for Other Media and Ribbon If you are not using Intermec media and ribbon, or you misplaced your packaging with the three-digit sensitivity number label on it, you can set the approximate sensitivity number. The first column of the Direct... - Page 41 100 Series Low Sensitivity 800 Series High Sensitivity (Paper) 600 Series Medium Sensitivity (Paper) 3400, 3440, and 3600 Bar Code Label Printer User’s Manual Helvetica Condensed Helvetica Chapter 2— Operating the Printer Sensitivity Setting Direct Thermal Media Duratherm Lightning Plus - 2...
-
Page 42: Communicating With The Printer
Downloading is the universal term used to describe the transfer of information from the host to any connected peripheral device, such as your printer. When you transfer data from your printer to the PC or host, you are performing a process called uploading. -
Page 43: Using The Printset Software
You can create labels by downloading formats (designs) and data with IPL commands. You can use the printer to perform any function or activate any feature of the printer except for those features or functions that you set with the DIP switches. See the IPL Programming Reference Manual (P/N 066396) for more information. - Page 44 Chapter 2— Operating the Printer 4 Select either the Text or the Bar Code option button. If you select to print text, you can choose any font in the Select Printer Font list box. If you select to print a bar code, you can choose any symbology in the Select Symbology list box.
-
Page 45: Maintaining The Printer
Maintaining the Printer This chapter explains how to clean and maintain the printer. Even though the printer can withstand harsh environments, you must clean it on a regular basis to maximize performance. It is very important to perform the maintenance procedures if you expose the printer to dirt or debris. This chapter covers these topics: •... -
Page 46: Inspecting The Printer
Clean your printer regularly to maintain the quality of your labels and extend the life of your printer. This table contains suggestions for cleaning the printer. Use the illustration to locate the parts you need to clean. Printer Maintenance Schedule... - Page 47 Label taken sensor Tear bar Printer parts: This illustration shows the printer parts that need to be cleaned. For a maintenance schedule of each part, see the Printer Maintenance Schedule table on pages 32-33. Switch off the printer power and remove the power cord before cleaning any part of the printer.
-
Page 48: Cleaning The Printhead
This raises the printhead so that you can clean it. 4 Remove the media and ribbon. 5 Open pouch and remove cleaning card. 6 Insert cleaning card into the printer following the media path. Cleaning card Head lift... - Page 49 7 Engage the printhead by rotating the head lift lever counterclockwise until it locks in place. 8 Use one hand to hold the printer and use the other hand to pull the cleaning card forward until you have pulled the entire card through the media path.
-
Page 50: Cleaning The Printer Covers
Cleaning the Printer Covers Use a general purpose cleaner (soapy water/mild detergent) to clean the printer covers. Do not use abrasive cleansers or solvents. Be sure to clean the transparent panel on the media cover so that the media supply inside the printer is visible when you close the cover. -
Page 51: Cleaning The Media Guides And Media Path
Always clean the media guides immediately after a label jam in the printer. To clean the media guides and media path 1 Turn the On/Off switch to the off position and remove the power cord. -
Page 52: Cleaning The Label Sensors
5 Clean the label taken sensor with a cotton swab moistened with isopropyl alcohol. Cotton swab Drive roller Lower media guide Label taken sensor Label mark sensor Upper media guide (underside) Cleaning brush Label gap sensor 3XXXU.036 3400, 3440, and 3600 Bar Code Label Printer User’s Manual... - Page 53 8 Replace the media and ribbon. 9 Engage the printhead by rotating the head lift lever counterclockwise until it locks in place. 10 Replace the media cover. 3400, 3440, and 3600 Bar Code Label Printer User’s Manual Chapter 3— Maintaining the Printer...
- Page 54 Chapter 3— Maintaining the Printer 3400, 3440, and 3600 Bar Code Label Printer User’s Manual...
-
Page 55: Troubleshooting
Troubleshooting This chapter provides some hints for troubleshooting error messages that the printer sends to the host and problems you may experience with the printer. • Troubleshooting checklist • Printer operation problems • Printer quality problems • Communication problems • Preventing data loss... -
Page 56: Troubleshooting Checklist
Chapter 4— Troubleshooting Troubleshooting Checklist Even though Intermec designed your printer to operate under harsh conditions, you may still encounter a printer operation, print quality, or communication problem at some time. You can easily fix most of the errors you encounter and consequently not delay operation of the printer for very long. - Page 57 Corrupt or incorrect information in communicating, not printer memory. printing, or not printing properly. 3400, 3440, and 3600 Bar Code Label Printer User’s Manual Chapter 4— Troubleshooting Solution Use PrintSet to change the image bands or print speed settings. Use PrintSet to change the image bands or print speed settings.
-
Page 58: Print Quality Problems
Printhead” on page 34. Clean the media path. For help, see “Cleaning the Media Guides and Media Path” on page 37. Use only Intermec label and ribbon stock to ensure superior print quality and product performance. Change sensitivity setting to match the type of media you are using. -
Page 59: Communication Problems
Continuous empty/pause The label mark sensor is not in the correct fault light (yellow LED). position. Communication Problems If your printer is not receiving downloaded data, try the solutions in the accompanying table. Communication Problems Symptom Possible Causes Printer does not Serial port is incorrectly configured. - Page 60 Hardware handshaking uses pin 11 or pin 20 of the RS-232 interface to control data flow. When the printer is using Intermec Standard protocol, it holds pins 11 and 20 high when the printer is ready to receive data. The...
-
Page 61: Optimizing Printer Performance
• Optimizing and maintaining print quality • Correcting uneven print quality • Adjusting the print darkness • Adjusting the label mark sensor • Using the printer memory efficiently • Increasing throughput 3400, 3440, and 3600 Bar Code Label Printer User’s Manual Optimizing Printer Performance... -
Page 62: Optimizing And Maintaining Print Quality
Chapter 5— Optimizing Printer Performance Optimizing and Maintaining Print Quality Intermec designed and configured your printer to provide the best possible print quality for both direct thermal and thermal transfer media. However, there are many factors that you need to take into account before you can achieve maximum print quality. -
Page 63: Adjusting The Print Darkness
The fine adjustments compensate for variations in the media (“lot to lot”), the printhead, or the printer. Set the darkness adjust control after you enter the media sensitivity number. -
Page 64: Adjusting The Label Mark Sensor
2 Use your index finger to slide the label mark sensor to the correct position for your media. You can position the label mark sensor anywhere from the inboard edge of the printer to the center of the paper path. -
Page 65: Using The Printer Memory Efficiently
Using the Printer Memory Efficiently To receive the best performance from your printer, you must understand how to use the printer RAM. The following sections can help you determine the most efficient way to use your printer memory. It is important to remember that using a lot of available memory for storage reduces the amount of memory used for imaging. -
Page 66: How Is The Printer Ram Used
There are limits to the number of formats, fonts, graphics, or pages that you can store in the printer. You can define up to 16 fonts, but there may not be enough room depending on the amount of memory being used for other purposes. -
Page 67: What Is An Image Band
The number of image bands (in inches) does not have to equal the length of the label since the printer recycles the image bands. Once the contents of an image band have been printed, it may be reused to image the next section of the label. -
Page 68: Optimizing Image Bands For Batch Printing
If the label prints, the image band setting is optimal. You do not need to perform any more adjustments. If the number of image bands is too low, the printer aborts the label before printing is completed and attempts to reprint the label at the slowest speed (2 ips) with the highest number of image bands. -
Page 69: Using Test And Service Mode
Using Test and Service Mode This chapter explains the different procedures you can perform while the printer is in Test and Service mode. Use Test and Service mode on the printer to print test labels, perform special procedures, and change select configuration commands. -
Page 70: Using Test And Service Mode Procedures
The function the printer is currently executing terminates, and the printer performs the new function. The printer remains in Test and Service mode until you turn the power off and reset the DIP switches. The printer executes all functions as soon as you select them. - Page 71 N: Page/Format/UDC/Font number. Least significant bit first. S: Source Page/Format/UDC/Font number. Least significant bit first. D: Destination Page/Format/UDC/Font number. Least significant bit first. 3400, 3440, and 3600 Bar Code Label Printer User’s Manual Chapter 6— Using Test and Service Mode Top Bank...
-
Page 72: Printing Test Labels
Chapter 6— Using Test and Service Mode Printing Test Labels The printer can print a variety of test print labels that provide you with information about the printer configuration and the quality of the printing. To print a test label 1 Turn the On/Off switch to the off position. -
Page 73: Resetting The Memory On Your Printer
When you set the printer DIP switches to the setting for selective transfer, the printer serial port is set at 19,200 baud, even parity, 1 stop bit, and 8 data bits. Set the receiving printer to these communication settings and power it up in Print mode. - Page 74 4 Hold the Feed/Pause button down for 1 second. The printer resets a portion or all of its memory. 5 To exit Test and Service mode, turn the printer power off and then on. If you have a 3400C printer, you can also reset the entire memory on the printer.
-
Page 75: Setting Configuration Commands In Test And Service Mode
X forms adjust, and Y forms adjust. The printer moves in 5 mil increments or 0.005 inch per dot. If the printer (3440 only) is in 2.5 mil Advanced mode it moves 0.0025 inch per dot. - Page 76 You need to move the label rest point forward 10 dot increments (0.05 inch) so that the printer feeds more label out when it is done printing. Find 10 in the # of Dot Increments column. It...
-
Page 77: Adjusting The Label Rest Point
Use a negative number if you want the printer to retract the label a number of dot increments after it prints the label. Use a positive number if you want the printer to feed the label a number of dot increments after it prints the label. -
Page 78: Setting Emulation Mode
DIP switches to their original settings. Setting Emulation Mode If you are replacing an Intermec 8636 or 8646 printer with a 3400, 3440, or 3600 printer, you can keep your existing network, hardware, software, and label formats by using Emulation mode. The labels produced on your new printer will look like the ones that your old 86XX printer printed. -
Page 79: Using Forms Adjust
4 Press and hold the Feed/Pause button while turning on the printer. The printer prints the hardware configuration label. 5 In the top bank of the Test and Service DIP switches, turn on switches 1 and 3 and turn off switch 2. -
Page 80: Forms Adjust
Each dot increment is 5 mil (0.005 inch). Note: Even though the default setting for the 3440 printer is 2.5 mil, each dot is a 5 mil increment when you use the DIP switches to adjust the label rest point. -
Page 81: Y Forms Adjust
Settings table on page 62 to see how to set the X forms adjust forward or backward a given number of increments. 5 Press the Feed/Pause button. The printer prints out the software configuration label using the new X forms adjust setting. 6 Verify the X forms adjust number on the software configuration label matches the number you set in Step 4. - Page 82 Chapter 6— Using Test and Service Mode 3400, 3440, and 3600 Bar Code Label Printer User’s Manual...
-
Page 83: Specifications
This chapter describes the specifications that are common to the 3400 (A, B, C, and D), 3440, and 3600 printers. For information about the 3400e printer, see the EasyCoder 3400e Bar Code Label Printer User’s Manual (P/N 071881). 3400, 3440, and 3600 Bar Code Label Printer User’s Manual... -
Page 84: Printer Specifications
• Asynchronous RS-232C, RS-422, RS-485 interfaces • Serial ASCII code • Hardware (Ready/Busy) Flow Control • XON/XOFF Protocol • Intermec Standard Block Protocol • Polling Mode D Protocol • Multi-Drop Protocol • Baud Rates: 1,200, 2,400, 4,800, 9,600, 19,200, 38,400, 57,000... -
Page 85: Self-Strip
The self-strip rewinder hub can take up the backing of an entire 152-meter (6,000-inch) roll of media. Peel Release 10-50 grams Note: For the 3400C and 3400D printer, self-strip printing is an option that you order with your printer. Self-strip printing is standard on the 3400A and 3400B. -
Page 86: Printhead
57 mm (2.25 in) maximum 127 mm (5 in) per second 152.4 mm (6 in) per second 50.8 mm (2 in) per second 76.2 mm (3 in) square 76.2 mm (3 in) square 3400, 3440, and 3600 Bar Code Label Printer User’s Manual... -
Page 87: Media
Media dimensions: This illustration shows how to measure the media dimensions. See the next table, Minimum and Maximum Media Dimensions, for specific media dimensions. Minimum and Maximum Media Dimensions Letter 3400, 3440, and 3600 Bar Code Label Printer User’s Manual 3XXXU055.eps Description Minimum Label width 16.5 mm (0.65 in) -
Page 88: 3440 Specifications
51 mm (2.0 in) 76 mm (3.0 in) 104 mm (4.1 in) 57.2 mm (2.5 in), 114.3 mm (4.5 in) maximum 127 mm (5 in) per second 50.8 mm (2 in) per second 3400, 3440, and 3600 Bar Code Label Printer User’s Manual... -
Page 89: Fonts And Graphics
Fonts and Graphics The 3440 printer contains 21 resident bitmap fonts and three outline fonts. You can use font ID 3 through 6 and 8 through 19 to download user-defined fonts. Maximum UDF Maximum UDC Media Minimum and Maximum Media Dimensions Letter 3400, 3440, and 3600 Bar Code Label Printer User’s Manual... -
Page 90: 3600 Specifications
80 mm (3.15 in) 107 mm (4.21 in) 128 mm (5.04 in) 168 mm (6.60 in) 57 mm (2.25 in) maximum 127 mm (5 in) per second 50.8 mm (2 in) per second 3400, 3440, and 3600 Bar Code Label Printer User’s Manual... -
Page 91: Fonts And Graphics
You can use font ID 3 through 6 and 8 through 19 to download user- defined fonts. Maximum UDF or UDC Media Minimum and Maximum Media Dimensions Letter 3400, 3440, and 3600 Bar Code Label Printer User’s Manual 76.2 mm (4 in) square 3XXXU055.eps Description Minimum Label width 76.2 mm (3.0 in) -
Page 92: Printer Options
Appendix A— Specifications Printer Options This page contains a list of the options you can use with the printer along with a brief description. Consult your Intermec representative to order any option. Memory Expansion and Fonts The memory expansion option is different for each printer. See the section that applies to your printer. -
Page 93: Communication Interface
Centronics Parallel Interface The Centronics parallel interface allows only one-way communications with the printer. You can purchase the Intermec parallel cable (P/N 051211), purchase the appropriate cable from your local computer store, or see “Parallel Interface Pin Descriptions” on page 80 to make your own interface cable. -
Page 94: Batch Takeup
Self-Strip Printing Use self-strip printing in applications where you want to apply labels to a surface immediately. After printing a label, the printer prints out the label with the backing removed. This option must be ordered when you order your printer. -
Page 95: Bar Code Symbologies Supported
Code 128 Interleaved 2 of 5 POSTNET HIBC 128 3400, 3440, and 3600 Bar Code Label Printer User’s Manual Description Originally developed in 1972, Codabar is a numeric symbology most commonly used in libraries, blood banks, and air parcel express applications. - Page 96 QR Code can handle a wide range of data, including numerical, alphabetical, Kanji, Hiragana, Katakana, graphics, and control codes. A built-in error correction function enables the QR Code to repair errors in the code. 3400, 3440, and 3600 Bar Code Label Printer User’s Manual...
-
Page 97: Character Sets
3600 printers support. To select a character set, use PrintSet, your third- party software application, or the IPL command set. This chapter contains these character sets: • International character sets • Extended character sets 3400, 3440, and 3600 Bar Code Label Printer User’s Manual... -
Page 98: International Character Sets
U.S. character that corresponds with the character in your language. Advanced Character Table If you are running your printer in Advanced mode (you are not using 86XX Emulation), use this table to find the right hex codes for the international character sets. -
Page 99: Emulation Mode Character Table
Norway/Denmark Sweden/Finland Spain Switzerland Italy IBM Translation Character Table If you are running your printer with IBM Translation enabled, use this table to find the right hex codes for the international character sets. U.S. ASCII ¦ U.K. ASCII ¦ Germany... -
Page 100: Code Page 850 Character Table
Appendix B— Character Sets Code Page 850 Character Table This table shows the character set that prints if your 3440 printer has Code Page 850 selected as the printer language. @ A B C D E F G H I P Q R S T U V W X Y Ç... - Page 101 6Ø 7Ø 8Ø 9Ø AØ BØ CØ DØ EØ FØ 3400, 3440, and 3600 Bar Code Label Printer User’s Manual 7 x 9 Standard 7 x 11 OCR 10 x 14 Standard Ø3 Ø4 Ø5 Ø6 Ø7 Ø8 Appendix B— Character Sets Ø9...
- Page 102 4Ø 5Ø 6Ø 7Ø 8Ø 9Ø AØ BØ CØ DØ EØ FØ 5 x 7 Standard Ø3 Ø4 Ø5 Ø6 Ø7 Ø8 3400, 3440, and 3600 Bar Code Label Printer User’s Manual Ø9 ØA ØB ØC ØD ØE ØF 3XXXU.058...
- Page 103 á EØ ñ FØ Note: The 3400A needs the 128K expanded memory option to support font C25. 3400, 3440, and 3600 Bar Code Label Printer User’s Manual 8 point 12 point 20 point Swiss Mono 721 standard outline font Ø2 Ø3...
- Page 104 3Ø 4Ø 5Ø 6Ø 7Ø 8Ø 9Ø AØ BØ CØ DØ EØ FØ OCR A Ø2 Ø3 Ø4 Ø5 Ø6 Ø7 Ø8 3400, 3440, and 3600 Bar Code Label Printer User’s Manual Ø9 ØA ØB ØC ØD ØE ØE 3XXXU.060...
- Page 105 4Ø 5Ø 6Ø 7Ø 8Ø 9Ø AØ BØ CØ DØ EØ FØ 3400, 3440, and 3600 Bar Code Label Printer User’s Manual OCR B Size 2 Ø2 Ø3 Ø4 Ø5 Ø6 Ø7 Ø8 Appendix B— Character Sets Ø9 ØA ØB ØC...
- Page 106 Appendix B— Character Sets 3400, 3440, and 3600 Bar Code Label Printer User’s Manual...
-
Page 107: Communications Reference
Communications Reference This chapter provides communications reference information. This chapter covers these topics: • Communications protocols • Communications interfaces • Printer serial port 3400, 3440, and 3600 Bar Code Label Printer User’s Manual... -
Page 108: Communication Protocols
All of these protocols are point-to-point except Multi-Drop. Application programs and/or ROM BIOS determine which protocols your computer can support. For more detailed information, refer to the Intermec Data Communications Reference Manual (P/N 044737). Intermec Standard Protocol Intermec Standard protocol is a proprietary block transfer/status response protocol. -
Page 109: Xon/Xoff Protocol (Software And Hardware Flow Control)
Software flow control uses the ASCII characters <DC1> (XON) and <DC3> (XOFF) to start and stop the flow of data from the host to the printer. Hardware flow control uses pin 11 or pin 20 (internally connected together) on the printer’s serial port to indicate “Ready”... -
Page 110: Xon/Xoff, No Status Protocol
(9600, E, 7, 1). Multi-Drop Protocol Use Multi-Drop protocol to connect up to 32 devices to an Intermec controller on a four-wire RS-485 (two twisted pair). This protocol is similar to Polling Mode D except each device has a unique address (POL and SEL character). - Page 111 DLE OUT XON OUT XOFF OUT PROTO-CMD 1 PROTO-CMD 2 TIMEOUT ON EOM 3400, 3440, and 3600 Bar Code Label Printer User’s Manual Appendix C— Communications Reference Protocol Affected POL MODE D, MULTI-DROP POL MODE D, MULTI-DROP POL MODE D, MULTI-DROP...
-
Page 112: Host Requirements
RS-232, RS-422, or RS-485. For information on configuring the host computer, port concentrator, or network controller, see the reference manual for the controlling device. Communications Boundaries The information below applies to all protocols that the printer supports. Communications Boundaries Parameter Message delay... -
Page 113: Serial Interface
Output: Serial differential data from the printer. Output: When you use a modem, connect to modem DTR pin. When using Intermec Standard Protocol, this pin indicates that the printer is switched on. When using XON/XOFF or hardware flow control, this pin indicates the printer mechanical status and the status of the printer input buffer. - Page 114 Note: The metal backshell is connected directly to the shield to achieve electrostatic discharge (ESD) immunity. Shield Ground 3XXXU010.eps Shield Ground 3XXXU011.eps 3400, 3440, and 3600 Bar Code Label Printer User’s Manual 25-Pin (Plug) D-Sub Metal Backshell Chassis Ground Received Data Transmitted Data Carrier Detect Data Terminal Ready...
- Page 115 Output TxDB RS-422 serial interface: This illustration shows the pin assignments for the RS-422 serial interface. The host in this case includes Intermec products that support RS-422. Non-Intermec controllers may have different pin assignments. Note: Connect pin 1 to shield at one end only.
-
Page 116: Printer Serial Port
Appendix C— Communications Reference Printer Serial Port The rear panel of the printer contains the serial port connector. It is a 25- pin D-style subminiature receptacle. The port is wired as a data terminal equipment (DTE) device. 3XXXU.063 Serial port pin assignments: This illustration shows the serial port pin assignments. -
Page 117: Full Ascii Table
Full ASCII Table This chapter contains these tables: • Full ASCII table • Full ASCII control characters table 3400, 3440, and 3600 Bar Code Label Printer User’s Manual... -
Page 118: Full Ascii Table
00101010 00101011 00101100 00101101 00101110 00101111 00110000 00110001 00110010 00110011 00110100 00110101 00110110 00110111 00111000 00111001 00111010 00111011 00111100 00111101 00111110 00111111 01000000 01000001 01000010 01000011 3400, 3440,and 3600 Bar Code Label Printer User’s Manual Char " & < >... - Page 119 01011111 01100000 01100001 01100010 Notes for the Full ASCII Table Bit positions are 76543210. Hexadecimal value. Decimal value. Code 39 characters. 3400, 3440, and 3600 Bar Code Label Printer User’s Manual Char Binary 01100011 01100100 01100101 01100110 01100111 01101000 01101001...
-
Page 120: Full Ascii Control Characters Table
Delete Data Link Escape End of Medium Enquiry End of Transmission Escape End Transmission Block End of Text 3400, 3440,and 3600 Bar Code Label Printer User’s Manual Definition Form Feed File Separator Group Separator Horizontal Tab Line Feed Negative Acknowledge... -
Page 121: Glossary
Glossary 3400, 3440, and 3600 Bar Code Label Printer User’s Manual... - Page 122 (such as Code 30, Codabar). cloning A procedure that copies the RAM contents (configuration, formats, fonts, pages and graphics) from the memory of one printer to the memory of another. configuration The current parameter settings that determine the operating characteristics of the printer.
- Page 123 Numbering). International standard bar code for retail food packages corresponding to the Universal Product Code (UPC) in the United States. Emulation mode An operating mode in which the printer has the operating characteristics of an 8636 or 8646 printer. Feed/Pause A printer control panel button that advances the media and causes the printer to pause printing.
- Page 124 Glossary graphic A bitmap picture downloaded to the printer by the host before printing. HIBC Health Industry Bar Code standard. A modified version of Code 39 that has 43 characters, utilizes the Modulus 43 check character, and reserves some character combinations for special usage.
- Page 125 The distance between the edge of a label and where the printing starts on that label. See also top of form. media The label stock on which the printer prints labels. Media can be made of plain paper, polyester, thermally reactive paper, or other materials with adhesive backing and ribbon.
- Page 126 Each element is switched on and off separately in order to react with the media or thermal transfer ribbon to create a mark on the label. ready The state in which the printer is able to print; the normal operating state of the printer. Ready/Busy line Pin 11/20 of the rear panel connector.
- Page 127 Often serial transmission is used to link host computers to terminals and PCs to printers. soft font A file stored in the printer to provide the ability to print text using fonts that are not resident in the printer. Standard protocol A communications protocol capable of controlling communications between two devices connected by a single data communication line.
- Page 128 Bar code and text fields that change from one label to the next. XON/XOFF protocol A protocol that stops the host from sending data when the printer buffer fills up and starts it again when the buffer empties. 3400, 3440, and 3600 Bar Code Label Printer User’s Manual...
-
Page 129: Index
Index 3400, 3440, and 3600 Bar Code Label Printer User’s Manual... - Page 130 84 cleaning drive roller, 36 label sensors, 38 media guides, 37 media path, 37 printer covers, 36 printhead, 34 schedule, 32 tear bar, 36 tools, 32 cloning, definition, 108 3400, 3440, and 3600 Bar Code Label Printer User’s Manual...
- Page 131 8 using the serial port, 8 copying formats, pages, fonts, or graphics, See selective transfer core-locking brackets, changing, 22 3400, 3440, and 3600 Bar Code Label Printer User’s Manual cover cleaning, 36 removing, 5 cutter option, 3400, 79...
- Page 132 98 EasyLAN 10i2 adapter accessory, 79 RS-232, 98 RS-422, 99 RS-485, 99 Interleaved 2 of 5, 81 Intermec Standard protocol, described, 94 international character sets, 84 advanced, 84 Code Page 850, 86 Emulation mode, 85 IBM translation, 85 IPL commands, using to communicate, 29...
- Page 133 25 setting for Intermec media and ribbon, 26 settings table direct thermal media, 27 thermal transfer media, 28 memory expansion option, 78 3400 printer, 78 3440 printer, 78 3600 printer, 78 increasing amount available, 52...
- Page 134 Code 49, 82 Code 93, 81 Data Matrix, 82 EAN, 81 Interleaved 2 of 5, 81 Maxicode, 82 PDF417, 82 POSTNET, 81 QR Code, 82 UPC, 81 symbology, definition, 113 3400, 3440, and 3600 Bar Code Label Printer User’s Manual...
- Page 135 See also top of form, set command XON/XOFF definition, 114 no status protocol, 96 protocol, 95 Y forms adjust default origin, 66 setting dot increments, 61 setting with DIP switches, 67 yellow LED, troubleshooting, 45 3400, 3440, and 3600 Bar Code Label Printer User’s Manual Index...
- Page 136 Index 3400, 3440, and 3600 Bar Code Label Printer User’s Manual...
- Page 137 blank page...
- Page 138 Corporate Headquarters 6001 36th Avenue West Everett, Washington 98203 U.S.A. tel 425.348.2600 fax 425.355.9551 www.intermec.com 3400, 3440, and 3600 Bar Code Label Printer User's Manual *065145-002* P/N 065145-002...
Need help?
Do you have a question about the EasyCoder 3400 and is the answer not in the manual?
Questions and answers