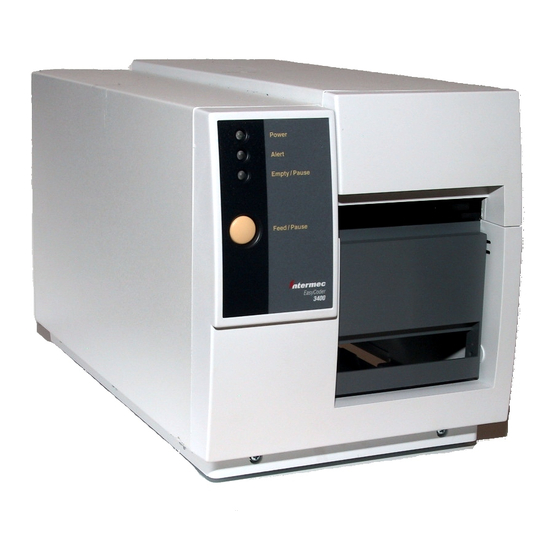
Intermec EasyCoder 3400e User Manual
Cutter
Hide thumbs
Also See for EasyCoder 3400e:
- User manual (150 pages) ,
- Quick start manual (20 pages) ,
- Instructions manual (6 pages)
Advertisement
Quick Links
Advertisement

Summary of Contents for Intermec EasyCoder 3400e
- Page 1 User’s Manual P/N 066391-001 3400, 4420, and 4440 Cutter...
- Page 2 The information contained herein is proprietary and is provided solely for the purpose of allowing customers to operate and/or service Intermec manufactured equipment and is not to be released, reproduced, or used for any other purpose without written permission of Intermec.
- Page 3 It also explains how to enable the cutter using PrintSet. Introduction to the Cutter With the cutter on your 3400, 4420, or 4440 printer, you can cut media into individual labels of the same or random lengths that are ready for use. The cutter blade is capable of cutting a wide range of die cut roll, continuous roll, or fanfold media;...
- Page 4 2. Unplug the printer power supply cord. 3. Remove the media cover. A. Pull the bottom of the media cover away from the base of the printer. B. Lift the front of the media cover upward to release it from the printer frame.
- Page 5 Attaching the Cutter to the Mounting Plate Front of cutter Mounting plate 7. Plug the cutter cable into the cutter connector at the base of the inside wall of the printer. Cutter connector Head lift lever Cable notch Thumbscrew Front of...
- Page 6 8. Feed the media through the cutter. The media should extend out past the opening in the cutter cover. 9. Turn the head lift lever counterclockwise to secure the printhead. 10. Replace the media cover. 11. Plug in the printer power supply cord. 12. Turn on the printer. 44XXU.004 Cutter...
-
Page 7: Enabling The Cutter
IPL to enable the cutter. For help, see the IPL Programming Reference Manual. 1. Start PrintSet on your PC. Note: Under the Printer Select menu, check that PrintSet is set up for your printer configuration (3400, 4420, or 4440). To customize the configuration for your printer, see the Help menu. - Page 8 Step 5. For help changing the configuration, see the Help menu. 5. Choose the Send Command button. A message box appears asking if you want to overwrite the current printer settings. Choose send to enable the cutter with either the default printer configuration or the configuration you have created.
-
Page 9: Cleaning The Cutter
If you are cutting through adhesive-backed media, you should clean the cutter after every 10,000 cuts. To see the number of cuts made, print out a hardware configuration test label as described in your printer user’s manual. The information following “Labels Cut” indicates how many labels have been cut since the cutter was installed. - Page 10 3400, 4420, and 4440 Cutter User’s Manual 5. Push down on the tab so that the cutter blade swings forward. Cutter blade 6. With a cotton swab moistened with alcohol, clean the blade. Note: Do not clean or get alcohol on the lubricated portions of the cutter. 7.
- Page 11 9. Lift the cutter cover up. When you close the cutter cover, you should hear a soft click. If you do not hear a click, swing the cutter cover down and gently pull the disable switch away from the cutter. The disable switch must touch the safety tab on the cutter cover for the cutter to operate.
- Page 12 14. Feed the media through the cutter. The media should extend out past the opening in the cutter cover. 15. Turn the head lift lever counterclockwise to secure the printhead. 16. Plug in the printer power supply cord and the cutter cable. 17. Turn on the printer. Paper 44XXU.007...
-
Page 13: Troubleshooting
Troubleshooting This section describes some possible problems and solutions. If these solutions do not solve your problem, try the troubleshooting solutions in your printer user’s manual or call your local Intermec service technician. Problem The cutter does not cut cleanly or the cut end is no longer straight. -
Page 14: Cutter Specifications
1,000,000 cuts at 0.005-inch (0.012 mm) paper thickness 500,000 cuts at 0.010-inch (0.025 mm) paper thickness Guillotine-type blade Attaches to the 3400C, 4420, or 4440 printer. Adds 0.5 inch (13 mm) to the printer’s length. All types except pressure-sensitive adhesive, polyester, polyethylene, Valeron tag, or Kimdura.


Need help?
Do you have a question about the EasyCoder 3400e and is the answer not in the manual?
Questions and answers