Table of Contents
Advertisement
Quick Links
Advertisement
Table of Contents

Related Manuals for Ecostrad iQ Plus


Summary of Contents for Ecostrad iQ Plus
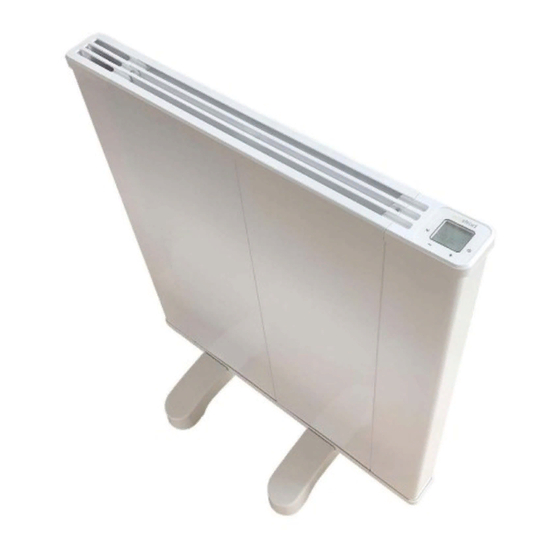
- Page 1 Ecostrad iQ Plus Electric Panel Heater PLEASE READ AND SAVE THESE INSTRUCTIONS...
- Page 2 Symbols Warning This symbol indicates a hazard with an average risk level which, if not avoided, could result in serious injury or death. Warning of electrical voltage This symbol indicates danger to the life and health of persons due to electrical voltage.
-
Page 3: Table Of Contents
Contents About the Manual - - - - - - - - - - - - - - - - - - - - - 4 2 | Warnings & Precautions - - - - - - - - - - - - - - - - - 4 Technical Information - - - - - - - - - - - - - - - - - - - 7 4 | Installation- - - - - - - - - - - - - - - - - - - - - - - - - - 7 4-1 Fixings - - - - - - - - - - - - - - - - - - - - - - - - - 7... -
Page 4: About The Manual
1 | About the Manual This manual describes the Ecostrad iQ Plus Panel Heater and details how to install and use the product. It is important to thoroughly review this manual before using the product. For additional information regarding any aspect of the Ecostrad iQ Plus Panel Heater, contact: Ecostrad Ltd. - Page 5 Warning Do not use the device in enclosed spaces if persons are present who cannot leave the room independently and are not under constant supervision. Warning To avoid overheating and risk of fire, do not cover the heater. Covering the heater for extended periods will activate the safety fuse, permanently disabling the heater.
- Page 6 • Do not use this device in the immediate surroundings of a bath, shower, swimming pool or any other water container. Risk of electric shock. This product is not suitable for bathroom use. • The device must be placed where the switches and controllers cannot be touched by a person in a bathtub or shower.
-
Page 7: Technical Information
• Switch the device off and disconnect the power cable from the mains socket when the device is not in use. • Allow the device to cool down before touching or transporting the device, or attempting maintenance work. 3 | Technical Information Table 1 | Specifications Voltage 220-240V AC / 50Hz... -
Page 8: Wall Mounting Instructions
4-2 | Wall mounting instructions WARNING - Before switching on the appliance make sure that the heater is correctly fixed and is secure to the wall. 4-2-1 | Prepare the heater Fix the hanging plates to the back of the heater using two 4*12mm screws for each plate as shown in Figure 1. - Page 9 Figure 2 | Diagram of minimum safety distances Fix the wall brackets: a. Use a tape measure and pencil to make two marks on the wall as per Figure 3 and Table 4. The template provided will help you measure the width.
-
Page 10: Free Standing Instructions
b. Using a 6mm drill bit, drill two holes where you made your marks c. Knock a wall plug into each hole using a hammer. d. Position the wall hangers over the holes and use the 4*35mm screws to fix them in place. -
Page 11: Control Panel
5 | Control Panel 5-1 | Power switch Before use the heater must be switched on at the mechanical switch at the base of the unit shown in Figure 6. 5-1-1 | Memory function In the event of power failure or disconnection, program and temperature settings will be remembered and the heater will restart on the mode it was previously running. -
Page 12: Standby Mode
Icons used on the control panel can be found in Table 5. Table 5 | Icons and their meanings Symbol Meaning Symbol Meaning Comfort Keypad locked Connected to WiFi Anti-freeze Device is heating Timer Open window detected Boost mode LST mode 5-3 | Standby mode When the heater first switches on it appears in standby mode, where the time is displayed and the heater will not heat. - Page 13 5-4-2 | Eco mode When the icon (and only the icon) displays on the screen, you are in eco mode. Just like comfort, in this mode the heater heats to a constant set room temperature. However, eco mode is designed to be set to a lower temperature, providing a low-heat, energy-saving alternative for when you are sleeping or out.
- Page 14 Setting the program The timer allows you to set a different program for every day of the week. P1 is the schedule for Monday, P2 is the schedule for Tuesday, and so on. Each program consists of 24 hourly slots where you can set either comfort or eco mode.
-
Page 15: Settings
5-5 | Settings The settings menu allows you to enable, disable and configure all the heater’s supplementary functions: temperature compensation (F0), open window detection (F2), low surface temperature setting (F3), WiFi function (F4) and time synchronisation (F5). Press to put the heater into standby mode and hold down for 5 seconds to enter the settings menu. - Page 16 • Use the keys to adjust. Choose 60 or 90 to enable the feature and set the number of minutes, or choose “oF” to disable detection. • Press to confirm and move onto the next setting. 5-5-3 | Low surface temperature setting (F3) The LST setting allows you to lower the heater’s temperature limit, providing peace of mind if you’re using the heater in a room where children or vulnerable adults are present.
-
Page 17: Child Lock
6 | Connecting to WiFi 6-1 | Downloading the app The Ecostrad iQ Plus Panel Heater is designed to work with the Smart Life app. Scan the code below to go to the app. Press install and follow the app's instructions to create an account. -
Page 18: Connecting To The App
6-2 | Connecting to the app 1. Ensure WiFi control is enabled in the heater settings. If the icon is flashing, the WiFi connection is enabled and you can move to step 2. If the icon is not flashing, go to section 5-5-4 and follow the instructions to enable. 2. - Page 19 Figure 9 | Finding device on Smart Life app 8. When successfully connected, the heater will appear as below on the app. Press to change its name or "Done" to return to the home screen. WiFi Connection — Troubleshooting If your heater does not connect on the first attempt: •...
-
Page 20: Using The App
• Depending on your device type and settings, location services may need to be enabled to achieve connection. • Make sure the app has registered successfully. • Make sure your smart device is connected to the same WiFi network as that to which you are attempting to connect the heater. - Page 21 Set temperature Adjust set temperature Room temperature Mode Set program Choose mode Settings Power ON/OFF Figure 10 | Control interface on Smart Life app 7-3-2 | Program mode Tap the program data icon on the control interface to configure a program. The program consists of 24 hourly intervals for each day, which you can set to comfort or eco temperature.
-
Page 22: Device Settings
Radiator set temperature (cannot be adjusted) Set boost timer Figure 11 | Boost mode on the iQ Plus 7-4 | Device settings Tap the icon to view and adjust the heater’s settings. These correspond to the settings available in the advanced settings of the control panel. - Page 23 Make sure you give the heater a name that’s easy for you to say and for your voice interface to understand. You can change the heater’s name in the Smart Life app. Table 6 | Voice control commands Command Action •...
-
Page 24: Troubleshooting
8 | Troubleshooting Issue Explanation Solution Heater is not Temperature sensor The heater will not heating. has become heat while either disconnected, or sensor is Er code displaying. heater has short disconnected. Contact the seller (section 1) to circuited. arrange repair or replacement. -
Page 25: Warranty
10 | Warranty The Ecostrad iQ Plus Panel Heater carries a 10-year guarantee on the body, a 3-year guarantee on paintwork and a 2-year guarantee on electrical components. Within the stated period, starting from the date the customer receives their unit, Ecostrad guarantee to repair or replace the unit where a fault is due to defects in materials or manufacturing. -
Page 26: Erp Ecodesign Information
11 | ERP Ecodesign Information Table 7 | Output guidelines Model 500W 1000W 1500W 2000W 2500W Heat output Nominal heat 0.47 0.98 1.48 1.97 2.48 output /kW) Minimum heat output (indicative) /kW) Maximum 0.47 0.98 1.48 1.97 2.48 continuous heat output /kW) max.c... -
Page 27: Disposal
Table 8 | Information requirements for electrical space heaters Item Unit electronic room temperature control plus day timer [no] electronic room temperature control plus week timer [yes] Other control options (multiple selections possible) room temperature control, with presence detection [no] room temperature control, with open window detection [yes] with distance control option...
Need help?
Do you have a question about the iQ Plus and is the answer not in the manual?
Questions and answers