
Related Manuals for Control Techniques M'Ax 403


Summary of Contents for Control Techniques M'Ax 403
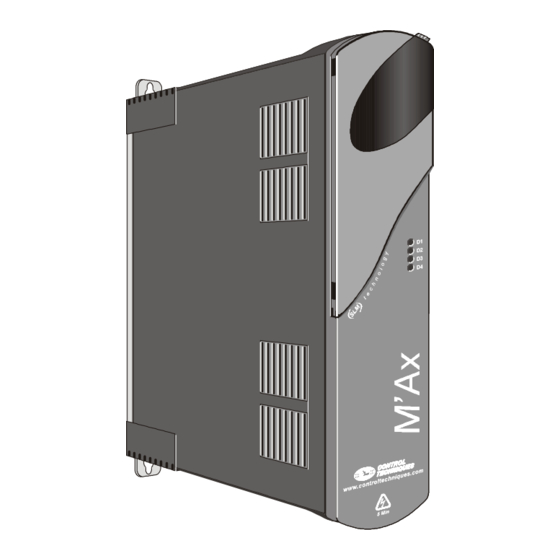
- Page 1 User Guide M’Ax Compact, high-performance, single-axis servo amplifier for brushless AC servo motors Part Number: 0453-0015 Issue Number: 4 www.controltechniques.com...
- Page 2 This product is supplied with the latest version of user-interface and machine-control software. If this product is to be used with other Control Techniques servo amplifiers in an existing system, there may be some differences between their software and the software in this product. These differences may cause a difference in functions.
-
Page 3: Table Of Contents
Contents Introduction Setting Up the Drive for Basic Applications Important information about this User Guide and the Installation Guide Procedure for version _AN Models and versions of the Drive Procedure for version _SL Familiarising yourself with the Drive before installing Additional setting-up De-rating the Drive Methods of control... - Page 4 Contents Appendix A Signal Connectors Cables and connectors 24V user supply Digital inputs Digital outputs Functions of the terminals Appendix B Diagnostics Types of indications Status indications Status LEDs Alarm indications Trip codes Appendix C Serial Communications Sequence for editing parameters Serial communications protocols and interfaces 86 EIA232 interface EIA485 interface...
- Page 5 Addendum The following parameters stated in the M’Ax User Guide are not operational with the current Drive sofware version: 8.59 Status line indicator 8.60 Status line output enable 11.65 SLM encoder mode select The following parameters are not available with the current Drive software version: 3.56 F/D mode select for simulated encoder output 6.35...
-
Page 7: Introduction
≥12A. which is an EIA485 two-wire high-speed data communications network specially designed by Control Techniques for linking the elements of servo systems. By this means digital control and synchronisation are Suffix Functionality maintained between all the elements. -
Page 8: Programming The Drive
Programming the Drive 1.10 Features of the M’Ax The Drive is configured and controlled by the adjustment of software General parameters. These reside in menus, as follows: Continuous output current ratings of 3.5A, 6.5A, 9.5A, 12.5A Menu 0 200% overload for up to 2 seconds Menu 0 contains a group of parameters that apply to simple applications;... - Page 9 Performance Interfaces High-precision synchronisation of axis-position within Encoder-simulation output producing 1024, 2048, 50ns 4096 or 8192 counts per revolution High-precision synchronisation of the speed-loop EIA232 or EIA485 serial communications within 50ns t echnology 2-wire EIA485 2-wire serial t echnology robust 2-wire serial link to the SLM communications Sampling rate: 125µs Two analog outputs...
-
Page 10: Connecting The Drive
Connecting the Drive Follow the instructions in this chapter for product familiarisation as well as permanent installation. For permanent installation... Personnel requirements Refer to the following in the Installation Guide: The Drive must be installed and operated only by • Chapter 1 Safety Information personnel having the necessary training or experience. -
Page 11: Locations Of The Signal Connectors
Locations of the signal connectors Figure 2-1 Locations of the signal connectors on the top surface of the Drive Functions of the signal connectors STANDALONE (15-way high-density male D-type) The following functions are available for versions _SL and _AN. • Frequency-and-direction, quadrature square-wave inputs and directional pulse inputs D-type connectors... -
Page 12: Functions Of The Signal Terminals
Functions of the signal terminals DIGITAL I/O SIM ENC B output Output 1 24V user supply Analog output 1 Input 1 A output Output 2 0V COMMON Input 2 Analog output 2 Digital I/O Output 3 Input 7 Standard-precision Input 3 Z output Input 8 analog input... -
Page 13: Example Signal Connections
Parallel and multiple connections The following functions are available on more than one connector (the Application Version(s) related terminals are connected in parallel in the Drive): Keypad mode 0V COMMON Hardware enable (setting up and/or product familiarisation) SLM-and-user back-up supply input High-precision analog speed control in Terminal 24V user supply mode... - Page 14 Signal connections for operation in Keypad mode Suitable for version: (If required, refer to the rating label on the right side of the Drive to find the version code.) Keypad mode is normally used only for the following: • Setting up •...
- Page 15 Signal connections for high-precision analog speed control in Terminal mode Suitable for version: (If required, refer to the rating label on the right side of the Drive to find the version code.) Make these connections to allow the Drive to be controlled and monitored locally by simple external controls and indicators.
- Page 16 Signal connections for standard-precision analog speed control in Terminal mode Suitable for version: (If required, refer to the rating label on the right side of the Drive to find the version code.) Make these connections to allow the Drive to be controlled and monitored locally by simple external controls and indicators.
- Page 17 Signal connections for remote control by a system Connections shown in grey are optional. controller or PLC supplying quadrature AB, F/D signals or directional pulse inputs The RESET contact is required for version _SL, but is optional for Suitable for versions: version _AN which can also be reset by use of the keypad.
- Page 18 Signal connections for serial communications The Drive can be started and stopped by a RUN contact or by changing the setting of parameter 6.34 Sequencing bit RUN via serial Suitable for versions: communications. Using a RUN contact gives faster control. _SL, _AN (essential for version _SL) Use either of the following types of serial link, as appropriate: EIA232...
- Page 19 M’Ax Drive to a fieldbus system a gateway device can be used to convert from one network system to another, such as Devicenet to Modbus. Control Techniques Drive Centres can supply a range of gateway options to suit most common fieldbuses. Field gateway...
- Page 20 Signal connections for high-precision speed control by motion controller supplying an analog speed reference The RESET contact is optional since version _AN can also be reset by Suitable for version: use of the keypad. (If required, refer to the rating label on the right side of the Drive to find Parameter Setting the version code.)
- Page 21 Signal connections for standard-precision speed control by motion controller supplying an analog speed reference For connections, see Figure 2-7 Signal connections for remote control and setting up by serial communications (PC running a dedicated Suitable for version: application program or a PLC) on page 12. Connections shown in grey are optional.
-
Page 22: Planning The Signal-Current Consumption
Signal connections for remote control by motion controller communicating by t echnology Suitable for versions: _SL, _AN The motion controller is used also for setting up the Drive. Connections shown in grey are optional. The RESET contact is required for version _SL, but is optional for version _AN. -
Page 23: Types Of Back-Up Supplies
Types of back-up supplies Requirements The following two types of back-up supply can be applied individually or The current from the back-up supply to each Drive concurrently to the Drive. They can continue to be applied when the AC must be limited to 500mA by a fuse or other protection supply is present. -
Page 24: User Interface
User Interface The locations of the displays and keypad are shown below. Displays and keypad A two-line alphanumeric display and a keypad are fitted in version _AN. When the Drive is powered up, both the upper and lower lines of the alphanumeric display are visible through the tinted window. -
Page 25: Software Parameters
Alphanumeric display Each parameter is identified by a number that is structured as in these examples: The alphanumeric display is used for the following... • Reading the values of software parameters that are used to Menu.Parameter configure, control and monitor the Drive 0.05 •... - Page 26 When new values take effect To change from external host to host mode, the Drive requires defaulting twice, i.e. XX.00 to either 1233, 1244 New values of most parameters take effect immediately; for this reason it or 1255. The first default changes the operation of the is essential that before a parameter is edited its impact on the system is Drive, and the second default identifies the Drive and fully understood.
-
Page 27: Programming Instructions
Programming Instructions Summary of the keypad functions Version: _AN Version _AN Follow the relevant instructions in this chapter as part of product Key(s) Status mode Parameter mode Edit mode familiarisation in order to learn how to read and change the values of parameters. -
Page 28: Preparation
2. To return to showing the status, press... Adjustment of parameter values must be performed only by suitably trained or experienced personnel. Incorrect values could be hazardous. For product familiarisation, it is recommended that you WARNING make only the adjustments stated in the following The status re-appears. -
Page 29: Selecting A Parameter To Access
Selecting a parameter to access Quick selection of the initially displayed parameter Hint If the display returns to Status mode during the course of selecting 1. While the display is in Parameter mode (and any other parameter parameters (because no keys have been pressed for eight has been selected), press at the same time... - Page 30 Changing the least-significant digit Making large changes in value quickly So far, you have changed the value by changing the least significant digit. The speed of change can be increased by selecting, then 1. Select again parameter number 0.18. individually changing the more-significant digits, as follows: 1.
- Page 31 Making a hidden most-significant digit appear Quick selection of least significant digit (from any other digit) If the permitted range of values for the selected parameter allows a more-significant digit and this is not currently displayed, it can be To select the least-significant digit when any other digit is flashing, selected by pressing...
-
Page 32: Making New Values Take Effect
Setting the value at zero 4.12 Flashing and non-flashing digits When the display is in Edit mode, momentarily press at the same When the display is in Edit mode, the flashing of a digit indicates that the time... value of the digit can be changed. If no digits flash, the parameter cannot be edited because it is read-only or that it is protected. -
Page 33: Selecting A Different Option
4.15 Selecting a different option Bit parameters that are used for selecting between two options are used in the way described in Changing the setting of a bit parameter. The following parameters... • Variable parameters used for selecting among a number of options which are identified as numbers •... -
Page 34: Getting Started
Getting Started 9. Close the RUN contact. The display indicates as follows: Electrical power connections Before continuing, ensure the Drive has been connected in accordance with the instructions in Chapter 2 Installing the Drive in the Installation Guide, including correct use of the ground bracket. When following the instructions in this chapter, it is your responsibility to NOTE connect and disconnect the AC supply as required. -
Page 35: Procedure For Serial Communications
15. Perform either of the following: Summary • Wait eight seconds; the display will return to Status mode The procedure has shown the following (for version _AN): • Press... • When the Drive is inhibited (disabled) (i.e. Hardware enable contact is open or parameter 6.15 Drive enable is set at 0), the lower line of the display states inh. - Page 36 9. The Drive is supplied configured for start and stop control by a RUN Summary contact. For start and stop control via serial communications, send a The procedure has shown the following (for either version controlled by write-command to set parameter 8.21 Digital input 1 destination serial communications): selector at 00.00.
-
Page 37: Setting Up The Drive For Basic Applications
Setting Up the Drive for Basic Applications The setting-up instructions are presented in the form of flow diagrams, as follows: Procedure for version _AN • Power-up routine • Select speed reference routine • Ramps routine • Starting routine Procedure for version _SL (control via serial communications;... -
Page 38: Procedure For Version _An
Procedure for version _AN Ensure the Drive is installed correctly. Ensure the motor is connected to the machine and the machine is safe to be driven. Ensure the Hardware enable contacts are open Apply AC power to the Drive Is the display lit? Status LEDs Appendix B Diagnostics... - Page 39 Use the high-precision analog input? (Version _ Set parameter 0.30 Reference selector at . Set the speed reference at the required value. (If required, see Calibrating the Analog Input later in this chapter.) Use the preset speed reference(s)? Set parameter 0.30 Reference selector...
- Page 40 Set parameter 0.24 Ramps enable at . Set parameter 0.25 at the required acceleration rate (in s/1000RPM). Set parameter 0.26 at the required deceleration rate (in s/1000RPM). Is deceleration to be fixed at the user-defined rate? Set parameter 0.27 Fast ramp select at .
- Page 41 Is an external braking resistor used? Set parameter 10.55 Internal braking resistor protection disable at . Does the Drive require de-rating? Planning the installation Chapter 2 of the Installation Guide. Initiate saving the new values by setting parameter XX.00 1000 After changing the setting and while the display is in Edit mode, press at the same time:...
-
Page 42: Procedure For Version _Sl
Procedure for version _SL Ensure the Drive is installed correctly and able to be controlled and monitored via serial communications. Ensure the motor is connected to the machine and the machine is safe to be driven. Ensure the Hardware enable contact and, if connected, the contacts... - Page 43 Use the standard-precision analog input? Set parameter 0.30 Reference selector at . Set the speed reference at the required value. (If required, see Calibrating the Analog Input later in this chapter.) Use the preset speed reference? Set parameter 0.30 Reference selector at .
- Page 44 Set parameter 0.24 Ramps enable at . Set parameter 0.25 at the required acceleration rate (in s/1000RPM). Set parameter 0.26 at the required deceleration rate (in s/1000RPM). Is deceleration to be fixed at the user-defined rate? Set parameter 0.27 Fast ramp select at .
- Page 45 Is an external braking resistor used? Set parameter 10.55 Internal braking resistor protection disable at . Does the Drive require de-rating? Planning the installation Chapter 2 of the Installation Guide. Initiate storing new values by setting parameter 0.50 Parameter transfer selector 2 Prog Alternatively, set 11.67...
-
Page 46: Additional Setting-Up
Additional setting-up 5. Set parameter 7.25 Calibrate analog input 1 full scale at 1 . 6. The scale factor is automatically entered in parameter 7.53 V/f scale. Refer as required to the following sections later in this chapter: 7.25 automatically returns to 0 . •... -
Page 47: Specifying A Different Initially Displayed Parameter
Version _SL Version _AN Version _AN (if required) Initiate the save operation by setting parameter XX.00 at 1000 . Ensure the Drive is disabled by checking that the Hardware enable Execute the operation by performing either of the following: contact is open or that parameter 6.15 is set at 0 , then perform either •... -
Page 48: Security And Accesssing The Advanced Parameters
Security and Accesssing the Advanced Parameters Version _AN Summary of security operations Condition Standard Security User Security Drive as despatched from the Advanced parameters cannot be read or edited (Menu None factory 0 is fully accesable) Advanced parameters cannot be read or edited (Menu Only parameter 0.00 can be edited;... -
Page 49: Locking Standard Security
Locking Standard Security When AC power is removed and subsequently re-applied, Standard Security and User Security (when set up) are locked. Lock Standard and User Security without removing AC power, as follows: 1. Select parameter XX.00 (in any menu). 2. Set the value at 2000 . 3. -
Page 50: Menu 0 Parameters
Menu 0 Parameters Setting Operation Version _AN (The Drive is supplied in this default state) NOTE Restore all parameters to their default values, and... In some cases, the function and/or range of a parameter are Enable retrieval of parameter values from the option affected by the setting of another parameter;... - Page 51 Reference selected indicator Maximum reference clamp 0.02 0.08 {1.49} 1 ~ 5 {1.06} 0 ~ 7500 ô ô ð 0.02 indicates which speed reference has been selected by 0.30 Maximum speed of the motor (defined by the motor via the SLM ) Reference selector, as follows: 0.08 is used for defining the maximum speed at which the Drive will drive the motor.
- Page 52 Speed-loop proportional gain Kp1 Drive rated current (FLC) 0.13 0.20 {3.10} 0.000 ~ 0.3000 [ SLM ] {11.32} 00.00 ~ 99.99 ô ð ô See Appendix D Optimising the Dynamic Performance. 0.20 indicates the maximum continuous output current of the Drive. This is also referred to as the FLC (full-load current).
- Page 53 Acceleration rate Reference selector 0.25 0.30 {2.11} 0 ~ 32.000 0.200 {1.14} 0 ~ 5 ô ð ô ð s/1000RPM s/1000RPM Set 0.25 for the required maximum acceleration rate in both directions of Set 0.30 as follows: rotation under the following conditions: 0.30 Speed reference •...
- Page 54 Drive overload accumulator 0.41 Serial comms. baude rate 0.36 {10.56} 0.0 ~ 100.0 ô {11.25} (see below) 9600 ô ð BAUD 0.41 indicates the value of an I t accumulator that monitors the output Baud rate power of the Drive. If the value exceeds 100%, the Drive will trip; the lower line of the alphanumeric display (version _ AN ) then indicates O.ht1 .
- Page 55 remain unchanged. Main parameters can be saved irrespective of the setting of parameter Security status indicator 0.49 0.50 (i.e. by setting parameter XX.00 at 1000 and executing the operation). 000 ~ 111 ô Setting Function Usage 0.49 indicates the state of security as shown below (the displayed digits At power-down: S- are treated as individual digits;...
- Page 56 Parameter 0.50 Parameter XX.00 set at Prog preset at 1000 (save) Flash memory EEPROM Parameter 0.50 Parameter 0.50 set at rEAd preset at Parameter 0.50 set at Parameter 0.50 , boot1 or boot2 preset at Parameter 0.50 preset at boot1 Parameter values are immediately copied in the indicated direction Parameter...
-
Page 57: Advanced Parameters
Advanced Parameters These parameters are listed for reference purposes only; the lists do not include sufficient information for adjusting the parameters. WARNING NOTE In some cases, the function or range of a parameter are affected by the setting of another parameter; the information in these lists relate to the default condition of such parameters. -
Page 58: Menu 1 Parameters
Menu 1 parameters Speed reference selection Reference 1.44 1.43 1.42 1.49 selected Analog Preset Keypad Keypad Pulse Pulse Pulse Pulse Analog reference Preset-references selected indicator 1.36 1.42 Keypad-reference selected indicator 1.43 Menu 7 Pulse-reference selected indicator 1.44 Preset reference Reference Preset-reference selector 1.45... - Page 59 DIGITAL I/O Menu 8 Sequencer (Menu 6) Pre-ramp 1.13 1.12 1.11 1.03 reference Jog selected Reverse Reference indicator selected enabled indicator indicator Menu 2 x(-1) 1.05 1.06 Jog reference Maximum reference clamp M’Ax User Guide Issue Number: 4...
- Page 60 Parameter Range( Default( Type ô ð 1.01 {0.03} Value of selected reference +[1.06] RPM 1.03 Pre-ramp reference +[1.06] RPM 1.04 {0.06} Reference offset +[1.06] RPM 1.05 {0.32} Jog reference 0 ~ 500 RPM RW Uni 0 ~ n 1.06 {0.08} Maximum reference clamp [SLM] RW Uni...
- Page 61 Use this page for notes M’Ax User Guide Issue Number: 4...
-
Page 62: Menu 2 Parameters
Menu 2 parameters Ramp selection Digital input 3 Acceleration rate Preset-reference Acceleration Acceleration-rate selected indicator DIGITAL I/O 2.32 rate selector select bit-0 indicator 2.10 1.50 Menu 8 Acceleration-rate 2.33 select bit-1 indicator Sequencer (Menu 6) Acceleration rate 1 2.11 1.13 Jog selected indicator Acceleration rate 2... - Page 63 Ramp controller 6.48 DC-bus level Sequencer Controlled- 6.49 (Menu 6) stop enable Fast ramp 2.04 indicator select Stop-control 2.46 proportional-gain 5.05 DC-bus voltage Stop-control 2.47 integral-gain Internal 10.12 braking-resistor overload alarm Braking-control 2.48 proportional gain Internal braking-resistor 10.39 Braking-control 2.49 overload integral gain accumulator...
- Page 64 Parameter Range( Default( Type ô ð 2.01 Post-ramp reference ±[1.06] 2.02 {0.24} Ramp enable 0 ~ 1 2.03 Ramp hold enable 0 ~ 1 2.04 {0.27} Fast ramp select 0 ~ 1 2.06 S-ramp enable 0 ~ 1 2.07 S-ramp acceleration limit 0.031 RW Uni 0 ~ 300.000 s...
-
Page 65: Menu 3 Parameters
Menu 3 parameters Speed-loop PID gains Hard speed reference 3.22 Hard speed reference selector SLM PID buffer 1 Demand 3.23 SLM PID buffer 2 Sequencer (Menu 6) SLM PID buffer 3 Menu 2 Feedback Post-ramp 2.01 reference 3.01 Menu 13 Final speed reference t echnology... - Page 66 Parameter Range( Default( Type ô ð 3.01 {0.04} Final speed reference ±[1.06] RPM 3.02 {0.05} Speed feedback ±[1.06] RPM 3.05 Zero-speed threshold 0 ~ 200 RPM RW Uni 3.06 At-speed lower limit 0 ~ [1.06] RPM RW Uni 3.07 At-speed upper limit 0 ~ [1.06] RPM RW Uni 0 ~ n...
-
Page 67: Menu 4 Parameters
Menu 4 parameters Torque control Current-demand Motor − thermal Symmetrical current 4.12 4.07 4.15 filter 1 cut-off time-constant limit Kc1 frequency Current-demand Motor − Symmetrical current 4.23 filter 2 cut-off 4.24 5.07 rated current limit Kc2 frequency Current-demand Drive rated Symmetrical current 4.27 filter 3 cut-off... - Page 68 Parameter Range( Default( Type ô ð 0 ~ I 4.01 {0.07} Motor current magnitude RO Uni ±200.0 %I 4.03 Torque demand 4.04 Current demand 0 ~ 620 RO Uni 0 ~ 300.0 % I 4.07 {0.18} Symmetrical current limit Kc1 200.0 RW Uni ±200.0 %I...
-
Page 69: Menu 5 Parameters
Menu 5 parameters Motor control 5.05 DC-bus voltage Phase advance [MO] Current demand Sine-wave Pulse width modulator Current loop modulator and power stage Menu 4 Position information Current measurement Offset adjustment t echnology Braking control Motor parameters Menu 4 Motor current Motor −... - Page 70 Parameter Range( Default( Type ô ð 5.05 {0.43} DC-bus voltage 0 ~ 1000 V RO Uni 5.07 {0.19} Motor - rated current 0 ~ FLC A [SLM] RO Uni 5.08 Motor - rated speed 0 ~ 7500RPM [SLM] RO Uni 0 ~ V 5.09 Motor - rated voltage...
-
Page 71: Menu 6 Parameters
Menu 6 parameters Sequencer functions AC supply loss modes Software diagram for Menu 6 M’Ax User Guide Issue Number: 4... - Page 72 Parameter Range( Default( Type ô ð 6.01 Stop mode selector 0 ~ 2 RW Txt 6.03 ac supply loss mode selector 0 ~ 1 RW Uni 6.08 Hold zero speed select 0 ~ 1 6.15 Drive enable 0 ~ 1 6.20 Powered-up time (years, days) 00.00 ~ 9.365 y.d...
- Page 73 Use this page for notes M’Ax User Guide Issue Number: 4...
-
Page 74: Menu 7 Parameters
Menu 7 parameters Analog I/O settings Temperature monitoring Software diagram for Menu 7 M’Ax User Guide Issue Number: 4... - Page 75 M’Ax User Guide Issue Number: 4...
- Page 76 Parameter Range( Default( Type ô ð 7.01 Analog input ±100.0 % 0 ~ 100 ° C ±10 ° C 7.04 Power-stage temperature 7.07 Analog input offset trim ±10.0 % 7.08 Analog input scaling 0.000 ~ 4.000 1.000 7.09 Analog input invert 0 ~ 1 00.00 ~ 20.50 7.10...
-
Page 77: Menu 8 Parameters
Menu 8 parameters Digital I/O settings and indications Default Default function destination parameter Digital input X Digital input X 6.34 state indicator destination Digital input X 6.33 REVERSE SELECT selector invert 6.31 JOG FORWARD 8.0X 8.1X 8.2X 6.35 FORWARD LIMIT 6.36 REVERSE LIMIT 10.33... - Page 78 Parameter Range( Default( Type ô ð 8.01 Digital input 1 state indicator 0 ~ 1 8.02 Digital input 2 state indicator 0 ~ 1 8.03 Digital input 3 state indicator 0 ~ 1 8.04 Digital input 4 state indicator 0 ~ 1 8.05 Digital input 5 state indicator 0 ~ 1...
-
Page 79: Menu 10 Parameters
Menu 10 parameters Status and diagnostic information Trip log Braking control Parameter Type Range( Default( ô ð 10.01 Drive healthy indicator 0 ~ 1 10.02 Drive running indicator 0 ~ 1 10.03 At zero speed indicator 0 ~ 1 10.05 Below set speed indicator 0 ~ 1 10.06... -
Page 80: Menu 11 Parameters
9.10 Menu 11 parameters Scale factor Initially displayed parameter Serial communications Drive information Parameter Range( Default( Type ô ð 11.20 Parameter 0.46 assignment selector 00.00 ~ 19.71 3.02 RW Uni 11.21 Parameter 0.46 scaling 0.000 ~ 9.999 RW Uni 00.00 ~ 13.99 11.22 Initially displayed parameter selector 0.05... -
Page 81: Menu 13 Parameters
9.11 Menu 13 parameters Pulse reference selection and scaling Menu 3 2.02 Ramp enable Software diagram for Menu 13 Parameter Range( Default( Type ô ð 13.01 Pulse reference ±7500 rpm 0 ~ 2 0 = F&D 13.20 Pulse reference selector RW Uni 1 = Quad 2 = Pulse Pulse... -
Page 82: Appendix A Signal Connectors
Cables of the required lengths and fitted with RJ45 connectors as powercircuits by basic insulation only. Ensure that all required are supplied by Control Techniques Dynamics Ltd. For external control circuits are separated from human ordering, create the required order code (see below) and contact the... -
Page 83: User Supply
com\ +24V com/ Drive (RJ45) +24V Drive +24V com/ (DIN) Figure A.1 Connecting the SLM cable to the connectors (only the relevant parts of the connectors are shown) Connectors SIM ENC Incorrect wiring of this cable could result in failure of MC/EIA485 the M’Ax or SLM 15-way high-density male D-type having a metal shell (improved... -
Page 84: Digital Outputs
Hardware enable Hardware enable is a positive-logic input having the specification given above. Time delays are as follows: Enable time: <250 µ s Disable time: <500 µ s ON region Digital outputs Logic sense: Positive Transition region Output voltage: –0 ~ 24V +10% Isolation: optical Maximum output current: 100mA, short-circuit protected at 450mA OFF region... - Page 85 STANDALONE Name Function Specification +24V input SLM-and-user back-up (See Types of back-up supplies on page supply 17.) For use with: Hardware enable OV COMMON must not be interchanged 0V COMMON Direction input Quadrature B input with 0V Frequency input Quadrature A input 24V user supply Hardware enable (See Digital inputs on page 77.)
- Page 86 SIM ENC Connecting cable for simulated-encoder signals When the encoder feedback is to operate at greater than 4096 pulses per revolution, a suitable connecting cable must be used. Each line pair must be terminated at the system controller or PLC by a resistor of an appropriate value.
- Page 87 MC/EIA485 Name Function Specification 2-wire EIA485 t echnology port for bi-directional Connecting cable: Shielded twisted pair com\ communications with a motion controller Hardware enable (See Digital inputs on page 77.) For use with: t echnology com and com\ 0V COMMON must not be interchanged Hardware-enable 0V COMMON with 0V...
- Page 88 Name Function Specification 2-wire EIA485 100 Ω twisted-pair inside 8-way shielded t echnology port for communication cable (see Cables and connectors on page com\ with the SLM For use with Drive-status input and output Current-source supply Drive-status supply connections Output-voltage compliance: 24V +20% Hardware enable (See Digital inputs on page 77.) 24V SLM supply...
- Page 89 MULTIDROP OUT Name Function Specification 2-wire EIA485 Version _ MD only: t echnology port for 100 Ω twisted-pair inside 8-way shielded communication with the next slave Drive in cable (see Cables and connectors earlier com\ multi-drop systems in this Appendix) On each Drive of a networked system, connect to the Drive-status input on the Drive-status supply...
-
Page 90: Appendix B Diagnostics
AC supply is connected. The Drive output is disabled allowing the motor to If a Drive is faulty, it must be returned to an authorised coast. Control Techniques distributor for repair. Status LEDs Types of indications When illuminated, these indicate the following: Status indications Trip OI.AC has occurred;... -
Page 91: Trip Codes
Trip codes Trip Trip Description Code Version _AN Excessive temperature detected by the Drive Trip codes appear on the upper line of the display. [22] O.ht2 heatsink thermistor. Version _SL [23] Excessive SLM PCB temperature. O.ht3 The number given in brackets under each trip code (in the following list) is the value that appears in parameter 10.20 . -
Page 92: Appendix C Serial Communications
Appendix C Serial Interfaces Communications An EIA232 or EIA485 (4-wire only) interface can be used with either protocol. Refer to this Appendix for either version to be controlled by serial Serial communications connections must be made only to one of these communications, in particular, version _ SL . -
Page 93: Transmitting And Receiving Data
Line loading Routing the serial communications cables The Drive loads the EIA485 serial communications lines as follows: A data communications cable should not run parallel to any power cables, especially any that connect Drives to motors. If parallel runs are 2 unit-loads (EIA485) unavoidable, ensure a minimum spacing of 300mm (12 in) between the 2 unit-loads (EIA485) -
Page 94: Message Structure
Message sequence Addressing the devices A typical message sequence is as follows: Addressing device(s) is performed by specifying an address number 1. The host enquires the value of a parameter in a Drive. immediately after the start bit in a message. This address number is the 2. -
Page 95: Making New Values Take Effect
Repeat the previous request for a parameter value Host to Drive XOR truth table Result A Drive will respond to this message only if the previous read-command issued by the host was addressed to and understood by the Drive. Otherwise, the host must send a new read-command. Request the value of the next parameter in the menu Procedure Host to Drive... -
Page 96: Storing New Parameter-Values
• Graphical representation in real-time of the values of parameters in uploaded to the Drive. a selected menu Control Techniques Drive Centres can supply and support M’Ax-Soft . • Compare the values of parameters in different Drives • Initiate auto-tune for flux alignment •... -
Page 97: Modbus Rtu Protocol
Devicenet to Modbus. 0 ~ 255 ô ð Control Techniques Drive Centres can supply a range of gateway options to suit most common fieldbuses. MODBUS frame 1 start bit 8 data bits 2 stop bits No parity bit is used. -
Page 98: Appendix D Optimising The Dynamic Performance
Appendix D Optimising the • Vibration • Instability Dynamic • Over-current trips (Inertia mismatch and flexible couplings are prone to introducing such Performance resonances.) Torque oscillations can be minimised by adjusting the current-loop Speed-loop parameters bandwidth of the Drive in addition to the PID gains. The dynamic performance during operation in speed control is controlled PID-gains buffers by the following parameters which are adjusted during commissioning of... -
Page 99: Specifying Shaft Stiffness And Load Inertia
Procedure 18. Disconnect the AC supply. 1. Make the signal connections shown in Figure D-1. Make the SPEED 19. Re-make the required signal connections for the application. REFERENCE connections for either high or standard precision as appropriate, not both. Connect an oscilloscope to terminal 11 ( SPEED ) and terminal 9 ( CURRENT ) of the SIM ENC connector. -
Page 100: Methods Of Updating Pid Buffers
Procedure Testing the system 1. Ensure the Hardware enable contact is open or that parameter 6.15 1. Close the Hardware enable contact or set parameter 6.15 at 1 , and Drive enable is set at 0 to disable the Drive. test the system. - Page 101 Related parameters Speed-loop PID buffer 3.63 in use indicator SLM PID buffer 1 Demand SLM PID buffer 2 SLM PID buffer 3 SLM buffer 11.63 update 11.64 SLM online (0.17) enable Feedback PID gains 1 t echnology 3.10 Speed-loop (0.13) proportional gain Kp1 3.11 Speed-loop integral...
-
Page 102: Gain Sequencing
Parameter Range( Default( Type ô ð 3.10 {0.13} Speed-loop proportional gain Kp1 0.0000 ~ 0.3000 0.0100 RW Uni 3.11 {0.14} Speed-loop integral gain Ki1 0.000 ~ 20.000 6.000 RW Uni 3.12 {0.15} Speed-loop derivative gain Kd1 0.0000 ~ 0.1000 0.0000 RW Uni 3.13 Speed-loop proportional gain Kp2... - Page 103 Assigning and using digital inputs to select by edge-triggering 1. Establish which digital inputs are not required for other purposes. 2. Refer to parameters 8.21 to 8.28 in Menu 8 Parameters (Chapter 9 Advanced Parameters on page 51) to identify the assignment parameters which are related to the digital inputs to be used for selecting PID buffers.
-
Page 104: Appendix E Auxiliary Back-Up Supply
Appendix E Auxiliary Back-up Supply Isolation The auxiliary back-up supply must be isolated from ground since it is referenced to –DC of the DC bus. It must also be isolated from any other auxiliary back-up CAUTION supply except when the DC-buses of the Drives are connected in parallel. - Page 105 Interlock circuit Contactor DIGITAL I/O circuit Digital output Y 0V COMMON 24V user supply Digital input X UU TRIP DISABLE 380 ~ 480V φ L L L U V W 1 2 3 Auxiliary back-up supply supplying an individual Drive 28V - 32V AC supply Live circuit...
-
Page 106: Setting-Up Procedure
Setting-up procedure 1. Referring to the appropriate circuit diagram in Example signal Model Current rating Fuse rating connections on page 7, identify one digital input and one digital M’Ax 403 output that are not used. M’Ax 406 2. Make the conections shown in Figure E-1. Use the terminals located M’Ax 409 at step 1 for Digital input X and Digital output Y. - Page 107 DIGITAL I/O Digital output 2 AT ZERO SPEED 0V COMMON 24V user supply Digital input 1 RESET Digital input 6 Figure E-2 Example DIGITAL I/O terminals in use DIGITAL I/O Digital output 2 AT ZERO SPEED 0V COMMON 24V user supply Digital input 1 RESET Digital input 6...
-
Page 108: Using The Auxiliary Back-Up Supply
Using the auxiliary back-up supply 1. Apply the AC supply and the auxiliary back-up supply to the Drive (in either order). 2. The Drive and motor will run normally while the AC supply is present. If the AC supply fails while the motor is running, the Drive will behave according to the setting of parameter 6.03 AC supply loss mode selector (see Chapter 9 Advanced Parameters on page 51). -
Page 109: Appendix F Motor Thermal-Overload Protection
Appendix F Motor Thermal- Version _SL Overload Protection Version _AN (if required) Ensure the Drive is disabled by checking that the Hardware enable contact is open or that parameter 6.15 is set at 0 , then perform either If the output current of the Drive is to be de-rated, follow the of the following: instructions in this Appendix after following De-rating the Drive on •... -
Page 110: Adjusting The Threshold For The Motor Thermal-Overload Alarm
6. Set parameter 8.64 at 1 . 7. Perform the following, as appropriate: Version _SL Version _AN Version _AN (if required) Initiate the save operation by setting parameter XX.00 at 1000 . Ensure the Drive is disabled by checking that the Hardware enable Execute the operation by performing either of the following: contact is open or that parameter 6.15 is set at 0 , then perform either •... - Page 111 Example Parameter Value 4.15 Motor – thermal time-constant 4.07 Symmetrical current limit Kc1 4.24 Symmetrical current limit Kc2 4.28 Symmetrical current limit Kc3 Process cycle time 11.5s Gain sequencing using all three PID-gains buffers 1. Set 4.53 Symmetrical current limit after motor thermal-overload alarm at 200 (the largest of the symmetrical current limit values).
-
Page 112: Appendix G Flux Alignment
Appendix G Flux Alignment Use this procedure only in exceptional circumstances; do not use it when setting up the Drive. 1. Disconnect the load from the motor. 2. Ensure the Hardware enable contact is open. 3. If a RUN contact is connected, ensure that it is open. 4. -
Page 113: Parameter Values
Appendix H Storage and Transfer of Parameter Values Parameter 0.50 Parameter XX.00 set at Prog preset at 1000 (save) Flash memory EEPROM Parameter 0.50 Parameter 0.50 set at rEAd preset at Parameter 0.50 set at Parameter 0.50 , boot1 or boot2 preset at Parameter 0.50... -
Page 114: List Of S-Parameters
List of S-parameters 10. Power-down the Drive. 11. Remove the option module. In the storage and transfer of parameters, the parameters designated S 12. If a number of option modules are to be programmed, repeat steps 6 in the parameter lists are treated separately from the remaining (main) to 11 for each module. - Page 115 Index Gain sequencing Numerics Getting Started 24V user supply Initially displayed parameter Introduction AC supply 380 ~ 480V ±10% category III AC supply loss modes Addressing the devices Keypad Adjusting the speed-loop gains Adjusting the threshold for the motor thermal-overload alarm Line biasing Advanced Parameters Line loading...
- Page 116 Programming Instructions Status and diagnostic information Pulse reference inputs Status indications Pulse reference selection and scaling Status LEDs Status mode Stiffness angle Quick selection of the initially displayed parameter Storage and Transfer of Parameter Value Storing new parameter-values Summary of security operations Ramp selection Summary of the keypad functions Read-write and read-only...
Need help?
Do you have a question about the M'Ax 403 and is the answer not in the manual?
Questions and answers