Advertisement
Quick Links
Advertisement

Related Manuals for Creality HALOT-LITE


Summary of Contents for Creality HALOT-LITE
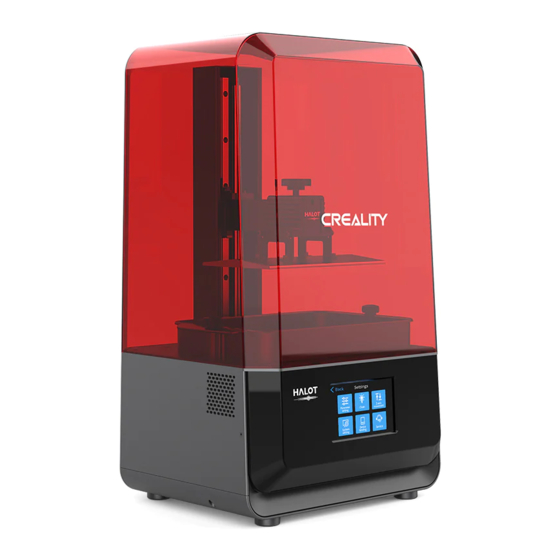
- Page 1 HALOT-LITE CREATE REALITY,ACHIEVE DREAMS HALOT-LITE 3D Printer User Manual V1.4...
- Page 2 Visit our official website www.creality.com to find relevant software/hardware information,contact details and operation and maintenance instructions. Firmware Upgrade Please login the official website https://www.creality.com/download, switch the language and select the relevant printer and model and download the required firmware, you can use it after the installation is finished.
- Page 3 Users should comply with the laws and regulations of the corresponding countries and regions where the equipment is located (used), abide by professional ethics, pay attention to safety obligations, and strictly prohibit the use of our products or equipment for any illegal purposes. Creality will not be responsible for any violators' legal liability under any circustance.
-
Page 4: Table Of Contents
Contents Introduction 01-01 Parameters 02-02 Parts List 03-03 Use the 3D Printer 04-09 Start Printing 10-12 Control remote printing 13-13 14-14 Wiring Connection 15-17 Troubleshooting... -
Page 5: Introduction
1. Introduction Protective cover Buliding platform USB port Limit switch Hexalobular socket screw Power socket Hexalobular socket screw Resin vat Leveling screw Touch screen... - Page 6 425*393*685mm Net Weight 10.6KG Gross Weight 13.5KG Print Method USB Disk, Creality Cloud Machine Language 中文(简/繁)/ English/ Español/ Deutsche/ Français/ Pусский/ Português/ Italiano/ Türk/Nederlands/Polskie/日本語/한국어 Slicing Software Operation System Win7/Win8/Win 10 64bit, Mac system (32-bit is not supported) Compatible Resin Common rigid photosensivie resin, Standard resin, Hight hardness,High toughness, Dental model resin.
-
Page 7: Parts List
3. Package Content Resin vat x 1 3D printer x 1 Print platform x 1 Tool list U disk x 1 Screwdrivers x 1set Brush x 1 Plastic blade x 1 Resin filter x 4 Release film x 1 Metal blade x 1 Power cord x 1 Vat cover x 1 Calibration card x 1... -
Page 8: Use The 3D Printer
4. Interface Information Print Note: The current interface is for reference only, due to the continuous upgrading of functions, the actual to the official website of the latest firmware UI as the standard. - Page 9 4. Interface Information Setting Note: The current interface is for reference only, due to the continuous upgrading of functions, the actual to the official website of the latest firmware UI as the standard.
- Page 10 5. Level Platform Note: The printing platform has been leveled at the factory. If it needs leveling due to transportation or other reasons, please follow the steps below to adjust the printing platform. 2. Loosen the four Leveling screw 1. To calibrate the printing platform, first raise the platform, loosen the 3.
- Page 11 5. Level Platform Note: The current interface is for reference only, due to the continuous upgrading of functions, the actual to the official website of the latest firmware UI as the standard.
- Page 12 6. Load Resin Pour the UV photosensitive resin into the resin vat. The slot capacity is 500ml/1000ml. 1000ml 500ml Tips: How to change resin: Caution : Resin may cause skin irritation or an allergic Take out the resin vat slowly, pour out the remaining resin into the container, clean the resin skin reaction.
-
Page 13: Parameters
7. Release Film Instructions Installation steps First, remove the 14 screws at the bottom of the vat and take down the old release film. Parameters Prepare the new release film, peel off the the protective films on both sides of the release film. Align the holes and fit the release film on the clamping ring. -
Page 14: Start Printing
file. to set corresponding parameters. ① ② 3. Click icon ①→Setting slice printing parameters②→ “ ” i l s fi → sliced file You are welcome to find more details of slicing tutorial on the official website www.creality.com). - Page 15 8. Start Printing ctb(.ctb) 3D objects 2. Print file name Save type Hide Folder preservation cancel USB port 2. Insert the U disk → press the print button. 1. Generate cxdlp file, and save the file to U disk. Warning: During the printing process, the machine can not be shaken, so as not to affect the printing quality.
- Page 16 8. Start Printing fi fi 3. Printing··· “ ” ;...
-
Page 17: Control Remote Printing
9. Control remote printing >> >> >> >> 1.Download 2.Register 3.Log in 4. Add equipment 5. Scan QR Code HALOT-LITE HALOT-LITE >> >> >> HALOT-LITE 6. Device naming 7. Select device 8. check printing status 9. Print Progress... -
Page 18: Wiring Connection
10.Wiring Connection Exhaust fan Power Supply port Z motor driver port UL LED fan port UV LED POWER EN port Z ends top USB HOST port LCD screen port Spare brush firm- ware interface RGB screen port... -
Page 19: Troubleshooting
11.Troubleshooting... - Page 20 FCC Statement FCC Caution: Any Changes or modifications not expressly approved by the party responsible for compliance could void the user's authority to operate the equipment. This device complies with part 15 of the FCC Rules. Operation is subject to the following two conditions: (1) This device may not cause harmful interference, and (2) this device must accept any interference received, including interference that may cause undesired operation.
- Page 21 IC Caution: This device complies with Industry Canada’s licence-exempt RSSs. Operation is subject to the following two conditions: (1) This device may not cause interference; and (2) This device must accept any interference, including interference that may cause undesired operation of the device. To maintain compliance with RF exposure guidelines, this equipment should be installed and operated with a minimum distance of 20cm between the radiator and your body.
- Page 22 SHENZHEN CREALITY 3D TECHNOLOGY CO., LTD. Add:18F,JinXiuHongDu Building, Meilong Blvd., Longhua Dist., Shenzhen, China 518131 Official Website: www.creality.com Tel:+86 755-8523 4565 E-mail: info@creality.com cs@creality.com 210-167519...
Need help?
Do you have a question about the HALOT-LITE and is the answer not in the manual?
Questions and answers