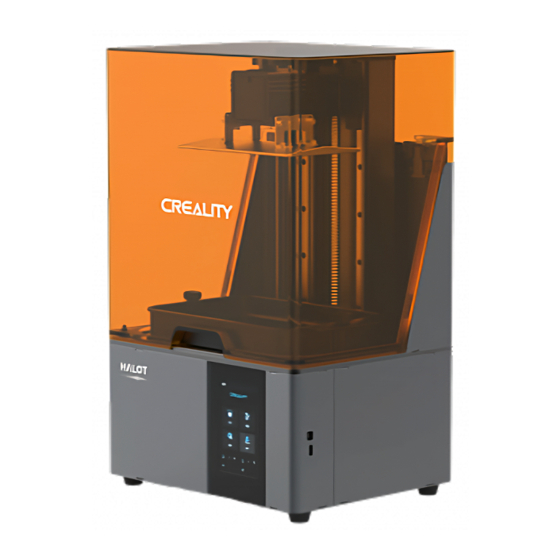
Summary of Contents for Creality HALOT-SKY
- Page 1 Create reality, achieve dreams Quick Installation Guide CN EN DE FR Pyc. PT-BR HALOT-SKY V1.0...
- Page 2 尊敬的用户: 感谢您选择创想三维的产品。为了您使用方便,请您在使用之前仔细阅读本快速指南,您在使用前可以通过扫 描二维码、链接地址、U盘获取相关使用说明及视频,并严格按照指示进行操作。 创想三维团队时刻准备为您提供优质的服务。在使用过程中无论遇到什么问题,请按照快速指南结尾所提供的 电话、邮箱与我们进行联系。 方法 1 手机扫描“创想云”二维码 如果您第一次使用创想云,请先注册账号,并根据APP提示填写信息; 如果您已经有创想云账号,请直接登录。 拥有:Creality 新品资讯 拥有:创想云趣打印 拥有:开箱资料 (用户可通用搜索机器型号,找到说明书/开箱视频) 拥有:服务支持 创想云二维码 方法 2 电脑登录官网 如果您更方便使用电脑,登录https://www.creality.com/download,在首页也可通过输入机器型号找到说明书 开箱视频以及相关设备使用资料。 https://www.creality.com/download 方法 3 U盘 打开机器包裹,您可以从工具包里面找出U盘,通过电脑获取产品说明书及视频相关资料。 (备注:U盘资料可能不是当前最新,建议采用方法1、方法2获取最新的资料。)...
- Page 3 调平平台 调平平台 2 1. 进行打印平台的校准,首先上升平台,拧松 料槽左右两侧胶头手拧螺丝,将料槽取出。 2.松开成型平台板连接板的四颗螺丝,将校准 卡片贴紧打印屏,参照调平平台2步骤作业, 检查平台是否与校准卡片均匀贴合。 3.拧紧上一步松开的螺丝。 注意: 打印平台出厂时已调平,若因运输或其他 原因需要调平,可以进行此步骤进行打印平台 注意: 界面仅供参考, 实际以UI为准。 调平。...
- Page 4 Method 1 Scan the QR code of "Creality Cloud" by your mobile phone. If it is your first time using Creality Cloud, please register an account first and fill in the information according to the APP prompts; If you already have a Creality Cloud account, please log in directly.
-
Page 5: Leveling Platform
LEVELING PLATFORM LEVELING PLATFORM 2 1. To calibrate the printing platform. Please raise the platform first, loosen the hexalobular socket screws on both the left and right sides of the resin trough, and take out the resin trough. 2. Loosen the four screws on the connecting plate of the modeling platform board, and attach the calibra- tion card to the printing screen tightly. - Page 6 ESTIMADOS USUARIOS, Gracias por elegir los productos 3D de Creality. Lea atentamente esta guía rápida antes de usar el producto para su comodidad. Usando el código QR, el enlace de la página web o el disco USB puede obtener las instrucciones y videos correspondientes antes de usar el producto.
- Page 7 NIVELACIÓN DE LA PLATAFORMA PLATAFORMA DE NIVELACIÓN 2 1. Para calibrar la plataforma de impresión. Primero eleve la plataforma, afloje los tornillos Allen hexagonales a los lados izquierdo y derecho de la canal de resina y retire dicha canal. 2. Afloje los cuatro tornillos del plato que une la placa de modelado de la plataforma, luego acoplefirmemente la tarjeta de calibración en la pantalla de impresión.
- Page 8 Methode 1 Scannen Sie den QR-Code von „Creality Cloud“ mit Ihrem Mobiltelefon. Wenn Sie Creality Cloud zum ersten Mal nutzen, registrieren Sie bitte zunächst ein Konto und geben Sie die Informationen gemäß den Aufforderungen der APP ein; Wenn Sie bereits über ein Creality Cloud-Konto verfügen, melden Sie sich bitte direkt an.
- Page 9 PLATTFORM-NIVELLIERUNG NIVELLIER-PLATTFORM 2 1. So kalibrieren Sie die Druckplattform. Bitte heben Sie zuerst die Plattform an, lösen Sie die Innensechskant Schrauben auf der linken und rechten Seite der Harzwanne und entnehmen Sie die Harzwanne. 2. Lösen Sie die vier Schrauben an der Anschlussplatte der Modellier-Plattform und befestigen Sie die Kalibrierungskarte fest am Drucksieb.
- Page 10 Web et du disque USB avant l'utilisation, et suivre strictement les instructions. L'équipe de Creality 3D est toujours prête à fournir des services de haute qualité. Quels que soient les problèm- es que vous rencontrez pendant l'utilisation, veuillez nous contacter par le téléphone et l'email fournis à la fin du guide d'installation rapide.
- Page 11 PLATE-FORME DE MISE À NIVEAU PLATE-FORME DE MISE À NIVEAU 2 1. Pour calibrer la plate-forme d'impression. Veuillez d'abord soulever la plate-forme, desserrer les vis à six pans creux sur les côtés gauche et droit du bac à résine, puis retirer le bac à résine. 2.
- Page 12 Если Вы используете Creality Cloud впервые, пожалуйста, сначала зарегистрируйте аккаунт и заполните информацию, следуя подсказкам приложения; Если у Вас уже есть аккаунт Creality Cloud, пожалуйста, войдите в систему напрямую. Наличие: информация о новой продукции Creality Наличие: веселая печать Creality Cloud Наличие:...
- Page 13 ВЫРАВНИВАЮЩАЯ ПЛАТФОРМА ВЫРАВНИВАЮЩАЯ ПЛАТФОРМА 2 1. Для калибровки печатной платформы. Пожалуйста, сначала поднимите платформу, ослабьте винты со звездообразным углублением на левой и правой сторонах лотка для смолы и извлеките лоток для смолы. 2. Ослабьте четыре винта на соединительной пластине платы моделирующей платформы и плотно...
- Page 14 Método 1 Escaneie o código QR de "Creality Cloud” pelo seu celular. Se for a primeira vez que usa o Creality Cloud, registre uma conta primeiro e preencha as informações de acordo com as instruções do APP; Se você já tem uma conta no Creality Cloud, faça login diretamente.
- Page 15 PLATAFORMA DE NIVELAMENTO PLATAFORMA NIVELADORA 2 1. Para calibrar a plataforma de impressão. Por favor, levante a plataforma primeiro, solte os parafusos da tomada hexa lobular nos lados esquerdo e direito do canal de resina, e retire o canal de resina. 2.
- Page 16 QR, l'indirizzo del link della pagina web e il disco USB; ti preghiamo di seguire scrupolosamente le istruz- ioni. Il team di Creality 3D è sempre pronto a fornire servizi di alta qualità. Per qualsiasi problema riscontrato du- rante l'uso, ti preghiamo di contattarci tramite il telefono e l'e-mail forniti alla fine della guida rapida all'inst- allazione.
- Page 17 PIATTAFORMA DI LIVELLAMENTO PIATTAFORMA DI LIVELLAMENTO 2 1. Per calibrare la piattaforma di stampa: solleva prima la piattaforma, allenta le viti a brugola su entrambi i lati destro e sinistro del contenitore della resina ed estrai il contenitore della resina. 2.
- Page 18 DEĞERLI KULLANICILAR, Creality 3D ürünlerini tercih ettiğiniz için te ekkürler. Size kolaylık sağlaması için, kullanmadan önce lütfen bu kılavuzu dikkatlice okuyunuz. Kullanmadan önce kare kod, internet sayfası bağlantı adresi ve USB bellek üzer- inden ilgili talimatlara ve videolara ula abilirsiniz; talimatlara sıkı bir ekilde uyun.
- Page 19 DENGELEME PLATFORMU DENGELEME PLATFORMU 2 1. Baskı platformunu kalibre etmek için. Lütfen önce platformu yükseltin, reçine oluğunun hem sol hem de sağ tarafındaki altıgen ba lı vidaları gev etin ve reçine oluğunu çıkarın. 2. Modelleme platformu panelinin bağlantı plakasındaki dört vidayı gev etin ve kalibrasyon kartını baskı ekranına sıkıca yerle tirin.
- Page 20 (used), abide by professional ethics, pay attention to safety obligations, and strictly prohibit the use of our products or equipment for any illegal purposes. Creality will not be responsible for any violators' legal liability under any circumstance.


Need help?
Do you have a question about the HALOT-SKY and is the answer not in the manual?
Questions and answers