
Subscribe to Our Youtube Channel
Related Manuals for Glow Bricks Lego Home Alone 21330


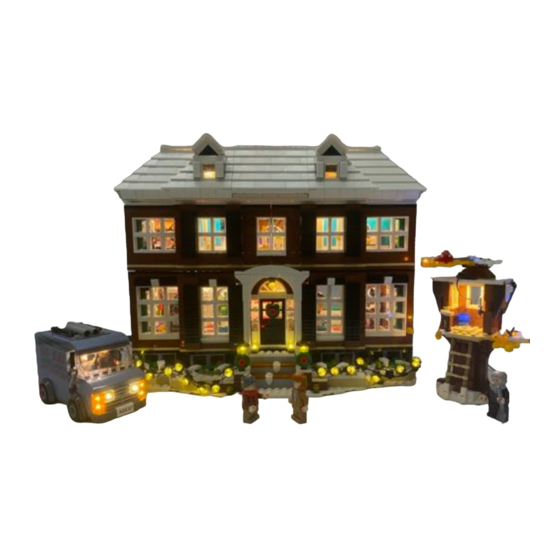
Summary of Contents for Glow Bricks Lego Home Alone 21330
- Page 2 Start by assembling lights for the van, take the following lighting parts Replace the grey plate by the lights...
- Page 3 After assembling the clear parts, restore the front light and pull the remain lights to the back Assemble it to the top...
- Page 4 Replace the 1x6 plate on the back by the lighting plate Pull the connectors inside the car and connect with the battery case...
- Page 5 Take the lighting parts shown for the tree house Start by assembling the 1x3 white plate inside the house...
- Page 6 Then assemble the lighting round plates on the leaves randomly Separate the back door part and assemble by this lighting parts...
- Page 7 Separate by the layers, detach the shown part, replace the clear yellow round bricks by the lighting parts Restore the lamps of the house and replace the fire...
- Page 8 Assemble the 1x8 lighting plate as ceiling light Pull the remain black lighting plate to the bottom and assemble it...
- Page 9 Take the following lighting parts for the front door lights...
- Page 10 Replace the yellow round plates by the lighting round plates For the light bulb at the end, assemble it inside the head...
- Page 11 Restore the lights on the front door Then restore the middle room and the top level...
- Page 12 Now take this lighting parts for the x’mas tree Start from the lights next to the connector and assemble from the bottom of the tree...
- Page 13 Replace the round plates on the tree by the lighting parts layer by layer It can be done very randomly, just make sure the last four round plates are assembled on the top layer...
- Page 14 Take the tan lighting plates to assemble it underneath the 2 floor as shown For the poles, install the lighting round plates right under the dishes on top of it...
- Page 15 Connect with the x’mas tree by the connector on the left side Restore the tree and combine the 1 floor...
- Page 16 The connector with shorter cable pull it to the upper floor And the other one will be pulled to the back of the house Take the last lighting parts for the roof...
- Page 17 Start by assembling the white lighting plates and the round plate to the lamp Pull the remain lightings to the bottom...
- Page 18 Assemble them to the bottom as shown Connect the cables with the 2 floor...
- Page 19 Combine the building and connect all four connectors to the USB cable...
Need help?
Do you have a question about the Lego Home Alone 21330 and is the answer not in the manual?
Questions and answers