
Related Manuals for Mountup MU0006


Summary of Contents for Mountup MU0006
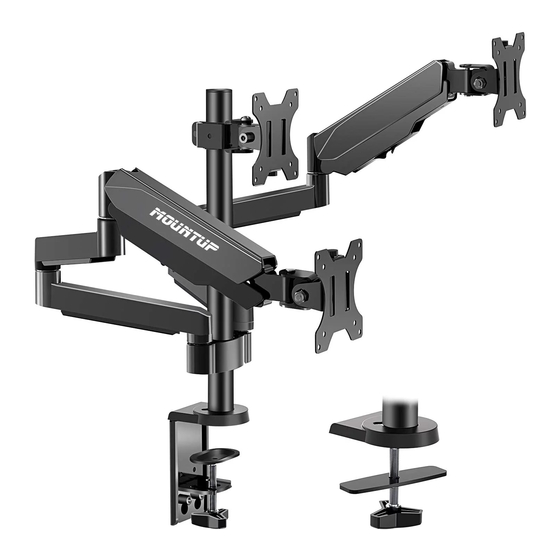
- Page 1 Triple Monitor Counterbalance Desk Mount Instruction Manual MU0006 27" 75x75 100x100 (1~8kg)x3 (2.2~17.6lbs)x3 If you have any questions , please contact us via: help@jollyholding.com V5.0...
-
Page 2: Package Contents
WARNING! If you do not understand these instructions or have doubts about the safety of the installation, assembly or use of this product, contact Customer Service via help@jollyholding.com. Before starting assembly, verify all parts are included and undamaged. Improper installation may cause damage or serious injury. -
Page 3: Assembly Steps
ASSEMBLY STEPS STEP 1: Clamp Installation OR Grommet Base Installation OPTION A: Clamp Installation Loosen Bolts (B5) by using 6mm Allen Key (N), then lift clip plate (B2), bottom plate (B3), and bolt Y (B4) a little to release them from bracket (B1). Mount bracket (B1) to pole(F) using bolts (I). - Page 4 STEP 1: (Continued) OPTION B: Grommet Base Installation Use 6mm allen key(N) to detach the bolt(B5), clip plate(B2),bottom plate(B3) and bolt Y(B4) from clamp(B). Install the grommet base plate(K) to the pole (F) using bolt (I). Install pole(F) with bolt Y(B4) and support plate(J). Tighten bolt Y (B4) or by using 6mm allen key (N).
-
Page 5: Step 2 : Arm Installation
STEP 2 : Arm Installation Install the middle head(E), wire clip(G) and swivel arm(A) to the pole. Fasten the bolt with supplied 6mm Allen key (N) - Page 6 STEP 3 : Attach Monitor OPTION A: Flat Back Monitor Attach the VESA plate (D) to back of monitor and secure with screws(M-A)or(M-C) with washers(M-E) using 6 mm Allen Key (N). Avoid excessive tightening screws damage the monitor. OPTION B: Curved Back Monitor Attach the VESA plate (D) to back of monitor and secure with screws (M-B) or (M-D) with washers (M-E)and washers(M-F)using 6 mm Allen Key (N).
- Page 7 STEP 4 : Hang Monitor Slide the monitors onto the head of swivel arm.Install the security bolt (H). Make sure the security bolt is installed before you rotate the monitor. Refer to below illustrations to adjust tilting angle of your monitor. Note: Fasten/loosen the tilting bolt as needed per arrow direction (+/-) shown in above diagram.
-
Page 8: Step 5 : Adjust Tension
STEP 5 : Adjust Tension For proper functioning of this mount, depending on di erent weight of monitor you might need to adjust tension in gas spring arm (A) using 6 mm Allen Key (N). Clockwise ("-" direction) reduces tension, counter clockwise("+"... -
Page 9: Step 6 : Cable Management
STEP 6 : Cable Management Remove bottom plastic covers from gas spring arm (A) .Run cables from monitor through bottom of gas spring arm (A). Reattach plastic covers as shown in diagram. - Page 10 Adjust as Desired Note: The total length of 3 monitors after arrayed can not be longer than 183cm. ±90° ±90° ±180° +35° -35° DESK DESK Pay attention while clamp install !
-
Page 11: Product Dimensions
Product Dimensions ±90° ±180° ±180° ±90°... - Page 12 CAUTION AND MAINTENANCE: • Never allow children to climb, stand, hang, or play on any part of monitor or stand. • This product is intended for indoor use only. Using this product outdoors could lead to product failure and personal injury. •...
Need help?
Do you have a question about the MU0006 and is the answer not in the manual?
Questions and answers