
Related Manuals for Hart InterCivic Verity Scan


Summary of Contents for Hart InterCivic Verity Scan
- Page 1 Polling Place Field Guide VERSION 3.1.0 Document Number 6651-017 A Humboldt County Office of Elections Revised January 2020...
- Page 2 Austin, TX 78728 Document Number 6651-017 A © 2019 Hart InterCivic, Inc. All Rights Reserved about this guide This Verity Polling Place Field Guide is a portable guide to polling place tasks using the Verity Scan and Verity Touch Writer devices.
- Page 3 Polling Place Field Guide VERSION 3.1.0...
-
Page 4: Table Of Contents
Verity Scan help and features......................................18 troubleshooting ............................................. 18 spoiling printed paper ballots ......................................19 undervotes, overvotes, and blank ballots on Verity Scan ............................19 provisional ballots ..........................................19 the emergency ballot bag and emergency ballot slot .............................. 20 multi-sheet ballots and Verity Scan ....................................20 suspending polls ...................................... -
Page 5: Verity Scan
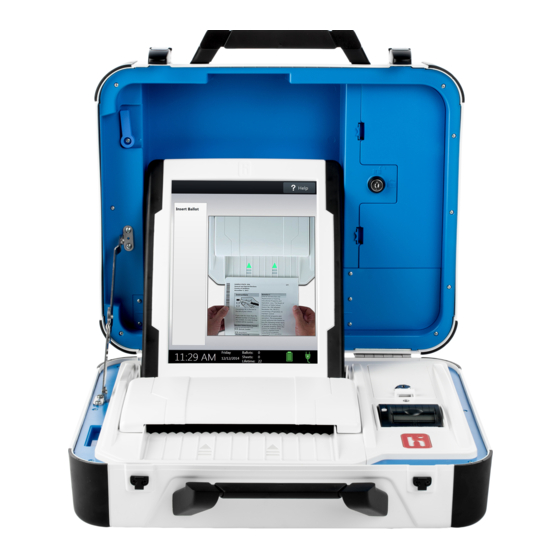
Verity Scan Verity Scan is a polling place-based digital scanner for scanning and casting ballots. Verity Scan can be used with hand-marked ballots or with ballots marked and printed using Verity Touch Writer (see page 26). Verity Scan deposits scanned ballots into its ballot box for secure storage. -
Page 6: Setting Up Verity Scan
Verity Scan setting up Verity Scan setting up the ballot box Position the folded ballot box as shown. Unlatch the four clips (two on each side). Pull open the ballot box. Press the side panels outward until they are flat, being careful not to pinch your hands or fingers. - Page 7 Lower the bottom panel but do not press down. Release the lid by unhooking the 3 straps. Pull the string on the underside of the lid upward to unlock the lid latch. Lift the lid while gently pulling upward and outward, ensuring that the double hinge is fully extended.
- Page 8 Verity Scan Unlock the front door with the ballot box key. Remove the white key from the voting equipment manuals and supplies bag. Using the white key, unlock the front door of the ballot box. Press firmly on bottom panel to lock it in place.
-
Page 9: Setting Up The Verity Scan
Assemble the ballot box, if this has not been done already (see page 6). Place the Verity Scan on the ballot box, aligning footpads with the indentations. The handle on the Verity Scan must face the front of the ballot box. ... - Page 10 IMPORTANT: Do not plug the power cord into the wall yet. Open the Verity Scan case and lock Log the yellow beaded seal number on your Security Log - AM. Open the Verity Scan the lid brace in place. case and lock the lid brace in place ...
- Page 11 During the power on process, a Power-On Self • Test report will print on Verity Scan’s built-in printer. This report will indicate any hardware or connection issues; if any issues are noted, check connections and restart the device using...
-
Page 12: Verity Scan Orientation
In addition to the date and time, the following appears at the bottom of the screen: Ballots: The number of ballots scanned and cast on the Verity Scan for the current • election; at the start of a voting event, this number should be zero. -
Page 13: Poll Worker Button
19. report printer operation The thermal report printer is located on the right- hand side of Verity Scan. To open the paper compartment: While standing in front of the device, pull the lever on the top of the printer cover towards you, and then lift up to open the paper compartment. -
Page 14: Opening Polls
You must open polls on the first day that voting will occur on that device. For instructions on reopening polls on the second or subsequent day of multiple-day voting events, see page 16. Set up and power on the Verity Scan. Confirm that you are running on AC power (see page 12). - Page 15 Select Open the Polls. You can also print a Configuration Readiness report, Precincts Enabled report, or additional copies of the Zero report, if your jurisdiction requires them. IMPORTANT: Once you open polls, you can no longer print a Zero report. Enter the Open Polls Code, and then select Accept.
-
Page 16: Reopening Polls
(Early Voting) To reopen polls after polls have been suspended, power on the Verity Scan. NOTE: When reopening polls, you will not print a Zero report. Enter the Open Polls Code, and then select Accept. The Open Polls report will print. -
Page 17: Voting With Verity Scan
Verity Scan overview: Verity Scan Verity Scan is a polling place-based scanner used to scan and cast paper ballots whether they are hand-marked, or marked using Verity Touch Writer (for Touch Writer instructions, see page 26). instructions for hand-marking ballots The voter fills in the selection box to the left of their choices completely using blue or black ink. -
Page 18: Verity Scan Help And Features
Verity Scan help and features The Help button is located at the top right of the Verity Scan screen. This button provides the voter with help text for the voting step currently underway. Select Exit Help on the bottom right of the Help screen to return to scanning ballots. -
Page 19: Spoiling Printed Paper Ballots
Verity Scan If scanning hand-marked paper ballots, and the voter has overvoted (marked more than the allowed number of choices in a contest), Verity Scan may prompt the voter to choose whether to: Remove their ballot and request a new ballot from the poll worker, or... -
Page 20: The Emergency Ballot Bag And Emergency Ballot Slot
Voters should be instructed to scan all sheets of their ballot, even if they have made no choices on a particular sheet. The Verity Scan ballot counter will increment when a sheet 1 is scanned but not •... -
Page 21: Suspending Polls
(Early Voting) Press the blue poll worker button on the back of the Verity Scan. Select Suspend Polls. Enter the Suspend Polls Code and select Accept. A Suspend Polls report will print automatically. ... - Page 22 Verity Scan to power it off. IMPORTANT: Wait for the Verity Scan to be completely powered down and showing a black screen if you will be unlocking and removing the tablet. If stowing the tablet, make sure to lock it in with the key and pull the blue latch down to secure it in place.
-
Page 23: Closing Polls
IMPORTANT: Wait until the close polls time to close polls. Once polls are closed they cannot be reopened on that Scan device. Press the blue poll worker button on the back of the Verity Scan. Select Close Polls. ... - Page 24 closing polls Enter the Close Polls Code and select Accept. The Close Polls report will print automatically. The polls are now closed. Print and file reports available on the screen as required by your jurisdiction. The available reports may vary and are configured by the election officials in your jurisdiction.
- Page 25 Verity Scan to power it off. IMPORTANT: Wait for the Verity Scan to be completely powered down and showing a black screen if you will be unlocking and removing the tablet. If stowing the tablet, make sure to lock it in with the key and pull the blue latch down to secure it in place.
-
Page 26: Verity Touch Writer
The voter then retrieves and casts the ballot, either using Verity Scan, or into a ballot box to be processed centrally. Verity Access is an Audio-Tactile Interface (ATI) intended for voters that cannot, or prefer not to, use the touchscreen. -
Page 27: Setting Up Touch Writer
setting up Touch Writer setting up the ballot printer Set up the ballot printer table and set the ballot printer on the table. Plug in the square end of the USB printer cable into the printer. (The flat end will be plugged into the Verity Touch Writer.) ... - Page 28 setting up Touch Writer The main tray extender kit for 17”/20” ballots includes two parts: The front piece installs into the MP Tray door, and is • used to support the ballots as they exit the printer. The rear piece replaces the stock paper stop and rear •...
-
Page 29: Setting Up The Voting Booth
setting up the voting booth Remove booth parts from the transport bag. A complete set of booth parts includes the booth table, rear leg assembly, front leg extensions, and privacy screens. Release bungee cords holding the booth legs, if present. - Page 30 setting up Touch Writer Attach the rear leg assembly. Press the metal buttons to attach and lock it into place. Attach the front leg extensions. Press the metal buttons to attach each leg and lock them into place. Turn the booth over to set up the Verity Touch Writer.
-
Page 31: Setting Up The Verity Touch Writer
setting up the Verity Touch Writer Set the Verity Touch Writer on top of the booth, aligning footpads with the indentations (the handle on the front of the Touch Writer should face the same direction as the handle on the booth). ... - Page 32 setting up Touch Writer Plug the flat end of the USB printer cable from the ballot printer into the back of the Verity Touch Writer, with the notch facing up. Open the Verity Touch Writer case and lock the lid brace in place. ...
- Page 33 Seat the tablet in the cradle (A), tilt it back (B), and lock it in place (C). Log the red CFAST seal number on the Security Log - AM. Seat the tablet in the cradle (A), tilt it back (B), and lock it in place (C). Verify the Verity Touch Writer Log the red wire seal number device seals, per local...
- Page 34 setting up Touch Writer Press the red button on the back of the Verity Press the switch on the front of ballot printer, located Touch Writer to power it on. on the bottom right side, to power on the printer. ...
-
Page 35: Touch Writer Orientation
Touch Writer orientation screen orientation When powered up for the first time the device is used during a voting event, the Verity Touch Writer should display the Print Zero Report screen. NOTE: If you are reopening polls during subsequent days of a multiple-day voting event, then you will not print a Zero report. -
Page 36: Poll Worker Button
Touch Writer orientation poll worker button The blue poll worker button is located on the back of Verity Touch Writer. This button is used for certain actions such as printing reports and issuing access codes. about Verity Access Verity Access is intended for voters that cannot, or prefer not to, use the touchscreen. -
Page 37: Report Printer Operation
report printer operation The thermal report printer is located on the right- hand side of the Verity Touch Writer. To open the paper compartment: While standing in front of the device, pull the lever on the top of the printer cover towards you and lift up to open the paper compartment. -
Page 38: Opening Polls
opening polls opening polls You must open polls on the first day that voting will occur on that device. For instructions on reopening polls on the second or subsequent day of multiple-day voting events, see page 40. Setup and power on the Verity Touch Writer. Confirm that you are running on AC power (see page 35). - Page 39 Select Open the Polls. You can also print a Configuration report, Precincts Enabled report, or additional copies of the Zero report, if your jurisdiction requires them. IMPORTANT: Once you open polls, you can no longer print a Zero report. Enter the Open Polls Code, and then select Accept.
-
Page 40: Reopening Polls
reopening polls reopening polls (Early Voting) To reopen polls after polls have been suspended, power on the Verity Touch Writer. NOTE: When reopening polls, you will not print a Zero report. Enter the Open Polls Code, and then select Accept. The Open Polls report will print. ... -
Page 41: Voting With Touch Writer
The voter can then verify their choices using Verity Reader (if available). The voter will cast their ballot using Verity Scan, or into a ballot box to be processed centrally. activating a ballot When the device is ready to be used for marking ballots, the “Ready for Use”... - Page 42 voting with Touch Writer Select Activate ballot. If your jurisdiction has Verity AutoBallot, after activating the ballot, you can use the barcode reader attached to the Verity Touch Writer to scan barcode labels produced by your electronic pollbook. When using AutoBallot, you will scan the barcode, skipping steps 5-6 of this section.
-
Page 43: Marking Ballots With Verity Touch Writer
marking ballots with Verity Touch Writer Once a poll worker has activated a ballot (page 41): The voter selects To get started, touch here (or turns the Move wheel on Verity Access clockwise). If multiple languages are available, a “get started” •... - Page 44 voting with Touch Writer The voter selects whether to use the screen, audio, or both to complete their ballot, and then adjusts their audio and/or screen settings. If the voter chooses to use both the screen and audio, they will then be walked •...
- Page 45 The voter can start voting (by selecting Begin Voting), learn how to use the ballot, or view a list of contests on the ballot. The voter makes their choices; The voter can make ballot choices using the touchscreen, or by using the Move wheel and Select button on the Verity Access.
- Page 46 The voter retrieves the printed ballot from the laser printer next to their Verity Touch Writer. If your polling place is equipped with Verity Scan, • the voter will take their printed ballot to the Verity Scan device to cast their ballot.
-
Page 47: Making Write-In Choices
making write-in choices To vote for a write-in candidate on the ballot (if applicable): On the page for that contest, the voter selects To enter a write in, touch here. The voter types the name of the desired write-in, using the touchscreen or Verity Access, and then selects Accept. -
Page 48: Verity Touch Writer Help And Features
voting with Touch Writer Verity Touch Writer help and features Each Verity Touch Writer is equipped with context-specific help text and settings that can be accessed from the touchscreen, or using Verity Access. To exit help or settings screens and resume voting, select Exit Help or Return to ballot on the bottom right. -
Page 49: Spoiling A Ballot On Verity Touch Writer
spoiling a ballot on Verity Touch Writer The Spoil Current Ballot menu allows you to spoil (discard) the current active ballot before it is printed. Press the blue poll worker button on the back of the Verity Touch Writer. Enter the Poll Worker Code and select Accept. Select Spoil current ballot. -
Page 50: Printing A Summary Report
Verity Touch Writer by selecting Mark as provisional on the Confirm Access Code screen. A provisional voter will then use this code to access, vote, and print a provisional ballot. IMPORTANT: Verity Scan will not accept provisional ballots printed from Touch Writer. Follow local procedure to process provisional ballots. -
Page 51: Suspending Polls
suspending polls (Early Voting) Press and hold your finger on the Ready for Use button on the Touch Writer screen, or, alternately, press the blue poll worker button on the back of the Verity Touch Writer. Select Menu at the top of the screen. ... - Page 52 suspending polls The polls are now suspended. Print and file reports available on the screen as required by your jurisdiction. Available reports may vary and are configured by the election officials in your jurisdiction. You may use the space below to document local requirements. local reporting requirements When you have finished printing reports, press the red power button on the back of the Verity...
-
Page 53: Closing Polls
closing polls IMPORTANT: Wait until the close polls time to close polls. Once polls are closed they cannot be reopened on that Touch Writer. Press and hold your finger on the Ready for Use button on the Touch Writer screen, or, alternately, press the blue poll worker button on the back of the Verity Touch Writer. - Page 54 closing polls Select Yes, close the polls. IMPORTANT: Once polls have been closed, they cannot be reopened on that Touch Writer. Enter the Close Polls Code and select Accept. The Close Polls report will print automatically. The polls are now closed. Print and file reports available on the screen as required by your jurisdiction.
- Page 55 Press the red power button on the back of the Verity Touch Writer to power it off. IMPORTANT: Wait for the Verity Touch Writer to be completely powered down and showing a black screen if you will be unlocking and removing the tablet.
- Page 56 ©2019 Hart InterCivic All Rights Reserved Hart InterCivic and Verity are registered trademarks of Hart InterCivic, Inc.
Need help?
Do you have a question about the Verity Scan and is the answer not in the manual?
Questions and answers