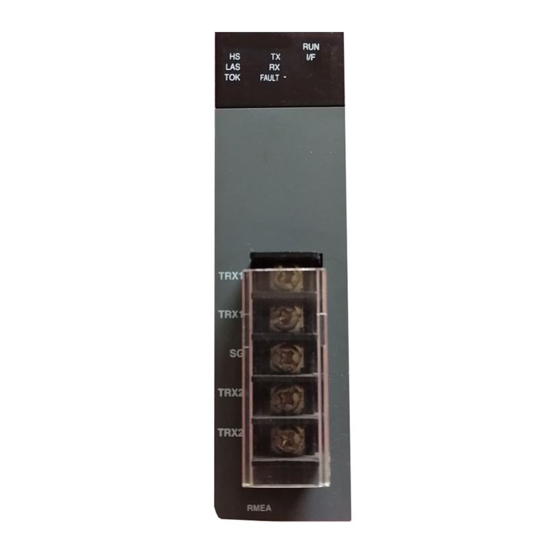
LS ELECTRIC XGT Series User Manual

LS ELECTRIC XGT Series User Manual

Programmable logic control ethernet module
Hide thumbs Also See for XGT Series:

Advertisement

Quick Links

LS ELECTRIC strives to maximize your profits in gratitude for choosing us as your partner.
Programmable Logic Control
XGT Series
XGT Ethernet Module
XGL-EFMTB
XGL-EFMFB
XGL-EFMHB
XOL-ES4T
XOL-ES4H
XGL-EH5T
XGL-EFMT
XGL-EFMF

Advertisement

Table of Contents
loading

Summary of Contents for LS ELECTRIC XGT Series

  • Page 1 LS ELECTRIC strives to maximize your profits in gratitude for choosing us as your partner. Programmable Logic Control XGT Ethernet Module XGT Series XGL-EFMTB XGL-EFMFB XGL-EFMHB XOL-ES4T XOL-ES4H XGL-EH5T XGL-EFMT XGL-EFMF...
  • Page 2 Safety Instruction Before using the product … For your safety and effective operation, please read the safety instructions thoroughly before using the product. Safety Instructions should always be observed in order to prevent accident or risk with the safe and proper use the product.
  • Page 3 Safety Instruction Safety Instructions for design process Warning Please install a protection circuit on the exterior of PLC so that the whole system may operate safely regardless of failures from external power or PLC. Any abnormal output or operation from PLC may cause serious problems to safety in whole system. Install protection units on the exterior of PLC like an interlock circuit that deals with opposite operations such as emergency stop, protection circuit, and forward/reverse rotation or install an interlock circuit that deals with high/low limit under its position controls.
  • Page 4: Safety Instructions

    Safety Instruction Safety Instructions for design process Caution I/O signal or communication line shall be wired at least 100mm away from a high-voltage cable or power line. Fail to follow this instruction may cause malfunctions from noise Safety Instructions on installation process Caution Use PLC only in the environment specified in PLC manual or general standard of data sheet.
  • Page 5 Safety Instruction Safety Instructions for wiring process Warning Prior to wiring works, make sure that every power is turned off. If not, electric shock or damage on the product may be caused. After wiring process is done, make sure that terminal covers are installed properly before its use.
  • Page 6 Safety Instruction Safety Instructions for test-operation and maintenance Warning Don’t touch the terminal when powered. Electric shock or abnormal operation may occur. Prior to cleaning or tightening the terminal screws, let all the external power off including PLC power. If not, electric shock or abnormal operation may occur. Don’t let the battery recharged, disassembled, heated, short or soldered.
  • Page 7 Safety Instruction Safety Instructions for waste disposal Caution Product or battery waste shall be processed as industrial waste. The waste may discharge  toxic materials or explode itself.
  • Page 8: Revision History

    Revision History Revision History Version Date Remark Page V1.0 2005.03 First Edition V1.1 2005.05 Adding the function description Adding module detachment and how to change Setting PLC type at CH3.8 V1.2 2005.09 XG-PD CH5.2 Adding appendix (CPU memory device) APPENDIX- V1.3 2005.11 Fixing figure and adding contents...
  • Page 9 Revision History Remark Version Date Page 1. Format and contents modification according to the change of company name(LSIS -> LS ELECTRIC) V3.1 2020.06 CH3.6 2. Adding RAPIEnet+ autoscan CH4, CH9 3. Adding Smart Extension service diagnostic variables...
  • Page 10 About User’s Manual Thank you for purchasing PLC of LS ELECTRIC Co., Ltd. Before use, make sure to carefully read and understand the User’s Manual about the functions, performances, installation and programming of the product you purchased in order for correct use and importantly, let the end user and maintenance administrator to be provided with the User’s Manual.
  • Page 11 Table of Content ◎ Contents ◎ Chapter 1 Overview ------------------------------------------------------------------------------------------------------------------------------------------ 1-1 Guide to use this manual -------------------------------------------------------------------------------------------------------------------------------- 1-1 Characteristics --------------------------------------------------------------------------------------------------------------------------------------------- 1-2 1.2.1 Ethernet module ------------------------------------------------------------------------------------------------------------------------------------ 1-2 1.2.2 Switch module --------------------------------------------------------------------------------------------------------------------------------------- 1-3 1.2.3 Product name --------------------------------------------------------------------------------------------------------------------------------------- 1-4 1.2.4 Function Items by Version ------------------------------------------------------------------------------------------------------------------------ 1-4 1.2.5 Number of units that can be installed for each CPU --------------------------------------------------------------------------------------- 1-7 Software for using the product ------------------------------------------------------------------------------------------------------------------------- 1-8...
  • Page 12 Table of Content Test operation ---------------------------------------------------------------------------------------------------------------------------------------------- 3-7 3.3.1 Precautions for System Configuration --------------------------------------------------------------------------------------------------------- 3-7 3.3.2 Check items before trial operation -------------------------------------------------------------------------------------------------------------- 3-7 3.3.3 The method to remove and replace the module. ------------------------------------------------------------------------------------------- 3-9 Precautions when Connecting to a Network ----------------------------------------------------------------------------------------------------- 3-10 3.4.1 Use ring network ---------------------------------------------------------------------------------------------------------------------------------- 3-10 3.4.2...
  • Page 13 Table of Content 4.5.2 View Communication Module Log ----------------------------------------------------------------------------------------------------------- 4-44 Smart extension system configuration ------------------------------------------------------------------------------------------------------------- 4-47 4.6.1 Typical Configuration ---------------------------------------------------------------------------------------------------------------------------- 4-47 4.6.2 Ring / Line configuration. ----------------------------------------------------------------------------------------------------------------------- 4-48 4.6.3 Auto Speed Sync Operation ------------------------------------------------------------------------------------------------------------------- 4-49 Chapter 5 High speed link service ------------------------------------------------------------------------------------------------------------------------ 5-1 Overview ---------------------------------------------------------------------------------------------------------------------------------------------------- 5-1 HS link send / receive data processing -------------------------------------------------------------------------------------------------------------- 5-2 HS link setting ---------------------------------------------------------------------------------------------------------------------------------------------- 5-3...
  • Page 14 Table of Content 6.3.2 P2P channel ----------------------------------------------------------------------------------------------------------------------------------------- 6-4 6.3.3 P2P block --------------------------------------------------------------------------------------------------------------------------------------------- 6-7 P2P service operation ------------------------------------------------------------------------------------------------------------------------------------ 6-9 User frame definition ----------------------------------------------------------------------------------------------------------------------------------- 6-19 6.5.1 Overview of a user frame definition ---------------------------------------------------------------------------------------------------------- 6-19 6.5.2 User frame definition setting ------------------------------------------------------------------------------------------------------------------- 6-19 6.5.3 Operation of a user frame definition ---------------------------------------------------------------------------------------------------------- 6-24 E-mail Service -------------------------------------------------------------------------------------------------------------------------------------------- 6-32 6.6.1...
  • Page 15 10.1.3 Cable ------------------------------------------------------------------------------------------------------------------------------------------------ 10-3 10.2 Requirement to conform to the Low-voltage Directive ----------------------------------------------------------------------------------------- 10-4 10.2.1 Standards applicable to XGT series --------------------------------------------------------------------------------------------------------- 10-4 10.2.2 Selection of XGT Series PLC------------------------------------------------------------------------------------------------------------------ 10-4 Appendix ----------------------------------------------------------------------------------------------------------------------------------------------------------------- A-1 A.1 XGT CPU memory device list ----------------------------------------------------------------------------------------------------------------------------- A-1...
  • Page 16 ■ Headquarter ■ Overseas Subsidiaries • LS ELECTRIC Japan Co., Ltd. (Tokyo, Japan) LS-ro 127(Hogye-dong) Dongan-gu, Anyang-si, Gyeonggi-Do, 14119, Korea Tel: 81-3-6268-8241 E-Mail: jschuna@lselectric.biz • LS ELECTRIC (Dalian) Co., Ltd. (Dalian, China) ■ Seoul Office Tel: 86-411-8730-6495 E-Mail: jiheo@lselectric.com.cn •...
  • Page 17 Table of Content...
  • Page 18 Chapter 1 Overview Chapter 1 Overview 1.1 Guide to use this manual This user's manual provides information on the performance specifications and operation methods of each product required to use the Ethernet (FEnet) module and switch module. Category Item Contents This chapter describes the structure of this manual, product features, and features Chapter 1 Overview...
  • Page 19 Chapter 1 Overview 1.2 Characteristics Ethernet is a 'technical standard' established by the IEEE, which enables easy network construction and high-speed, high- capacity data collection through CSMA / CD communication. Ethernet module is a module for data transmission between upper system such as PC device or PLC using electric / optical media. The Ethernet module supports TCP / IP and UDP / IP protocols and has the following characteristics.
  • Page 20 1.2.2 Switch module A switch module is a hub module that has a switching function for interfacing between XGT series Ethernet modules. Mounting XGT base module to connect PLC-to-PLC or system-to-system by Ethernet communication. (1) Can be mounted on XGK / I / R base module (XGL-EH5T) It can be mounted on XGT base without external power, and its compact size makes it easy to install in small spaces.
  • Page 21 Chapter 1 Overview 1.2.3 Product name This chapter describes the product configuration of the XGT Ethernet module. Type Content Note XGL-EFMT 10BASE-T/100BASE-TX Category-5E or higher(STP) XGL-EFMF 100BASE-FX Fiber Optic(SC) XGL-EFMTB 100BASE-TX/1000BASE-T Category-5E or higher(STP) 100BASE-TX/1000BASE-T Category-5E or higher(STP) XGK/ XGI / XGR XGL-EFMHB 100BASE-FX/1000BASE-X Fiber Optic(LC/SFP)
  • Page 22 Chapter 1 Overview (2) HS Link Service The high speed link is the communication method between the XGB PLC and XGK PLC communication modules and data is transmitted and received periodically according to the high speed link parameter setting. The high speed link service transmits a frame to the subnet broadcast using the UDP protocol.
  • Page 23 Among EtherNet / IP functions, client functions are integrated in the Smart expansion service. (9) RAPIEnet service Based on Ethernet communication, it communicates between XGT series PLCs and provides two Ethernet ports capable of line (daisy chain) and ring configuration. It provides a flexible network configuration method compared to the existing STAR type PLC-to-PLC communication module.
  • Page 24 Chapter 1 Overview 1.2.5 Number of units that can be installed for each CPU Up to 24 Ethernet modules can be mounted regardless of the main base or extension base. For maximum performance of the communication module, mount it on the main base where possible. The table below shows the types of services available for each CPU.
  • Page 25 1.3 Software for using the product Describes programming tools and other CPU software for using the Ethernet module. For use, please refer to the following and apply it to the system. 1.3.1 Software checklist (1) Applied to XGT series Programming Category Service/Driver adding XGK CPU...
  • Page 26 Chapter 1 Overview Notes (1) The above program can be downloaded and used from the current website If you can not use the Internet, visit the nearest distributor and use the installation CD-ROM. Website address: http://www.lselectric.co.kr/ (2) XG5000 can be programmed with RS-232C port and USB of CPU module. Refer to XGK CPU Module or XGI CPU Module User's Manual for wiring type.
  • Page 27 Chapter 1 Overview 1-10...
  • Page 28: Chapter 2 Product Specifications

    Chapter 2 Product specifications Chapter 2 Product specifications 2.1 General specifications The general specifications of the XGT series are as follows. Related Item Specification specifications Ambient 0 ~ 55 C temperature Storage 25 ~70 70 C  temperature Ambient Humidity...
  • Page 29: Performance Specifications

    Chapter 2 Product specifications 2.2 Performance specifications Please refer to the table below when configuring the system. Specifications Item Communication Port Driver Note method number FEnet UDP/IP 2006 HS Link Up to 128 blocks Service 200 words per block RAPIEnet TCP/IP 2004 XGT Enet client...
  • Page 30 Chapter 2 Product specifications 2.2.1 Ethernet module XGL- Item XGL-EFMT XGL-EFMF XGL-EFMFB XGL-EFMHB EFMTB Electric: 10/100/1 Transmission speed(Mbps) 10/100 100/1000 10/100/1000 Optical :100/1000 Transmission method Baseband Maximum distance 100m Electric:100m Transmiss between nodes (Node-Switch) (Multi-mode) Optical: 2km Electric: Category 5E or higher STP (Shielded Twisted-pair) cable Specificati Send media Optical: Multi mode(MMF)/Single mode(SMF) cable...
  • Page 31 Chapter 2 Product specifications Notes (1) Baud rate can be set as shown above when RAPIEnet is set to Disable. However, when setting RAPIEnet v1 in driver setting, only 100M is supported for electrical and optical ports, and setting 100/1000 for electrical and optical ports when setting to RAPIEnet v2.
  • Page 32 Chapter 2 Product specifications 2.2.4 Load specifications Communication load is divided into the load by media interrupt received per second from Ethernet media and the transmission load transmitted by CPU module to Ethernet module. If the load due to the media interrupt guaranteed by the Ethernet module and the transmission load are exceeded, it may not operate normally.
  • Page 33: Structure And Characteristics

    Chapter 2 Product specifications 2.3 Structure and Characteristics 2.3.1 Names of Part and Function (1) XGL-EFMT/XGL-EFMF <Name of each part> Name Contents LED Display Please refer to the content below. It is a connector for electric cable for connecting Ethernet communication with external Communication device.
  • Page 34 Chapter 2 Product specifications Names of LED display Functional Description contents condition Display server Operating server service with remote Ethernet (including PC). service operation Server service operation is disabled. state Communication with the CPU module is not normal. The module is critical error. Display module failure state Normal operation.
  • Page 35 Chapter 2 Product specifications (2) XGL-EFMTB/XGL-EFMFB/ XGL-EFMHB <Name of each part> Name Contents LED Display Please refer to the following content It is a connector for electric cable for connecting Ethernet communication with external Communication device. connector It is a connector for optical fiber cable for Ethernet communication with external device. ON : when data is transmit or receive.
  • Page 36 Chapter 2 Product specifications Names of LED display Functional Description contents condition service operation High-speed P2P service is canceled. state Display Smart Operating remote service with remote Ethernet communication device (including PC). PADT extension service Remote service operation is disabled. operation state.
  • Page 37 Chapter 2 Product specifications Names of LED display Functional Description contents condition When the communication network is connected. Display LINK * Please refer to the RJ-45 LNK LED specification for LINK speed. LINK LED operation state When the communication network is not connected. Notes (1) Relay function is not supported at 0Mbps, so if Relay option is checked at 10Mbps, Relay LED will be off.
  • Page 38 Chapter 2 Product specifications (3) XGL-EH5T <Name of each part> Name Contents LED Display Please see below. Communication It is a connector for electric cable for connecting Ethernet communication with external connector device. <Names of LED and Function> Names of LED display Functional Description contents...
  • Page 39 Chapter 2 Product specifications (4) XOL-ES4T/ XOL-ES4H 2-12...
  • Page 40 Chapter 2 Product specifications <Name of each part> Name Contents LED Display Please see below. Station number The station number of the product can be set from 0 to 99. It is a connector for electric cable for connecting Ethernet communication with external device. Communication connector It is a connector for optical fiber cable for Ethernet communication with external device.
  • Page 41 Chapter 2 Product specifications Names of LED LED display contents Functional Description condition This is when MRS has a station number collision with another node. Flicker - This is the case of a station number collision between the nodes other than Display FAULT LED MRS in the network.
  • Page 42 Chapter 2 Product specifications 2.4 Specification of cable 2.4.1 Twisted pair cable Cables are classified into two types according to the following standards. Shield or not: 3 Categories (UTP, FTP, STP), Applied frequency band: 7 Categories( Cat.1~ 7) (1) Cable type (Shield) Classification Detail Usage...
  • Page 43 Chapter 2 Product specifications (3) Example of category 5 twist pair wire (UTP) (CTP-LAN5) Item Unit Value Ω/km Conductor resistance 93.5 (Max.) MΩ·km Insulation 2,500 resistance(Min.) Withstand voltage V/minute AC 500 Ω(1~100MHz) Characteristic 100 ± 15 impedance 10MHz dB/100m Attenuation 16MHz or less 20MHz...
  • Page 44 Chapter 2 Product specifications 2.5 How to connect communication between our products Ethernet module displays communication connection method with own communication module when master and slave operate. 2.5.1 Master communication 2-17...
  • Page 45 Chapter 2 Product specifications 2.5.2 Slave communication 2-18...
  • Page 46 Chapter 3 Product Installation and trial operation Chapter 3 Product Installation and trial operation 3.1 Installation 3.1.1 Preparation for operating (1) Ethernet module system configuration 1) Check the basic elements necessary for the system configuration and select a proper communication module.
  • Page 47 Chapter 3 Product Installation and trial operation 3.1.2 Setting sequence for operation Describes the order of installation and operation of the product. When the installation of the product is completed, please install and set up the system in the following order. 1) Mount Ethernet module on base module.
  • Page 48 Chapter 3 Product Installation and trial operation 3.2 Installation 3.2.1 Ethernet module Network UTP 5 Cable Hub/Switch 8Pin RJ-45 Plug Maximum segment length for electric media is 100 m Cables are classified into two types according to the following standards. Between Switch and Pin No.
  • Page 49 Chapter 3 Product Installation and trial operation (1) Precautions for installing the cable 1) For reliable 100Mbps signal transmission, use a cable that meets category 5 or higher characteristics. 2) Be careful not to exceed excessively the tensile strength of the cable while wiring. 3) When removing the cover, peel off the cover only for the length you want to wire and make sure that the insulation is not damaged.
  • Page 50 Chapter 3 Product Installation and trial operation 3.2.2 Installing and Removing the Switch Module The XOL-ES4T / ES4H is equipped with a standard DIN rail (35 mm rail width) hook and can be installed on the DIN rail. (1) When installing on DIN rail ①...
  • Page 51 Chapter 3 Product Installation and trial operation (3) Precautions for Ethernet Switch Module(XGL-EH5T) Installation Switch modules can be used to connect between Ethernet modules using 10 / 100BASE-TX. Therefore, as shown in the figure below, the configuration for network system configuration between modules and between PLC systems and PCs can be connected.
  • Page 52: Test Operation

    Chapter 3 Product Installation and trial operation 3.3 Test operation After connecting the communication cable, turn on the power and check the LED for normal operation. If it is normal, download the program to the PLC and execute the program. 3.3.1 Precautions for System Configuration (1) IP addresses, including Ethernet modules, must not overlap each other.
  • Page 53 Chapter 3 Product Installation and trial operation (2) Sequence of trial operation The following shows the procedure from the completion of installation on the PLC to the trial run. Start Power ON: 1) Check the input power wiring. 2) Check the communication cable connection. 3) Turn on the power.
  • Page 54 Chapter 3 Product Installation and trial operation 3.3.3 The method to remove and replace the module. If you want to replace or remove the module due to hardware error or system change, follow the procedure below. (1) Order of exchanging communication module 1) Turn off the power module of the base where the communication module is installed.
  • Page 55 Chapter 3 Product Installation and trial operation 3.4 Precautions when Connecting to a Network If a node that supports the RAPIEnet protocol and a node that does not support the RAPIEnet protocol are connected on the same network, refer to the information below. 3.4.1 Use ring network When using a ring network, the node that supports the RAPIEnet protocol selects the ring manager for ring control.
  • Page 56 Chapter 3 Product Installation and trial operation 3.4.2 Use line network When using a line type network, both last nodes among the nodes that support the RAPIEnet protocol are selected as the Line Manager. At this time, if you connect nodes that do not support the RAPIEnet protocol to the outside of the line managers, the nodes that can communicate with the nodes are determined by the relay option of the line manager.
  • Page 57 Chapter 3 Product Installation and trial operation 3.5 XG5000 Program XG5000 is a program tool for Ethernet communication network control and management. It provides configuration and management functions related to communication module such as communication parameter, communication service parameter and module and network diagnosis. The functions related to Ethernet module of XG5000 can be classified as follows.
  • Page 58 Chapter 3 Product Installation and trial operation 3.5.2 Communication module registration This section describes the communication settings for the Ethernet module to operate. (1) Selection and execution of communication module For standard setting of communication module, base, slot location of communication module should be registered in Undefined Network of XG5000 project tree list.
  • Page 59 Chapter 3 Product Installation and trial operation Click the [Add Module] button on the bottom left of the [Select Module] window. In the [Communication Module Settings] window, specify Type, Base and Slot. The screen where Ethernet module is registered in Slot 0 of BASE 0 is as follows. 2) On line registration If communication module is connected to the installed XGT CPU module, all communication modules installed in XGT can be searched automatically and registered in the project window as follows.
  • Page 60 Chapter 3 Product Installation and trial operation Press the "I/O Sync" button at the bottom left of the [I / O Information] window. 3-15...
  • Page 61 Chapter 3 Product Installation and trial operation Check the contents of the message window and click “Yes” if there is no problem. The screen where Ethernet module is automatic registered in slot 00 of base 00 is as follows. 3-16...
  • Page 62 Chapter 3 Product Installation and trial operation 3.5.3 Standard settings This is a screen for setting communication system parameters for Ethernet module to connect to network. It provides basic information such as IP address, Subnet Mask, Gateway address, Receive Time Out Setting, No. of Dedicated Connections, Host Table Settings and Sets EIP Server.
  • Page 63 Chapter 3 Product Installation and trial operation 1) TCP/IP setting(XGK/I CPU series) Classification Content Station number used for high speed link and RAPIEnet communication between Ethernet modules. Modules on the same network should not have duplicate station numbers. - The station number range of the high speed link communication is 0 ~ 63. - The station number range of the RAPIEnet communication (including Smart Station No Extension) is 0 ~ 220.
  • Page 64 Chapter 3 Product Installation and trial operation 1) Driver setting Classification Content XGT server: When operating as a server(TCP Port:2004, UDP Port:2005) Server mode - V6.0 or less: It supports XGT Enet dedicated communication server. - V6.0 or higher: Spports XGT Enet dedicated communication server / XGT Cnet dedicated communication server.
  • Page 65 Chapter 3 Product Installation and trial operation 1) ONE IP Solution If ONE IP Solution is used, when master switching occurs due to error, communication disconnection, etc., the IP address of the FEnet module mounted on the master base and the FEnet module mounted on the standby base are exchanged.
  • Page 66 Chapter 3 Product Installation and trial operation 3) Reception timeout time setting Classification Content When operating If a response message is not received within the client Receive Time Out period set by Client the requesting server during P2P client communication, it assumes a problem with the server system and terminates the connected P2P client service.
  • Page 67 Chapter 3 Product Installation and trial operation Notes (1) In case of DHCP setting, download the parameter and connect to PLC and check the IP address in [Online][Communication module setting][System diagnosis][Communication module information]. In addition, you can check the default setting displayed when you double-click the communication module displayed in the project tree after opening from the PLC.
  • Page 68 Chapter 3 Product Installation and trial operation Classification Contents SNTP time ENABLE : Enable SNTP operation synchronization DISABLE : Disabled SNTP operation function Operate with SNTP ENABLE: Operates immediately when power is applied. Initialization DISABLE: Operates after synchronization cycle time after power is applied. NTP Server Register NTP server to request time information.
  • Page 69 Chapter 3 Product Installation and trial operation 3.5.7 Advanced Settings This is a function to change the XGT server port. By default, it is assigned as 2004 for TCP / IP and 2005 for UDP / IP, but you can change this value to the number you want. For XGT server function, refer to Section 7.1 XGT Server. 3-24...
  • Page 70 Chapter 3 Product Installation and trial operation 3.5.8 Download/Upload Standard Settings parameters created using XG5000 can be written (download) or parameters can be read (uploaded). (1) Writing (download) 1) Connect with the CPU of the system equipped with the Ethernet module via [Online]  [Connect].
  • Page 71 Chapter 3 Product Installation and trial operation Notes 1) XG5000 can be connected to RS-232C port or USB port of CPU module. Refer to the wiring diagram of the relevant CPU module for the available cable types. 2) When downloading the communication parameters to the CPU module, if the link of the related service is allowed, the parameter is automatically changed after the download is completed.
  • Page 72 Chapter 3 Product Installation and trial operation (2) Reading(Upload) 1) Connect with the CPU module of the main base equipped with the Ethernet module and register the communication module to read the Standard Settings. That is, select [Online]  [Read] after designating communication module of [Undefined Network] in the project tree as B0S2 XGL-EFMT (B).
  • Page 73 Chapter 3 Product Installation and trial operation 3.5.9 Link enable In order to send / receive high speed link and P2P data downloaded to XG5000, link permission to start communication operation is required. By allowing link enable, communication module initiates sending / receiving service. Each parameter can be individually assigned an action.
  • Page 74 Chapter 3 Product Installation and trial operation (2) Link enable through a flag 1) Here is how to enable link via flag. The following version is required to use link enable using flag. Item Version XG5000 V3.61 or higher XGR CPU V1.91 or higher XGI CPU V3.4 or higher...
  • Page 75 Chapter 3 Product Installation and trial operation Flag Data type Device Contents _HS6_REQ_NUM F10315 Set enable/disable for high speed link No. 6 _HS7_REQ_NUM F10316 Set enable/disable for high speed link No. 7 _HS8_REQ_NUM F10317 Set enable/disable for high speed link No. 8 _HS9_REQ_NUM F10318 Set enable/disable for high speed link No.
  • Page 76 Chapter 3 Product Installation and trial operation ▶ Link enable method - Set On for high speed link/P2P enable/disable setting flag  high speed link/P2P enable/disable request flag On ▶ Disable enable method - Set Off for high speed link/P2P enable/disable setting flag  high speed link/P2P enable/disable request flag On ▶...
  • Page 77: System Diagnosis

    Chapter 3 Product Installation and trial operation 3.6 System diagnosis The system diagnosis function indicates the overall service status and information communication module. It shows detailed online status such as link type, link information and O /S information so that users can diagnose and debug data send/ receive relationship of current communication module.
  • Page 78 Chapter 3 Product Installation and trial operation 3.6.2 Types of diagnostic functions On the diagnosis screen, diagnose the status of each module with the pop-up menu. The main functions of each item are as follows. Classification Content Communication Module It shows basic information, hardware and communication status of Information communication module.
  • Page 79 Chapter 3 Product Installation and trial operation (1) Communication Module Information Communication module information shows Standard information such as base information, HS link station no., IP information and start status of media and communication service. This allows the user to check whether the communication module is in normal state.
  • Page 80 Chapter 3 Product Installation and trial operation 2) P2P service When P2P parameter is set and enabled, it indicates whether the service is normal or not. Real-time monitoring is possible by specifying redo and continuous read through menu. 3-35...
  • Page 81 Chapter 3 Product Installation and trial operation 3) HS Link Service Monitoring by flag is performed for individual parameters of HS link parameter. HS link service information displays individual information such as run link and link trouble. (3) Media information Indicates packet information input to the media.
  • Page 82 Chapter 3 Product Installation and trial operation (4) Ping Test (5) Autoscan Indicates the link interface status of the network. 3-37...
  • Page 83 Chapter 3 Product Installation and trial operation (6) RAPIEnet media information(Module version V6.0 or higher) Indicates the link interface status of the network. (7) RAPIEnet autoscan(Module version V6.0 or higher:) Indicates the link interface status of the network. 3-38...
  • Page 84 Chapter 3 Product Installation and trial operation (8) Saving and comparing RAPIEnet autoscans(V8.1 or higher) This function compares the results of the previous RAPIEnet autoscan with the results of the current RAPIEnet autoscan in RAPIEnet autoscan. Executing RAPIEnet autoscan in [Online]> [Communication module setting and diagnosis]> [System diagnosis]. Click the [Save] button to save the current RAPIEnet autoscan information to the module.
  • Page 85 Chapter 3 Product Installation and trial operation (9) RAPIEnet+ Auto Scan function (V8.10 or higher) RAPIEnet + Auto Scan function is provided for link disconnection section detection of EtherNet / IP devices connected to XOL-ES4x (MRS). The disconnection section detection is performed by comparing the current system configuration (hereafter Live Image) based on the system configuration (hereinafter Goden Image) set by the user.
  • Page 86 Chapter 3 Product Installation and trial operation If the cable between the 0st and 20th node is removed in this state, the disconnection section is displayed in red as shown below. 3-41...
  • Page 87 Chapter 3 Product Installation and trial operation When nodes 0st and 20th are connected again, the connected section is marked with a blue line as follows. When removing node 2 in the above state, the removed module is displayed in red as shown below, and the cable disconnection section is displayed in red due to the module.
  • Page 88 Chapter 3 Product Installation and trial operation (10) View Communication Module Log (Module version V6.0 or higher:) It indicates the event and communication history of communication module. (11) Remote OS download (Module version V6.0 or higher) Update OS of remote communication module. 3-43...
  • Page 89 Chapter 3 Product Installation and trial operation (12) Loopback test (Module version V6.0 or higher:) The loopback test of the local Ethernet module is used to test the hardware for abnormalities. Notes 1) Reset communication module after remote OS download If you do not reset, the communication module will not operate normally.
  • Page 90 Chapter 4 Smart Extension service Chapter 4 Smart Extension service 4.1 Overview Smart extension service is a service between Ethernet (FEnet) module V8.0 or higher and Communication device, that is, Expansion driver, Smart I/O expansion (XEL-BSSRT / BSSRF / BSSRH), Smart I / O block. It is a service that can be used like one system by adding several PLCs with simple setting.
  • Page 91 Chapter 4 Smart Extension service 4.2 Smart extension service setting Smart Extension service can be easily set by selecting parameters for each item in XG5000. The setting procedure and the function of each item are as follows. 4.2.1 Standard settings Smart Extension service operates according to the Standard Settings of Ethernet (FEnet).
  • Page 92 Chapter 4 Smart Extension service connection of Communication devices in Smart extension service. - If RAPIEnet protocol is used in Smart Extension service, ring configuration and High Speed communication between own networks are possible. 4.2.2 Smart Extension service (1) Click the [Project] tab on the left project window and select by right clicking on the communication module item on the tree.
  • Page 93 Chapter 4 Smart Extension service (4) If you do not want to add the Smart Extension service without using the Smart extension wizard, simply select “Cancel” in the [Overview] window of the Smart extension wizard to register the Smart extension service. (5) After setting each item in [Details] or performing “Autoscan”, select the following.
  • Page 94 Chapter 4 Smart Extension service (6) In [PLC area setting] window, memory setting for 'Input / Output Variable' and 'Enables EB/Slot Diagnostic variable' is available. The address and size are automatically changed according to the communication device added in the advanced detailed settings. (However, the memory area setting counts Smart extension service as the highest priority.
  • Page 95 Chapter 4 Smart Extension service (7) To add a communication device, right-click [Smart Extension] and select [Add Item]  [Add Communication Device] or double-click New under Smart Extension in the project window. (8) You can add the communication device of the Smart Extension Service by specifying the connection information on the Connection tab of the Add Communication Device window and selecting 'OK'.
  • Page 96 Chapter 4 Smart Extension service Item Content EB No. Specify the Extension Base (EB) number of the Communication device to add. Specifies the connecting protocol of the communication device to be added. Available protocol information according to RAPIEnet setting of master and Communication deviceommunication device is as follows.
  • Page 97 Chapter 4 Smart Extension service 4.2.3 Smart Extension master setting In the Smart expansion master setting, the master setting, PLC area setting and Communication device operation setting can be performed. When a Communication device is added using the Smart Expansion Window or Autoscan, the start address and size of the input / output variables and diagnostic variables in the PLC area settings are automatically set up for the added Communication device.
  • Page 98 Chapter 4 Smart Extension service Item Contents Name Set the name of the Smart Expansion master module. Set the EB number of the Smart Expansion master module. EB No. (Default: 0 Cannot be modified) Set the type of the Smart Expansion master module. Module type (Displays the communication module type.) image...
  • Page 99 Chapter 4 Smart Extension service [When set to default] [When input is set to% MW1000 and output is set to% MW2000] (4) Select "Communication Device Settings" from the Smart extension tree to set the Communication device operation setting. 4-10...
  • Page 100 Chapter 4 Smart Extension service Item Contents Set all I / O parameters of the PLC equipped with the Sets all I/O parameters Communication device. Detailed setting is as follows. Set standard input filter value of input module installed in Communication device.
  • Page 101 Chapter 4 Smart Extension service Check the location (Smart Extension EB, BASE, SLOT) of the module to apply in batch and select 'OK’ (It is not applicable to each module individually, but the setting values are applied to all modules at once.) Notes Use with caution because the set values of the same module in the Smart Expansion System are set to be the same.
  • Page 102 Chapter 4 Smart Extension service (7) In the [Allocate Input/Output Variables] window, check the input / output devices of the PLCs equipped with each Communication device. At this time, select “Register Variable” to register the device as a variable. (8) If you double-click [Variable / Comment] in the [Project] window, you can see that the Smart Extension input / output variable is registered as the CPU variable of the master.
  • Page 103 Chapter 4 Smart Extension service The variable name rules for input / output variables are as follows (1) I/O Module _BBSS_EBXX_RQxxPyy: Base number on which the master module is mounted _BBSS_EBXX_RQxxPyy: Slot number on which the master module is mounted _BBSS_EBXX_RQxxPyy: EB number of the Communication device _BBSS_EBXX_RQxxPyy: Input / Output division(RQ:Output / RI: Input) _BBSS_EBXX_RQxxPyy: Slot number of the module mounted on the Communication device...
  • Page 104 Chapter 4 Smart Extension service (10) Diagnostic variables are as follows Category Item Type and Contents Size _BBSS_STATUS_CHG_CNT 1Word(2Byte) Number of Smart Expansion Network Status changes (When using RAPIEnet V2, the counter increases when the network topology is changed) 1Word(2Byte) Smart Expansion Maximum Scan time(100 ㎲) (If _BBSS_SCAN_MAX all the protocol types of EB participating in the service...
  • Page 105 Chapter 4 Smart Extension service Notes The variable name rules for diagnostic variables are as follows (1) System diag _BBSS_STATUS_CHG_CNT: Base number on which the master module is mounted _BBSS_STATUS_CHG_CNT: Slot number on which the master module is mounted _BBSS_STATUS_CHG_CNT: Variable Type (2) EB Diagnostic variables _BBSS_EBXX_CFG_ER: Base number on which the master module is mounted _BBSS_EBXX_CFG_ER: Slot number on which the master module is mounted...
  • Page 106 Chapter 4 Smart Extension service (12) Select [Smart Extension] in the [Project] window and double-click to select [EIP Cycle/Details] in the Smart Extension tree. In the EIP Cycle/Details,Check the list of EIP clients currently configured. (EIP server list is not available.) (13) Check the list and detailed settings of the EIP client in the EIP Cycle/Details window.
  • Page 107 Chapter 4 Smart Extension service (14) RAPIEnet autoscan topology change display function(V8.0 or higher) This function displays the changed information on the screen when the topology information set by the user and the installed topology information are different in RAPIEnet Auto Scan. To set the topology information, you can set it in [Undefined Network]>...
  • Page 108 Chapter 4 Smart Extension service The opposite case is indicated by a blue line. 4-19...
  • Page 109 Chapter 4 Smart Extension service 4.2.4 Setting Communication device Set up the Communication device remotely. However, remote setting of station number and IP address is impossible except for special cases. (The station number and IP address of the communication device can be remotely set using the 'Station No./IP Change' function only when the station number switch of the Communication device is '00'.) Setting method, refer to the Communication Device User's Manual.
  • Page 110 Chapter 4 Smart Extension service - setting: Hold output when an error occurs - Non-setting: Clear output when an error occurs Setting to allow the exchange of EB (PLC with communication device) or module mounted in EB during operation. EB or module swap during - setting: Continue operation when a fault occurs and normal operation when a operation (hot swap) fault is restored...
  • Page 111 Chapter 4 Smart Extension service (5) In [Smart extension variables] of [Sets Communication Device] tree, check the module variable set in [I / O Parameters]. Notes (1) In case of PLC system equipped with Communication device, base extension using extension cable is not supported.
  • Page 112 Chapter 4 Smart Extension service 4.2.5 Smart Extension service setting Download When the setting of the Smart Extension service is downloaded to the CPU module, the Communication device operates according to the setting value. (Downloading Smart Extension Service settings is only possible while online.) (1) Select [Online] ...
  • Page 113 Chapter 4 Smart Extension service 4.2.6 Smart Extension Enable Services Enable the service to use the Smart Extension service. Also, if you want to stop only the Smart extension service while the PLC service is running, disabling the Smart Extension service will only stop the Smart Extension service. (Setting the Smart Extension Service enable is only possible while online.) (1) Select [Online]...
  • Page 114 Chapter 4 Smart Extension service 4.3 Hot Swapping function Functions that mask errors in case of module failure and control the system with replaced modules include Fault Mask and IO skip. This feature is only supported by the Smart Extension Service and is not supported by other services. In a system equipped with a CPU, it is not set in the Smart Extension service but in the Error Operation Settings of the Basic Parameter Setting window of the CPU.
  • Page 115 Chapter 4 Smart Extension service 4.3.2 Hot Swap Operation setting The hot swap setting is set by the Smart Extension service. (1) Double-click [Project]  [Smart Extension] window. (2) Click [Smart Extension]  [Communication Device Settings] to display the screen on the right. Checking "Exchange EB or modules while running (hot swap)"...
  • Page 116 Chapter 4 Smart Extension service 4.3.3 Diagnostic Variable Operation According to Exchange EB or modules while running (hot swap) Option Some of the Allocate diagnostic variables depend on the setting of the Exchange EB or modules while running (hot swap) option.
  • Page 117 Chapter 4 Smart Extension service (2) EB diag operation EB diag name Hot Swap Settings in EB Diagnostic Variable Operation with Hot Swap setting Hold “Off” _BBSS_EBXX_IO_DEER swap settings Enable swap settings "On" if an I/O module detachment of EB occurs Disable Hold “Off”...
  • Page 118 Chapter 4 Smart Extension service 4.3.4 Operation by Hot Swap Setting The system below is an example of a mix of hot-swap Setting Smart extention master EB01 EB04 Hot swap Hot swap enable disable EB02 EB03 Hot swap Hot swap enable disable (1) Module detached from base with hot swap enable...
  • Page 119 Chapter 4 Smart Extension service 3) EB Diagnostic variables The diagnostic variable is turned ON because the IO module of EB 01 is detached. EB01(Hot swap:Enable) EB02(Hot swap:Enable) EB03(Hot swap: Disable) EB04(Hot swap: Disable) Diagnostic Monitoring Diagnostic Monitoring Diagnostic Monitoring Diagnostic Monitoring variables...
  • Page 120 Chapter 4 Smart Extension service Notes (1) If EB01 ~ EB04 is set to disable, SYSTEM_ER, IO_DEER and EB_ER01 ~ EB04 are On when the module is detached from EB03, and Smart extension operation stops. 3) EB Diagnostic variables The diagnostic variable is turned ON because the IO module of EB 03 is detached. EB01(Hot swap:Enable) EB02(Hot swap:Enable) EB03(Hot swap: Disable)
  • Page 121 Chapter 4 Smart Extension service EB_ER_02 EB_ER_03 EB_ER_04 3) EB Diagnostic variables If EB 01 is dropped, EB01_DEER variable is ON. EB01(Hot swap:Enable) EB02(Hot swap:Enable) EB03(Hot swap: Disable) EB04(Hot swap: Disable) Diagnostic Monitoring Diagnostic Monitoring Diagnostic Monitoring Diagnostic Monitoring variables value variables value...
  • Page 122 Chapter 4 Smart Extension service EB_ER_03 EB_ER_04 Notes If EB01 ~ EB04 is set to disable, SYSTEM_ER, EB_DEER and EB_ER01 ~ EB04 are On when EB03 is detached and Smart extension operation stops. 3) EB Diagnostic variables IO module detachment diagnostic variables of EB 03 turns ON. EB01(Hot swap:Enable) EB02(Hot swap:Enable) EB03(Hot swap: Disable)
  • Page 123 Chapter 4 Smart Extension service 4.3.5 Operation and Return Condition of Communication Device According to Hot Swap Setting (1) Hot Swap with EB01 to EB06 Systems EB No. Device Hot swap setting EB 01 Extension driver Disable EB 02 Extension driver Enable EB 03...
  • Page 124 Chapter 4 Smart Extension service Notes (1) When hot swap of each country operated by Smart extension service is set to Enable and the media is set to Auto, each station automatically operates by adjusting the communication speed. If there is only 100M of station number, the system communicates with 100M.
  • Page 125 Chapter 4 Smart Extension service 4.4 Smart Extension service operation (1) Program using Smart Extension Wizard XGP-AC23 XGK-CPUE XGL-EFMTB XGQ-RY2A XGI-D22A XGQ-TR2A XGP-AC23 XGL-EFMTB XGQ-TR2A XGQ-RY2A XGI-D21A XGQ-TR2A XGH-DT4A ▶ Program to turn on the output contact point connected to the expansion stage 1 using the Smart expansion service 4-36...
  • Page 126 Chapter 4 Smart Extension service Program procedures Sequ Setting Setting method ence process 1)[project]Open [New Project] and enter the project name, CPU series, CPU type, programming type, and program name. Create project 1) Select [Undefined Network][Add item] [Communication module]. 2) In the [Select Module] window, click “Add module”. Undefine Network 1) Setting the Type, Base and Slot.
  • Page 127 Chapter 4 Smart Extension service Sequ Setting Setting method ence process Enter TCP / IP Settings, Receive time out Settings, and Driver settings on the [Basic Settings] tab. Network Basic setting Click [Online][Write] and select and download the master module of the network parameter.
  • Page 128 Chapter 4 Smart Extension service Sequ Setting Setting method ence process 1) Select “Autoscan” on the [Overview][Details] window to automatically register the connected network. (PLC system should be connected in [Online][Connect] before Autoscan.) 2) Set input / output variables and diagnostic variables as initial values in the [PLC Area Setting] window.
  • Page 129 Chapter 4 Smart Extension service Sequ Setting Setting method ence process 1) Click [Smart Extension][Add Item] [Add Communication Device]. 2) In the [Adds Communication Device] window, enter the contents of the [Basic Parameter] and [Connect] tab. Commun ication device 3) Double-click [Smart Extension]  [EB01-XGL-DBDT] and click the [I / O Parameter] setting menu in the [B0S0 EB01] window.
  • Page 130 Chapter 4 Smart Extension service Sequ Setting Setting method ence process 1) [Smart extension]  Open [Input / Output Variable Assignment] and click "Register Variable". It can be created by referring to the program after registering the variable Allocate input/out variables 1) Create NewProgeam of the scan program.
  • Page 131 Chapter 4 Smart Extension service 4.5 Smart extension diagnosis function Smart extension service is provided with diagnostic function. Check the service status of Smart extension service by using service status, communication module history, diagnostic variables, Communication device connection configuration, EIP cycle / detailed setting list.
  • Page 132 Chapter 4 Smart Extension service (3) Check the service status of the Smart extension by selecting the [Status by Service][Smart Extension] tab. Item Contents Base Number Displays the base number on which the Ethernet module is mounted. Slot No. Displays the slot number on which the Ethernet module is mounted. Service status Displays the enabled status of the Smart extension service.
  • Page 133 Chapter 4 Smart Extension service EB detachment count Displays the EB detachment counts that have occurred currently. EB flag Flag is displayed according to the type of error occurred when an error occurs in EB. Slot No. (slot) Displays the slot number (EB). Type(slot) Displays the module type installed in the slot (EB).
  • Page 134 Chapter 4 Smart Extension service (3) Check the event history by selecting [Event History] in the [View Communication Module Log] window. (Click the error history to display the details of the error and the corrective action.) (4) Check the communication error history by selecting [Communication history] at the top of [Module log] window. (Click the error history to display the details of the error and the corrective action.) 4-45...
  • Page 135 Chapter 4 Smart Extension service 4-46...
  • Page 136 Chapter 4 Smart Extension service 4.6 Smart extension system configuration Smart extension service can be used in various system configurations. However, if 1Gbps and 100Mbps media are mixed in the system, it will operate at 100Mbps. In case of optical media, the transceiver should be mounted accordingly. 4.6.1 Typical Configuration Ethernet module(V8.0)
  • Page 137 Chapter 4 Smart Extension service Ethernet module(V8.0) Total number of slaves: 63 Expansion driver Expansion driver( Expansion Expansion (XGL-DBDx) XGL-DBDx) Smart I/O Smart I/O Smart I/O Smart I/O 100Mbps/1Gbps 100Mbps/1Gbps 4.6.2 Ring / Line configuration. Mix RAPIEnet and Ethernet / IP communication for ring / line configuration. Ethernet module(V8.0) Total number of slaves: 63...
  • Page 138 Chapter 4 Smart Extension service 4.6.3 Auto Speed Sync Operation The Smart extension Master and Communication device modules provide an Auto Speed Sync function that automatically matches the speed of the two communication ports when the media setting of both communication ports is AUTO. At this time, the communication speed is synchronized to the lower of the communication speeds of the two ports.
  • Page 139 Chapter 4 Smart Extension service Notes (1) The optical module determines the link speed based on the Transceiver's 100M or 1G even when the media is set to AUTO. However, in case of the mixing module, if 100M Transceiver is connected to the optical port, if the electrical port is set to AUTO, the communication is connected to 100M according to the optical port speed.
  • Page 140 Chapter 5 High speed link service Chapter 5 High speed link service 5.1 Overview HS link is a communication method between XGT PLC communication modules and can send and receive data periodically by setting HS link parameter. In XG5000, data can be send / received by setting send / receive data size, period, area and storage area in parameter.
  • Page 141 Chapter 5 High speed link service 5.2 HS link send / receive data processing How to use High Speed Link is explained as a setting example when Ethernet module of station“0” and station“1” sends and receives data. Station “0” sends 10 words of data in M0000 of block “0” and receives 10 words of data in M0010 of block 1 of station “1”. Station “1”...
  • Page 142 Chapter 5 High speed link service 5.3 HS link setting Select High Speed Link parameter and set the item. The setting order and function per item are as follows. 5.3.1 Standard settings The following describes the Standard settings parameter needed high speed link service. (1) Station No In the high speed link service, the station number is used as the station number of Ethernet (master) when using RAPIEnet protocol communication with the Communication device.
  • Page 143 Chapter 5 High speed link service 5.3.2 HS Link Service (1) Parameter setting method for high speed link 1) Click the Project tap on the left [Project] window and select by right clicking on the communication module item on the tree. 2) Click the View High-speed Link tab on the left [Project] window and select by right clicking on the PLC item on the tree.
  • Page 144 Chapter 5 High speed link service (2) Communication module setting Classification Content Module type Register Ethernet module. Base Number Base number where Ethernet module is mounted. Set to 00. Communication Slot No. Slot number where Ethernet module is mounted. module setting High speed link Ethernet module can be set from 1 to 12 in CPU system and number...
  • Page 145 Chapter 5 High speed link service (3) Screen after selecting communication module Classification Content FEnet Select for Ethernet high speed link communication. Select for RAPIEnet high speed link communication. RAPIEnet The driver setting must be set to RAPIEnet in the Standard settings. Station type RAPIEnet Select to control Smart I/O block with high speed link.
  • Page 146 Chapter 5 High speed link service Notes (1) RAPIEnet driver can be set in Ethernet (V6.0 or higher). (2) RAPIEnet Remote is set automatically when connecting RAPIEnet Smart I / O block as slave. (3) The send / receive mode is set when connecting RAPIEnet Smart I / O block. (4) High-speed link service between Ethernet (master) and expansion driver / Smart I / O expansion / Smart I / O block (slave) is available only in Smart I / O block RAPIEnet v1 version.
  • Page 147 Chapter 5 High speed link service (5) High-speed link parameters read 1) Select [Online] [read] on menu. 2) Check the relevant HS link in [read] window and press OK button.
  • Page 148 Chapter 5 High speed link service (6) Downloading parameter 1) Select [Online]  [Write] of XG5000 to open the screen below. Check the setting parameters and click the OK button. 2) After downloading the Standard Settings parameters, the PLC power must be Off-> On or reset. If you do not reset the communication module, the new communication parameter information will not be applied.
  • Page 149 Chapter 5 High speed link service 5.3.3 Communication device configuration (Smart I / O block v1 version) When using Smart I / O block RAPIEnet v1 driver, the following settings are possible. Set RAPIEnet setting as below in standard settings. Select the newly registered Ethernet (XGL-EFMx) module on the network configuration screen and right-click to select the [Add Item]...
  • Page 150 Chapter 5 High speed link service 1) Auto scan(Slave Registration) This item is activated only when there is an online connection to the PLC. By clicking Auto Scan, you can add Smart I O block that is not occupied by other master modules. Clicking Add Auto Scan Slave creates a list of slaves that can be added from the network.
  • Page 151 Chapter 5 High speed link service Notes 1) If you click the Add Slave button, you can add only for Smart I / O block with no parameters. If the slave to be selected in the slave add window is controlled by another master module, the slave cannot be selected. 2) Apply all parameters This function is used when applying all the modules according to the module type.
  • Page 152 Chapter 5 High speed link service The functions of each menu are as follows. Name Meaning Select Slave It means the module to apply the parameter batch application function. Basic Parameter It means the basic parameter of module. Module Parameter In case of module parameter, it is active only when analog input / output module is selected.
  • Page 153 Chapter 5 High speed link service Name Meaning Product name Displays the product name of the Smart I / O block module. This menu is used to set Smart I / O station No. 0 ~ 63. It must match the station number of Station No the module on the network.
  • Page 154 Chapter 5 High speed link service Notes (1) When the data of input module is changed in 2ms unit, it is the calculation method of network load according to minimum send prohibition time. 1) When the minimum send prohibition time is set to 2 ms - Packets per second (pps) = 1 / 0.002 = 500pps - 5,000 pps with 10 modules of the same condition 2) When the minimum send prohibition time is set to 200ms...
  • Page 155 Chapter 5 High speed link service Notes Even if it is necessary to change the slave list in the HS link block according to the network system change, click Slave Registration to select the slave to be used and click Apply. 3) HS link block setting(slave) If you double-click High-speed Link item on High-speed Link view tab, the following parameter registration window is created.
  • Page 156 Chapter 5 High speed link service (4) Downloading the high speed link parameter After completing HS link parameter setting, select [Online]  [Write (Basic setting, HS link, P2P)] in XG5000 and check the HS link and click OK button. (5) High-speed link parameters enable Select [Online] ...
  • Page 157 Chapter 5 High speed link service 5.4 HS Link operation Standard settings To change the basic parameters (high speed link Use XG5000 station no., Media, IP, etc.), the basic parameters ▽ must be set, downloaded and reset. Communication module settings Network ConfigurationAdd item on Undefined Module Type Network] →...
  • Page 158 Chapter 5 High speed link service (1) HS Link Service Operation How to use High Speed Link is explained as a setting example when Ethernet module of station “0” and station “1” sends and receives data. “Station "0" transmits two words of M0000 in block“0” and the data received from station "1" is stored in M0010. “Station "1" receives M0000 2 words of station“0”...
  • Page 159 Chapter 5 High speed link service Program sequence: Connect to PLC system 1, 2 CPU and set in the following order. Set system 1 as station number 0 and system 2 as station number 1. Sequ Setting Setting method ence process 1) [Project]Open [New Project] and enter the project name, CPU series, CPU type, programming type, and program name.
  • Page 160 Chapter 5 High speed link service Sequ Setting Setting method ence process Set TCP / IP Settings, Receive time out Settings, and Driver settings on the [Basic Settings] tab. 1) Set Station No.: 0 and IP address 2) Set Station No.: 1 and IP address to a station number different from station number 0. Standar settings Click [Project][Add item][High speed link communication].
  • Page 161 Chapter 5 High speed link service Sequ Setting Setting method ence process HS link Double-click HS link 01 in the [Project] window. setting 1)Block 0 send and block 1 receive of Station No. 0(Block 1 send data of station No. 1) 2)Block 0 receive(Block 0 send data of station No.0) and block 1 send of Station No.
  • Page 162 Chapter 5 High speed link service Sequ Setting Setting method ence process [Online]Write window Click [OK]. Program Downloa [Online][Communication module setting and diagnosis] check link 1 in [Service Enable]. Set link enable 5-23...
  • Page 163 Chapter 5 High speed link service 5.5 HS Link Information 5.5.1 High speed link flag As HS link service exchanges data between two or more communication modules, it is necessary to check the reliability of data read from the other station. User can check the service status by using HS link flag information for reliable communication. In other words, according to the parameters set by the user, the high-speed link flag information is provided by synthesizing the data received up to that point every time a high-speed link is operated.
  • Page 164 Chapter 5 High speed link service (2) Link-trouble(_HSxLTRBL, x=High speed link No.(1~12) Total Information that indicates whether the High Speed Link is normal with the set parameters. It is OFF when Run Link is ON and it is on Run Link is Off. (3) Normal communication status(_HSxTRX[0..127], x=High speed link No.(1~12)) Up to 128 send / receive information as individual information representing the send / receive status of block link parameter.
  • Page 165 Chapter 5 High speed link service 5.5.2 HS Link Information Monitor High speed link information can be checked by using variable /comment monitor or communication module setting after connecting XG5000 online. (1) Variable monitor Variable monitor is a function to monitor only necessary items by using view flag monitor function of XG5000. Select [Variable Monitoring Window] in [View] to display the following variable registration screen.
  • Page 166 Chapter 5 High speed link service (3) HS Link Service selection Place the mouse cursor on XGL-EFMTB and right-click and click [Status by Service] to open the following screen. Select HS link service. 5-27...
  • Page 167 Chapter 5 High speed link service 5.6 XGR Redundancy Program Method This section explains how to use High Speed Link in XGR. 5.6.1 When configuring an XGR redundant network When configuring a redundant network in XGR, you can freely set the A-side and B-side station numbers and IP addresses. In other words, the same station number (IP address) or different station number (IP address) can be used.
  • Page 168 Chapter 5 High speed link service 4) High speed link function block In XGR and XGI, function block is used for receiving data processing. In XGK, there is no function block, so you can use the program written in the below letter. Notes Send/ receive using sequence number is a basic data send / receive algorithm method.
  • Page 169 Chapter 5 High speed link service 5.6.2 When configuring an XGR Single network In case of a single net in XGR, A-Side and B-Side are grouped in the same network. So, station number and IP should be set differently. (1) When XGR sends - XGK (I) receives 1) Data send and receive When sending, block setting is one station number to receive, so communication service is made same as communication setting between XGK (I) and XGK (I).
  • Page 170 Chapter 5 High speed link service 5.7 XGR Redundant High Speed Link Setting Program This section explains how to use High Speed Link in XGR. 5.7.1 When configuring an XGR redundant network (1) When XGR sends - XGK (I) receives 1) Communication settings(XGR send-side) Standard settings (When using the same high speed link station no.
  • Page 171 Chapter 5 High speed link service 2) Ladder program(XGR send- side) In the HS link block setting, increase the sequence number in the first block and set the send data to be sent by the user in the second block. 3) Communication settings(XGK(I) receive-side) Standard settings 5-32...
  • Page 172 Chapter 5 High speed link service High speed link block setting (Communication module connected to XGR A-Side) The sequence number and user data can be set in one block as shown below. High speed link block setting (Communication module connected to XGR B-Side) The sequence number and user data can be set in one block as shown below.
  • Page 173 Chapter 5 High speed link service Category Contents MOD_A STATE FLAG for A-Side High Speed Link Input Block MOD_B STATE FLAG for B-Side High Speed Link Input Block RX_SRI_A SEQ number of A-Side(Device setting (word) of HS link first input block) RCV_A1 Receive data of A-Side(Variable Array) RX_SRI_B...
  • Page 174 Chapter 5 High speed link service 5-35...
  • Page 175 Chapter 5 High speed link service (2) When XGK(I) sends - XGR receives 1) Communication settings(XGK(I) send- side) High speed link block setting (Communication module connected to XGR A-Side) High speed link block setting (Communication module connected to XGR B-Side) 2) ladder program(XGK(I) receive-side) : No ladder program required 5-36...
  • Page 176 Chapter 5 High speed link service 3) Communication settings(XGR receive- side) Standard settings Block setting 4) Ladder program(XGR receive- side) If the network is normal, you can process data on the master side. However, if a network error occurs, you should copy the data on the standby side to the master and process it as data using the SYNC command using STATE FLAG.
  • Page 177 Chapter 5 High speed link service 5.7.2 When configuring an XGR Single network (1) When XGR sends - XGK (I) receives 1) communication setting(XGR send- side) 2) High-speed link parameters setting 3) Ladder program(XGR send- side) 5-38...
  • Page 178 Chapter 5 High speed link service 4) Communication settings(XGK(I) receive- side) High speed link parameter setting at receiving side including sequence number 5) Ladder program(XGK (I) receive- side) 5-39...
  • Page 179 Chapter 5 High speed link service (2) When XGK(I) sends– XGR receives 1) Communication settings(XGK(I) send- side) High-speed link parameters setting 2) ladder program(XGK(I) send- side side) : No ladder program required 3) Communication settings(XGR receive- side) 4) Redundant receive high speed link parameter setting 5) Ladder program(XGR receive- side) 5-40...
  • Page 180 Chapter 5 High speed link service 5.8 Ethernet System Configuration Ethernet systems can connect to the Internet public network using the open protocol TCP / IP. Therefore, on-site PLC system access is possible by using GLOFA VIEW (latest: InfoU, XP, iXP) of wide area monitoring system [1,2]. In addition, a local monitoring system directly connected to the site network allows access to on-site PLC systems.
  • Page 181 Chapter 5 High speed link service 5.8.1 Configuration of Ethernet System Using Dedicated Network The Ethernet system can be configured using a dedicated network that is not connected to the Internet. Shows an example of an Ethernet system configuration using a dedicated network. PLC system connected to dedicated Ethernet network using XGT Ethernet module can send or receive data using High Speed Link, P2P, dedicated service.
  • Page 182 Chapter 5 High speed link service 5.8.3 Mix of public, dedicated and third party Ethernet systems This shows a mixed Ethernet network system in which a PLC system and a third party PLC system are configured as one system using the Internet, that is, a public network and a dedicated network. Wide area monitoring system [1,2] can access remote Ethernet network using public network.
  • Page 183 Chapter 5 High speed link service 5.8.5 System configuration using single network Ethernet in XGR system InfoU IP: 192,168,91,194 Ethernet network XGK/I IP: 192,168,91,193 B-Side A-Side IP: 192,168,91,192 IP: 192,168,91,191 5-44...
  • Page 184 Chapter 6 P2P service Chapter 6 P2P service 6.1 Overview 6.1.1 Overview of P2P service P2P service is the master operation of communication module. It is the function implemented by function, block (command) by parameter setting. There are seven P2P commands available in the Ethernet module: Read, Write, Write_NC, Send, Send_NC, Receive, and ESend.
  • Page 185 Chapter 6 P2P service 6.2 Type of P2P service 6.2.1 Type of P2P command P2P used by the user for writing a program can be classified into seven commands. The usage of commands varies according to the service method. Apply each command by referring to the following table.
  • Page 186 Chapter 6 P2P service differently by the manufacturer, which can be edited to suit the characteristics of each communication module. The user frame definition has basic structure of HEAD, BODY and TAIL. (3) Modbus TCP / Modbus RTU( V6.0 or higher)/Modbus ASCII( V6.0 or higher) Client Ethernet module supports various Modbus protocol in addition to user frame definition protocol.
  • Page 187 Chapter 6 P2P service 6.3 P2P service setting 6.3.1 Ethernet (server) driver (1) Driver setting Ethernet (server) driver is XGT Ethernet built-in server protocol. The built-in protocol includes the XGT server and the Modbus server. Ethernet (server) driver is used to read or write data of Ethernet module from other station using Modbus or XGT protocol.
  • Page 188 Chapter 6 P2P service (1) P2P channel setting The Ethernet module can send and receive data in up to 16 channels. The channel consists of the IP address and port number of the communication device. The number of channels that can be used in the P2P is the total number of channels (16) subtracted by the number of dedicated connections in the basic parameter.
  • Page 189 Chapter 6 P2P service Classification Content User frame A protocol used to communicate with an external device. It definition is a user frame definition protocol (frame definition). This is the XGT dedicated protocol. (The frame is not XGT Enet client defined.) It is XGT Cnet client protocol Communicate with LS XGT Cnet client...
  • Page 190 Chapter 6 P2P service 6.3.3 P2P block Select P2P block of the parameter in P2P menu, then P2P parameter setting screen appears. Up to 64 separate blocks can be set. Select any block in XG5000 and set the action of the block as follows. The setting items for each and their meaning are as follows.
  • Page 191 Chapter 6 P2P service Command Please refer to the table below for the usage of commands used when users write programs. Category Command Usage This command is used to read / save arbitrary area of destination station Read and it is used the same in XGT / Modbus client driver. Available memory areas: P, M, K, F, T, C, U, Z, L, N, D, R, ZR,% Q,% I,% M, etc.
  • Page 192 Chapter 6 P2P service 6.4 P2P service operation P2P service operation describes how to read / write data between Ethernet modules as an example. IP: 192.168.1.3 XGP-AC23 XGK-CPUSN XGL-EFMFB XGQ-RY2A XGI-D22A XGQ-TR2A IP: 192.168.1.2 XGP-AC23 XGK-CPUE XGQ-TR2A XGL-EFMFB XGI-D21A XGQ-TR2A XGH-DT4A Write / Read data to Ethernet side of IP '192,168.1.2' to XGT Enet / Modbus TCP client from Ethernet side with IP address '192.168.1.3'.
  • Page 193 Chapter 6 P2P service (1) P2P service setting(PLC1) Program sequence: Connect to PLC system 1, 2 CPU and set in the following order. At this time, PLC1 sets the IP as “192.168.1.3”. Setting Setting method process 1) [Project]Open [New Project] and enter the project name, CPU series, CPU type, programming type, and program name.
  • Page 194 Chapter 6 P2P service [continue] Setting Setting method process 1) Set the media, IP address, etc. in the [Standard settings] window. Enter own's IP address. Select server mode among XGT server / Modbus server / Smart server. If you use XGT server and Modbus server at the same time, select smart server. PLC1 selects XGT server as server operation of XGT Enet client.
  • Page 195 Chapter 6 P2P service [continue] Setting Setting method process 1) Click P2P channel item of P2P01 parameter to set channel. - Set channel 0 as XGT Enet client and, channel 1 as Modbus TCP client and input the destination station's IP. paramete r setting 1) Set the setting items for each P2P block channel of P2P 01 parameter as...
  • Page 196 Chapter 6 P2P service [continue] Sequen Setting Setting method process 1) After selecting [Online]  [Connect] and [Online]  [Write], download the following items. Project downloa 1) Select [On-line]  [Reset/Clear]  [Reset individual module] 2) Select the relevant module in the reset window of individual module reset and select OK.
  • Page 197 Chapter 6 P2P service Then select [Online]  [Change Mode] to run. 6-14...
  • Page 198 Chapter 6 P2P service (2) P2P service setting(PLC2) Program sequence: Connect to PLC system 1, 2 CPU and set in the following order. At this time, PLC2 sets the IP address as “192.168.1.2”. Setting Setting method process 1) [Project]Open [New Project] and enter the project name, CPU series, CPU type, programming type, and program name.
  • Page 199 Chapter 6 P2P service [continue] Setting Setting method process 1) Set the media, IP address, etc. in the [Standard settings] window. Enter own's IP address. Select server mode among XGT server / Modbus server / Smart server. If you use XGT server and Modbus server at the same time, select smart server. Select Smart Server as the server operation of XGT Enet and Modbus TCP client of PLC1.
  • Page 200 Chapter 6 P2P service [continue] Setting Setting method process 1) Click P2P channel item of P2P01 parameter to set channel. - Set channel 0 as XGT Enet client and input the destination station's IP. paramete r setting 1) Set the setting items for each P2P block channel of P2P 01 parameter as follows.
  • Page 201 Chapter 6 P2P service [continue] Sequen Setting Setting method process 1) After selecting [Online]  [Connect] and [Online]  [Write], download the following items. Project downloa 1) Select [On-line]  [Reset/Clear]  [Reset individual module] 2) Select the relevant module in the reset window of individual module reset and select OK.
  • Page 202 Chapter 6 P2P service 6.5 User frame definition 6.5.1 Overview of a user frame definition When the user needs to send a frame desired by the user or receives a frame among the frames on the network, the frame to be sent or received should be defined. The user frame definition can be used only in the P2P service. All frames consist of Head, Body and Tail, each of which can be omitted.
  • Page 203 Chapter 6 P2P service 2) Select the name of user frame definition group and frame type In the Edit Group window, enter the group name and select the frame type. Group name can be entered arbitrarily. 3) When the group name “SEND” and frame type are selected as sending, the results entered in the project window are shown.
  • Page 204 Chapter 6 P2P service 1) Adding HEAD of a user frame definition 2) Adding TAIL of a user frame definition 3) Create and add a BODY name of a user frame definition. 6-21...
  • Page 205 Chapter 6 P2P service (3) Type of segments Frame is composed of a number of segments consisting of Head, Body, Tail, and registered in the frame edit window below. 1) Frame configuration Categor Command Usage Numerical Defines the part of the frame that is fixed as a constant and specifies the constant data value as Hex.
  • Page 206 Chapter 6 P2P service Swap data in 2,4,8 byte unit. The result of swapping h1234567811223344 according to each method is as follows. Swap - 2 bytes Swap: h3412785622114433 - 4 bytes Swap: h7856341244332211 - 8 bytes Swap: h4433221178563412 2) The specification of transmission and reception frame supported in the user frame definition communication is as follows.
  • Page 207 Chapter 6 P2P service 6.5.3 Operation of a user frame definition Read current value and set temperature value of the temperature controller at intervals of 1 second, save the current value at address M200, and save the temperature set value at address M210. The frame structure of PC Link which is the communication protocol of Han Young temperature controller used in this example is as follows.
  • Page 208 Chapter 6 P2P service (2) Standard settings Sequen Setting Setting method process 1)[Project]Open [New Project] and enter the project name, CPU series, CPU type, programming type, and program name. Create project 1) Select [Undefined Network][Add item] [Communication module]. 2) In the [Select Module] window, click “Add module”. Undefine Network 1) Set Type, Base and Slot in Communication module settings.
  • Page 209 Chapter 6 P2P service Sequen Setting Setting method process Set TCP / IP Settings, Receive time out Settings, and Driver settings on the [Standard Settings] tab. 1) Set Station No.: 0 and IP address Standard settings Select [Add item][P2P communication]. 2) The user frame definition is displayed in P2P 01 of the project window.
  • Page 210 Chapter 6 P2P service (3) Writing send frame Sequen Setting Setting method process 1) Select User frame definition. 2) Click the right mouse button and select [Add item] [Add a group]. Create a user frame 1) The group name indicates the name of a frame that will be created by the user. 2) Select send for the frame type since the send frame is created currently.
  • Page 211 Chapter 6 P2P service Sequen Setting Setting method process 1) Click Add Frame and select the frame type HEAD, TAIL, BODY to create. 2)The name of the frame edit window becomes active only if the type is BODY. 3) A number of BODY's can be created by using a different name. HEAD,TAI Register BODY...
  • Page 212 Chapter 6 P2P service (4) Writing receive frame Sequen Setting Setting method process 1) Select User frame definition. 2) Click the right mouse button and select [Add item][Add a group]. Create a user frame 1) The group name indicates the name of a frame that will be created by the user. 2) Select Reception for the frame type since the reception frame is created currently Edit group 1) Select the frame name, right-click and select [Add Frame].
  • Page 213 Chapter 6 P2P service Sequen Setting Setting method process 1) Click Add Frame and select the frame type HEAD, TAIL, BODY to create. 2)The name of the frame edit window becomes active only if the type is BODY. 3) A number of BODY's can be created by using a different name. HEAD,TAI Register BODY...
  • Page 214 Chapter 6 P2P service (5) Create P2P send / receive block Sequen Setting Setting method process 1) Double click P2P block in P2P 01. 2) Enter the channel (user frame definition) selected in P2P channel. 3) In the P2P function, select Send as SEND and Receive as RECEIVE. 4) The starting condition will be enabled only when the P2P function is SEND.
  • Page 215: E-Mail Service

    Chapter 6 P2P service 6.6 E-mail Service E-mail service is a service to notify the remote administrator of the status by using the system when a problem occurs in the system. If the status of the CPU has changed or an event occurred during operation, you can deliver the status using the mail server.
  • Page 216 Chapter 6 P2P service The event information determines status information by monitoring the status of the CPU periodically. If the PLC mode is STOP or an error has occurred, the communication parameters will not operate, so this service is provided as an option in preparation for such a case. 6.6.2 Writing address Double-clicking an address in the E-mail setup section of the P2P screen displays the screen for editing the...
  • Page 217 Chapter 6 P2P service (2) Specified group Select Group if you want to send the mail to a group instead of individual users at once.  If you select a group, the personal address book registered so far is displayed on the left screen. ...
  • Page 218 Chapter 6 P2P service (3) Writing a message If you select a message in the E-mail setup section of the P2P screen, the message edit screen appears. 1) Double click on the mail message you want to send. 2) Double click the 0 on the above window to display the [E -mail Message] window. 3) Click “Add”...
  • Page 219 Chapter 6 P2P service Item Usage STRING: It is used to send the message data of P2P ESend parameter to the contents set in the following data. Form MB: Used to send the message data of P2P ESend parameter by the number of bytes set in size.
  • Page 220 Chapter 6 P2P service 6.6.3 Create block Parameter setting of P2P block is to send / receive the message of E -mail setting. Click the P2P block and set the E-mail button to select the corresponding P2P command. Category Contents E-mail Enable your email service.
  • Page 221 Chapter 6 P2P service 6.7 Downloading and diagnosis of P2P parameter 6.7.1 Downloading a P2P parameter When the P2P parameter setting is completed, you need to download the parameters to the PLC CPU and start To download P2P parameters, select [Online]  [Write] in the XG5000 menu window and the the P2P service.
  • Page 222 Chapter 6 P2P service 6.7.2 P2P service operation In order to download P2P parameters and start P2P service, P2P operation must be performed. To do this, select [Online]  [Communication module setting]  [Enable Services (high speed link, P2P)] from the menu. Select a P2P parameter you wish to start from the [Enable Link (HS Link, P2P)] window.
  • Page 223 Chapter 6 P2P service 6.7.3 P2P service diagnosis P2P system diagnosis shows the service status and information of communication program after driver setting of communication module. The user can check whether the P2P service is operating normally wit h the system diagnosis Please refer to the Chapter 3.4 XG5000 program for details.
  • Page 224 Chapter 6 P2P service 6.8 XGR Redundancy Program Method In case of P2P service, in order to read the data of the redundant system, P2P write should be done on the XGK (I) side without using P2P write on the XGR side and use the flag of P2P service. Save normal service count of P2P service connected to A-Side and B-Side and read STATUS of the block to check if it is 0 After that, it checks that STATUS is 0 and normal service count is increased and read the data on either side.
  • Page 225 Chapter 6 P2P service If 1 is normal, 1 data is taken. If 1 server is abnormal, 2 data are taken. (2) XGR and XGK (I) are redundant with different IP addresses on other (separate) networks. If you create a ladder in P2P service 1 connected to the master (standby) side, P2P service 2 connected to the standby (master) side and 0 in P2P block 0, you can write as follows.
  • Page 226 Chapter 6 P2P service If XGR and XGK (I) are redundantly configured with the same IP address in different (separate) networks, duplicated services can be implemented by writing the same ladder program (2) and the basic part is different. . 6-43...
  • Page 227 Chapter 6 P2P service 6-44...
  • Page 228: Chapter 7 Server Service

    7.1.1 Overview (1) Overview of the protocol XGT server protocol is communication protocol between LS ELECTRIC Ethernet modules. Read / write is available by using command and communication is available by using XGT server (dedicated) protocol from PC and HMI.
  • Page 229 Chapter 7 server service 3) Company Header (20 bytes) Size Item Contents (Byte) -“LSIS-XGT” + “NULL NULL(Reserved)” (ASCII CODE : 4C 53 49 53 2D 58 47 54 00 00) Company ID -“LGIS-GLOFA” (ASCII CODE : 4C 47 49 53 2D 47 4C 4F 46 41) * Client ...
  • Page 230 Chapter 7 server service 4) Command (2 Bytes), Data Type (2 Bytes) There are 4 commands used in XGT server protocol and each command processes read / write and request / response. Available data type of each instruction is bit, byte, word, double word, long word if it is individual and data type is only byte if it is consecutive.
  • Page 231 Chapter 7 server service 5) Data Item Contents Reserved 0x0000: Ignore area(2 Bytes) Single: It consists of [Variable] and [Variable Length] to be read and can be maximum 16. Number of Range is h’0001~ h’0010. blocks (2 bytes) Continuous: Up to 1,400 bytes can be set for the number of bytes of data. Variable It indicates the number of direct variable name characters and maximum 16 characters are allowed.The value is h’0001 to h’0010...
  • Page 232 Chapter 7 server service (3) Example of XGT server frame 1) Request frame reading a variable separately: XGI-CPUE read Category Form Frame Size ASCII LSIS 0x4C 0x53 0x49 Ox53 Ox2D 0x58 0x47 0x54 0x00 0x00 Identification Company ID 1 ASCII Number 0x4C 0x47...
  • Page 233 Chapter 7 server service 3) Response frame to reading a variable continuously :XGI- CPUU read Category Form Frame Size ASCII 0x4C 0x53 0x49 Ox53 Ox2D 0x58 0x47 0x54 0x00 0x00 LSIS Identification Company ID 1 Number ASCII 0x4C 0x47 0x49 0x53 0x2D 0x47...
  • Page 234 Chapter 7 server service 7.1.2 Request to read information and status(PC/HMI -> PLC) It is a service that can use PLC information and status through communication. (1) Computer requirements format Item Size (Byte) Content Command 0x00B0: Status Request Data type 0x0000: Ignore Reserved area 0x0000: Ignore...
  • Page 235 Chapter 7 server service (4) Flag description 1) _CPU_TYPE Bit 15 (0) : XGI , Bit 15(1) : XGK Bit 15(0) : Single, Dual master0) , Bit 15(1) : Dual slave (Ex, Single: 0x8000~0xffff, XGK-CPUH :0xA001, XGK-CPUS: 0xA002) 2) _VER_NUM 0xXXYY: xx.yy 3) _SYS_STATE Displays the operation mode and operation status of the system.
  • Page 236 Chapter 7 server service Variable Position Device Function Description Bit26 F0001A Bit27 F0001B _PB1 Bit28 F0001C Program code 1 Program code 1 is being executed _PB2 Bit29 F0001D Program code 2 Program code 2 is being executed _CB1 Bit30 F0001E Compile code 1 Compilation code 1 is being executed _CB2 Bit31...
  • Page 237 Chapter 7 server service 5) _CNF_WAR Collectively displays warning flags related to continue operation(DWORD, F004~F005) Variable Type Device Function Description _RTC_ER F00040 Abnormal RTC data In case of abnormal data of RTC Cold restart is performed because normal (hot or warm restart) program modification is impossible due to abnormal backup _DBCK_ER F00041 Data back-up error...
  • Page 238 Chapter 7 server service 7.1.3 Server operation (1) System configuration System where Ethernet module communicates with HMI as XGT server XGP-AC23 XGI-CPUE XGL-EFMFB XGI-D22A XGI-D22A XGQ-TR2A To communicate using server service, you must set server mode before downloading. (If not set, XGT server) Dedicated connection number in basic parameter means the number of channels (HMI connection) connected by XGT server.
  • Page 239 Chapter 7 server service (2) Program procedures Connect to PLC and set as below. Setting Sequence Setting method process 1)[project]Open [New Project] and enter the project name, CPU series, CPU type, programming type, and program name. Create project 1) Select [Undefined Network][Add item] [Communication module]. 2) In the [Select Module] window, click “Add module”.
  • Page 240 Chapter 7 server service Setting Sequence Setting method process Set TCP / IP Settings, Receive time out Settings, and Driver settings on the [Standard Settings] tab. 1) Set Station No.: 0 and IP address Standard settings [Online]Write window Click[OK]. Program Download 7-13...
  • Page 241: Modbus Server

    Chapter 7 server service 7.2 Modbus Server It is used when another device or upper PC (HMI) operates as Modbus master. Overview 7.2.1 The Modbus TCP/IP protocol is the function to read and write data using the function code. The Modbus TCP/IP frame consists of MAC, Header, TCP Header and Modbus ADU for the Ethernet communication.
  • Page 242 Chapter 7 server service 3) MBAP header structure Category Size Description Client Server Classification of Transaction identifier MODBUS Reply by copying in 2 Byte Initialize on client (Transaction Identifier) request/response response from server process Copy from request 2 Byte 0 = MODBUS protocol Initialize on client frame in response Protocol Identifier...
  • Page 243 Chapter 7 server service 7.2.2 Server operation (1) Program procedures Connect to PLC and set as below. Setting Sequence Setting method process 1)[project]Open [New Project] and enter the project name, CPU series, CPU type, programming type, and program name. Create project 1) Select [Undefined Network][Add item]...
  • Page 244 Chapter 7 server service Setting Sequence Setting method process Set TCP / IP Settings, Receive time out Settings, and Driver settings on the [Standard Settings] tab. 1) Set Station No.: 0 and IP address 2)Click Modbus setting and input each device Standard settings In the [Online][Write] window ,Click ok.
  • Page 245: Ethernet / Ip Server

    Chapter 7 server service 7.3 EtherNet / IP server 7.3.1 Overview EtherNet / IP communication method is divided into Implicit and Explicit communication method. Implicit is classified into Class1 and Explicit is classified into UCMM and Class3. Class1 is divided into producer, consumer model, and UCMM. Class3 is divided into client and server models.
  • Page 246 Chapter 7 server service (4) Period communication (Implicit) method Implicit Message provided by periodic communication means implicit (implicit) message and contains minimum header information except the data on the frame. As a result, the frame itself is a message that does not know what the data means.
  • Page 247 Chapter 7 server service 7.3.2 Operation Sequence (1) EIP period server operation sequence XGL-EFMxB setting and operation ▽ Basic parameter setting using XG5000 Basic parameter setting Use XG5000 ▽ Communication module settings Enter the network type and base / slot number where the Module Type communication module is installed ...
  • Page 248 Chapter 7 server service 7.3.3Parameter setting The Ethernet module is a Smart extension service that provides EtherNet/IP client and server functions. Describes how to set parameters for EtherNet / IP client / server functions. (1) Standard settings Smart Extension service operates according to the Standard Settings of Ethernet (FEnet). The following describes the Standard Settings parameters for the Smart extension service.
  • Page 249 Chapter 7 server service 7.3.4 Client setting (1) Adding Smart Extension Click the [Project] tab on the left project window and select by right clicking on the communication module item on the tree. 1) When using the Smart Extension window to set up the Smart Extension Service, select” Next” in the Smart Extension [Overview] window.
  • Page 250 Chapter 7 server service 3) After setting each item in [Details] or performing “Autoscan”, select the following. In order to proceed with “Auto Scan”, it must be in [Online][Connect]. Item Contents Set the number of Communication devices to be added to the Smart extension Communication service.
  • Page 251 Chapter 7 server service 4) In [PLC area setting] window, memory setting for 'Input / Output Variable' and 'Enables EB/Slot Diagnostic variable' is available. The address and size are automatically changed according to the communication device added in the advanced detailed settings. (However, the memory area setting counts Smart extension service as the highest priority.
  • Page 252 Chapter 7 server service (2) Communication device setting 1) If you double-click EtherNet / IP module among communication devices added under [Project][Smart Expansion], you can check [Communication device setting] and [Communication device information] tree. 2) In the [Communication device setting] tree, set the client parameter by setting the block in the [EIP detailed setting] window.
  • Page 253 Chapter 7 server service Item Contents Set the operation mode of the EIP client. Operation mode - Select either Period client or Non-period client. Set I / O type of EIP Period client. I/O type - A list of choices is displayed depending on what is defined in the server's EDS file. Set the connection type with the EIP server.
  • Page 254 Chapter 7 server service Item Contents EB No. Specify the EB number to be assigned to the communication device. Specify the protocol type to be used for communication with the communication device. Protocol type - Only EtherNet / IP can be selected because it is an EtherNet / IP dedicated module. Specify Station number set to the Communication device.
  • Page 255 Chapter 7 server service 7.3.5 Server setting (1) In case of operating as period server 1) In the [Project] window, right-click the communication module added under the undefined network and select Open. 2) Set each item in [Standard settings]. 3) In the [Standard settings] window, select the parent Sets EIP Server tab. 4) In the [Sets EIP Server] window, double-click the area of the local tag.
  • Page 256 Chapter 7 server service 5) In the [Select EtherNet / IP Tag ]window, select the tag you want to use as the local tag for the EIP period server, then select OK. 6) If the tag has been added to a local tag in the [Sets EIP Serve] window, select OK. (2) In case of operating as Non-period server When the Ethernet module operates as Non-periodic server, there is no additional parameter setting other than...
  • Page 257 Chapter 7 server service 7.3.6 Tag register If an EIP client / server uses a tag other than a device for a local tag, the tag must be registered first. The Tag register method is as follows. (1) Tag setting when using XGK CPU 1) Set tag for EIP communication.
  • Page 258 Chapter 7 server service Item Contents Variable Enter the name of the variable (tag) to use Data type Select the data type of the variable (tag) to use. Device Enter the device value to map with the variable (tag) Comment Enter a description of the variable (tag).
  • Page 259 Chapter 7 server service (2) Tag setting when using XGI, XGR CPU 1) Right-click on [Global / Direct Variable] or [Local Variable] in the [Project] window and select Open. 2) Fill in the information of the variable (tag) to be used and check “EIP / OPC UA”. (for details of global / direct variable and local variable setting, please refer to XGI, XGR CPU manual.) 7-32...
  • Page 260 Chapter 7 server service 7.3.7 Setting Download Downloading the EIP client / server configuration will download it to the CPU module. The download method is as follows. (1) On the[Online] tab, select Write (2) In the [Write] window, check the check boxes of [Smart Extension Service], [EIP Tag], and [EIP Server], and select OK.
  • Page 261 Chapter 7 server service 7.3.8 EtherNet/IP periodic communication operation example (1) Operation of EtherNet/IP module (period client) and Ethernet module (period server) XGP-AC23 XGK-CPUE XGL-EFMFB XGL-EFMTB XGI-D22A XGQ-TR2A Ethernet module Implicit Server operation XGP-AC23 XGK-CPUSN XGL-EIPT XGI-TR2A XGI-D21A XGQ-TR2A XGH-DT4A XGF-DC4H EIP Module Implicit Client operation...
  • Page 262 Chapter 7 server service 1) Client setting Setting Sequence Setting method process 1) [Project]Open [New Project] and enter the project name, CPU series, CPU type, programming type, and program name. Create project 1) Select [Undefined Network][Add item] [Communication module]. 2) In the [Select Module] window, click “Add module”. Undefined Network 1) Set Type, Base and Slot in Communication module settings.
  • Page 263 Chapter 7 server service Setting Sequence Setting method process In the [Standard settings] window, set the IP address, subnet mask, gateway, DNS server, waiting time, and tag usage. Check when using tag information in EIP module. Click [Project][Add item][P2P Communication]. Select among P2P parameter window No. 1 ~ Standard settings 1) Double click EIP Configuration to display the [EIP Configuration 01] screen below.
  • Page 264 Chapter 7 server service Setting Sequence Setting method process Double click EIP channel to open [Channel setting] window. Channel 0's operation mode is set as period client as previously set in EIP configuration. 1)Double click EIP block to set up block 2)Input I / O type, connection type and tag setting in channel 0.
  • Page 265 Chapter 7 server service Setting Sequence Setting method process On [Online] [Write] window, check EtherNet / IP basic setting and P2P and click OK. Program Download Check P2P (EIP) in [Online][Communication module setting and diagnosis][Service Enable]. Set link enable 7-38...
  • Page 266 Chapter 7 server service 2) Server setting Setting Sequence Setting method process 1)[project]Open [New Project] and enter the project name, CPU series, CPU type, programming type, and program name. Create project 1) Select [Undefined Network][Add item] [Communication module]. 2) In the [Select Module] window, click “Add module”. Undefined Network 1) Set Type, Base and Slot in Communication module settings.
  • Page 267 Chapter 7 server service Setting Sequence Setting method process 1) XGK CPU - Click [Project][EtherNet / IP (OPC UA) Tag Settings]. - Select “Add Variable” to add variables, data types, and devices. registration 2) XGI/R CPU - Add variables in the [Global / Direct Variables] or [Local Variables] window of the project tree.
  • Page 268 Chapter 7 server service (2) Operation of Ethernet module (period client) and EtherNet/IP module (period server) XGP-AC23 XGK-CPUE XGL-EFMFB XGL-EFMTB XGI-D22A XGQ-TR2A Ethernet module Smart extension operation XGP-AC23 XGK-CPUSN XGL-EIPT XGI-TR2A XGI-D21A XGQ-TR2A XGH-DT4A XGF-DC4H EIP Module Implicit Server operation This is a program example that reads tag data of XGL-EIPT connected to period server by Smart extension service of Ethernet module.
  • Page 269 Chapter 7 server service 1) Client setting Setting Sequence Setting method process 1) [Project]Open [New Project] and enter the project name, CPU series, CPU type, programming type, and program name. Create project 1) Select [Undefined Network][Add item] [Communication module]. 2) In the [Select Module] window, click “Add module”. Undefined Network 1) Set Type, Base and Slot in Communication module settings.
  • Page 270 Chapter 7 server service Setting Sequence Setting method process Enter TCP / IP Settings, Receive time out Settings, and Driver settings on the [Standard Settings] window. Standard settings Click [Project][Add item][Smart Extension]. 1) Select “Autoscan” on the [Overview][Details] window to automatically register the connected network.
  • Page 271 Chapter 7 server service Setting Sequence Setting method process 1) Double-click [Smart Extension] and click the [Master Settings] window on the [Smart Extension] window. 1) In the [Master Setting] window, set the master setting, PLC area setting and Communication device operation setting as initial values. Standard settings 1) XGK CPU...
  • Page 272 Chapter 7 server service Sequence Setting process Setting method 1)Click [Smart Extension][Add Item] [Add Communication Device]. 1) 2)In the [Adds Communication Device] window, enter the contents of the [Basic Parameter] and [Connect] tab. Smart Extension 3) 1)Click [Sets EIP Details] under XGL-EIP of Smart Extension to register the pre-registered Communication Tag1 as the local tag and the Tag3 as the remote tag.
  • Page 273 Chapter 7 server service 2) Server setting Setting Sequence Setting method process 1)[project]Open [New Project] and enter the project name, CPU series, CPU type, programming type, and program name. Create project 1) Select [Undefined Network][Add item] [Communication module]. 2) In the [Select Module] window, click “Add module”. Undefined Network 1) Set Type, Base and Slot in Communication module settings.
  • Page 274 Chapter 7 server service Setting Sequence Setting method process In the [Standard settings] window, set the IP address, subnet mask, gateway, DNS server, waiting time, and tag usage. Check when using tag information in EIP module. Standard settings 1) XGK CPU - Click [Project][EtherNet / IP (OPC UA) Tag Settings].
  • Page 275 Chapter 7 server service Setting Sequence Setting method process 1) In [Online][Write] window ,Click ok. 2) Check P2P (EIP) in [Online][Communication module setting and diagnosis] [Service Enable]. Program download Enable Services 7-48...
  • Page 276 Chapter 7 server service 7.3.9 Diagnosis Ethernet module (FEnet) does not provide diagnostic function for EIP server (Period/Non-period) among EtherNet / IP services, but only diagnostic function for EIP client (Period/Non-period). The EIP Client Service is integrated into the Smart Extension Service and also includes diagnostics. For the diagnosis function of smart extension service, refer to '4.4 Smart extension diagnosis function'.
  • Page 277 Chapter 7 server service 7.3.10 System configuration The Ethernet module provides both EtherNet / IP server and client functions. Ethernet module(V8.0) Client Max. 64 stations Switch module(MRS) 100Mbps/1Gbps EtherNet/IP server EtherNet/IP server EtherNet/IP server 7-50...
  • Page 278 Chapter 7 server service 7.4 OPC UA function OPC Unified Architecture (IEC 62541) is an interoperability standard for secure and reliable information exchange, making it suitable for industrial applications. Based on client-server model, it is a communication protocol applicable from sensor level to cloud and has the following features.
  • Page 279 Chapter 7 server service 7.4.1 Overview XGT OPC UA module has the following features  Message encryption feature  Authentication via Certificate  User security functions  Variable read / write function  Variable Monitoring (MonitoredItem) Function through Subscription  Alarm / Event function for variables ...
  • Page 280 To use the OPC UA server, you need to upgrade the OS of the Ethernet module. (Only V7.x version is supported) 1) Download OPC UA server OS from LS ELECTRIC website (http://www.lselectric.co.kr/). 2) After installing the Ethernet module on the system, supply power to the PLC 3) Connect to PLC with XG5000 and change the operation mode to STOP.
  • Page 281 Chapter 7 server service 6) Select on [Online][Communication module setting][OS download / upload]. 7) After selecting Ethernet module, select “OS” in file type selection and click [download] button. When the file search window appears, select the OS file downloaded from the homepage. 7-54...
  • Page 282 Chapter 7 server service 8) Wait for the progress bar to reach 100% and click the [OK] button. Notes Only Ethernet modules (V6.0 or higher) manufactured after January ‘18 can be upgraded to OS that supports OPC UA server. If you change to the firmware version V7.x version, OPC UA is supported and other V6.x or V8.x version does not support OPC UA function.
  • Page 283 Chapter 7 server service 7.4.2 Parameter setting OPC UA server parameter is divided into basic setting, secure channel setting, user authentication setting parameter, and selecting variable to use in OPC UA. It is downloaded through XG5000. (1) Standard settings To set up OPC UA server, you have to select “Use OPC UA” option in standard settings of Ethernet communication module.
  • Page 284 Chapter 7 server service 7.4.3 OPC UA settings (1) Select on [Communication module setting]  [OPC UA setting] menu to move to setting screen. (2) Standard settings 1) Application name: The name of the OPC UA server displayed when the OPC UA client connects to the server's URL.
  • Page 285 Chapter 7 server service 3) Publishing Interval: Set the minimum frequency that the OPC UA server can send to OPC UA clients. The default value is 200ms and can be changed by the user from 20ms to 1000ms. 4) Sampling Interval: Set the sampling cycle between PLC CPU and OPC UA server communication module for the variable registered as MonitoredItem.
  • Page 286 Chapter 7 server service 4) Trusted client : Register a certificate for trusted clients connecting to the OPC UA server. Unchecked the “Automatically accept all client certificates” check box in 3) to enter the file. 5) Select Certificate: Enroll by issuing your own certificate or selecting a certificate stored on your PC. (4) User Authentication 7-59...
  • Page 287 Chapter 7 server service 1) Allow anonymous access: When connecting without specifying a user ID and password, this function accepts the client's connection for the request. 2) Allow User and Password access: Check the user ID and password to determine if the client is connected. 7.4.4 Variable registration The OPC UA server registers and uses server variables for use by OPC UA clients.
  • Page 288 Chapter 7 server service 7.4.5 Setting Download After setting up OPC UA server and selecting parameters, use [Online] [Write] menu to download OPC UA server parameters. 7-61...
  • Page 289 Chapter 7 server service 7-62...
  • Page 290: Chapter 8 Additional Functions

    Chapter 8 Additional functions Chapter 8 Additional functions 8.1 Remote communication This function is XG5000 and remote control function such as program writing, user program download, program debugging, and monitor in network system where PLC is connected by Ethernet. Especially, when the devices connected to the network are far apart, it is a convenient function to easily access each device from one place without moving the place.
  • Page 291 Chapter 8 Additional functions 8.2 XG5000 setting and connection All PLCs connected to XGT network can be connected by XG5000 communication service. The remote connection of the XG5000 consists of the 1-stage connection and the 2-stage connection, The following describes how to connect remote stage 1 and stage 2.
  • Page 292 Chapter 8 Additional functions 192.168.91.190 (2) Settings (Details) _USB 1) USB driver: Set to LSIS XGT Series. (3) Settings (Details) _Remode 1 1) Network type: Select Rnet, Fdnet, Cnet, FEnet, FDEnet, etc. according to the network type to which step 1 connection is made.
  • Page 293 Chapter 8 Additional functions 3) IP address: Specify the IP address of the Ethernet module mounted in the PLC of the destination station (PLC (2)) to be connected with network 1 in network 1. Connect to the Ethernet module with the IP address 192.168.91.191.
  • Page 294 Chapter 8 Additional functions (2) Details_Remote 1(Remote 1 setting is same as “8.2.1 Remote 1 connection”.) (3) Details_Remote 2 1) Network type: Select Rnet, Fdnet, Cnet, FEnet, FDEnet, etc. according to the network type to which step 2 connection is made. The network types of the 1st and 2nd connection are not related. It is connected by 1- stage Ethernet to FEnet.
  • Page 295 Chapter 8 Additional functions 8.2.3 CPU access directly from PC connected to Ethernet If the PC running XG5000 is connected to PLC by network, you can connect to CPU with remote 1 by Ethernet without connecting to PLC CPU by USB or RS-232C PLC(N) PLC(1) PLC(2)
  • Page 296 Chapter 8 Additional functions 1) Connection method Select how the connection will be made. Select Ethernet because it connects to Ethernet without using RS- 232C. 2) Connection stage: Decide whether to establish the connection to the PLC in either remote 1-stage or remote 2-stage. Select remote stage 1.
  • Page 297 Chapter 8 Additional functions Notes (1) Cautions when working with remote stage 1/2 1)If the currently open project on XG5000 and CPU type connected in 1st and 2nd stage do not match, the following menu items cannot be used. a) Write the program and each parameter b) Read the program and each parameter c) Monitor d) Flash memory...
  • Page 298 Chapter 8 Additional functions 8.3 System configuration using switch module Communication with host system, existing PLC system and other controllers can be done by using Ethernet communication module. XGT PLC can be configured with high speed and reliability by using Ethernet module. 8.3.1 Ethernet, RAPIEnet mixed system configuration (supported by Ethernet V6.0 or higher, switch V1.1 or higher)
  • Page 299 Chapter 8 Additional functions (3) RAPIEnet and Ethernet communication using MRS Ethernet module(V6.0) Ethernet: RAPIEnet: Switch module(MRS) Expansion RAPIEnet Smart I/O Smart I/O Ethernet module(V6.0) RAPIEnet ,Ethernet system configuration Use either Ethernet or PAPIEnet among the four switch modules. Notes (1) Smart extension service can be used in various system configurations.
  • Page 300: Chapter 9 Troubleshooting

    Chapter 9 Troubleshooting Chapter 9 Troubleshooting An explanation of how to check the causes of a failure or an error that may occur during system operation and measures. The following procedure can be used to check the status of the Ethernet module. Please follow the troubleshooting procedures to determine the abnormal module status.
  • Page 301 Chapter 9 Troubleshooting 9.1 LED Error Check To check the fault or status of the module, check the status of the communication module according to the lighting status of the LED. 9.1.1 Abnormal operation indication of XGL-EFMT / EFMF LEDs on the front of the Ethernet module provide easy operation. LED Name Error contents Solution...
  • Page 302 Chapter 9 Troubleshooting 9.1.2 Abnormal operation indication of XGL-EFMTB / EFMF Checked by the LED on the front of the Ethernet module. XGL-EFMTB RELAY LINK PADT FAULT LINK LED Name Error contents Solution 1) Mounting error of Ethernet communication module LED off after PLC - Check if the DC 5V power supply of the power supply module is abnormal..
  • Page 303 Chapter 9 Troubleshooting LED Name Error contents Solution 1) Check if the IP redundancy setting is on the same network. (V5.0 or higher) 2) Check if the media of the standard settings parameter and the product have the same media type. Turned on after 3) Check the RAPIEnet slave parameters for errors.
  • Page 304 Chapter 9 Troubleshooting 9.1.3 Abnormal operation display of XGL-EH5T Check the normal operation through the LED on the front of the switch module. The switch module only needs to be powered from the base and no parameter setting is required. If all LEDs except the power LED of the switch module blink once after the power is applied, the switch module is normal.
  • Page 305 Chapter 9 Troubleshooting 9.1.4 Abnormal operation display of XOL-ES4T/ES4H Check the normal operation through the LED on the front of the switch module. The switch module only needs to be powered from the base and no parameter setting is required. LED contents Error contents Solution...
  • Page 306 Chapter 9 Troubleshooting 9.2 Error checking method by XG5000 connection 9.2.1 Error / Warning check during PLC operation By XG5000 program, you can monitor the communication module abnormally. After connecting to CPU port, check through [Online]- [Diagnostics ] [PLC History] and [PLC Error / Warning] of XG5000.
  • Page 307 Chapter 9 Troubleshooting (1) Error / Warning check during XGK CPU module operation Operati Code Cause of error Action (Restart Mode After Action) Diagnostics point condition Status Blink in full Data Bus Error A / S request if repeated on power up Error Power on LED order...
  • Page 308 Chapter 9 Troubleshooting Diagnostics Code Cause of error Action (Restart Mode After Action) LED status status point Check the location of the slot where access error I / O module data is not occurred with XG5000, replace the module and restart STOP ERR : ON normally accessed during...
  • Page 309 Chapter 9 Troubleshooting (2) Error / Warning check during XGI CPU module operation Operation Diagnostics Code Cause of error Action (Restart Mode After Action) LED condition Status point Blink in full LED Data Bus Error A / S request if repeated on power up Error Power on order...
  • Page 310 Chapter 9 Troubleshooting Code Cause of error Action (Restart Mode After Action) Diagnostics point Status status Check the location of the slot where access error occurred with XG5000, replace the I / O module data is not module restart (according STOP ERR : ON normally accessed during...
  • Page 311 Chapter 9 Troubleshooting (3) Error / Warning check during XGR CPU module operation Operation Diagnostics Code Cause of error Action (Restart Mode After Action) Status condition point A / S request if repeated on power up Power on Base information error STOP S013 mode...
  • Page 312 Chapter 9 Troubleshooting Code Cause of error Action (Restart Mode After Action) Diagnostics point Status condition Duplicated base setup STOP E043 Power on Check Expansion driver ID duplicates error Check power module installation when both power STOP, Base power error E045 Power on modules are off...
  • Page 313 Chapter 9 Troubleshooting 9.2.2 Error / Warning check during communication module operation By XG5000 program, you can monitor the communication module abnormally. Connect to CPU port and click [Online]  [Communication module setting and diagnosis]  [System diagnosis] of XG5000. Thereafter, you can right-click the Ethernet module in the PLC system and check it through the Block Status tab of [Status by Service] ...
  • Page 314 Chapter 9 Troubleshooting (1) Error / Warning check during communication module operation(P2P/dedicated service) Error code Error contents Solution 0x0000 Normal operation 1) Modbus registration failed in Modbus communication. If the problem persists, please contact our Customer centre. P2P-Communication 2) The number of channels in the message in the server service (dedicated 0x0001 Error communication) exceeded 1 Check the P2P block setting.
  • Page 315 Chapter 9 Troubleshooting Error code Error contents Solution 1) The Cnet client requested a data type that is not supported by the server Server service - Data CPU. Check the block setting. 0x0007 2) It was downloaded without using “E-mail” in Email setup window. Select "Use type error E-mail"...
  • Page 316 Chapter 9 Troubleshooting P2P-Connection XGT dedicated communication cannot establish connection with server. Check 0x0017 request error the communication settings and network connection. P2P-internal transmit The internal transmission frame number of FEnet dedicated communication has 0x0018 frame storage been exceeded. Check the communication settings and network connection. exceeded P2P-Exceeded The maximum number of connections that can be connected to XGT dedicated...
  • Page 317 Chapter 9 Troubleshooting It was downloaded without using “E-mail” in Email setup window. Select "Use E- P2P-Email parameter 0x5D52 download error mail" to use. Dedicated Server - The device area requested by XGT Cnet client (Cnet dedicated communication) 0x7132 Excess of variable has been exceeded.
  • Page 318 Chapter 9 Troubleshooting FEnet has a connection with a server in dedicated / user frame definition 0xE022 P2P-Connecting communication. P2P-XGT dedicated An error occurred during data send in FEnet dedicated communication. Check 0xE024 protocol transmit error the network connection. P2P-Modbus protocol An error occurred during Modbus data send during Modbus communication.
  • Page 319 Chapter 9 Troubleshooting 1) In user frame definition communication, the server cannot send data before making a connection. First, establish a connection on the other client. 0xFFFF P2P-Error 2) The data size set in user frame definition communication exceeded the maximum size (1024byte).
  • Page 320 Chapter 9 Troubleshooting (2) Error / Warning check during communication module operation(Smart Extension Service) By XG5000 program, you can monitor the communication module abnormally. Connect to CPU port and click [Online]  [Communication module setting and diagnosis]  [System diagnosis] of XG5000. Thereafter, you can right-click the Ethernet module in the PLC system and check it through the Block Status tab of [Status by Service] ...
  • Page 321 Chapter 9 Troubleshooting -Event service: EtherNet / IP Client Service EB status Displays the current EB status. Service status Description IDLE The communication device (slave) to be controlled is not recognized in the network. DETECTING Looking for communication device (slave). STATE_CFM The communication device has been checked.
  • Page 322 Chapter 9 Troubleshooting (3) Diagnostic variables during communication module operation(Smart Extension Service) Smart extension service can check error-related diagnostic variable (EB flag) in diagnosis variable and Status by Service. See the table below for the corrective actions for the errors identified in the diagnostic variables (EB flags). If the same error occurs after the measures below, request A / S.
  • Page 323 Chapter 9 Troubleshooting Diagnostic Variable name Corrective Measure variables Check the network connection. 1) System check including smart extension network cable 2) Check the power status of devices in the network _BBSS_SYSTEM_E * Allocate diagnostic variables depend on the setting of the EB or modu le swap (hot swap) option during operation.
  • Page 324 Chapter 9 Troubleshooting 2) Check if I / O module failure of communication device * This diagnostic variable reflects only the status of EB or EB with module exchange (hot swap) setting enabled during operation. During operation, replace the I/O module that has a FUSE error among the I/O modules of the EB or EB with module exchange (hot swap) setting enabled.
  • Page 325 Chapter 9 Troubleshooting 1) Check if I / O module is missing from communication device 2) Check if I / O module failure of communication device * 해당 진단 변수는 ‘동작 중 EB 또는 모듈 교환(핫 스왑) 설정’ 옵 션에 따라 동작이 달라집니다. 자세한 사항은 ‘4.4.3 동작 중 EB 또 는...
  • Page 326 Chapter 9 Troubleshooting 9.2.3 View Communication Module Log Communication module history view function of XG5000 program can check whether error occurred and measures. Select [Online]  [Communication module setting]  [System Diagnosis] from XG5000. Right-click on the XGL-EFMxB module you want to diagnose and select [View communication module log].
  • Page 327 Chapter 9 Troubleshooting 9.3 XGT dedicated communication error code 9.3.1 STATUS value that can be checked in communication frame This is an error code that responds when an error occurs for a request for XGT dedicated communication beginning with “LSIS-XGT” or “LGIS-GLOFA”. The error code can be checked in the error code area of the NAK message.
  • Page 328: Troubleshooting By Error

    Chapter 9 Troubleshooting 9.4 Troubleshooting by error Trouble shooting method is to check the error history in XG5000 and LED status of Ethernet module and then take measures. 9.4.1 Troubleshooting (1) Turn off the Run LED on the Ethernet module: Hardware error H/W error Is the power supply Check the power /...
  • Page 329 Chapter 9 Troubleshooting (2) I / F LEDs on the Ethernet Module do not flash: Interface error H/W error Is the power supply Check the power / normal? voltage Comply with the general Does the installation standards for the environment meet the surrounding inst allation spec if ications? environment.
  • Page 330: Chapter 10 Emc Standard

    Chapter 10 EMC Standard Chapter 10 EMC Standard 10.1 The requirements for compliance with EMC standards The EMC Directive specifies the products must 'be so constructed that they do not cause excessive electromagnetic interference (emissions) 'and 'are not unduly affected by electromagnetic interference (immunity)'. The applicable products are requested to meet these requirements This section summarizes the precautions on conformance to the EMC Directive of the machinery assembled using XGT PLC series.
  • Page 331 Chapter 10 EMC Standard 10.1.2 Panel The PLC is an open type device (device installed to another device) and must be installed in a control panel. This is because an accident such as electric shock does not occur when a person comes into contact with the product (XGT PLC), and the noise generated in the PLC has the effect of attenuating the control panel.
  • Page 332 (3) How to fix the cable in the panel When fixing the extension cable of the XGT series to the metal control panel, keep the extension cable at least 1 cm so that the extension cable does not directly contact the metal plate. The metal plate of the control panel has a shielding effect that blocks noise from radio waves, but it can also be a good antenna if a cable that is a source of noise is connected nearby.
  • Page 333: Requirement To Conform To The Low-Voltage Directive

    The low-voltage directive requires each device that operates with the power supply ranging from 50V to 1000VAC and 75V to 1500VDC to satisfy the safety requirements. Cautions and installation and wiring of the series PLC XGT series to conform to the low-voltage directive are described in this section. However, LSIS will not guarantee that the overall machinery manufactured according to the details conforms to the below-described directives.
  • Page 334 Appendix Appendix A.1 XGT CPU memory device list For the latest CPU type devices, refer to the CPU manual. Also, for CPU models released after the writing of this manual, please refer to the relevant CPU manual. A.1.1 XGK CPU devices Memory area of the CPU used for local data send / receive.
  • Page 335 Appendix A.1.2 XGI CPU devices Device Type Size Range Note Symbolic variable 512K byte %AW0~%AW262143 Up to 256K byte retainable area(A) Input variable(I) 16K byte %IW0.0.0 ~ %IW127.15.3 Output variable(Q) 16K byte %QW0.0.0 ~ %QW127.15.3 256K byte %MW0~%MW131071 Up to 128K byte retainable Direct 64K byte * 2 Block %RW0~%RW32767...
  • Page 336 Appendix A.2 Describes of terms Before using this product, explain the general terms of Ethernet module. Please refer to the Ethernet technical book for details. Auto-MDIX(Automatic Medium Dependent Interface Crossover) The type of Ethernet cable is divided into Crossover Cable (TX-RX, RX-TX) and Straight Cable (TX-TX, RX-RX), where the TX / RX is interchanged based on TX / RX. Communication of each network device is possible through connection of TX (node A) -RX (node B) / RX (node A) -TX (node B), so it is impossible to communicate with Straight Cable.
  • Page 337 Appendix  DNS(Domain Name System) A method used to convert alphabetic Domain Name on the Internet to its identical Internet number (namely, IP address).  Dot Address Shows IP address of ‘100.100.100.100’, where each figure is displayed in decimal with 1 byte occupied respectively for 4 bytes in total.
  • Page 338 Appendix  FTP(File Transfer Protocol) An application program used to transfer files between computers among application programs providing TCP/IP protocol. If an account is allowed to the computer to log in, fast log in the computer is available wherever the computer is so to copy files.
  • Page 339 Appendix  IP Address Address of respective computers on the Internet made of figures binary of 32 bits (4 bytes) to distinguish the applicable machine on the Internet. Classified into 2 sections, network distinguishing address and host distinguishing address. The network address and the host address is respectively divided into class A, B and C based on the bits allotted.
  • Page 340 Appendix  Reset This is function used when you want to initialize the communication module to clear the error.  RPI Abbreviation for Requested Packet Interval, which means to send packet. (XGT EtherNet / IP module is provided in transmission cycle) ...
  • Page 341 Appendix  Token Ring As short-distance network using Token to connect to network having physical ring structure, one of the Node connection methods at network. If node sending data gets Token, then node gets right to send message packet. Realistically structured examples are IEEE 802.5, ProNet-1080 and FDDI.
  • Page 342 Appendix A.3 List of flags A.3.1 Special Relay (F) List Device 1 Device 2 Type Variable Function Description F0000 DWORD _SYS_STATE Mode and state Indicates PLC mode and operation status F00000 _RUN RUN status. F00001 _STOP STOP STOP status. F00002 _ERROR ERROR ERROR status.
  • Page 343 Appendix Device 1 Device 2 Type Variable Function Description F0002 DWORD _CNF_ER System error Indicates the critical error state of the system. F00020 _CPU_ER CPU error There is an error in the CPU configuration. F00021 _IO_TYER Module type error The module type does not match. Module detachment F00022 _IO_DEER...
  • Page 344 Appendix Device 1 Device 2 Type Variable Function Description F0004C _HS_WAR5 High speed link 5 High speed link– parameter 5 or more F0004D _HS_WAR6 High speed link 6 High speed link– parameter 6 or more F0004E _HS_WAR7 High speed link 7 High speed link–...
  • Page 345 Appendix Device 1 Device 2 Type Variable Function Description F00102 _USR_CLK2 Repeat specified scan Specified scan On/Off Clock 2 F00103 _USR_CLK3 Repeat specified scan Specified scan On/Off Clock 3 F00104 _USR_CLK4 Repeat specified scan Specified scan On/Off Clock 4 F00105 _USR_CLK5 Repeat specified scan Specified scan On/Off Clock 5 F00106...
  • Page 346 Appendix Device 1 Device 2 Type Variable Function Description PUT/GET done in the extended base level F0029 WORD _PUTGET_NDR6 PUT/GET complete 6 PUT/GET done in the extended base level F0030 WORD _PUTGET_NDR7 PUT/GET complete 7 Indicates information related to the CPU F0044 WORD _CPU_TYPE...
  • Page 347 Appendix Device 1 Device 2 Type Variable Function Description F0074 DWORD _CA_CNT Block service Increase in module's block data service F0076 DWORD _CA_LIM_CNT Block service LIMIT Increase in block data abnormal service Block service F0078 DWORD _CA_ERR_CNT Increase in block data abnormal service ERROR F0080 DWORD...
  • Page 348 Appendix Device 1 Device 2 Type Variable Function Description Fuse disconnection 4 Extension base 4-stage fuse disconnection F0116 WORD _FUSE_ER4 error error Fuse disconnection 5 Extension base 5-stage fuse disconnection F0117 WORD _FUSE_ER5 error error Fuse disconnection 6 Extension base 6-stage fuse disconnection F0118 WORD _FUSE_ER6...
  • Page 349 Appendix Device 1 Device 2 Type Variable Function Description F0154 WORD _BASE_INFO4 Slot information 4 Extension base 4-slot information F0155 WORD _BASE_INFO5 Slot information 5 Extension base 5-slot information F0156 WORD _BASE_INFO6 Slot information 6 Extension base 6-slot information F0157 WORD _BASE_INFO7 Slot information 7...
  • Page 350 Appendix A.3.2 Communication relay (L) list (1) Special register for data link High speed link No. 1 ~12 keyword Type Content Description Indicates that all stations operate normally as per the parameter set from the high speed link. It becomes On in the following conditions. 1.
  • Page 351 Appendix High speed Address in L area Note link number L000500~L00099F L001000~L00149F L001500~L00199F Compared with HS link 1, the flag address of other HS link station no. Is as follows. L002000~L00249F Calculation formula: Address in L area = L000000 + 500 x (high speed link number– 1) L002500~L00299F L003000~L00349F f you want to use HS link flag for program and monitoring, you can use the flag map...
  • Page 352 Appendix P2P parameter: 1 ~ 8 , P2P block : 0 ~63 keyword Type Content Description P2P parameter No. 1 completed No. P2P parameter No. 1 completed No. 0 block L006250 _P2P1_NDR00 00 block service normally service normally P2P parameter No. 1 completed No. P2P parameter No.
  • Page 353 Appendix (2) Link devices (N) list P2P index: 1 ~ 8 , P2P block : 0 ~63 keyword Type Content Description Saves the destination station address on No 00 block of P2P parameter No. 1 No. P2P parameter No. 1. N00000 _P1B00SN WORD...
  • Page 354 Appendix keyword Type Content Description N00036 ~ Device P2P parameter No. 1 No. Saves device 4 on No. 00 block save area of P2P _P1B00WD4 N00039 structure 00 block save area device 4 parameter No. 1. P2P parameter No. 1 No. Saves size 4 on No.
  • Page 355: Ascii Code Table

    Appendix A.4 ASCII Code Table American National Standard Code for Information Interchange ASCII Code ASCII Code ASCII Code ASCII Code Value Value Value Value Decimal Decimal Decimal Decimal € NULL À • Á ‚ Â ƒ Ã „ Ä … Å...
  • Page 356 Appendix ASCII Code ASCII Code ASCII Code ASCII Code Value Value Value Value Decimal Decimal Decimal Decimal œ Ü • Ý ž Þ Ÿ ß (space) à ¡ á " ¢ â £ ã ¤ ä ¥ å & ¦ æ...
  • Page 357 Appendix A.5 Ethernet technology compare table technology Speed (Mbps) Media Max. distance Token Ring 4,16 100m 10BASE-T 100m 10BASE-F(Multi mode) Optical cable Max. 2km Ethernet 10BASE-F(Single mode) Optical cable Max. 2.5km 10BASE-5 Coaxial cable 500m 10BASE-2 Coaxial cable 185m 100BASE-T4 100m 100BASE-TX 100m...
  • Page 358 Appendix A.6 Dimension (1) XGL-EFMTB/EFMFB, XGL-EH5T Unit : mm A-25...
  • Page 359 Appendix (2) XOL-ES4H Unit : mm A-26...
  • Page 360 Appendix (3) XOL-ES4T Unit : mm A-27...
  • Page 361 Appendix A-28...
  • Page 362: Warranty

    3. Since the above warranty is limited to PLC unit only, make sure to use the product considering the safety for system configuration or applications. Environmental Policy LS ELECTRIC Co., Ltd supports and observes the environmental policy as below. Environmental Management About Disposal LS ELECTRIC’...
  • Page 363 Warranty and Environment Policy...
  • Page 364 ■ Headquarter ■ Overseas Subsidiaries • LS ELECTRIC Japan Co., Ltd. (Tokyo, Japan) LS-ro 127(Hogye-dong) Dongan-gu, Anyang-si, Gyeonggi-Do, 14119, Korea Tel: 81-3-6268-8241 E-Mail: jschuna@lselectric.biz • LS ELECTRIC (Dalian) Co., Ltd. (Dalian, China) ■ Seoul Office Tel: 86-411-8730-6495 E-Mail: jiheo@lselectric.com.cn •...

Table of Contents