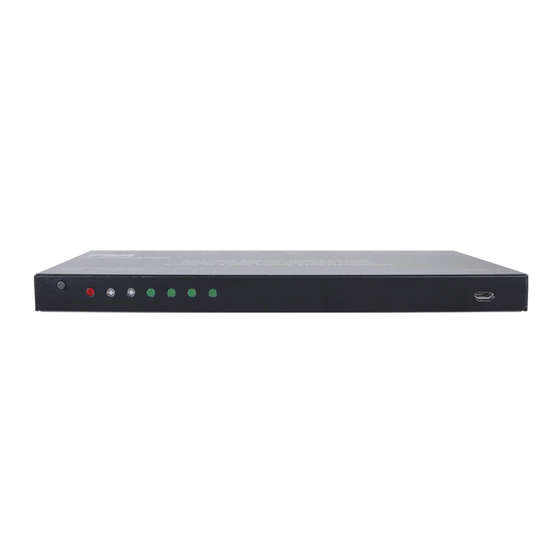
Summary of Contents for FSR DV-HSW4K-41AUD
- Page 1 DV-HSW4K-41AUD HDMI 2.0 4x1 Switcher User Manual 244 Bergen Blvd Woodland Park, NJ 07424 973-998-2300 www.fsrinc.com All Rights Reserved 43440 LIT1844...
- Page 2 DV-HSW4K-41AUD, HDMI 2.0 4x1 Switcher Preface Read this user manual carefully before using the product. This manual is only for operation instruction, please contact the local distributor for maintenance assistance. In the constant effort to improve the product, we reserve the right to make functions or parameters changes without notice or obligation.
- Page 3 DV-HSW4K-41AUD, HDMI 2.0 4x1 Switcher SAFETY PRECAUTIONS To ensure the best performance from the product, please read all instructions carefully before using the device. Save this manual for further reference. Unpack the equipment carefully and save the original box and packing material for ...
-
Page 4: Table Of Contents
DV-HSW4K-41AUD, HDMI 2.0 4x1 Switcher Table of Contents 1. Product Introduction ....................5 1.1 Features ......................5 1.2 Package List ...................... 6 2. Technical Specification ....................7 3. Panel Description ......................8 3.1 Front Panel ......................8 3.2 Rear Panel ......................9 4. -
Page 5: Product Introduction
DV-HSW4K-41AUD, HDMI 2.0 4x1 Switcher 1. Product Introduction The DV-HSW4K-41AUD is an ultrathin auto switcher with four HDMI video inputs and one HDMI output. This switcher supports HDMI video resolution up to 4K@60Hz 4:4:4 HDR and multichannel audio. Except passing EDID information from the display, there are multiple built-in EDID settings to simplify an installation. -
Page 6: Package List
DV-HSW4K-41AUD, HDMI 2.0 4x1 Switcher 1.2 Package List 1x HDMI 2.0 4x1 Switcher 2x Mounting Ears 4x Mounting Screws 4x Plastic Cushions 1x RS232 Cable (3.5mm to DB9) 1x IR Remote 1x IR Receiver ... -
Page 7: Technical Specification
DV-HSW4K-41AUD, HDMI 2.0 4x1 Switcher 2. Technical Specification Video Input Input (4) HDMI Input Connector (4) Female type-A HDMI HDMI Input Resolution Up to 4K@60Hz 4:4:4, Dolby Vision, HDR HDMI Standard HDCP Version Video Output Output (1) HDMI Output Connector... -
Page 8: Panel Description
DV-HSW4K-41AUD, HDMI 2.0 4x1 Switcher 3. Panel Description 3.1 Front Panel ① Auto/Source Button: Press to switch to next input source. Press and hold for three seconds to switch between manual mode and auto ② Power LED: The LED illuminates red when power is applied. -
Page 9: Rear Panel
DV-HSW4K-41AUD, HDMI 2.0 4x1 Switcher 3.2 Rear Panel ① IN 1~4: Four type-A female HDMI input ports to connect HDMI sources. Only input 4 port supports ARC. ② OUT: Type-A female HDMI output port to connect HDMI display. ③ AUDIO: 3.5mm mini jack for analog audio output. -
Page 10: System Connection
DV-HSW4K-41AUD, HDMI 2.0 4x1 Switcher 4. System Connection 4.1 Usage Precaution Make sure all components and accessories are included before installation. System should be installed in a clean environment with proper ventilation and humidity. All plugs, sockets, and power cords should meet local and national code. -
Page 11: Source Button Control
DV-HSW4K-41AUD, HDMI 2.0 4x1 Switcher 5. Source Button Control 5.1 Manual Switching When the switcher is in manual switching mode, the Switching Mode LED will be green, and pressing Auto/Source button will switch to the next input. 5.2 Automatic Switching To enable automatic switching, press and hold the Auto/Source button for three seconds. -
Page 12: Ir Remote Control
DV-HSW4K-41AUD, HDMI 2.0 4x1 Switcher 6. IR Remote Control Connect the IR receiver to the IR input port; the IR remote is used for input switching and it can also be used to control source and display devices based on CEC functionality. -
Page 13: Rs232 Control
DV-HSW4K-41AUD, HDMI 2.0 4x1 Switcher 7. RS232 Control Connect the switcher to the control device (e.g., PC, Control System) with an RS232 cable and set the parameters correctly. 7.1 RS232 Control Basic Settings Baud rate: 9600 Data bit: 8 Stop bit: 1 Parity bit: none. -
Page 14: Source Device Control
DV-HSW4K-41AUD, HDMI 2.0 4x1 Switcher 7.1.2 Source Device Control Note: The input source device is required to support CEC. HDMI input 4 port does not support CEC, the source device connected to this port cannot be controlled by IR remote. -
Page 15: Display Device Control
DV-HSW4K-41AUD, HDMI 2.0 4x1 Switcher 7.1.3 Display Device Control Note: The display device is required to support CEC. Function Command Feedback Example Turn on the display device, e.g., >>TVOn <<TVOn HDTV. Turn off the display device, e.g., >>TVOff <<TVOff HDTV. -
Page 16: Edid Management
DV-HSW4K-41AUD, HDMI 2.0 4x1 Switcher 8. EDID Management 8.1 Predefined EDID Setting The rear panel provides a 4-pin DIP switch to set a predefined EDID. The unit has ten types of embedded EDID and their corresponding switch status are shown in the list below. -
Page 17: User Defined Edid Setting
DV-HSW4K-41AUD, HDMI 2.0 4x1 Switcher 8.2 User Defined EDID Setting There are five EDID settings that can be customized following the below operations. Rename the user defined EDID according to the following format. EC_xx_xxxx_xxx.bin EC: Represents EDID. xx: Represents EDID ID. It is 11~15. -
Page 18: Arc Mode
DV-HSW4K-41AUD, HDMI 2.0 4x1 Switcher 9. ARC Mode Audio Return Channel (ARC) allows audio from a display to pass “upstream” through an HDMI cable to an audio processing device, such as an AV amplifier. When ARC mode is active on the switcher, the ARC stream will pass to the active HDMI source device if it can process the signal. -
Page 19: Troubleshooting & Maintenance
NOTE: all equipment being returned for repair must have a Return authorization (RMA) Number. To get a RMA Number, please call the FSR Service Department (1-800-332- FSR1). Please display your RMA Number prominently on the front of all packages. - Page 20 FSR factory or Authorized Repair Stations. This warranty shall be cancelable by FSR at its sole discretion if the unit has been subjected to physical abuse or has been modified in any way without written authorization from FSR.


Need help?
Do you have a question about the DV-HSW4K-41AUD and is the answer not in the manual?
Questions and answers