
Subscribe to Our Youtube Channel
Related Manuals for FSR DV-MFMV-74


Summary of Contents for FSR DV-MFMV-74
- Page 1 DV-MFMV-74 7x1 MultiVU Seamless Windowing Switcher Manual Based on firmware revision 1.12 and FSR1.0.0.Q 244 Bergen Blvd Woodland Park NJ 07424 973-785-4347 www.fsrinc.com 43090 LIT1556C...
-
Page 2: Proprietary Information
PROPRIETARY INFORMATION All information in this manual is proprietary to and the property of FSR Inc. This publication is protected by the Federal Copyright Law, with all rights reserved. No part of this document may be reproduced, transcribed, or transmitted, in any form or by any means, without prior explicit written permission from FSR Inc. -
Page 3: Limited Warranty
The DV-MFSW-74 is warranted against failures due to defective parts or faulty workmanship for a period of three years after delivery to the original owner. During this period, FSR will make any necessary repairs or replace the unit without charge for parts or labor. Shipping charges to the factory or repair station must be prepaid by the owner, return-shipping charges (via UPS Ground) will be paid by FSR. -
Page 4: Safety
SURGE PROTECTION DEVICE RECOMMENDED This product contains sensitive electrical components that may be damaged by electrical spikes, surges, electric shock, lightning strikes, etc. Use of surge protection systems is highly recommended in order to protect and extend the life of your equipment. -
Page 5: Table Of Contents
TABLE OF CONTENTS PROPRIETARY INFORMATION ..............2 UNPACKING ........................2 LIMITED WARRANTY ..................3 SAFETY ......................4 DESCRIPTION ....................6 FEATURES ......................6 APPLICATION DIAGRAM ................7 AUDIO BLOCK DIAGRAM ................7 DIMENSIONS ....................8 PANEL LAYOUT AND OPERATION ...............9 FRONT PANEL ........................9 VGA INPUT AUTO ADJUST BEHAVIOR: ............... 10 REAR PANEL ........................ -
Page 6: Description
It easily integrates with the HuddleVU FLEX collaboration system to create a powerful and cost effective solution. The DV-MFMV-74 features 4 HDMI, 2 DisplayPort, and 1 VGA (RGB/ YPbPr) input. It is HDCP compliant with the HDMI and DisplayPort inputs supporting resolutions up to 4Kx2K 30Hz and 4Kx2K 60Hz respectively. -
Page 7: Application Diagram
APPLICATION DIAGRAM AUDIO BLOCK DIAGRAM... -
Page 8: Dimensions
DIMENSIONS 17.32 CHASSIS WIDT H 10.71 19.00 18.31 1.71 WINDOW SELECT WINDOW L AYOUT OUTPUT FORM AT D V-M FM V-7 4 AUDIO 1900 INPUT SELECT A U T O 1200 SELECT SELECT POWER 1600 4K x2K 1.25 1200 2.00 1280 1080 P 1024... -
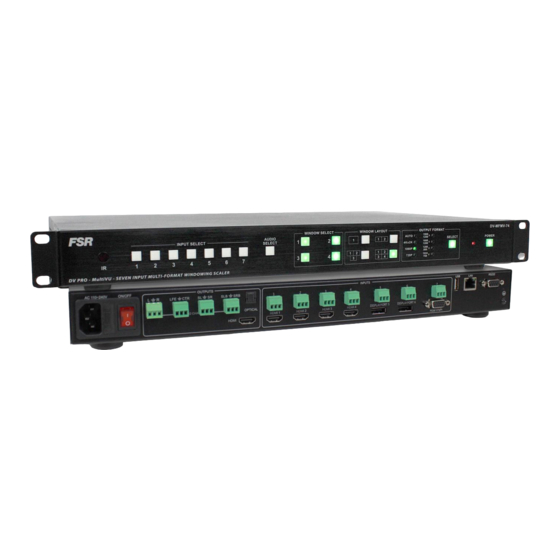
Page 9: Panel Layout And Operation
PANEL LAYOUT AND OPERATION Front Panel WINDOW SELECT WINDOW L AYOUT OUTPUT FORM AT DV-M FM V-74 AUDIO 1900 INPUT SELECT A U T O 1200 SELECT SELECT POWER 1600 4K x2K 1200 1280 1080 P 1024 720 P DV PRO - M ultiVU - SEVEN INPUT M U LTI-FORM AT WINDOWING SCALER 1 IR sensor Input selection NOTE: The VGA auto adjust command can be executed by pressing and holding the input 7 switch... -
Page 10: Vga Input Auto Adjust Behavior
LEDs blink. VGA input Auto Adjust behavior: The DV-MFMV-74 switcher will automatically adjust to new VGA sources when they are first connected. The process will take several seconds during which time the image will move around the screen until the optimal scaler settings are determined. -
Page 11: Rear Panel
Rear Panel U SB LA N R S232 AC 110- 240V O N / O FF O U TPU TS I N PU TS C TR SR B O PTI C A L H D M I 1 H D M I 2 H D M I 3 H D M I 4 D I SPL AYPO R T 5... -
Page 12: Ir Remote Control And Operation
IR REMOTE CONTROL AND OPERATION Button layout 1 Power ON and OFF (Standby) 2 Input selection Window selection Window 1 Window 2 Input 4 Input 3 To assign an input to a window press Video (Window number) Input Press Video 1 Input 4 Press Video 2 ... -
Page 13: On Screen Display (Osd)
ON SCREEN DISPLAY (OSD) HDMI2 Selected input and its input resolution 3840x2160@30 HDMI2 not connected Selected input state and DV-MFMV-74’s IP IP: 192.168.0.10 address VGA Auto Adjust VGA auto adjust Volume IP: 192.168.0.10 DV-MFMV-74’s IP address and port number Port: 23... -
Page 14: Ip Settings
IP SETTINGS There are two methods to obtain the IP address: 1. Obtain the IP address and port number via the information from the on-screen display (OSD). 2. Obtain the IP address and port number via the IP CONFIGURATION TOOL APPLICATION. -
Page 15: Ip Configuration Tool Application
APPLICATION: Download the application "FSR_DV_71_74_Switcher.exe" file from the FSR Document Library at www.fsrinc.com. NOTE: Make sure the PC and DV-MFMV-74 are on the same network. Run the application on the PC to show Click Device Search, the following the main screen: device list is shown. - Page 16 MFMV-74’s IP information. DHCP is where the DV-MFMV-74's information is shown. enabled by default. The static IP address can be entered manually by The DV-MFMV-74 settings can be disabling the DHCP via the pulldown returned to factory default by clicking menu. Factory Default.
- Page 17 Single commands may be sent to change the display capabilities of the unit by clicking on SEND COMMAND. Select either Ethernet or Serial radio button Select the appropriate COM port or Ethernet address. Then either select a predefined command or enter a user defined command. Click the SEND button to send the command:...
-
Page 18: Firmware Update (External Control Board)
1. Connect a Serial straight-through cable to the DV-MFMV-74's RS-232 port. If present, disconnect the Ethernet cable from the LAN port. 2. Turn on the DV-MFMV-74 and wait for it to finish booting up before proceeding to the next step. -
Page 19: Embedded Web Server
EMBEDDED WEB SERVER DV-MFSW-74 can be controlled via a Web browser, which contains General, Advanced and Network settings. For more information about how to obtain the IP address, see the section on “IP SETTINGS”. For example, the obtained IP address is 192.168.0.145 Type 192.168.0.145 in the address bar of the web browser. -
Page 21: Control Ports
CONTROL PORTS To control the DV-MFMV-74 use the RS-232 or LAN port but not both at the same time. RS-232 SETTINGS RS-232 Settings Baud rate 9600 Data bits Parity None Stop bits Flow control None DB-9 Computer DV-MFMV-74 Ground Ground NOTE: For serial control, use a straight-through cable. -
Page 22: Rs-232 Serial And Ethernet Control Protocol
RS-232 Serial and Ethernet Control Protocol Settings Command Reply Audio delay ATM 09 AUD_DLY W X 09 AUD_DLY W X Ex: Audio delay OFF ATM 09 AUD_DLY W 0 09 AUD_DLY W 0 Audio delay request ATM 08 AUD_DLY R 08 AUD_DLY R AUD_DLY X Audio delay Audio input configuration... - Page 23 Settings Command Reply Firmware version request ATM 08 CSW_VER W 08 CSW_VER W X Ex: X = FSR1.0.0.H Data:2015.07.15 HDCP input ATM 09 IPT_DCP W X 09 IPT_DCP W X Ex: HDCP input ON ATM 09 IPT_DCP W 1 09 IPT_DCP W 1 X = (0 = OFF and 1 = ON) HDCP output ATM 0A HDO_HDP W X Y...
- Page 24 Settings Command Reply Power save ATM 0A POW_SAV W XX 0A POW_SAV W XX Ex: Power save set to 30 minutes ATM 0A POW_SAV W 1E 0A POW_SAV W 1E Power save request ATM 08 POW_SAV R 08 POW_SAV R POW_SAV R XX = (00 –...
- Page 25 Settings Command Reply Volume ATM 09 VOL_CRL W X 09 VOL_CRL W X Ex: Volume set to 5 ATM 09 VOL_CRL W 5 09 VOL_CRL W 5 Ex: Volume Up ATM 09 VOL_CRL W + 09 VOL_CRL W + Volume request ATM 08 VOL_CRL R 08 VOL_CRL R VOL_CRL Y X = (0-A, + = Up or - = Down), 10 = A...
-
Page 26: Firmware Update (Audio And Video Board)
FIRMWARE UPDATE (AUDIO AND VIDEO BOARD) Download the MERGE.BIN file from the FSR website doc library The DV-MFSW-74 can be updated through a USB drive as follows. 1. Copy the MERGE.BIN update file to the root directory of a blank USB drive. -
Page 27: Specifications
SPECIFICATIONS Supported Formats HDMI video up to 3840x2160 30Hz and audio up to 7.1Ch Input DisplayPort up to 3840x2160 60Hz VGA (RGB/YPbPr) up to 1920x1200 60Hz HDMI video up to 3840x2160 30Hz and audio up to 7.1Ch Output Stereo analog audio Digital optical audio up to 7.1Ch Connectors 4 x HDMI Type A 19-pin, female...
Need help?
Do you have a question about the DV-MFMV-74 and is the answer not in the manual?
Questions and answers