Table of Contents
Advertisement
Available languages
Available languages
π
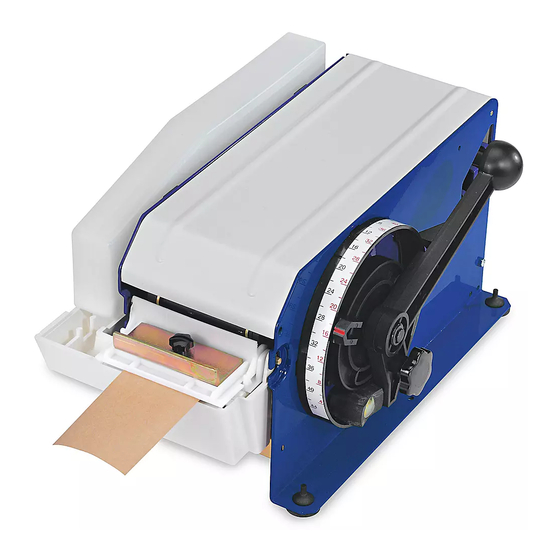
H-725
MANUAL KRAFT
TAPE DISPENSER
PAGE 1 OF 12
1-800-295-5510
uline.com
Para Español, vea páginas 5-8.
Pour le français, consulter les pages 9-12.
IMPORTANT!
Read this manual thoroughly
and familiarize yourself with ALL
controls and operating features.
Keep this manual for future
reference and maintenance.
Unpacking: Check the machine
for damage. If damage is
found, return to Uline.
TECHNICAL DATA
Dimensions of machine:
14 x 11 x 8¾"
Weight of machine: 20½ lbs.
TAPE
Plain, one-layer reinforced
two-layer reinforced.
PAPER FEATURES
Length: min. 4", max. 43¼"
Width: min. 3/4", max. 4"
Maximum roll diameter: 7
⁄
"
7
8
0620 IH-725
Advertisement
Table of Contents

Related Manuals for U-Line H-725


Summary of Contents for U-Line H-725
- Page 1 Para Español, vea páginas 5-8. Pour le français, consulter les pages 9-12. π H-725 1-800-295-5510 uline.com MANUAL KRAFT TAPE DISPENSER IMPORTANT! Read this manual thoroughly and familiarize yourself with ALL controls and operating features. Keep this manual for future reference and maintenance.
-
Page 2: General Information
GENERAL INFORMATION BEFORE USING THE MACHINE IF USING OPTIONAL TOP HEATER Follow all safety and operating instructions contained in WARNING! Burn Danger – Unplug the top heater this manual. Check local and state codes. and allow it to cool down before performing any cleaning, maintenance or repair. - Page 3 SETUP INSTRUCTIONS CONTINUED INSTALL WEIGHT AND COVER PLATE 3. Adjust reservoir level: To maintain the optimum moisture level for the type of tape you are using, 1. Attach weight to cover plate with locking nut. Slide place the water bottle filler opening over one of the weight back for lighter paper tapes (60/70 grade).
-
Page 4: Operation
SETUP INSTRUCTIONS CONTINUED LOAD TAPE ROLL CONTINUED 3. Insert tape roll between guide plates and over roller so tape is positioned gummed side down. Feed the 2. Reposition the roller for gummed in or gummed tape under the upper paper guide and white wheel. out tapes. - Page 5 π H-725 800-295-5510 uline.mx DESPACHADOR DE CINTA KRAFT MANUAL ¡IMPORTANTE! Lea detenidamente este manual y familiarícese con TODOS los controles y características de funcionamiento. Conserve este manual para referencias futuras y mantenimiento. Desempaque: Inspeccione la máquina en busca de daños.
-
Page 6: Información General
INFORMACIÓN GENERAL ANTES DE USAR LA MÁQUINA SI UTILIZA LA RESISTENCIA SUPERIOR OPCIONAL Siga todas las instrucciones de seguridad y ¡ADVERTENCIA! Peligro de quemadura – funcionamiento que se incluyen en este manual. Desenchufe la resistencia superior y permita Compruebe los códigos locales y estatales. que se enfríe antes de limpiarla, realizar tareas de mantenimiento o reparaciones. - Page 7 CONTINUACIÓN DE INSTRUCCIONES DE CONFIGURACIÓN INSTALAR EL PESO Y LA PLACA DE CUBIERTA 3. Ajuste el nivel del depósito: Para mantener un nivel de humedad óptimo para el tipo de cinta que Fije el peso a la placa de cubierta con una vaya a usar, coloque la abertura de llenado de la contratuerca.
-
Page 8: Mantenimiento Y Cuidado
CONTINUACIÓN DE INSTRUCCIONES DE CONFIGURACIÓN CONTINUACIÓN DE CARGAR EL ROLLO DE CINTA 3. Inserte el rollo de cinta entre las placas de guía y por encima del rodillo de forma que la cinta quede 2. Vuelva a colocar el rodillo para cintas con colocada con la cara engomada hacia abajo. - Page 9 π H-725 1-800-295-5510 uline.ca DÉVIDOIR DE RUBAN ADHÉSIF EN KRAFT MANUEL IMPORTANT! ARRÊT Lisez attentivement ce manuel et familiarisez-vous avec TOUTES les commandes et les caractéristiques de fonctionnement. Conservez ce manuel en vue de consultation et d'entretien ultérieurs. Déballage : Vérifiez si l'appareil est endommagé.
-
Page 10: Renseignements Généraux
RENSEIGNEMENTS GÉNÉRAUX AVANT D'UTILISER L'APPAREIL SI VOUS UTILISEZ UN ÉLÉMENT CHAUFFANT SUPÉRIEUR (FACULTATIF) Suivez toutes les instructions d'utilisation et les consignes de sécurité contenues dans ce manuel. Vérifiez les AVERTISSEMENT! Risque de brûlure – Débranchez codes qui s'appliquent dans votre province et votre l'élément chauffant supérieur et laissez-le municipalité. - Page 11 INSTALLATION SUITE INSTALLATION D'UN POIDS ET DE LA PLAQUE DE 3. Réglage du niveau du réservoir : pour maintenir le degré d'humidité optimal pour le type de ruban FINITION que vous utilisez, placez l'orifice de remplissage Fixez le poids à la plaque de finition à l'aide d'un de la bouteille d'eau sur l'une des trois tiges écrou freiné.
-
Page 12: Entretien Et Nettoyage
INSTALLATION SUITE CHARGEMENT DU ROULEAU DE RUBAN SUITE 3. Introduisez le rouleau de ruban entre les plaques de guidage. Ensuite, enfilez le ruban par-dessus le rouleau 2. Repositionnez le rouleau selon le côté gommé du de sorte que le côté gommé du ruban soit orienté vers ruban : gommé...
Need help?
Do you have a question about the H-725 and is the answer not in the manual?
Questions and answers