
Related Manuals for PRESONUS Quantum 4848


Summary of Contents for PRESONUS Quantum 4848
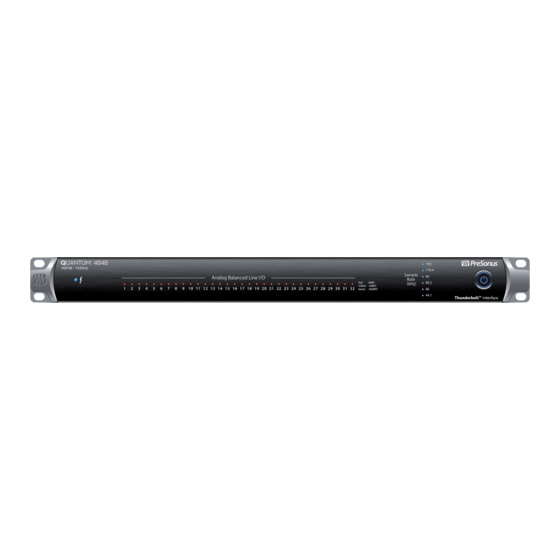
- Page 1 Quantum 4848 Ultra-lowlatencyThunderbolt AudioInterface ™ 雷电二代机架式音频接口 Owner’s Manual 用户手册 ® English www.presonus.com...
-
Page 2: Table Of Contents
TableofContents 目录内容 Overview 概述 — 1 Introduction 简介 — 1 Creating a New Song 创建一首新歌曲 — 24 Configuring Your I/O 配置你的 I/O— 25 6.3.1 Product Registration 产品注册 — 1 6.3.2 CreatingAudioandMIDITracks 创 建 音 频 和 M ID I 音 What is in the Box 包装里有什么... -
Page 3: Overview 概述
Thank you for purchasing a PreSonus Quantum 4848 Thunderbolt Audio Interface. PreSonus Audio Electronic s has designed the Quantum 4848 for the recording professional. Route audio from your vintage gear to your DAW and back without any signal degradation, capturing every nuance of your favorite boutique equipmentatextremelylowlatencythankstoourcustom Thunderboltdrivers. - Page 4 Quantum 4848 Overview To register your Quantum 4848 需要注册你的 Quantum 4848 Go to My.PreSonus.com and follow the onscreen instructions. 进入网站 My.PreSonus.com,按照屏幕上的指示操作。 –OR– 或者 Download the MyPreSonus app from the Apple App Store or Google Play. 从”Apple App Store” 苹果应用商店或 ”Google Play” 下载 MyPreSonus 应用程序。...
-
Page 5: What Is In The Box 包装里有什么
Product registration and software authorization card 产品注册和软件授权卡 PreSonus Health Safety and Compliance Guide 健康安全与合规指南 Power User Tip: All companion software and drivers for your PreSonus Quantum- series interface are available for download from your My PreSonus user account. Simply visit http://my.presonus.com... -
Page 6: Companionpresonusproducts 产品伙伴
Companion PreSonusProducts Companion PreSonus Products 产品伙伴 Thanks for choosing PreSonus! As a solutions company, we believe the best way to take care of our customers (that’s you) is to ensure that you have the best possible experience from the beginning of your signal chain to the end. To achieve this goal, we’ve prioritized seamless integration throughout every design phase of these... -
Page 7: Hookup 连接
4848当前的采样率设置。 Power button and Sync light. The lighted ring around the power button of your Quantum 4848 is a clock source / sync indicator. It lets you know if your unit is receiving word clock correctly. Power button and Sync light. 电源按钮和同步指示灯。Quantum 4848的电源按... - Page 8 Quantum 4848 Hookup 用户提示:字时钟是数字设备同步帧率的计时信号。正确的字时钟同步可以 防止数字设备由于不匹配的数字音频传输而导致音频信号出现爆音、咔嗒声 和失真。一般你会使用 Quantum 4848 接口,作为工作室的主时钟,它提 供高质量的字时钟。如果你想使用其他设备作为主时钟,你可以在 UC Surface 中设置时钟的输入源。详见第 4.1 节。...
-
Page 9: Back Panel Connections 后面板连接
Hookup Quantum 4848 Owner’sManual Back Panel Connections Back Panel Connections 后面板连接 Line Inputs. The lower row of DB25 connections are for use with line- level devices. These inputs are scaled to accept line-level signals up to +18 dBu. Line Inputs. - Page 10 Channels 33-36 Channels 37-40 When connecting a PreSonus DigiMax DP88 to your Quantum 4848, the ADAT connections will also send and receive preamp control information for the DigiMax DP88, so that it can be controlled directly from UC Surface or Studio One.
- Page 11 更多信息见第 节。 Power Connection. This is where you connect the external power supply for your Quantum 4848. Your Quantum interface is equipped with a twist-lock power connection, keep this in mind when connecting disconnecting it from your interface. Power Connection. 这是为 Quantum 4848连接外部电源的位置。你的...
-
Page 12: Quantum4848Hookupdiagram 连接图
Quantum 4848 Hookup Owner’sManual Quantum 4848Hookup Diagram Quantum 4848 Hookup Diagram 连接图... -
Page 13: Connecting To A Computer 连接计算
My PreSonus user account. This bundled installer includes Universal Control, UC Surface, and the audio driver for Quantum- series interfaces. To begin, you must create or log into your My PreSonus user account, and register your Quantum interface, either by downloading the My PreSonus app for your iOS or Android device or by visiting http://my.presonus.com. - Page 14 Quantum 4848 Connecting to a Computer Open System Preferences and click Security & Privacy to “Allow” the installation. 打开系统优先,点击 “Security” & “Privacy” ,"Allow"允许安装。 If this message does not appear in Security & Privacy, restart the computer. 如果该信息没有出现在“Security” & “Privacy” 中,请重新启动计算机。...
-
Page 15: 3.2 Using A Quantum Interface With Popular Audio Applications
启动 Ableton Live 2. Go to Options | Preferences | Audio. 进入选项|首选项|音频。 3. Choose Driver Type: ASIO | Audio Device: ASIO PreSonus Quantum 4848. 选择驱动类型:ASIO | 音频设备:ASIO PreSonus Quantum 4848。 4. Go to Input Config: Enable and select the desired Input channels. - Page 16 Highlight all input and output drivers beginning with “PreSonus Quantum 4848” 8. Go to Options | Audio... and click on the General tab. Set the Playback Timing Master to “PreSonus Quantum 4848... DAW Out 1.” Set the Recording Timing Master to “PreSonus Quantum 4848... Line 1.”...
- Page 17 5.重新启动 Sonar。 6.进入选项|音频...并点击 ”Drivers” 标签。 7.突出显示所有以 "PreSonus Quantum 4848 " 开头的输入和输出驱动程序。 8.进入选项|音频...并点击 ” General” 标签。 9.将 ”Playback Timing Master ” 为 "PreSonus Quantum 4848... DAW Out 1." 10.将 ”Recording Timing Master”为 "PreSonus Quantum 4848...DAW Out 1"。 Line 1"。 Steinberg Cubase Launch Cubase.
-
Page 18: Universal Control
Quantum 4848提供广泛的计量以及配置选项,供Quantum 4848用户使用。 Firmware Updates 固件更新 UC Surface is designed to verify that your Quantum 4848 has the correct firmware version installed. You will be prompted if your Quantum 4848 interface needs its firmware updated. Click on the Update Firmware button to begin the update. - Page 19 Quantum 4848 Universal Control and UC Surface When the firmware update is complete, you must disconnect the physical power source from your Quantum 4848 and reconnect it. Powering it off it will not complete the update process. 当固件更新完成后,你必须断开 Quantum 4848的物理电源并重新连接。关...
-
Page 20: Universalcontrollaunchwindow
Universal Control Launch Window Universal Control is a powerful hardware-management application for all PreSonus interface products. It allows you to view any PreSonus interface product connected to yourcomputeroryourcomputer’snetwork. When Universal Control is launched, you will see the Launch window. From this window,you can manage all thedriver settings. - Page 21 Quantum 4848 Universal Control and UC Surface ChannelProfile. Some third-party DAW applications, like ProTools Native, limit simultaneous I/O to 32 ins and outs. Channel Profile modes are provided so that you can customize your 48-channel I/O configuration for 32-channel application as follows: ChannelProfile.
-
Page 22: Metering 音频观察计量
当你第一次启动 UC Surface 时,可以查看所有32个模拟输入和输出的输入计量。 Front Panel Metering Toggle By default, the 32 LEDs on the front panel of your Quantum 4848 display the signal level for your 32 analog inputs. From UC Surface, you can toggle them to display the signal from the 32 analog outputs instead. - Page 23 Quantum 4848 Universal Control and UC Surface Owner’s Manual UC Surface provides a real-time analyzer (RTA) in which x = frequency and y = amplitude for every input and output. An RTA provides a close visual representation of what you are hearing.
- Page 24 Quantum 4848 Universal Control and UC Surface Average. Averaging is a mathematical process that takes multiple data samples and performs division to acquire a statistically more accurate calculation of the response. That’s a technical way of saying that it slows down the “real-time” of a real-time analyzer.
-
Page 25: Aggregating Devices 聚集设备
Owner’sManual macOS Aggregating Devices 聚集设备 Up to four Quantum 4848 interfaces can be aggregated together for combined 192 inputs and 192 outputs at 44.1 and 48 kHz . Quantum-series interfaces are fully compatible with one another and PreSonus supports the aggregation of any four Quantum-series interfaces together. - Page 26 6. Designate one Quantum interface as the Master Clock and set the other units to follow using BNC. 指定一个Quantum接口作为主时钟,并设置其他设备使用BNC来跟随。 Quantum 4848 #4 Quantum 4848 #3 Quantum 4848 #2 Quantum 4848 #1 (Master) Computer Your Quantum system is now ready to use. 你的Quantum 系统现在可以使用了。...
-
Page 27: Windows 系统
请注意:你的 Quantum 接口必须通过 BNC 相互时钟连接,并且必须指定 一个设备作为主设备。 Quantum 4848 #4 Quantum 4848 #3 Quantum 4848 #2 Quantum 4848 #1 (Master) Computer 2. Select the Quantum interface you would like to use as the first bank of channels and set the priority to “1.”... - Page 28 Quantum 4848 Aggregating Devices Owner’sManual Windows 选择你想作为第一组通道的Quantum接口,并将 优先级设置为 "1"。 3. Select the Quantum interface you would like to use for the next bank of channels. Set the priority to “2” and the Clock Source to Wordclock. 选择你想用于下一组通道的Quantum接口。将优 先级设置为 "2",将时钟源设置为字时钟。 4. If you are connected three or four Quantum interfaces, you will repeat step 3 and set the priority to 3 and 4 respectively.
-
Page 29: Studio One Profesional Quick Start
Installation and Authorization 安装与授权 Once you have installed the drivers for your audio interface and connected it to your computer, you can use the included PreSonus Studio One music- production software to begin recording, mixing, producing, and mastering your music. - Page 30 Setting Up Studio One Downloading and running the Studio One installer.下载并运行Studio One安装程序。 To install Studio One, download the Studio One installer from your My PreSonus account to the computer on which you will use it. 要安装 Studio One,请从你的 My PreSonus 帐户下载 Studio One 安装程序到你要使用它的计算机上。...
- Page 31 的内容,然后点击 "Install"。这些内容将自动开始从你的 "My PreSonus " 用户账户中下载和安装。 Power User Tip: You may be prompted to enter your My PreSonus user account information. Clicking “Remember Credentials” will allow you to have immediate access to any content you purchase from the PreSonus Marketplace.
-
Page 32: Studio One 专业版快速入门
1. In the middle of the Start page, you will see the Setup area. Studio One automatically scans your system for all available drivers and selects a driver. By default, it will choose a PreSonus driver if one is available. -
Page 33: Configuring Midi Devices 配置Midi装置
Quantum 4848 Studio One Profesional Quick Start Owner’sManual Creating a New Song 2. If you do not see your device listed on the Start page when you launch Studio One, click on the Configure Audio Devices link in the Setup area to open the Options window. - Page 34 Quantum 4848 Studio One Profesional Quick Start Owner’sManual Creating a New Song Setting up an external MIDI keyboard controller from the Start page. A MIDI keyboard controller is a hardware device that is generally used for playing and controlling other MIDI devices, virtual instruments, and software parameters.
- Page 35 Quantum 4848 Studio One Profesional Quick Start Owner’sManual Creating a New Song 单击 "Add" 按钮。这将启动 "Add Device" 窗口。 3. From the menu on the left, select your MIDI controller from the list of manufacturers and models. If you do not see your MIDI controller listed, select New Keyboard.
- Page 36 Quantum 4848 Studio One Profesional Quick Start Owner’sManual Creating a New Song Power User Tip: In the Send To drop-down menu, select the MIDI interface output from which your Studio One will send MIDI data to your keyboard. If your keyboard controller doesn’t need to receive MIDI data from Studio One, you can leave this unselected.
- Page 37 Quantum 4848 Studio One Profesional Quick Start Owner’sManual Creating a New Song 9. In the External Devices window, click the Add button. 在 "External Devices" 窗口,单击 "Add" 按钮。 10. Select your device in the menu on the left. If your device is not listed, select New Instrument.
- Page 38 Quantum 4848 Studio One Profesional Quick Start Owner’sManual Creating a New Song 12. In the Send To menu, select the MIDI interface output from which Studio One will send MIDI data to your sound module. Click OK and close the External Devices window.
-
Page 39: Configuring Your I/O 配置你的 I/O
Quantum 4848 Studio One Profesional Quick Start Owner’sManual Creating a New Song 3. Select Empty Song from the Templates list. At this point, you should give your Song a name and select your preferred sample rate and bit depth for recording and playback. You can also set the length of your Song and the type of time format you would like the timeline to follow (notation bars, seconds, samples, or frames). - Page 40 点击音频I/O设置标签。 3. From the Inputs tab, you can enable any or all of the inputs on your PreSonus Quantum audio interface that you’d like to have available. We recommend that you create a mono input for each of the inputs on your interface.
-
Page 41: Creating Audio And Miditracks 创建音频和Midi音轨
Quantum 4848 Studio One Profesional Quick Start Owner’sManual Creating a New Song Power User Tip: If you would like this I/O configuration to be the same every time you open Studio One, click the Make Default button. 用户提示:如果你希望每次打开 Studio One 时,这个 I/O 配置都是一样的,... - Page 42 Quantum 4848 Studio One Profesional Quick Start Owner’sManual Creating a New Song 2. In the Add Tracks window, you can customize the track name and color, add a preset rack of effects, and set the physical source for the input and output of your audio tracks. Most important, you can select the number and type of tracks you’d...
-
Page 43: Recording An Audio Track 录制音频轨道
6.3.3 Recording an AudioTrack 1. To begin recording, create an audio track from the Add Tracks window, set its input to Input 1 on your Quantum 4848 interface, and connect a source to the same input. 要开始录音,从” Add Tracks”窗口创建一个音轨,将其输入设置为 Quantum 4848接口的输入1,并将一个音源连接到同一输入。... -
Page 44: Adding Virtual Instruments And Effects 添加虚拟乐 器与效果器
Quantum 4848 Studio One Profesional Quick Start Owner’sManual Creating a New Song 现在你可以开始录音了。如需完整的说明,请查阅位于 ”Help” 中的”Studio One Reference manual”|”Studio One ”参考手册。 Adding Virtual Instruments and Effects 添加虚拟音乐与效果器 6.3.4 You can add plug-ins and instruments to your Song by dragging-and-dropping them from the browser. You can also drag an effect or group of effects from one channel to another, drag in customized effects chains, and instantly load your favorite virtual-instrument preset without ever scrolling through a menu. - Page 45 Quantum 4848 Studio One Profesional Quick Start Owner’sManual Creating a New Song Drag-and-drop effects. To add a plug-in effect to a track, click the Effects button in the browser and select the plug-in or one of its presets in the effects browser. Drag- and-drop the selection over the track to which you would like to add the effect.
-
Page 46: Optimizing Latency Andperformance 延时和性能优化
Quantum 4848 Studio One Profesional Quick Start Owner’sManual Monitor Mixing in Studio One Owner’sManual OptimizingLatencyandPerformance Optimizing Latency and Performance 优化延时和性能 When you are working with a large amount of audio tracks and virtual instruments, computer performance can limit your capabilities. -
Page 47: Audio Dropout Protection 音频中断保护
Quantum 4848 Studio One Profesional Quick Start Owner’sManual Monitor Mixing in Studio One 6.4.2 Audio Dropout Protection Clicking on the Processing tab in the Audio Setup Preferences window, will allow you to set the amount of Audio Dropout Protection you would like to employ. -
Page 48: Plug-In Use With Native Low-Latency Monitoring 插
混音中的每个通道都有独立的电平和 pan 控制。只需指定一对或几 对输出作为监听混音,你就可以在Studio One混音器中找到Cue Mix 控制。 You can create a cue mix and send it to any output pair on your Quantum 4848. You simply need to create a stereo output bus and enable Cue Mix. 你可以创建一个监听混音,并将其发送到Quantum 4848的任何输出 对组。你只需要创建一个立体声输出总线并启用 Cue Mix。... - Page 49 Quantum 4848 Studio One Profesional Quick Start Owner’sManual Monitor Mixing in Studio One 6.5.1 Cue Mix Functions Once you have created a cue mix output, you will notice a special Send object in the channels of the Console. This Send object is called a Cue Mix object.
- Page 50 Quantum 4848 Studio One Profesional Quick Start Owner’sManual Monitor Mixing in Studio One 1. Activate Button. Tocompletelyremoveanychannel from a Cue Mix, simply deactivate the Cue Mix object for that channel. In most instances, you will leave this enabled. 2. Horizontal Level Fader. This is the channel’s Cue Mix volume control. By default this level will be identical to the level set on the channel’s fader.
- Page 51 6.5.2 Punching In The Quantum 4848’s unique integration with Studio One and ultra-low latency performance make punching in easier than ever. This section will guide you through setting up a punch in so that there is no change sonically between audio you’re playing back and the audio you’re recording.
-
Page 52: Pipeline Xt
With automatic latency compensation and the Quantum 4848’s low-latency Thunderbolt drivers, Pipeline XT is the perfect tool to integrate your hardware rack into your Studio One session. - Page 53 Pipeline XT 1. Send Output. This dropdown menu allows you to select the physical Quantum 4848 output you would like to use to connect to your external hardware unit. Note: Mono instances of Pipeline XT require a mono output bus. Stereo instances of Pipeline XT can use mono or stereo output buses.
- Page 54 Both the ping and the returned signal will be displayed, however, you will only hear the input signal. Use this mode to set your latency compensation. Setup Mode is mutually exclusive with Scope Mode (#6). 1. SendOutput。你在这个下拉菜单中,可以选择你想用来连接到外部硬件设 备的Quantum 4848物理输出。注意:Pipeline XT的单声道实例需要一个单声 道输出总线。Pipeline XT的立体声实例可以使用单声道或立体声输出总线。 2.SendMeter。Monitors 从Studio One到外部硬件设备的输出电平。 3.Send Level。Adjusts 从Studio One到外部硬件设备的发送电平。...
- Page 55 Quantum 4848 Studio One Profesional Quick Start Owner’sManual Pipeline XT 19.Setup Mode. 设置模式从 Studio One 向你的外部硬件发送一个测试信号, 或称 "ping"。Ping 和返回的信号都会被显示出来,但是,你只能听到输入信 号。使用这个模式来设置你的延迟补偿。设置模式与范围模式(#6)是相互 排斥的。...
- Page 56 Quantum 4848 Technical Information Owner’sManual Specifications Technical Information 技术信息 Specifications 技术规格 Line Inputs Type DB25(TascamFormat),Balanced) MaximumInputLevel +18 dBu (Balanced,min.gain) Frequency Response 20Hzto20kHz(+/-0.15dB,unitygain,48kHz) 20 Hzto40kHz(+/-0.22dB,unitygain,96kHz) DynamicRange(min.gain,A-wtd) > 118 dB THD+N(1kHz,min.gain) < 0.005% InputImpedance 10 kΩ Line Outputs Type DB25(TascamFormat),ImpedanceBalanced,DCCoupled MaximumOutputLevel +18 dBu Frequency Response 20Hzto20kHz(+/-0.15dB,unitygain,48kHz) 20...
- Page 57 While not one of Southeast Louisiana’s more famous dishes, Redfish Couvillion is a favorite way to serve our favorite Gulf fish. Also known as Reds or Red Drum, Redfish is not only fun to catch, it’s also delicious! 虽然不是路易斯安那州东南部最著名的菜肴之一,但 Couvillion鲑鱼是我们最喜欢的一种食用方法。也被称 为红鱼或红鼓,红鱼捕捉不仅有趣,味道也很鲜美! ©2020PreSonusAudioElectronics,Inc.AllRightsReserved.PreSonus,StudioLive,andXMAXaretrademarksorregisteredtrademarksofPreSonusAudioElectronics,Inc.StudioOne isaregistered trademarksofPreSonusSoftwareLtd.MacandmacOSareregisteredtrademarksofApple,Inc.,intheU.S.andothercountries.Windowsisaregisteredtrademarkof Microsoft,Inc.,in theU.S.andother countries.Thunderboltisa trademarkofIntelCorporationor itssubsidiariesintheU.S.and/orothercountries.Otherproductnamesmentionedhereinmaybetrademarksoftheirrespective companies.Allspecificationssubjecttochangewithoutnotice...excepttherecipe,whichisaclassic.
- Page 58 Quantum 4848 Ultra-lowlatencyThunderbolt AudioInterface ™ 雷电二代机架式音频接口 Owner’s Manual 用户手册 18011 Grand Bay Ct. • Baton Rouge, ® Louisiana 70809 USA• 1-225-216-7887 Part# 70-12000108-A www.presonus.com...
Need help?
Do you have a question about the Quantum 4848 and is the answer not in the manual?
Questions and answers