Table of Contents
Advertisement
Advertisement
Table of Contents

Related Manuals for PRESONUS Quantum HD Series


Summary of Contents for PRESONUS Quantum HD Series
- Page 1 Quantum HD Series USB Audio Interfaces Owner’s Manual ® www.presonus.com...
-
Page 2: Table Of Contents
Table of Contents Stereo Linking — 20 Reamping a Guitar — 21 Overview — 1 Using the Optical Inputs/Outputs — 21 Using the Quantum HD as a Standalone Introduction — 1 Mixer — 21 Quantum HD Features — 1 5.10 Using the Quantum HD as an Audio Interface What’s in the Box —... -
Page 3: Overview
We encourage you to contact us with questions or comments regarding your PreSonus Quantum HD interface. PreSonus Audio Electronics is committed to constant product improvement, and we highly value your suggestions. -
Page 4: What's In The Box
• IEC Cable (HD 8) / AC adapter (HD 2) HD 8 HD 2 • PreSonus Health, Safety and Compliance Guide Note: All companion software and drivers for your PreSonus Quantum HD interface are available for download from your MyPreSonus user account. Simply visit http://my.presonus.com and register your... -
Page 5: Getting Started
Your Quantum HD is a powerful audio interface, loaded with professional audio tools and flexible monitoring controls. Before connecting to a computer, please visit www.presonus.com and navigate to the Quantum HD product page to verify the latest system requirements for your interface. -
Page 6: Universal Control Installation
The Universal Control installer will take you through each step of the installation process. Universal Control will install PreSonus’ high-performance audio driver. Universal Control also installs any necessary firmware updates, so it is highly recommended that you install this application. The Universal Control installer will take you through each step of the installation process. -
Page 7: Hardware Features
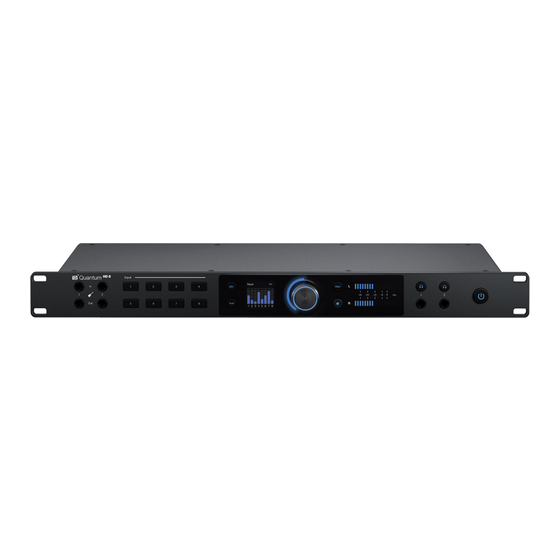
Quantum HD-Series Hardware Features Owner’s Manual Front Panel Hardware Features The following section provides an overview of the front and back panel connections and controls for both the Quantum HD 8 and HD 2 interfaces. Front Panel Instrument Inputs - Your Quantum HD audio interface is equipped with two ¼-inch (TS) connectors for use with passive instruments like a guitar, bass, etc. - Page 8 Quantum HD-Series Hardware Features Owner’s Manual Front Panel You can quickly turn phantom power On or Off for multiple channels by pressing and holding the 48V button, then pressing the channel select buttons you’d like phantom power applied to (red means 48V is active on that channel, white means it is not active).
-
Page 9: Back Panel
Quantum HD-Series Hardware Features Owner’s Manual Back Panel Headphone Control Buttons - The HD 8 has two headphone control buttons, while the HD 2 has one. Pressing either headphone control button (1 or 2) will enable control of the selected headphone output of the device via the knob (the LED ring will turn green when you press either button). -
Page 10: Quantum Hd 8 Hookup Diagram
(Main 1/2 vs Out 3/4) or be used to send audio to outboard FX processors, etc. All line outputs are also DC coupled for sending control voltages. Microphone / Line Combo Inputs – The Quantum HD series features PreSonus MAX-HD microphone preamplifiers for use with many types of microphones. The Quantum HD 8 has eight preamps, while the Quantum HD 2 has two. -
Page 11: Quantum Hd 2 Hookup Diagram
Quantum HD-Series Hardware Features Owner’s Manual Quantum HD 2 Hookup Diagram Quantum HD 2 Hookup Diagram Note: Using the front Instrument Inputs disables the corresponding inputs on the rear panel. Unplug from the front panel to access back panel Inputs 1 & 2. -
Page 12: Software Features
The Quantum HD interface is compatible with any audio-recording application that supports Core Audio, WDM, or ASIO. To make the process of creating new music as seamless as possible, all PreSonus professional recording products come with Studio One recording and production software. - Page 13 Quantum HD-Series Software Features Owner’s Manual Studio One and Other Popular DAWs The first time you launch Studio One, you will be prompted to install its companion content. Select the content you wish to add and click “Install.” The content will automatically begin to download and install from your MyPreSonus user account.
-
Page 14: Using Your Quantum Hd
Speaker Switching The Quantum HD series allows one to check their mix on different speaker sets (A and B) to ensure a mix translates well. Activate a Speaker Switching mode in Universal Control to change the behavior of the Main button. -
Page 15: Setting The Gain
Quantum HD-Series Using Your Quantum HD Owner’s Manual Setting the Gain • Press the Main button again to switch back to the original speaker set. Depending on the mode selected (A - B or A - A+B), the screen will temporarily show which speaker set is selected. -
Page 16: Auto Gain For Single Channels
Quantum HD-Series Using Your Quantum HD Owner’s Manual Setting the Gain 5.4.2 Auto Gain for Single Channels The Auto Gain button on your Quantum HD interface automatically sets the gain level for the channel(s) you’ll be using. Please note that Auto Gain is available for microphone and guitar inputs only. If you would like Auto Gain applied to a single channel, follow the directions below: Press the number of the channel that you are setting the gain for. -
Page 17: Auto Gain For Multiple Channels
Quantum HD-Series Using Your Quantum HD Owner’s Manual Setting the Gain 5.4.3 Auto Gain for Multiple Channels In other situations, you may want to set Auto Gain for multiple channels at once. Please note that Auto Gain is available for microphone and guitar inputs only. While in Main or Headphone output knob modes (meters are shown), follow the directions below: Press the Auto Gain button. -
Page 18: Display Screens
Quantum HD-Series Using Your Quantum HD Owner’s Manual Display Screens If Auto Gain cannot determine the best level, the knob (cap) will blink red 3 • times and the knob will return to the last known gain level position (white). The display will change to the “Try Again”... -
Page 19: Headphone Control Mode
Quantum HD-Series Using Your Quantum HD Owner’s Manual Display Screens While turning the knob: Output Name - Displays the currently selected output name. 2. Volume Level Value - Displays the current level value. 3. Output meters - These meters display the Main L / R signal level before the main output level control. -
Page 20: Additional Channel Settings
Quantum HD-Series Using Your Quantum HD Owner’s Manual Display Screens 5.5.4 Additional Channel Settings To enter the additional channel settings, press the knob once while in Channel Edit Mode. From here, you can choose to enable or disable a HPF or -20 dB pad: HPF (High-Pass Filter) 80Hz - This can be used to cut low-end rumble and other unwanted low frequencies from your recordings. -
Page 21: Alternate Metering Displays
Quantum HD-Series Using Your Quantum HD Owner’s Manual Display Screens 4. Sample Rate - Sets the sample rate to either: 44.1 (default) • • 88.2 • • 176.4 • 192 kHz • Note: Sample Rate is not controllable via the Quantum HD front panel when connected to a computer or mobile device. -
Page 22: Stereo Linking
Quantum HD-Series Using Your Quantum HD Owner’s Manual Stereo Linking ADAT Inputs • ADAT Outputs • Note: ADAT channels that become unavailable due to current sample rate, above 48 kHz as an example, will appear grayed out to indicate the channels are not supported at the current sample rate. -
Page 23: Reamping A Guitar
Quantum HD-Series Using Your Quantum HD Owner’s Manual Reamping a Guitar Linking Constraints: • Only odd numbered channels can be made into a stereo pair (ex., 1, 3, etc.). • Only similar input types can be linked such as analog to analog, S/PDIF to S/PDIF or ADAT to ADAT. •... -
Page 24: Using The Quantum Hd As An Audio Interface On Mobile Devices
Only Android devices with USB-C ports are supported. When plugged directly into a mobile device (iOS, iPadOS, or Android), the Quantum HD series uses the audio driver built into the respective operating system (i.e. class-compliant). As such, only analog inputs and outputs are available due to driver technical limitations. -
Page 25: Resources
Quantum HD-Series Resources Owner’s Manual Specifications Resources Specifications AD / DA CONVERSION Sample Rates 44.1, 48, 88.2, 96, 176.4, 192 kHz Bit Depth 32-bit INPUTS Instrument Inputs Connector Type ¼-inch Female Gain Range -7 dB to +68 dB Maximum Input Level +21 dBu (unbalanced, minimum gain) Frequency Response 20 Hz to 20 kHz, +/- 0.1 dB (unity gain, reference 1 kHz) - Page 26 Quantum HD-Series Resources Owner’s Manual Specifications Line Outputs Connector Type ¼-inch Female, TRS Maximum Output Level +18 dBu Frequency Response 20 Hz to 20 kHz, +/- 0.2 dB (unity gain, reference 1 kHz) Dynamic Range 123 dB (A-weighted) THD + N 0.001% (1 kHz, +4 dBu) Output Impedance 51 Ohms...
-
Page 27: Technical Support
For Technical Support, click onto the “Support” tab inside your MyPreSonus account. From here, you can create a new ticket and view both open and closed support tickets. Support for all PreSonus hardware and software products is provided via email. Note that your product must be registered to receive support. - Page 28 13. Serve over rice with potato salad. Serves 12 ©2024 PreSonus Audio Electronics, Inc. All Rights Reserved. PreSonus and the Wave Logo are registered trademarks of PreSonus Audio Electronics, Inc. Studio One is a registered trademark of PreSonus Software Ltd.
- Page 29 Quantum HD Series USB Audio Interfaces Owner’s Manual Baton Rouge • USA www.presonus.com Part# 70-12000203-A...
Need help?
Do you have a question about the Quantum HD Series and is the answer not in the manual?
Questions and answers
How do I connect outboard gear such as a compressol or an e to the quantum hd8. Pictures would be helpful not just a text answer