
Related Manuals for PRESONUS Quantum series


Summary of Contents for PRESONUS Quantum series
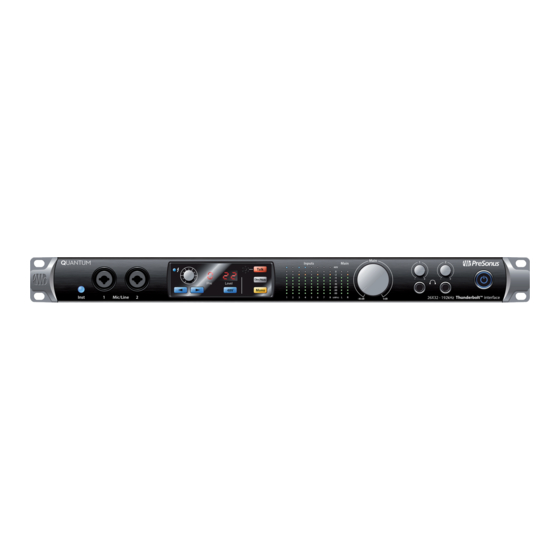
- Page 1 Quantum-series Ultra-low latency Thunderbolt Audio Interfaces ™ and Studio Command Centers Owner’s Manual ® English www.presonus.com...
-
Page 2: Table Of Contents
Table of Contents Overview — 1 Aggregating Devices — 19 Introduction — 1 macOS — 19 Quantum-series Interface Hardware Windows — 21 Features — 1 Studio One Artist Quick Start — 23 UC Surface Features — 2 Installation and Authorization — 23 Studio One Artist Features —... -
Page 5: Overview
Owner’s Manual Overview Introduction Thank you for purchasing a PreSonus Quantum-series Thunderbolt Audio Interface and Studio Command Center. PreSonus Audio Electronics has designed Quantum- series interfaces utilizing high-grade components to ensure optimum performance that will last a lifetime. Loaded with high-headroom, Class A, digitally controlled XMAX™... -
Page 6: Uc Surface Features
Studio One Key Commands Guide Product registration and software authorization card PreSonus Health Safety and Compliance Guide Power User Tip: All companion software and drivers for your PreSonus Quantum-series interface are available for download from your My PreSonus user account. Simply visit http://my.presonus.com... -
Page 7: Hookup
Front Panel Connections and Controls Microphone inputs. Your Quantum-series interface is equipped with 8/4 digitally controlled PreSonus XMAX microphone preamplifiers for use with all types of microphones. The XMAX design provides a Class A input buffer, followed by a dual-servo gain stage. This arrangement results in ultra-low noise and wide gain control, allowing you to boost signals without increasing noise. -
Page 8: Front Panel Connections And Controls
Hookup Quantum-series Front Panel Connections and Controls Owner’s Manual Talkback mic and controls (Quantum). Quantum features an onboard talkback microphone. Press the Talk button to patch the signal to the selected mixes. To control the level of the onboard Talkback mic, select the “c” (Comm) channel in the preamp control section and use the encoder to adjust the level. -
Page 9: Back Panel Connections
Hookup Quantum-series Back Panel Connections Owner’s Manual • Red. Quantum is either not synced to your computer or its external clock source is not present. • Flashing purple. The identify button is active in UC Surface. Power User Tip: Word clock is the timing signal with which digital devices sync frame rates. - Page 10 Hookup Quantum-series Back Panel Connections Owner’s Manual Clock In and Out. These BNC connections allow Quantum-series interfaces to receive and transmit word clock to and from other digital audio devices. Power User Tip: In UC Surface, when using the BNC Clock input, you will need to set “BNC” as the Clock Source and set the sample rate to correspond to that of the external device.
- Page 11 Hookup Quantum-series Back Panel Connections Owner’s Manual MIDI I/O. These are the MIDI input and output connections. MIDI stands for “Musical Instrument Digital Interface. ” However, MIDI can be used for many things other than instruments and sequencing. The MIDI inputs and outputs allow connection to a variety of MIDI-equipped hardware, such as keyboard controllers, and can be used to send and receive MIDI Machine Control and MIDI Time Code.
-
Page 12: Quantum Hookup Diagram
Quantum Hookup Diagram QUANTUM 25-32 48kHz 17-24 19-26 48kHz 11-18 Power MIDI Clock S/PDIF Main Out Line Outputs TRS Balanced Mic/Line Inputs 21-24 96kHz 17-20 15-18 96kHz 11-14 See www.presonus.com for the latest system requirements. DigiMax-series preamps or other compatible hardware... -
Page 13: Quantum 2 Hookup Diagram
Hookup Quantum-series Quantum 2 Hookup Diagram Owner’s Manual Quantum 2 Hookup Diagram See www.presonus.com for the latest system requirements. DigiMax-series preamps or other compatible hardware... -
Page 14: Connecting To A Computer
My PreSonus user account. This bundled installer includes Universal Control, UC Surface, and the audio driver for Quantum-series interfaces. To begin, you must first visit http://my.presonus.com, create or log into your user account, and register your Quantum interface. Once registered, all software downloads will be available from within your My PreSonus user account. - Page 15 “PreSonus Quantum 2” 8. Go to Options | Audio... and click on the General tab. 9. Set the Playback Timing Master to “PreSonus Quantum... DAW Out 1” or “PreSonus Quantum 2... DAW Out 1. ” 10. Set the Recording Timing Master to “PreSonus Quantum... Mic/Inst 1” or “PreSonus Quantum 2...
-
Page 16: Controlling Quantum Mic Preamps
Connecting to a Computer Quantum-series Controlling Quantum Mic Preamps with MIDI Owner’s Manual Controlling Quantum Mic Preamps with MIDI Quantum microphone preamps can be controlled from the front panel, UC Surface, or Studio One. If you configure your Quantum interface as a MIDI device inside your DAW application, you can also control trim and phantom power from within your DAW environment and store those settings with your session. -
Page 17: Uc Surface Control Software
UC Surface Control Software Quantum-series Controlling Quantum Mic Preamps with MIDI Owner’s Manual UC Surface Control Software UC Surface is a powerful control software for your Quantum-series interface. These control functions are completely integrated inside Studio One. UC Surface allows users of other popular DAW applications to access these functions. -
Page 18: Uc Surface Launch Window
UC Surface Control Software Quantum-series UC Surface Launch Window Owner’s Manual UC Surface Launch Window Sample Rate. Changes the sample rate. You can set the sample rate to 44.1, 48, 88.2, 96, 176.4, or 192 kHz. A higher sample rate will increase the fidelity of the recording but will increase the file size and the amount of system resources necessary to process the audio. -
Page 19: Main Knob Controls
UC Surface Control Software Quantum-series Main Knob Controls Owner’s Manual Main Knob Controls The large Main level encoder can be used to control any or every output on your Quantum-series interface. Use these controls to select which output levels are adjusted with this knob. It should be noted that this knob always controls the Main Left/Right outputs on Quantum and Outputs 1/2 on Quantum 2. -
Page 20: Headphone Select
UC Surface Control Software Quantum-series Headphone Select Owner’s Manual Headphone Select The Headphone outputs on your Quantum-series interface feature independent DACs. For Quantum users, the source for both headphone outputs can be selected from any output pair. By default, both headphone outputs mirror the Main Left/Right mix. For Quantum 2 users, UC Surface allows you to select the “B”... -
Page 21: Rta
UC Surface Control Software Quantum-series Owner’s Manual UC Surface provides a real-time analyzer (RTA) in which x = frequency and y = amplitude for every input and output. An RTA provides a close visual representation of what you are hearing. It provides a view of the long-term spectrum of the signal, such as the one third-octave spectrum long-term average of a musical performance. - Page 22 UC Surface Control Software Quantum-series Owner’s Manual Meter Style. This menu allows you to change the type of output metering displayed at the bottom of the screen. • Peak. This type of metering displays the instantaneous level of the audio signal. •...
-
Page 23: Aggregating Devices
Aggregating Devices Quantum-series macOS Owner’s Manual Aggregating Devices Up to four Quantum interfaces can be aggregated together for combined 104 inputs and 128 outputs at 44.1 and 48 kHz. From UC Surface, you can easily locate every Quantum interface connected to your computer by pressing the Identify button in the Device Tab. -
Page 24: Macos
Aggregating Devices Quantum-series macOS Owner’s Manual 5. Connect your other Quantum interfaces. Power User Tip: For tighter clocking, PreSonus recommends designating one Quantum interface as the master and using BNC wordclock to sync additional units. Quantum #4 QUANTUM 25-32 48kHz... -
Page 25: Windows
Aggregating Devices Quantum-series Windows Owner’s Manual Windows 1. Connect your Quantum interfaces to your computer and launch Universal Control. Please Note: Your Quantum interfaces must be clocked to each other via BNC and one unit must be designated as the master. Quantum #4 QUANTUM 25-32... - Page 26 Aggregating Devices Quantum-series Windows Owner’s Manual 3. Select the Quantum interface you would like to use for the next bank of channels. Set the priority to “2” and the Clock Source to Wordclock. 4. If you are connected three or four Quantum interfaces, you will repeat step 3 and set the priority to 3 and 4 respectively.
-
Page 27: Studio One Artist Quick Start
Studio One’s exclusive Cue Mix feature for PreSonus interfaces. Power User Tip: As a valued PreSonus customer, you are eligible for a discount upgrade to Studio One Professional. For more details on the Studio One upgrade program for PreSonus customers, please visit http://studioone.presonus.com/. -
Page 28: Setting Up Studio One
“Install. ” The content will automatically begin to download and install from your My PreSonus user account. Power User Tip: You may be prompted to enter your My PreSonus user account information. Clicking “Remember Credentials” will allow you to have immediate access to any content you purchase from the PreSonus Marketplace. -
Page 29: Configuring Audio Devices
1. In the middle of the Start page, you will see the Setup area. Studio One Artist automatically scans your system for all available drivers and selects a driver. By default, it will choose a PreSonus driver if one is available. 2. If you do not see your device listed on the Start page when you launch Studio One, click on the Configure Audio Devices link in the Setup area to open the Options window. - Page 30 Make sure you have connected the MIDI Out of your external MIDI controller to a MIDI In on your PreSonus audio interface (if available) or other MIDI interface. If you are using a USB MIDI controller, connect it to your computer and power it on.
- Page 31 Studio One Artist Quick Start Quantum-series Setting Up Studio One Owner’s Manual 3. From the menu on the left, select your MIDI controller from the list of manufacturers and models. If you do not see your MIDI controller listed, select New Keyboard. At this point, you can customize the name of your keyboard by entering the manufacturer and device names.
- Page 32 Studio One Artist Quick Start Quantum-series Setting Up Studio One Owner’s Manual Setting up an external MIDI sound module from the Start page. MIDI instrument controllers (keyboards, MIDI guitars, etc.) send musical information in the form of MIDI data to tone modules and virtual instruments, which respond by generating sound, as instructed.
-
Page 33: Creating A New Song
Studio One Artist Quick Start Quantum-series Creating a New Song Owner’s Manual 3. Specify which MIDI channels will be used to communicate with this sound module. For most purposes, you should select all MIDI channels. If you are unsure of which MIDI channels to select, we suggest you select all 16. 4. -
Page 34: Configuring Your I/O
I/O. 2. Click on the Audio I/O Setup tab. 3. From the Inputs tab, you can enable any or all of the inputs on your PreSonus Quantum audio interface that you’d like to have available. We recommend that you create a mono input for each of the inputs on your interface. -
Page 35: Creating Audio And Midi Tracks
Studio One Artist Quick Start Quantum-series Creating a New Song Owner’s Manual 4. Click on the Outputs tabs to enable any or all of the outputs on your Quantum audio interface. In the lower right corner, you will see the Audition select menu. -
Page 36: Recording An Audio Track
Studio One Artist Quick Start Quantum-series Creating a New Song Owner’s Manual • Audio. Use this track type to record and playback audio files. • Instrument. Use this track to record and playback MIDI data to control external MIDI devices or Virtual Instrument plug-ins. •... -
Page 37: Adding Virtual Instruments And Effects
Studio One Artist Quick Start Quantum-series Creating a New Song Owner’s Manual 2. Select Record Enable on the track. Turn up the Input 1 level on your audio interface while speaking/singing into the microphone. You should see the input meter in Studio One Artist react to the input. Adjust the gain so the input level is near its maximum without clipping (distorting). - Page 38 Studio One Artist Quick Start Quantum-series Creating a New Song Owner’s Manual Drag-and-drop effects. To add a plug-in effect to a track, click the Effects button in the browser and select the plug-in or one of its presets in the effects browser. Drag-and-drop the selection over the track to which you would like to add the effect.
-
Page 39: Integrated Quantum Controls
Studio One Artist Quick Start Quantum-series Integrated Quantum Controls Owner’s Manual Integrated Quantum Controls You can control the hardware functions of your Quantum interface from within Studio One. 6.4.1 Preamp Controls As soon as you set an analog Quantum input as the input source for a track in Studio One, you’ll find its preamp controls in the Studio One mixer. -
Page 40: Talkback And Monitoring
Studio One Artist Quick Start Quantum-series Monitor Mixing in Studio One Owner’s Manual 6.4.2 Talkback and Monitoring 1. Talk Button (Quantum). Use this to engage the Talk function. This will route the onboard talkback microphone to the cue mix outputs. 2. -
Page 41: Punching In
Studio One Artist Quick Start Quantum-series Monitor Mixing in Studio One Owner’s Manual In the Large Console view, Cue Mix objects appear below the Send device rack on each channel. 1. Activate Button. To completely remove any channel from a Cue Mix, simply deactivate the Cue Mix object for that channel. - Page 42 Studio One Artist Quick Start Quantum-series Monitor Mixing in Studio One Owner’s Manual 2. On the Console preference tab, check the box next to “Audio track monitoring mutes playback (Tape Style). This will allow you use Cue Mix to monitor during a punch in. Click Apply and then OK. 3.
-
Page 43: Technical Information
Technical Information Quantum-series Specifications Owner’s Manual Technical Information Specifications Microphone Preamp (XLR Balanced) Type XLR Female (via Combo), Balanced Remote Maximum Input level +10 dBu (Balanced, min. gain) Gain Control Range 60 dB Frequency Response 20 Hz to 20 kHz (+/- 0.15 dB, unity gain, 48 kHz) 20 Hz to 40 kHz (+/- 0.22 dB, unity gain, 96 kHz) Dynamic Range >... -
Page 44: Specifications
Technical Information Quantum-series Specifications Owner’s Manual Headphone Outputs Type 1/4” TRS Female, Stereo, Unbalanced, (x2 Quantum, x1 Quantum 2) Maximum Output Level 175 mW / channel (56Ω load) Frequency Response 20 Hz to 20 kHz (+/- 0.5 dB, 48 kHz) Dynamic Range (A-wtd) >... -
Page 45: Warranty Information
PreSonus-branded products under normal use. This Limited Warranty applies only to hardware products manufactured by or for PreSonus that can be identified by the PreSonus trademark, trade name, or logo affixed to them. Exclusions and Limitations This warranty does not cover the following: 1. - Page 46 PreSonus will repair or replace, at our sole and absolute option, products covered by this warranty at no charge for labor or materials. If the product must be shipped to PreSonus for warranty service, the customer must pay the initial shipping charges. PreSonus will pay the return shipping charges.
-
Page 47: How Consumer Law Relates To This Warranty
Exclusion of Damages PRESONUS’S LIABILITY FOR ANY DEFECTIVE PRODUCT IS LIMITED TO THE REPAIR OR REPLACEMENT OF THE PRODUCT, AT PRESONUS’S SOLE OPTION. IF PRESONUS ELECTS TO REPLACE THE PRODUCT, THE REPLACEMENT MAY BE A RECONDITIONED UNIT. IN NO EVENT WILL PRESONUS BE LIABLE FOR DAMAGES... - Page 49 © 2017 PreSonus Audio Electronics, Inc. All Rights Reserved. AudioBox, Nimbit, PreSonus, QMix, StudioLive, and XMAX are trademarks or registered trademarks of PreSonus Audio Electronics, Inc. Capture and Studio One are trademarks or registered trademarks of PreSonus Software Ltd. Mac and Mac OS are registered trademarks of Apple, Inc., in the U.S. and other countries.
-
Page 50: Audio Interfaces
Quantum-series Ultra-low latency Thunderbolt Audio Interfaces ™ and Studio Command Centers Owner’s Manual 18011 Grand Bay Ct. • Baton Rouge, ® Louisiana 70809 USA• 1-225-216-7887 Part# 70-12000061-A www.presonus.com...
Need help?
Do you have a question about the Quantum series and is the answer not in the manual?
Questions and answers