
Subscribe to Our Youtube Channel
Related Manuals for PRESONUS Quantum 4848


Summary of Contents for PRESONUS Quantum 4848
- Page 1 Quantum 4848 Ultra-low latency Thunderbolt Audio Interface ™ Owner’s Manual ® English www.presonus.com...
-
Page 2: Table Of Contents
Creating Audio and MIDI Tracks — 25 What is in the Box — 2 6.3.3 Recording an Audio Track — 27 What’s in your My PreSonus Account — 2 6.3.4 Adding Virtual Instruments Companion PreSonus Products — 3 and Effects — 27 Optimizing Latency and Performance —... -
Page 3: Overview
About this manual: We suggest that you use this manual to familiarize yourself with the features, applications, and correct connection procedures for your Quantum 4848 interface before trying to connect it to your computer. This will help you avoid problems during installation and setup. -
Page 4: What Is In The Box
Product registration and software authorization card PreSonus Health Safety and Compliance Guide Power User Tip: All companion software and drivers for your PreSonus Quantum-series interface are available for download from your My PreSonus user account. Simply visit http://my.presonus.com and register your Quantum-series interface to receive downloads and licenses. -
Page 5: Companion Presonus Products
Owner’s Manual Companion PreSonus Products Thanks for choosing PreSonus! As a solutions company, we believe the best way to take care of our customers (that’s you) is to ensure that you have the best possible experience from the beginning of your signal chain to the end. To achieve this goal, we’ve prioritized seamless integration throughout every design phase of these... -
Page 6: Hookup
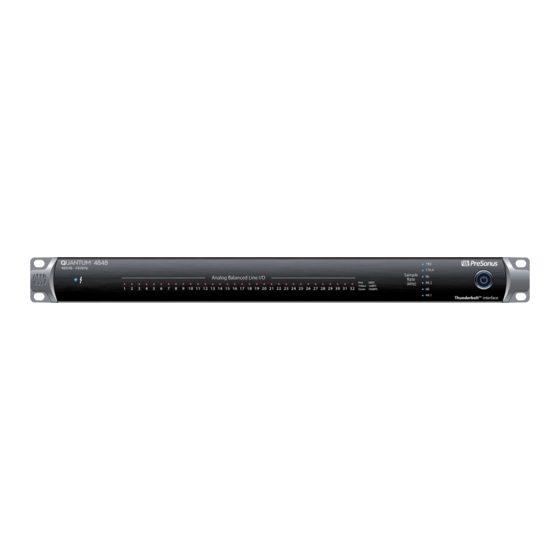
Sample Rate Indicators. These LEDs display the currently set Sample Rate for your Quantum 4848. Power button and Sync light. The lighted ring around the power button of your Quantum 4848 is a clock source / sync indicator. It lets you know if your unit is receiving word clock correctly. •... - Page 7 Hookup Quantum 4848 Back Panel Connections Owner’s Manual Back Panel Connections Line Inputs. The lower row of DB25 connections are for use with line-level devices. These inputs are scaled to accept line-level signals up to +18 dBu. Line Outputs. The upper row of DB25 connections provide 32 balanced line outputs to route to external devices, such as headphone amps, signal processors, and patchbays.
-
Page 8: Back Panel Connections
Back Panel Connections Owner’s Manual When connecting a PreSonus DigiMax DP88 to your Quantum 4848, the ADAT connections will also send and receive preamp control information for the DigiMax DP88, so that it can be controlled directly from UC Surface or Studio One. -
Page 9: Quantum 4848 Hookup Diagram
Hookup Quantum 4848 Quantum 4848 Hookup Diagram Owner’s Manual Quantum 4848 Hookup Diagram... -
Page 10: Connecting To A Computer
My PreSonus user account. This bundled installer includes Universal Control, UC Surface, and the audio driver for Quantum-series interfaces. To begin, you must create or log into your My PreSonus user account, and register your Quantum interface, either by downloading the My PreSonus app for your iOS or Android device or by visiting http://my.presonus.com. - Page 11 7. Highlight all input and output drivers beginning with “PreSonus Quantum 4848” 8. Go to Options | Audio... and click on the General tab. 9. Set the Playback Timing Master to “PreSonus Quantum 4848... DAW Out 1. ” 10. Set the Recording Timing Master to “PreSonus Quantum 4848... Line 1. ”...
-
Page 12: Universal Control And Uc Surface
Quantum 4848 users. Firmware Updates UC Surface is designed to verify that your Quantum 4848 has the correct firmware version installed. You will be prompted if your Quantum 4848 interface needs its firmware updated. Click on the Update Firmware button to begin the update. - Page 13 Universal Control and UC Surface Quantum 4848 Universal Control Launch Window Owner’s Manual Sample Rate. Changes the sample rate. You can set the sample rate to 44.1, 48, 88.2, 96, 176.4, or 192 kHz. A higher sample rate will increase the fidelity of the recording but will increase the file size and the amount of system resources necessary to process the audio.
-
Page 14: Metering
32 analog inputs and outputs: Front Panel Metering Toggle By default, the 32 LEDs on the front panel of your Quantum 4848 display the signal level for your 32 analog inputs. From UC Surface, you can toggle them to display the signal from the 32 analog outputs instead. -
Page 15: Rta
Universal Control and UC Surface Quantum 4848 Owner’s Manual The Quantum RTA provides several customization features that allow you to view the RTA in the way that is most useful for your application. Height. This provides a more or less granular display for the RTA. -
Page 16: Aggregating Devices
Owner’s Manual Aggregating Devices Up to four Quantum 4848 interfaces can be aggregated together for combined 192 inputs and 192 outputs at 44.1 and 48 kHz . Quantum-series interfaces are fully compatible with one another and PreSonus supports the aggregation of any four Quantum-series interfaces together. -
Page 17: Macos
Quantum 4848 macOS Owner’s Manual 5. Connect your other Quantum interfaces. Power User Tip: For tighter clocking, PreSonus recommends designating one Quantum interface as the master and using BNC wordclock to sync additional units. Quantum 4848 #4 Quantum 4848 #3... -
Page 18: Windows
Quantum 4848 #4 Quantum 4848 #3 Quantum 4848 #2 Quantum 4848 #1 (Master) Computer 2. Select the Quantum interface you would like to use as the first bank of channels and set the priority to “1. ”... - Page 19 Aggregating Devices Quantum 4848 Windows Owner’s Manual 3. Select the Quantum interface you would like to use for the next bank of channels. Set the priority to “2” and the Clock Source to Wordclock. 4. If you are connected three or four Quantum interfaces, you will repeat step 3 and set the priority to 3 and 4 respectively.
-
Page 20: Studio One Profesional Quick Start
Owner’s Manual Studio One Profesional Quick Start Quantum 4848 users will find a license for Studio One Professional in their My PreSonus user account. As an integrated system, Studio One Professional allows you to unleash the full potential of their Quantum 4848. -
Page 21: Setting Up Studio One
Select the content you wish to add and click “Install. ” The content will automatically begin to download and install from your My PreSonus user account. Power User Tip: You may be prompted to enter your My PreSonus user account information. Clicking “Remember Credentials” will allow you to have immediate access to any content you purchase from the PreSonus Marketplace. -
Page 22: Configuring Audio Devices
1. In the middle of the Start page, you will see the Setup area. Studio One automatically scans your system for all available drivers and selects a driver. By default, it will choose a PreSonus driver if one is available. 2. If you do not see your device listed on the Start page when you launch Studio One, click on the Configure Audio Devices link in the Setup area to open the Options window. - Page 23 Studio One Profesional Quick Start Quantum 4848 Setting Up Studio One Owner’s Manual tone-generation functions as two different devices; a MIDI keyboard controller and a sound module. The MIDI controls (keyboard, knobs, faders, etc.) will be set up as a Keyboard. The sound modules will be set up as an Instrument.
- Page 24 Studio One Profesional Quick Start Quantum 4848 Setting Up Studio One Owner’s Manual 4. You must specify which MIDI channels will be used to communicate with this keyboard. For most purposes, you should select all MIDI channels. If you are unsure of which MIDI channels to choose, select all 16.
-
Page 25: Creating A New Song
Studio One Profesional Quick Start Quantum 4848 Creating a New Song Owner’s Manual 10. Select your device in the menu on the left. If your device is not listed, select New Instrument. At this point you can customize the name of your keyboard by entering the manufacturer and device names. -
Page 26: Configuring Your I/O
Studio One Profesional Quick Start Quantum 4848 Creating a New Song Owner’s Manual 2. In the New Song window, name your Song and choose the directory in which you’d like it saved. You’ll notice a list of templates on the left. These templates provide quick setups for a variety of devices and recording situations. -
Page 27: Creating Audio And Midi Tracks
Creating a New Song Owner’s Manual 3. From the Inputs tab, you can enable any or all of the inputs on your PreSonus Quantum audio interface that you’d like to have available. We recommend that you create a mono input for each of the inputs on your interface. If you plan on recording in stereo, you should also create a few stereo inputs. - Page 28 Studio One Profesional Quick Start Quantum 4848 Creating a New Song Owner’s Manual 2. In the Add Tracks window, you can customize the track name and color, add a preset rack of effects, and set the physical source for the input and output of your audio tracks. Most important, you can select the number and type of tracks you’d like to create.
-
Page 29: Recording An Audio Track
6.3.3 1. To begin recording, create an audio track from the Add Tracks window, set its input to Input 1 on your Quantum 4848 interface, and connect a source to the same input. 2. Select Record Enable on the track. Turn up the Input 1 level on your audio interface while speaking/singing into the microphone. - Page 30 Studio One Profesional Quick Start Quantum 4848 Creating a New Song Owner’s Manual Drag-and-drop virtual instruments. To add a virtual instrument to you session, open the browser and click on the Instrument button. Select the instrument or one of its patches from the instrument browser and drag it into the Arrange view.
-
Page 31: Optimizing Latency And Performance
Studio One Profesional Quick Start Quantum 4848 Optimizing Latency and Performance Owner’s Manual Optimizing Latency and Performance When you are working with a large amount of audio tracks and virtual instruments, computer performance can limit your capabilities. Increasing the buffer size will free up computer resources, but this comes at the cost of greater latency (or delay) when monitoring audio inputs or playing virtual instruments. -
Page 32: Plug-In Use With Native Low-Latency
Cue Mix controls in your Studio One mixer. You can create a cue mix and send it to any output pair on your Quantum 4848. You simply need to create a stereo output bus and enable Cue Mix. -
Page 33: Cue Mix Functions
Studio One Profesional Quick Start Quantum 4848 Monitor Mixing in Studio One Owner’s Manual Cue Mix Functions 6.5.1 Once you have created a cue mix output, you will notice a special Send object in the channels of the Console. This Send object is called a Cue Mix object. -
Page 34: Punching In
Owner’s Manual Punching In 6.5.2 The Quantum 4848’s unique integration with Studio One and ultra-low latency performance make punching in easier than ever. This section will guide you through setting up a punch in so that there is no change sonically between audio you’re playing back and the audio you’re recording. -
Page 35: Pipeline Xt
Studio One session. 1. Send Output. This dropdown menu allows you to select the physical Quantum 4848 output you would like to use to connect to your external hardware unit. Note: Mono instances of Pipeline XT require a mono output bus. - Page 36 Studio One. 15. Return Input. This dropdown menu allows you to select the physical input on your Quantum 4848 to which the return signal from your external hardware is connected. Note: Mono instances of Pipeline XT require a mono input.
-
Page 37: Technical Information
Technical Information Quantum 4848 Specifications Owner’s Manual Technical Information Specifications Line Inputs Type DB25 (Tascam Format), Balanced) Maximum Input Level +18 dBu (Balanced, min. gain) Frequency Response 20 Hz to 20 kHz (+/- 0.15 dB, unity gain, 48 kHz) 20 Hz to 40 kHz (+/- 0.22 dB, unity gain, 96 kHz) Dynamic Range (min. -
Page 38: Warranty Information
PreSonus-branded products under normal use. This Limited Warranty applies only to hardware products manufactured by or for PreSonus that can be identified by the PreSonus trademark, trade name, or logo affixed to them. Exclusions and Limitations This warranty does not cover the following: 1. - Page 39 PreSonus will repair or replace, at our sole and absolute option, products covered by this warranty at no charge for labor or materials. If the product must be shipped to PreSonus for warranty service, the customer must pay the initial shipping charges. PreSonus will pay the return shipping charges.
- Page 40 Owner’s Manual How to Get Warranty Service (outside of USA) 1. You must have an active user account with PreSonus and your hardware must be on file with your account. If you do not have an account, please go to: https://my.presonus.com...
- Page 41 © 2018 PreSonus Audio Electronics, Inc. All Rights Reserved. PreSonus, StudioLive, and XMAX are trademarks or registered trademarks of PreSonus Audio Electronics, Inc. Studio One is a registered trademarks of PreSonus Software Ltd. Mac and macOS are registered trademarks of Apple, Inc., in the U.S. and other countries. Windows is a registered trademark of Microsoft, Inc., in the U.S.
- Page 42 Quantum 4848 Ultra-low latency Thunderbolt Audio Interface ™ Owner’s Manual 18011 Grand Bay Ct. • Baton Rouge, ® Louisiana 70809 USA• 1-225-216-7887 Part# 70-12000108-A www.presonus.com...
Need help?
Do you have a question about the Quantum 4848 and is the answer not in the manual?
Questions and answers