Sign In
Upload
Download
Table of Contents
Contents
Add to my manuals
Delete from my manuals
Share
URL of this page:
HTML Link:
Bookmark this page
Add
Manual will be automatically added to "My Manuals"
Print this page
×
Bookmark added
×
Added to my manuals
Manuals
Brands
PRESONUS Manuals
Recording Equipment
AudioBox iOne
Owner's manual
PRESONUS AudioBox iOne Owner's Manual
Usb/ipad recording systems
Hide thumbs
Also See for AudioBox iOne
:
Hook-up manual
(2 pages)
1
Table Of Contents
2
3
4
5
6
7
8
9
10
11
12
13
14
15
16
17
18
19
20
21
22
23
24
25
26
27
28
29
30
31
32
33
34
35
36
37
38
39
40
41
42
43
44
45
46
47
48
49
50
51
52
53
54
55
56
page
of
56
Go
/
56
Contents
Table of Contents
Troubleshooting
Bookmarks
Table of Contents
Table of Contents
1 Overview
Introduction
Summary of Hardware Features
Summary of Included Software Features
Studio One Artist
Capture for Ipad
What's in the Box
2 Hookup
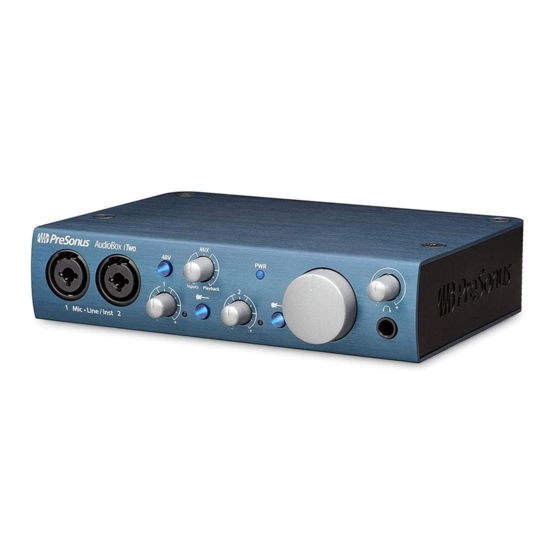
Front-Panel Controls and Connections
Rear-Panel Connections
Basic Hookup Diagrams
Ione Computer Hookup Diagram
Ione Ipad Hookup Diagram
Itwo Computer Hookup Diagram
Itwo Ipad Hookup Diagram
3 Connecting to a Computer or Ios Device
Minimum System Requirements
Installation for Mac os X and Ios
Installation for Windows
Windows Presonus Driver Control Panel
Using the Audiobox with Popular Audio Applications
4 Studio One Artist Quick Start
Installation and Authorization
Enabling the Audio Driver
Configuring MIDI Devices (Audiobox Itwo)
Configuring MIDI Devices
Creating a New Song
Creating Audio Tracks
Anatomy of an Audio Track
Adding Virtual Instruments and Plug-In Effects to Your Song
Drag-And-Drop Virtual Instruments
Drag-And-Drop Effects
5 Tutorials
Microphone Types
Condenser
Dynamic
USB Microphones and Other Types
Stereo Microphone Placement
A Brief Tutorial on Dynamics Processing
Common Questions Regarding Dynamics Processing
Types of Dynamic Processing
Compression Setting Suggestions
Equalizers
What Is an EQ
Equalization Settings: How to Find the Best and Leave the Rest
EQ Frequency Guides
EQ Setting Suggestions
Acoustic Guitar
6 Technical Information
Instrument Input
Line Outputs
Headphone Output
Digital Audio
Ione and Itwo Technical Specifications
7 Troubleshooting and Warranty
Troubleshooting
Warranty
Advertisement
Quick Links
1
Summary of Hardware Features
2
Front-Panel Controls and Connections
3
Rear-Panel Connections
Download this manual
AudioBox
USB/iPad Recording Systems
Owner's Manual
iOne and iTwo
™
®
www.presonus.com
English
Table of
Contents
Previous
Page
Next
Page
1
2
3
4
5
Advertisement
Table of Contents
Need help?
Do you have a question about the AudioBox iOne and is the answer not in the manual?
Ask a question
Questions and answers
Related Manuals for PRESONUS AudioBox iOne
Accessories PRESONUS AudioBox iOne Hook-Up Manual
(2 pages)
Recording Equipment PRESONUS AUDIOBOX USB - V 2.0 User Manual
24-bit/48k recording interface (27 pages)
Recording Equipment PRESONUS AudioBox USB User Manual
24-bit/48k recording interface (20 pages)
Recording Equipment PRESONUS Audiobox USB Quick Start Manual
(87 pages)
Recording Equipment PRESONUS AudioBox Studio USB Quick Start Manual
(22 pages)
Recording Equipment PRESONUS AudioBox Stereo Quick Start Manual
Presonus audiobox stereo quick start guide (393 pages)
Recording Equipment PRESONUS AudioBox STUDIO Manual
(81 pages)
Recording Equipment PRESONUS 1BOX Manual
Complete hardware/software recording kit (17 pages)
Recording Equipment PRESONUS AudioBox iTwo Owner's Manual
Usb/ipad recording systems (56 pages)
Recording Equipment PRESONUS AudioBox GO Owner's Manual
Ultra-compact, mobile2x2 usb audio interface (44 pages)
Recording Equipment PRESONUS AUDIOBOX GO Quick Start Manual
Usb-c®-compatible audio interface (2 pages)
PreSonus AudioBox GO Manual
(article)
Recording Equipment PRESONUS ACP 88 - V 1.2 User Manual
Eight channel compressor/limiter/gate (24 pages)
Recording Equipment PRESONUS ACP22 User Manual
Two channel stereo compressor/limiter/gate (26 pages)
Recording Equipment PRESONUS AudioBox 1818VSL Owner's Manual
Presonus audiobox 1818vsl owner’s manual (80 pages)
Recording Equipment PRESONUS AudioBox 1818VSL Quick Start Manual
(20 pages)
This manual is also suitable for:
Audiobox itwo
Ione
Itwo
Table of Contents
Save PDF
Print
Rename the bookmark
Delete bookmark?
Delete from my manuals?
Login
Sign In
OR
Sign in with Facebook
Sign in with Google
Upload manual
Upload from disk
Upload from URL


Need help?
Do you have a question about the AudioBox iOne and is the answer not in the manual?
Questions and answers