Table of Contents
Advertisement
Quick Links
USER'S MANUAL
TwinFresh Expert RW1-50 V.2
TwinFresh Expert RW1-50C1 V.2
TwinFresh Expert RW1-85 V.2
TwinFresh Expert RW1-100 V.2
TwinFresh Expert RW1-100C1 V.2
TwinFresh Expert Duo RW1-30 V.2
Single-room reversible energy regeneration ventilator
TwinFresh Expert RMW1-50 V.2
TwinFresh Expert RMW1-50C1 V.2
TwinFresh Expert RMW1-85 V.2
TwinFresh Expert RMW1-100 V.2
TwinFresh Expert RMW1-100C1 V.2
Advertisement
Table of Contents

Related Manuals for Vents-us TwinFresh Expert RW1-50 V.2


Summary of Contents for Vents-us TwinFresh Expert RW1-50 V.2
- Page 1 USER’S MANUAL TwinFresh Expert RW1-50 V.2 TwinFresh Expert RMW1-50 V.2 TwinFresh Expert RW1-50C1 V.2 TwinFresh Expert RMW1-50C1 V.2 TwinFresh Expert RW1-85 V.2 TwinFresh Expert RMW1-85 V.2 TwinFresh Expert RW1-100 V.2 TwinFresh Expert RMW1-100 V.2 TwinFresh Expert RW1-100C1 V.2 TwinFresh Expert RMW1-100C1 V.2 TwinFresh Expert Duo RW1-30 V.2...
-
Page 2: Table Of Contents
Transported air must not contain any dust or other solid impurities, sticky substances, or fibrous materials. Do not use the unit in a hazardous or explosive environment containing spirits, gasoline, insecticides, etc. Do not close or block the intake or extract vents in order to ensure the efficient air flow. www.vents-us.com... - Page 3 Precautions must be taken to avoid the back-flow of gases into the room from the open flue of gas or other fuel-burning appliances. THE PRODUCT MUST BE DISPOSED SEPARATELY AT THE END OF ITS SERVICE LIFE. DO NOT DISPOSE THE UNIT AS UNSORTED DOMESTIC WASTE. www.vents-us.com...
-
Page 4: Purpose
M – model without automatic shutters, with manual blocking of air flow Air duct section shape R: round Ventilator series Expert: series of reversible ventilators with unidirectional air flow Expert Duo: series of reversible ventilators with bidirectional air flow www.vents-us.com... -
Page 5: Technical Data
TwinFresh Expert Duo " " " " " " " " " " " Wi-Fi technical data Длина воздуховода (толщина стены) Standard IEFE 802,11, b/g/n Frequency band [GHz] Transmission power [mW] (dBm) 100(+20) Network DHCP WLAN safety WPA, WPA2 www.vents-us.com... -
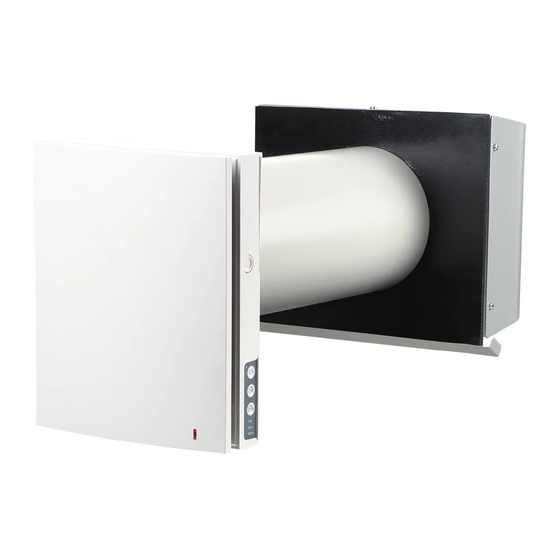
Page 6: Design And Operating Principle
Fulfils the decorative function. The design enables to TwinFresh Expert Duo shut off the air duct in case of an extended downtime of the ventilator. The front part of the TwinFresh Expert Duo unit is used for air filtration. www.vents-us.com... - Page 7 While one ventilator supplies air, the other one extracts air. Air supply: the ventilator operates in the supply mode irrespective of position of the DIP switch No. 3 (refer to section “Positioning of the DIP switch”).. www.vents-us.com...
-
Page 8: Mounting And Set-Up
To cut the air duct either make preliminary calculations of the min 3 mm required duct length or make sure to have access to the external wall after fixation of the air duct. www.vents-us.com... - Page 9 6. Route the power cable as figured below and connect the ventilator to power mains in compliance with the external wiring diagram. Fix the power cable and the signal cables with a cable clamp. After completion of the electrical connection re-install the transparent terminal cover in site. Cable clamp www.vents-us.com...
- Page 10 After that insert the ready roll into the air duct. Install the adjusted air flow separators to the air duct. 10. Install the outer ventilation hood. For mounting guidelines of the ventilation hood please refer to the installation instruction for the outer hood. www.vents-us.com...
-
Page 11: Connection To Power Mains
120 V~60 Hz Power supply to the next ventilator NO contact of an external unit (relay sensor) Input for 0-10 V +12V analogue sensor + 12V NO contact of an Input for 0-10 V external unit analogue sensor (relay sensor) www.vents-us.com... - Page 12 ON: after sensor actuation the ventilator runs in the current mode at the third speed Reset to factory settings OFF: standard operation mode ON: reset to factory settings. Turn the switch to the position ON while the ventilator is running. After the sound signal turn the switch to the position OFF. www.vents-us.com...
- Page 13 The air direction is not changed. Party mode. Activation of the speed III according to the timer (the default setting is 4 hours). Night mode. Activation of the speed I according to the timer (the default setting is 8 hours). www.vents-us.com...
- Page 14 Blinking of the indicator indicates the Slave unit and no connection with the unit. Slave Master No glowing of the indicator means that this ventilator is a unit and it is connected to the unit. Setup Mode. Synchronous blinking of all the indicators on the casing of the ventilator indicates activated www.vents-us.com...
- Page 15 The ventilator reverts to operation with a previous speed setting upon the timer countdown. Press any speed setting button to deactivate the timer or press the timer control button once again. www.vents-us.com...
- Page 16 By default the ventilator password is 1111 (is highlighted in the entry line automatically). WARNING! At this stage the password for the ventilator cannot be changed. 8. Validate the entered data. Once the connection has been established, go to the app menu and select Control. www.vents-us.com...
- Page 17 Filter replacement indicator. To reset the filter timer, go to When simultaneously activating several operation modes that exclude each other, the operation mode selection is done according to the following priority: 1. Night mode timer or Party mode timer. 2. Standby. 3. Boost. 4. Schedule 5. Regular mode. www.vents-us.com...
- Page 18 (refer to section “Connection of mobile application to the ventilator”) • set the sensors using the mobile application • exit the special setup mode • turn the ventilator to the Slave mode using the DIP switch No. 1 www.vents-us.com...
- Page 19 Menu - Setting - Factory settings. Then To reset to the factory settings via the mobile application, go to Reset to factory settings press the button. WARNING! Reset to the factory settings may result in losing Wi-Fi connection with the device. www.vents-us.com...
- Page 20 IP address is set up automatically upon connection to the home router (recommended). Static: enables manual entry of the IP address, subnet mask and default gateway. These settings are recommended for expert users only. Select this IP address type at your own risk. Apply Then press the button. www.vents-us.com...
- Page 21 Optionally connection of several Master units to the network for arranging a zone control is also possible. Router with its wireless access point Mobile device Mobile device Master Slave No. 1 Slave No. N Extra wireless access point Mobile device Mobile device Slave No. N+1 Slave No. N+N www.vents-us.com...
- Page 22 The battery is located on the control circuit board. Power off the ventilator to replace the battery, remove the front panel and the cover protecting the control circuit board. Remove the battery and install the new one. Battery type: CR1220. www.vents-us.com...
- Page 23 5. Enter a ventilator name on your choice, the ventilator ID as stated on the control circuit board and the unit password (1111 by default). 6. Confirm the entries. Menu - Connection - Through the cloud server. To log into the account via the mobile app go to Enter Then enter the login and password and press the button. www.vents-us.com...
- Page 24 Open the air duct in the reverse order. The fan starts operating according to the actual speed setting set with the current mode. The light operation indicator is located on the front panel. In the night time the indicator glowing goes down. www.vents-us.com...
-
Page 25: Technical Maintenance
2. Remove the socket connector from the control board. Do not remove the socket connector by pulling the wires. Use a flat screwdriver to uplift it, if required. TwinFresh Expert TwinFresh Expert Duo Disconnect the socket Disconnect the socket connector from the control connector from the control board board www.vents-us.com... - Page 26 The battery type is CR2025. Remove the holder with the battery from the lower part of the remote control. CR2025 Then replace the battery and re-install the holder with a new battery in site. CR2025 www.vents-us.com...
-
Page 27: Storage And Transportation Regulations
The unit must be transported only in the working position. • Avoid sharp blows, scratches, or rough handling during loading and unloading. • Prior to the initial power-up after transportation at low temperatures, allow the unit to warm up at operating temperature for at least 3-4 hours. www.vents-us.com... -
Page 28: Manufacturer's Warranty
If proof of sales date is absent, warranty period is calculated from the production date. The unit can be exchanged at the following address: Vents-US 400 Murray Road, Cincinnati, OH 45217, USA Tel: 1-888-640-0925, 513-583-5786, Fax: 513-268-4597 E-mail: support@ventsus.com... - Page 29 www.vents-us.com...
- Page 30 TwinFresh Expert (Duo) R(M)W1-30/50/85/100(C1) V.2 www.vents-us.com...
-
Page 31: Certificate Of Acceptance
The unit has been installed in accordance with the provisions of all the applicable local and national construction, electrical and technical codes and standards. The unit operates normally as intended by the manufacturer. Signature: WARRANTY CARD Unit Type Single-room reversible energy regeneration ventilator Model Serial Number Manufacture Date Purchase Date Warranty Period Seller Seller’s Stamp www.vents-us.com... - Page 32 VUSA133-4EN_A4_stkr-07...
Need help?
Do you have a question about the TwinFresh Expert RW1-50 V.2 and is the answer not in the manual?
Questions and answers