Hand Held Products 2020 User Manual
2d cordless imaging system
Hide thumbs
Also See for 2020:
- System manual (248 pages) ,
- User manual (186 pages) ,
- User manual (181 pages)
Table of Contents
Advertisement
Quick Links
Download this manual
See also:
System Manual
Advertisement
Table of Contents

Related Manuals for Hand Held Products 2020


Summary of Contents for Hand Held Products 2020
- Page 1 User’s Guide 2020/4820/4820 ™ 2D Cordless Imaging System...
- Page 2 Hand Held Products. Hand Held Products shall not be liable for technical or editorial errors or omissions contained herein; nor for incidental or consequential damages resulting from the furnishing, performance, or use of this material.
- Page 3 2. This device must accept any interference received, including interference that may cause undesired operation. Caution: Any changes or modifications made to this equipment not expressly approved by Hand Held Products, Inc. may void the FCC authorization to operate this equipment. Agency Compliance Statements...
- Page 4 5627 BT Eindhoven The Netherlands Hand Held Products shall not be liable for use of our product with equipment (i.e., power supplies, personal computers, etc.) that is not CE marked and does not comply with the Low Voltage Directive. This equipment is intended for use...
- Page 5 Safety approval conforms to NOM-019. Comision Federal de Telecomunicaciones (radio approval) Solids and Water Protection The 2020 and 4820 have ratings of IP41, immunity of foreign particles and dripping water. The 4820i has a rating of IP54, immunity of foreign particles and sprayed water.
- Page 6 Required Safety Labels Scanner Compliance Label locations Item Number, Serial Number and Revision Information location...
- Page 7 Base Compliance Label locations Item Number, Serial Number and Revision Information location...
-
Page 9: Table Of Contents
Table of Contents Chapter 1 - Getting Started About This Manual ... 1-1 Unpacking the System ... 1-1 Image Scanner Models ... 1-1 Cordless System: Main Components... 1-2 About the Battery... 1-2 Proper Disposal of the Battery... 1-3 Connecting the Base ... 1-3 Connecting the Base with USB... - Page 10 Base Charge Mode... 3-3 Beeper and LED Sequences and Meaning... 3-4 Image Scanner LED Sequences and Meaning ... 3-4 2020 LED Sequences and Meaning ... 3-4 Image Scanner Modes... 3-5 Unlinking the Image Scanner... 3-5 Single Image Scanner Operation ... 3-5 Locked Link Mode - Single Image Scanner ...
- Page 11 Multiple Image Scanner Operation ... 3-7 Image Scanner Name ... 3-8 Image Scanner Report... 3-10 Application Work Groups... 3-10 Application Work Group Selection... 3-11 Resetting the Standard Product Default Settings: All Application Work Groups ... 3-12 Resetting the Standard Product Default Settings: Current Application Work Group...
- Page 12 Presentation Mode ... 4-7 Presentation LED Behavior after Decode ... 4-7 Presentation Sensitivity... 4-7 Streaming Presentation™ Mode... 4-8 Hands Free Time-Out ... 4-8 Reread Delay ... 4-8 User-Specified Reread Delay ... 4-9 LED Power Level ... 4-10 Illumination Lights ... 4-10 Aimer Delay...
- Page 13 Intercharacter, Interfunction, and Intermessage Delays ... 5-5 Intercharacter Delay ... 5-5 User Specified Intercharacter Delay... 5-6 Interfunction Delay... 5-6 Intermessage Delay ... 5-7 Chapter 6 - Data Formatting Data Format Editor Introduction... 6-1 To Add a Data Format... 6-1 Other Programming Selections ... 6-2 Data Format Editor Commands...
- Page 14 Code 93 ... 7-11 Code 93 Message Length ... 7-11 Code 93 Code Page ... 7-12 Straight 2 of 5 Industrial (three-bar start/stop) ... 7-12 Straight 2 of 5 Industrial Message Length ... 7-13 Straight 2 of 5 IATA (two-bar start/stop) ... 7-13 Straight 2 of 5 IATA Message Length...
- Page 15 UPC-E1 ... 7-25 EAN/JAN-13 ... 7-25 EAN/JAN-13 Check Digit... 7-26 EAN/JAN-13 Addenda... 7-26 EAN/JAN-13 Addenda Required... 7-26 EAN/JAN-13 Addenda Separator ... 7-27 ISBN Translate ... 7-27 EAN/JAN-8 ... 7-27 EAN/JAN-8 Check Digit... 7-28 EAN/JAN-8 Addenda... 7-28 EAN/JAN-8 Addenda Required... 7-29 EAN/JAN-8 Addenda Separator ...
- Page 16 EAN•UCC Emulation ... 7-40 TCIF Linked Code 39 (TLC39) ... 7-41 Postal Codes ... 7-41 4-CB (4-State Customer Barcode) ... 7-41 ID-tag (UPU 4-State) ... 7-41 Postnet ... 7-42 Planet Code ... 7-42 British Post ... 7-43 Canadian Post... 7-43 Kix (Netherlands) Post...
- Page 17 RF Default Imaging Device ... 8-20 Chapter 9 - OCR Programming OCR Fonts ... 9-1 OCR ... 9-1 U.S. Currency Font ... 9-2 MICR E13 B Font ... 9-2 SEMI Font ... 9-3 OCR Templates... 9-3 Creating an OCR Template ... 9-4 Stringing Together Multiple Formats (Creating “Or”...
- Page 18 Data Formatter Selections ... 12-13 Symbologies ... 12-13 Imaging Default Commands ... 12-22 OCR Selections ... 12-25 Minimizing Bluetooth/ISM Band Network Activity 12-25 Chapter 13 - Product Specifications 4820 Product Specifications ... 13-1 4820i Product Specifications ... 13-2 2020 Product Specifications ... 13-4...
- Page 19 Repairs ... 14-1 Maintenance... 14-1 Cleaning the Device ... 14-1 Inspecting Cords and Connectors... 14-1 Replacing the 2020 Interface Cable: ... 14-2 Assembling the Battery Charge Sleeve Kit ... 14-3 Troubleshooting Base ... 14-4 Appendix A - Reference Charts Symbology Chart ... A-1 ASCII Conversion Chart (Code Page 1252) ...
-
Page 21: Chapter 1 - Getting Started
4820/4820i. Product specifications, dimensions, warranty, and customer support information are also included. Hand Held Products barcode image scanners are factory programmed for the most common terminal and communications settings. If you need to change these settings, programming is accomplished by scanning the barcodes in this guide. -
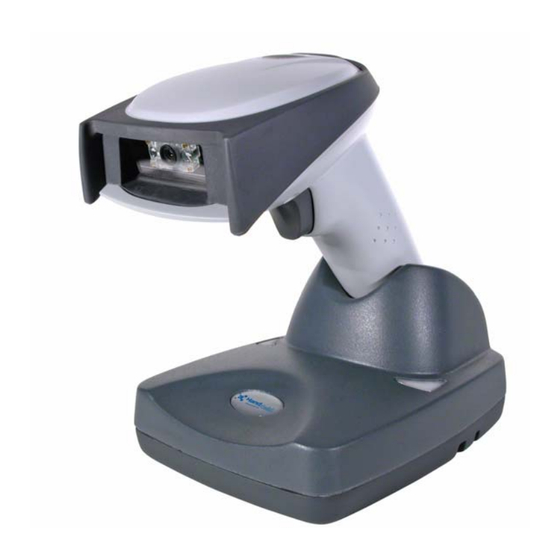
Page 22: Cordless System: Main Components
About the Battery Use only the Li-ion battery packs provided by Hand Held Products. The use of any battery pack not sold by Hand Held Products will void your warranty and may result in damage to your unit. Power is supplied to the cordless image scanner by a rechargeable battery that is integrated in the image scanner handle. -
Page 23: Proper Disposal Of The Battery
Replace it after the battery is unable to hold an adequate charge. • If you are not sure if the battery or charger is working properly, send it to Hand Held Products or an authorized Hand Held Products service center for inspection. -
Page 24: Connecting The Base With Usb
Held Products “USB Application Note,” available at Connecting the Base with Keyboard Wedge 1. Turn off power and disconnect the keyboard cable from the back of the ter- minal/computer. 1 - 4 page 2-5. www.handheld.com 2020/4820/4820 i User’s Guide Sample Symbols... - Page 25 4. Program the base for the keyboard wedge interface. See Connection" on page 2-1. 5. Verify the base operation by scanning a barcode from the in the back of this manual. 2020/4820/4820 i User’s Guide "Keyboard Wedge Sample Symbols 1 - 5...
-
Page 26: Connecting The Base With Rs-232 Serial Port
4. Once the image scanner has been fully connected, power up the computer. Connecting the Base with RS-232 Wedge The 2020 uses TTL signal levels to wedge into an RS-232 serial network. Use only 2020 serial wedge cables to prevent damage to the base. Refer to Baud Rate on page 2-16 to set the baud rate and communications protocol. - Page 27 5. Plug the other serial connector into the host connection and tighten the two screws. 6. Plug the power supply to the base and plug into the AC source. 7. Once the base has been fully connected, power up the computer. 2020/4820/4820 i User’s Guide 1 - 7...
-
Page 28: Linking Image Scanner To Base
This is possible since the cordless system provides two-way communication between the image scanner and the base. 1 - 8 Image Scanner 2020 Cordless Base 2020/4820/4820 i User’s Guide page 14-... - Page 29 If it cannot be determined that the data has been properly sent to the base, the image scanner issues an error indication. You must then check to see if the scanned data was received by the host system. 2020/4820/4820 i User’s Guide 3) Base sends data to host...
-
Page 30: Reading Techniques
If the code being scanned is highly reflective (e.g., laminated), it may be necessary to tilt the code up 15° to 18° to prevent unwanted reflection. 1 - 10 2020/4820/4820 i User’s Guide... -
Page 31: Chapter 2 - Programming The Interface
The following Laptop Direct Connect barcode selects terminal ID 03, programs a carriage return (CR) suffix and turns on Emulate External Keyboard 2020/4820/4820 i User’s Guide IBM PC AT and Compatibles with CR suffix... -
Page 32: Rs-232
Terminal ID Method on page 2-7.) Wand Emulation Plug & Play (Code 39 Format) 2 - 2 RS-232 Interface Programming the Interface - 2020/4820/4820 i User’s Guide Wand Emulation Plug & Play Same Code... -
Page 33: Ibm 4683 Ports 5B, 9B, And 17 Interface
* Suffixes programmed for Code 128 with IBM 4683 Port 5B, IBM 4683 Port 9B HHBCR-1, and IBM 4683 Port 17 Interfaces **Suffixes programmed for Code 128 with IBM 4683 Port 9 HHBCR-2 Interface 2020/4820/4820 i User’s Guide Symbology EAN 8... -
Page 34: Ibm Surepos
2 - 4 Symbology EAN 8 EAN 13 UPC A UPC E Code 39 Interleaved 2 of 5 Code 128 IBM SurePos (USB Tabletop Scanner) Interface Suffix 00 0A 0B 00 0D 0B 00 18 0B 2020/4820/4820 i User’s Guide... -
Page 35: Usb Pc Or Macintosh Keyboard
USB Japanese Keyboard (PC) USB HID Scan the following code to program the image scanner for USB HID barcode image scanners. Scanning this code changes the terminal ID to 131. USB HID Barcode Image 2020/4820/4820 i User’s Guide 2 - 5... -
Page 36: Usb Com Port Emulation
Scan the following code to program the image scanner to emulate a regular RS- 232-based Com Port. If you are using a Microsoft® Windows® PC, you will need to download a driver from the Hand Held Products website (www.handheld.com). The driver will use the next available Com Port number. Apple® Macintosh computers recognize the image scanner as a USB CDC class device and automatically uses a class driver. -
Page 37: Serial Wedge
Terminal ID barcode, scan the digits, and the Save code again. Note: The default interface is Keyboard Wedge (Term ID = 003). Terminal ID Save Note: After scanning one of these codes, you must power cycle your computer. 2020/4820/4820 i User’s Guide 2 - 7... -
Page 38: Supported Terminals
USB Tabletop Image Scanner 360 CSE, 340, 750 365, 755CV 2676D, 2677C, 2677D 9271 98XX Series M19, M200 M240, M250, M290, M380, P500 Indy, Indigoll 2020/4820/4820 i User’s Guide Terminal 003 * 003 * 003 * 128** 129** 003 *... - Page 39 Format) Wand Emulation (Same Code Format) * Default for 2020-5B and 2020-5BE models **It is best to use the Plug and Play barcodes, beginning on terfaces, rather than scanning the terminal ID listed in this table. 2020/4820/4820 i User’s Guide...
-
Page 40: Keyboard Country
@ | $ # { } [ ] = / ‘ \ < > ~ * United States Brazil Czech Republic Finland (Sweden) Germany/Austria Hungary 2 - 10 Belgium Canada (French) Denmark France Greece Israel (Hebrew) 2020/4820/4820 i User’s Guide... - Page 41 Keyboard Country (continued) Italy Latin America Netherlands (Dutch) Norway Poland Portugal Romania Russia Slovakia Spain Sweden Switzerland (German) 2020/4820/4820 i User’s Guide 2 - 11...
-
Page 42: Keyboard Style
Turkey F Turkey Q U.K. Please refer to the Hand Held Products website (www.handheld.com) for complete keyboard country support information and applicable interfaces. If you need to program a keyboard for a country other than one listed above, scan the Program Keyboard Country barcode below, then scan the numeric barcode(s) for the appropriate country from the inside back cover, then the Save barcode. -
Page 43: Keyboard Modifiers
(IBM AT or equivalent). Emulate External Keyboard Note: After scanning the Emulate External Keyboard barcode, you must power cycle your computer. Keyboard Modifiers This modifies special keyboard features, such as CTRL+ ASCII codes and Turbo Mode. 2020/4820/4820 i User’s Guide 2 - 13... -
Page 44: Keyboard Function Relationships
Turbo Mode. Default = Off Turbo Mode On * Turbo Mode Off Numeric Keypad Mode: Sends numeric characters as if entered from a numeric keypad. Default = Off Numeric Keypad Mode On * Numeric Keypad Mode Off 2 - 14 2020/4820/4820 i User’s Guide... - Page 45 Automatic Direct Connect Mode: This selection can be used if you have an IBM AT style terminal and the system is dropping characters. Default = Off Automatic Direct Connect Mode On * Automatic Direct Connect Mode Off 2020/4820/4820 i User’s Guide 2 - 15...
-
Page 46: Rs-232 Baud Rate
Baud Rate sends the data from the image scanner to the terminal at the specified rate. The host terminal must be set for the same baud rate as the image scanner. Default = 115,200. 1200 4800 19200 57,600 2 - 16 2400 9600 38400 * 115,200 2020/4820/4820 i User’s Guide... -
Page 47: Rs-232 Word Length: Data Bits, Stop Bits, And
7 Data, 2 Stop Parity None 8 Data, 1 Stop, Parity Even 8 Data, 1 Stop, Parity Odd 2020/4820/4820 i User’s Guide 7 Data, 1 Stop, Parity None 7 Data, 2 Stop, Parity Even 7 Data, 2 Stop, Parity Odd... -
Page 48: Rs-232 Receiver Time-Out
XOFF was sent. Default = RTS/ CTS, XON/XOFF and ACK/NAK Off . RTS/CTS On * RTS/CTS Off XON/XOFF On * XON/OFF Off ACK/NAK On * ACK/NAK Off 2 - 18 2020/4820/4820 i User’s Guide... -
Page 49: Host Ack Selection
10 seconds. If a time out occurs, the operator should check the host system to understand why a response to the image scanner was not received. 2020/4820/4820 i User’s Guide (page 2-20). -
Page 50: Host Ack Enable
Host ACK Enable Host ACK On * Host ACK Off 2 - 20 2020/4820/4820 i User’s Guide... - Page 51 2020 Host Escape Commands Command Action <ESC> a Indicate as if successful menu change made <ESC> b Indicate as if unsuccessful menu change made Illuminate green LED for 135 milliseconds (followed by at least 70 mSecs. <ESC> 1 dark time when multiple blinks) Illuminate green LED for two seconds (followed by at least 500 mSecs.
-
Page 52: Wand Emulation
Code Format barcode sets the terminal ID to 64. Default = Code 39 Format. Code 39 Format Same Code Format Wand Emulation Data Block Size This transmits the data in smaller blocks to prevent buffer overflow. Default = 40. * 40 2 - 22 2020/4820/4820 i User’s Guide... -
Page 53: Wand Emulation Delay Between Blocks
The check character is the character which when Exclusive-OR’d with every preceding character of the message yields a result of 0x00 (00H). Default = Off. Wand Emulation Overall Checksum On * Wand Emulation Overall Checksum Off 2020/4820/4820 i User’s Guide 2 - 23... -
Page 54: Wand Emulation Transmission Rate
Default = 25 inches/second. Wand Emulation Polarity The Polarity can be sent as standard with black bars high, or reversed with white spaces high. Default = Black High. * Black High 2 - 24 * 25 White High 2020/4820/4820 i User’s Guide... -
Page 55: Wand Emulation Idle
When in Wand Emulation mode, you must set the image scanner’s idle state to match the idle state for the device to which the image scanner is connected. Default = Idle High . * Idle High Idle Low 2020/4820/4820 i User’s Guide 2 - 25... - Page 56 2 - 26 2020/4820/4820 i User’s Guide...
-
Page 57: Chapter 3 - Basic System Operation
(parameter menuing, visual indicator support, low battery indication), and data translation required for the host system. The RF communication module performs the data exchange between the image scanner and the base. 2020/4820/4820 i User’s Guide 3 - 1... -
Page 58: System Conditions
Once the radio connection is made, the image scanner produces a series of beeps while the data is being transferred to the base. 3 - 2 2020/4820/4820 i User’s Guide... -
Page 59: Base Charge Mode
12V host applications and only serves as a backup if the system goes down. Scan the appropriate barcode for your application. Default = Automatic . * Automatic Low Charge Rate 2020/4820/4820 i User’s Guide Fast Charge Slow Charge Fast Charge Fast Charge... -
Page 60: Beeper And Led Sequences And Meaning
Charge Condition Image Scanner inserted into base Three flashes >80% charged 30% to 80% charged <30% charged Note: Charging only occurs with external power applied to the 2020 or 12 volt host power. 3 - 4 Beeper Indication None 1 beep... -
Page 61: Image Scanner Modes
Image Scanner Modes The 4820 is capable of working in single image scanner mode, multiple image scanner mode, or with Bluetooth devices, other than the 2020 base. Unlinking the Image Scanner If the base has an image scanner linked to it, that image scanner must be unlinked before a new image scanner can be linked. -
Page 62: Locked Link Mode - Single Image Scanner
3 - 6 * Locked Link Mode (Single Image Scanner) Open Link Mode (Single Image Scanner) Override Locked Image Scanner (Single Image Scanner) "Image Scanner 2020/4820/4820 i User’s Guide... -
Page 63: Multiple Image Scanner Operation
To put the image scanner in multiple image scanner mode, scan the barcode below. Once you scan this barcode, the image scanner is unlinked from the base and must be placed into the base to re-link. 2020/4820/4820 i User’s Guide Multiple Image Scanner 3 - 7... -
Page 64: Image Scanner Name
If you wish to change the names of additional image scanners, re-link them one at a time and repeat the “:4820:BT_NAM name .” or “:4820i:BT_NAM name .” command for each image scanner. 3 - 8 2020/4820/4820 i User’s Guide... - Page 65 Save. Then scan the Reset barcode and wait for the scanner to re-link to the base before scanning the next barcode. Repeat that process for image scanner number 2, 3, 4 etc. 2020/4820/4820 i User’s Guide Programming Chart Image Scanner Name...
-
Page 66: Image Scanner Report
You may use Barcode Builder, which is included with Quick*View. Refer to Quick*View on page 11-6 for instructions about downloading Quick*View from the Hand Held Products website: www.handheld.com Image Scanner Report Scan the barcode below to generate a report for the connected image scanners. -
Page 67: Application Work Group Selection
You may then program the settings (e.g., beeper volume, prefix/suffix, data formatter) that your application requires. * Group 0 Group 2 Group 4 Group 6 2020/4820/4820 i User’s Guide Group 1 Group 3 Group 5 3 - 11... -
Page 68: Resetting The Standard Product Default Settings: All Application Work Groups
All Application Groups beginning on page 12-5 list the standard product default beginning on page 12-5 list the factory default settings for "Image Scanner Modes" Standard Product Default Settings: Current Application Group on page 3-5 for additional 2020/4820/4820 i User’s Guide... -
Page 69: Using The Image Scanner With Bluetooth Devices
If you go out of range with your image scanner, the image scanner will not reconnect to the Bluetooth device when it is back in range. If you want to re-link to the 2020 base, refer to "Override Locked Image Scanner"... - Page 70 2. Tap the Start flag at the top left of the Today screen. 3. Select Settings at the bottom of the menu. 3 - 14 2020/4820/4820 i User’s Guide...
- Page 71 4. Tap the Connections tab at the bottom of the screen and then tap the Radio Manager icon. 5. Enable one of the Bluetooth modes (e.g., Bluetooth only or 80211b/ Bluetooth). The screen below shows that only the GSM radio is active. 2020/4820/4820 i User’s Guide 3 - 15...
- Page 72 7. Tap OK in the top right of the screen and tap X on the upper, right corner to return to the Today screen. The Bluetooth icon displays in the bottom, right part of the screen. 8. Tap the Bluetooth icon in the bottom, right part of the screen. 3 - 16 2020/4820/4820 i User’s Guide...
- Page 73 Note: If you have already used Bluetooth and changed any of the default settings, you may want to first select My Bluetooth device and ensure that it is connectable and the Bluetooth com port is enabled. 10. Tap Tools -> Device Discovery. 2020/4820/4820 i User’s Guide 3 - 17...
- Page 74 Next. The Mobility Systems device searches for other Bluetooth devices. If the 4820i is in BT Connection - PDA Mobility Systems Mode (see Connection - PDA/Mobility Systems Device the device discovery window. 3 - 18 on page 3-13), it will appear in 2020/4820/4820 i User’s Guide...
- Page 75 13. Select the 4820i by checking the box and select Next and Finish. 14. Select Next and Finish. 15. Select the X to return to the desktop. 2020/4820/4820 i User’s Guide 3 - 19...
-
Page 76: Changing The Image Scanner's Bluetooth Pin Code
Scan Save to save your selection. Bluetooth PIN When authentication is enabled on the Mobility Systems device, you must enter the PIN of the image scanner. 1. Select Advanced Features -> My Bluetooth Device. 3 - 20 2020/4820/4820 i User’s Guide... - Page 77 Step 13 (page page 3-19), the following screen appears. 1. In the Bluetooth Passkey box, enter the image scanner’s PIN code. The same Bluetooth passkey (PIN code) is required for each device. 2. Tap Reply. 2020/4820/4820 i User’s Guide 3 - 21...
-
Page 78: Starting Scanwedge
Once the image scanner is linked to the Mobility Systems device, you need to configure ScanWedge for the correct COM port and then start ScanWedge. For additional information, refer to the Hand Held Products Powertools User’s Guide, which can be downloaded from www.handheld.com. -
Page 79: Data Accumulation Mode
1) for additional information. * Batch Mode Transmit Delay Off (No Delay) Batch Mode Transmit Delay Medium (500 ms) 2020/4820/4820 i User’s Guide * Data Accumulation Mode Off Batch Mode Transmit Delay Short (250 ms) Batch Mode Transmit Delay Long... - Page 80 3 - 24 2020/4820/4820 i User’s Guide...
-
Page 81: Chapter 4 - Output
Beeper - Good Read Off Beeper Volume – Good Read The beeper volume codes modify the volume of the beep the image scanner emits on a good read. Default = Medium. * Medium High 2020/4820/4820 i User’s Guide 4 - 1... -
Page 82: Beeper Pitch - Good Read
LED – Good Read The LED indicator can be programmed On or Off in response to a good read. Default = On. * LED - Good Read On LED - Good Read Off 4 - 2 2020/4820/4820 i User’s Guide... -
Page 83: Number Of Beeps - Good Read
If you want to set your own length for the good read delay, scan the barcode below, then set the delay (from 0-30,000 milliseconds) by scanning digits from the inside back cover, then scanning Save . User-Specified Good Read Delay 2020/4820/4820 i User’s Guide 4 - 3... -
Page 84: Serial Trigger Modes
Serial Trigger. When there is no activity within a specified time period, the image scanner enters low power mode. Scan the appropriate Image Scanner Power Time-Out barcode to change the time-out duration (in seconds). 4 - 4 2020/4820/4820 i User’s Guide... - Page 85 “image scanner power time-out timer” is reset. If the image scanner is placed in the 2020 cradle and the battery is in the process of being charged, the image scanner will not go into power down mode.
-
Page 86: Scan Stand Mode
(Default High) and attempts to find and decode barcodes in its field of view. 4 - 6 Show Software Revision on page 4-10). This mode requires at least 50 lux Scan Stand Mode Scan Stand Symbol 2020/4820/4820 i User’s Guide... -
Page 87: Presentation Mode
Sensitivity barcode, then scan the degree of sensitivity (from 0-20) from the inside back cover, and Save . 0 is the most sensitive setting, and 20 is the least sensitive. Default = 1. 2020/4820/4820 i User’s Guide Presentation Mode Sensitivity... -
Page 88: Streaming Presentation™ Mode
Use shorter delays in applications where repetitive barcode scanning is required. Default = Medium. 4 - 8 Show Software Revision Streaming Presentation Mode (page 4-14), a lower priority symbol must be Hands Free Time-Out 2020/4820/4820 i User’s Guide on page... -
Page 89: User-Specified Reread Delay
If you want to set your own length for the reread delay, scan the barcode below, then set the delay (from 0-30,000 milliseconds) by scanning digits from the inside back cover, then scanning Save . 2020/4820/4820 i User’s Guide Presentation Mode User-Specified Reread Delay (see page 4-7). -
Page 90: Led Power Level
Note: This setting does not affect the aimer light. The aiming light can be set using Aimer Mode * Lights On 4 - 10 Aimer Delay (page 4-11). 2020/4820/4820 i User’s Guide on page 4-11), the Low (50%) Lights Off... -
Page 91: Aimer Delay
Save. Delay Duration Aimer Mode This feature allows you to turn the aimer on and off. When the Interlaced barcode is scanned, the aimer is interlaced with the illumination LEDs. * Interlaced 2020/4820/4820 i User’s Guide 4 - 11... -
Page 92: Centering
640 by 480 pixels. Left Right 100% 4 - 12 Bottom Default Center 2020/4820/4820 i User’s Guide Aimer 100%... - Page 93 Scan Save . Default Centering = 40% for Top and Left, 60% for Bottom and Right. Centering On * Centering Off Top of Centering Window Bottom of Centering Window Left of Centering Window Right of Centering Window 2020/4820/4820 i User’s Guide 4 - 13...
-
Page 94: Decode Search Mode
If the time-out period expires before a high priority symbology is read, the imager will read any bar code in its view (low priority or unspecified). If there is no bar code in the imager’s view after the time-out period expires, then no data is reported. 4 - 14 2020/4820/4820 i User’s Guide... - Page 95 If you want to set additional low priority symbologies, scan FF, then scan the 2 digit hex value from the Programming Chart for the next symbology. You can program up to 5 low priority symbologies. Scan Save to save your selection. Default = None Low Priority Symbology 2020/4820/4820 i User’s Guide 4 - 15...
- Page 96 Save. Default = 500 ms. Preferred Symbology Time-out Preferred Symbology Default Scan the bar code below to set all Preferred Symbology entries to their default values. Preferred Symbology Default 4 - 16 2020/4820/4820 i User’s Guide...
-
Page 97: Output Sequence Overview
5. End Output Sequence Editor Scan F F to enter an Output Sequence for an additional symbology, or Save to save your entries. 2020/4820/4820 i User’s Guide Require Output on page A-1, find the symbology to which you want Barcodes, page A-6, find the Hex... -
Page 98: Output Sequence Example
9999 code length that must match for Code 128, 9999 = all lengths start character match for Code 128, 42h = “B” termination string for second code 4 - 18 A - Code 39 B - Code 128 C - Code 93 2020/4820/4820 i User’s Guide... -
Page 99: Output Sequence Editor
When it’s On/Not Required , the image scanner will attempt to get the output data to conform to an edited sequence, but if it cannot, the image scanner transmits all output data to the host device as is. 2020/4820/4820 i User’s Guide page 4-18, but assume a <CR> suffix and... -
Page 100: Multiple Symbols
With No Read turned On , the image scanner notifies you if a code cannot be read. If using a Quick*View Scan Data Window, an “NR” appears when a code cannot be read. If No Read is turned Off , the “NR” will not appear. * Off 4 - 20 2020/4820/4820 i User’s Guide... -
Page 101: Print Weight
Video Reverse must be disabled to read the menu barcodes and then re-enabled after menuing is completed. Note: Images downloaded from the unit will not be reversed. This is a setting for decoding only. * Off 2020/4820/4820 i User’s Guide 4 - 21... -
Page 102: Working Orientation
Default = Upright. Upright: Rotate Code Clockwise 90°: Upside Down: Rotate Code Counterclockwise 90°: * Upright Rotate Code Clockwise 90° (Rotate Image Scanner Counterclockwise) Upside Down Rotate Code Counterclockwise 90° (Rotate Image Scanner 4 - 22 2020/4820/4820 i User’s Guide... -
Page 103: Fips Encryption Indicators
1 minute pause sequence after a scan means the last transmission was not encrypted. It means the FIPS software was loaded in the scanner, but not in the base. 2020/4820/4820 i User’s Guide Disable Scanner Indicators 4 - 23... -
Page 104: Base Indicators
The following barcode can be scanned to display the scanner and base software numbers and revisions to a host application. (For keyboard emulation, Microsoft Word® or Notepad® can be used.) 4 - 24 1234567890 Show Software Revision 2020/4820/4820 i User’s Guide * Disable Base Indicators... -
Page 105: Chapter 5 - Data Editing
To Add a Prefix or Suffix: Step 1. Scan the Add Prefix or Add Suffix symbol Step 2. Determine the 2 digit Hex value from the Symbology Chart (included in Symbology Chart, 2020/4820/4820 i User’s Guide Scanned Data Suffix variable length 1-11 alpha numeric &... - Page 106 Code Page Mapping of Printed Programming Chart beginning on page A-1) for UPC. Programming Chart inside the back cover of this Code Page Mapping of Printed Programming Chart inside the back cover of this 2020/4820/4820 i User’s Guide inside the back inside the back...
-
Page 107: To Clear One Or All Prefixes Or Suffixes
Scan the following barcode if you wish to add a carriage return suffix to all symbologies at once. This action first clears all current suffixes, then programs a carriage return suffix for all symbologies. 2020/4820/4820 i User’s Guide beginning on page A-1) for the symbology from Programming Chart... -
Page 108: Prefix Selections
10-3. When the image scanner is in keyboard wedge mode, the scan code is converted to a key code before it is transmitted. Default = Enable. * Enable 5 - 4 Clear One Prefix Clear One Suffix Supported Interface Keys Disable 2020/4820/4820 i User’s Guide starting... -
Page 109: Intercharacter, Interfunction, And Intermessage Delays
Intercharacter Delay To remove this delay, scan the Intercharacter Delay barcode, then set the number of steps to 0. Scan the SAVE barcode using the Programming Chart inside the back cover of this manual. 2020/4820/4820 i User’s Guide 5 - 5... -
Page 110: User Specified Intercharacter Delay
Interfunction Delay To remove this delay, scan the Interfunction Delay barcode, then set the number of steps to 0. Scan the SAVE barcode using the Programming Chart inside the back cover of this manual. 5 - 6 2020/4820/4820 i User’s Guide... -
Page 111: Intermessage Delay
Intermessage Delay To remove this delay, scan the Intermessage Delay barcode, then set the number of steps to 0. Scan the SAVE barcode using the Programming Chart inside the back cover of this manual. 2020/4820/4820 i User’s Guide 5 - 7... - Page 112 5 - 8 2020/4820/4820 i User’s Guide...
-
Page 113: Chapter 6 - Data Formatting
PC. Scan three numeric barcodes on the inside back cover to program the image scanner for your terminal ID (you must enter 3 digits). For example, scan 0 0 3 for an AT wedge. 2020/4820/4820 i User’s Guide (page 6-4). -
Page 114: Other Programming Selections
Code Page Mapping of Printed Barcodes Programming Chart Program- (page 6-2). Scan the symbols inside the back cover of this inside the back cover of on page A-6.) on page A-6.) 2020/4820/4820 i User’s Guide... - Page 115 E4 Replaces up to 15 characters in the data string with user specified charac- ters. Replacement continues until the E5 command is encountered. Syn- tax = E4nnxx 2020/4820/4820 i User’s Guide Code Page Mapping of Printed Code Page Mapping of Printed Barcodes Code Page Mapping of Printed Barcodes on page A-6.
-
Page 116: Data Format Editor
If character is numeric, format is aborted. Syntax = ED . Data Format Editor Enter Data Format Clear One Data Format Save 6 - 4 defines replacement characters, continuing defines charac- on page A-6.) * Default Data Format Clear All Data Formats Discard 2020/4820/4820 i User’s Guide... -
Page 117: Data Formatter
The image scanner will scan the next barcode, formatting the data with the selected alternate format, then revert immediately to the primary format. Alternate Data Format 1 Alternate Data Format 2 Alternate Data Format 3 2020/4820/4820 i User’s Guide 6 - 5... - Page 118 6 - 6 2020/4820/4820 i User’s Guide...
- Page 119 • EAN/JAN-8 • EAN•UCC Composite Codes • GS1 DataBar Omnidirectional • GS1 DataBar Limited • GS1 DataBar Expanded 2020/4820/4820 i User’s Guide • Interleaved 2 of 5 • ID-tag (UPU 4-State) • Japanese Post • Kix (Netherlands) Post • Korea Post •...
-
Page 120: All Symbologies
The minimum and maximum lengths and the defaults are included with the respective symbologies. 7 - 2 All Symbologies Off Max. length = 20 Max. length = 15 2020/4820/4820 i User’s Guide Programming Chart... -
Page 121: Codabar
When Check Character is set to Validate and Transmit , the image scanner will only read Codabar barcodes printed with a check character, and will transmit this character at the end of the scanned data. 2020/4820/4820 i User’s Guide 7 - 3... -
Page 122: Codabar Concatenation
D34A Select Require to prevent the image scanner from decoding a single “D” Codabar symbol without its companion. This selection has no effect on Codabar symbols without Stop/Start D characters. * Off Require 7 - 4 2020/4820/4820 i User’s Guide... -
Page 123: Codabar Message Length
(page 7-2) for additional information. Minimum and Maximum lengths = 2-60. Minimum Default = 4, Maximum Default = 60. Minimum Message Length Maximum Message Length Code 39 < Default All Code 39 Settings > Code 39 * On 2020/4820/4820 i User’s Guide 7 - 5... -
Page 124: Code 39 Start/Stop Characters
Code 39 barcodes printed with a check character, and will transmit this character at the end of the scanned data. Default = No Check Character. * No Check Character Validate, but Don’t Transmit Validate and Transmit 7 - 6 2020/4820/4820 i User’s Guide... -
Page 125: Code 39 Message Length
The image scanner transmits the appended data when it reads a Code 39 barcode that starts with a character other than a space. Default = Off. * Off 2020/4820/4820 i User’s Guide 7 - 7... -
Page 126: Code 32 Pharmaceutical (Paraf)
SUB $Z ESC %A 7 - 8 7-34) must be turned off while scanning Code 32 SPACE 0 < %G L %H M > 2020/4820/4820 i User’s Guide * Off ‘ %W p %M m %N n %O o DEL %T... -
Page 127: Code 39 Code Page
The data characters should then appear properly. Code 39 Code Page Interleaved 2 of 5 < Default All Interleaved 2 of 5 Settings > Interleaved 2 of 5 * On 2020/4820/4820 i User’s Guide 7 - 9... -
Page 128: Check Digit
Scan the barcodes below to change the message length. Refer to Message Length Description (page 7-2) for additional information. Minimum and Maximum lengths = 2-80. Minimum Default = 4, Maximum Default = 80. Minimum Message Length Maximum Message Length 7 - 10 2020/4820/4820 i User’s Guide... -
Page 129: Code 93 Message Length
Scan the barcodes below to change the message length. Refer to Message Length Description (page 7-2) for additional information. Minimum and Maximum lengths = 0-80. Minimum Default = 0, Maximum Default = 80. Minimum Message Length Maximum Message Length 2020/4820/4820 i User’s Guide 7 - 11... -
Page 130: Code 93 Code Page
The data characters should then appear properly. Code 93 Code Page Straight 2 of 5 Industrial (three-bar start/stop) <Default All Straight 2 of 5 Industrial Settings> Straight 2 of 5 Industrial * Off 7 - 12 2020/4820/4820 i User’s Guide... -
Page 131: Straight 2 Of 5 Industrial Message Length
Maximum lengths = 1-48. Minimum Default = 4, Maximum Default = 48. Minimum Message Length Maximum Message Length Straight 2 of 5 IATA (two-bar start/stop) <Default All Straight 2 of 5 IATA Settings> Straight 2 of 5 IATA * Off 2020/4820/4820 i User’s Guide 7 - 13... -
Page 132: Straight 2 Of 5 Iata Message Length
Maximum lengths = 1-48. Minimum Default = 4, Maximum Default = 48. Minimum Message Length Maximum Message Length Matrix 2 of 5 <Default All Matrix 2 of 5 Settings> Matrix 2 of 5 * Off 7 - 14 2020/4820/4820 i User’s Guide... -
Page 133: Matrix 2 Of 5 Message Length
(page 7-2) for additional information. Minimum and Maximum lengths = 1-80. Minimum Default = 4, Maximum Default = 80. Minimum Message Length Maximum Message Length Code 11 <Default All Code 11 Settings> Code 11 * Off 2020/4820/4820 i User’s Guide 7 - 15... -
Page 134: Check Digits Required
Length Description (page 7-2) for additional information. Minimum and Maximum lengths = 1-80. Minimum Default = 4, Maximum Default = 80. Minimum Message Length Maximum Message Length Code 128 <Default All Code 128 Settings> 7 - 16 2020/4820/4820 i User’s Guide... -
Page 135: Isbt 128 Concatenation
Scan the barcodes below to change the message length. Refer to Message Length Description (page 7-2) for additional information. Minimum and Maximum lengths = 0-80. Minimum Default = 0, Maximum Default = 80. Minimum Message Length Maximum Message Length 2020/4820/4820 i User’s Guide 7 - 17... -
Page 136: Code 128 Code Page
Programming Chart on the inside the back cover of this manual. The data characters should then appear properly. Code 128 Code Page Telepen <Default All Telepen Settings> Telepen * Off 7 - 18 2020/4820/4820 i User’s Guide... -
Page 137: Telepen Output
Message Length Description (page 7-2) for additional information. Minimum and Maximum lengths = 1-60. Minimum Default = 1, Maximum Default = 60. Minimum Message Length Maximum Message Length UPC-A <Default All UPC-A Settings> 2020/4820/4820 i User’s Guide 7 - 19... -
Page 138: Upc-A Check Digit
The numeric system digit of a U.P.C. symbol is normally transmitted at the beginning of the scanned data, but the unit can be programmed so it will not transmit it. Default = On. * On 7 - 20 2020/4820/4820 i User’s Guide... -
Page 139: Upc-A Addenda
When this feature is on, there is a space between the data from the barcode and the data from the addenda. When turned off, there is no space. Default = On. * On 2020/4820/4820 i User’s Guide * 2 Digit Addenda Off * 5 Digit Addenda Off page... -
Page 140: Upc-A/Ean-13
Most U.P.C. barcodes lead with the 0 number system. For these codes, use the UPC-E0 selection. If you need to read codes that lead with the 1 number system, (page 7-25). Default = On. UPC-E1 * UPC-E0 On UPC-E0 Off 7 - 22 2020/4820/4820 i User’s Guide... -
Page 141: Upc-E0 Expand
When this feature is on, there is a space between the data from the barcode and the data from the addenda. When turned off, there is no space. Default = On. * On 2020/4820/4820 i User’s Guide 7 - 23... -
Page 142: Upc-E0 Check Digit
This selection adds 2 or 5 digits to the end of all scanned UPC-E data. Default = Off for both 2 Digit and 5 Digit Addenda. 2 Digit Addenda On 5 Digit Addenda On 7 - 24 * 2 Digit Addenda Off * 5 Digit Addenda Off 2020/4820/4820 i User’s Guide... -
Page 143: Upc-E1
(page 7-22). If you need to read codes that lead with the 1 number system, use the UPC-E1 selection. Default = Off. UPC-E1 On * UPC-E1 Off EAN/JAN-13 <Default All EAN/JAN Settings> EAN/JAN-13 * On 2020/4820/4820 i User’s Guide 7 - 25... -
Page 144: Ean/Jan-13 Check Digit
When Addenda Required is set to on, the image scanner will only read EAN/JAN- 13 barcodes that have addenda. Default = Not Required. Required 7 - 26 * 2 Digit Addenda Off * 5 Digit Addenda Off * Not Required 2020/4820/4820 i User’s Guide... -
Page 145: Ean/Jan-13 Addenda Separator
UPC-A/EAN-13 with Extended Coupon Code (page 7-22). ISBN Translate This selection causes EAN-13 Bookland symbols to be translated into their equivalent ISBN number format. Default = Off. * Off EAN/JAN-8 <Default All EAN/JAN-8 Settings> 2020/4820/4820 i User’s Guide 7 - 27... -
Page 146: Ean/Jan-8 Check Digit
This selection adds 2 or 5 digits to the end of all scanned EAN/JAN-8 data. Default = Off for both 2 Digit and 5 Digit Addenda. 2 Digit Addenda On 5 Digit Addenda On 7 - 28 * 2 Digit Addenda Off * 5 Digit Addenda Off 2020/4820/4820 i User’s Guide... -
Page 147: Ean/Jan-8 Addenda Required
When this feature is on, there is a space between the data from the barcode and the data from the addenda. When turned off, there is no space. Default = On. * On <Default All MSI Settings> * Off 2020/4820/4820 i User’s Guide 7 - 29... -
Page 148: Msi Check Character
Length Description (page 7-2) for additional information. Minimum and Maximum lengths = 4-48. Minimum Default = 4, Maximum Default = 48. Minimum Message Length Maximum Message Length Plessey Code <Default All Plessey Code Settings> 7 - 30 2020/4820/4820 i User’s Guide... -
Page 149: Plessey Message Length
Maximum lengths = 4-48. Minimum Default = 4, Maximum Default = 48. Minimum Message Length Maximum Message Length GS1 DataBar Omnidirectional < Default All GS1 DataBar Omnidirectional Settings > GS1 DataBar Omnidirectional * On 2020/4820/4820 i User’s Guide 7 - 31... -
Page 150: Gs1 Databar Limited
GS1 DataBar Limited < Default All GS1 DataBar Limited Settings > GS1 DataBar Limited * On GS1 DataBar Expanded < Default All GS1 DataBar Expanded Settings > GS1 DataBar Expanded * On 7 - 32 2020/4820/4820 i User’s Guide... -
Page 151: Gs1 Databar Expanded Message Length
(page 7-2) for additional information. Minimum and Maximum lengths = 4-74. Minimum Default = 4, Maximum Default = 74. Minimum Message Length Maximum Message Length PosiCode <Default All PosiCode Settings> PosiCode A and B * On 2020/4820/4820 i User’s Guide 7 - 33... -
Page 152: Posicode Message Length
Maximum Message Length Trioptic Code Note: If you are going to scan Code 32 Pharmaceutical codes (page 7-8), Trioptic Code must be off. Trioptic Code is used for labeling magnetic storage media. * Off 7 - 34 2020/4820/4820 i User’s Guide... -
Page 153: Codablock F
Length Description (page 7-2) for additional information. Minimum and Maximum lengths = 1-2048. Minimum Default = 1, Maximum Default = 2048. Minimum Message Length Maximum Message Length Code 16K <Default All Code 16K Settings> 2020/4820/4820 i User’s Guide 7 - 35... -
Page 154: Code 16K Message Length
(page 7-2) for additional information. Minimum and Maximum lengths = 0-160. Minimum Default = 1, Maximum Default = 160. Minimum Message Length Maximum Message Length Code 49 <Default All Code 49 Settings> Code 49 * On 7 - 36 2020/4820/4820 i User’s Guide... -
Page 155: Code 49 Message Length
(page 7-2) for additional information. Minimum and Maximum lengths = 1-81. Minimum Default = 1, Maximum Default = 81. Minimum Message Length Maximum Message Length PDF417 < Default All PDF417 Settings > PDF417 * On 2020/4820/4820 i User’s Guide 7 - 37... -
Page 156: Pdf417 Message Length
(page 7-2) for additional information. Minimum and Maximum lengths = 1-2750. Minimum Default = 1, Maximum Default = 2750. Minimum Message Length Maximum Message Length MicroPDF417 < Default All MicroPDF417 Settings > MicroPDF417 * Off 7 - 38 2020/4820/4820 i User’s Guide... -
Page 157: Micropdf417 Message Length
Scan the UPC/EAN Version On barcode to decode EAN•UCC Composite symbols that have a UPC or EAN linear component. (This does not affect EAN•UCC Composite symbols with a UCC/EAN-128 or GS1 linear component.) UPC/EAN Version On * UPC/EAN Version Off 2020/4820/4820 i User’s Guide 7 - 39... -
Page 158: Ean•Ucc Composite Code Message Length
“]e0.” Any application that accepts EAN•UCC data can be simplified since it only needs to recognize one data carrier type. Default = No Emulation . GS1 Emulation 128 Emulation * EAN•UCC Emulation Off 7 - 40 2020/4820/4820 i User’s Guide... -
Page 159: Tcif Linked Code 39 (Tlc39)
Note: For best performance when reading a postal symbology, all other postal symbologies should be turned off. The following postal codes can only be read by a 2D image scanner. 4-CB (4-State Customer Barcode) ID-tag (UPU 4-State) 2020/4820/4820 i User’s Guide * Off * Off * Off 7 - 41... -
Page 160: Postnet
This selection allows you to specify whether the check digit should be transmitted at the end of the scanned data. Transmit Check Digit 7 - 42 * Off * Don’t Transmit Check Digit * Off * Don’t Transmit Check Digit 2020/4820/4820 i User’s Guide... -
Page 161: British Post
Note: Kix code can misread when scanned sideways or upside down. Use Working Orientation, page 4-22, if your Kix codes will not usually be presented upright to the image scanner. Australian Post 2020/4820/4820 i User’s Guide * Off * Off * Off * Off... -
Page 162: Japanese Post
Alphanumeric C Table causes the field to be interpreted as alphanumeric data using the C Table. Refer to the Australian Post Specification Tables. * Bar Output Numeric N Table Alphanumeric C Table Japanese Post * Off 7 - 44 2020/4820/4820 i User’s Guide... -
Page 163: China Post
Scan the barcodes below to change the message length. Refer to Message Length Description (page 7-2) for additional information. Minimum and Maximum lengths = 2-80. Minimum Default = 4, Maximum Default = 80. Minimum Message Length Maximum Message Length 2020/4820/4820 i User’s Guide 7 - 45... -
Page 164: Korea Post
Scan the barcodes below to change the message length. Refer to Message Length Description (page 7-2) for additional information. Minimum and Maximum lengths = 2-80. Minimum Default = 4, Maximum Default = 48. Minimum Message Length Maximum Message Length 7 - 46 2020/4820/4820 i User’s Guide... -
Page 165: Qr Code
Scan the barcodes below to change the message length. Refer to Message Length Description (page 7-2) for additional information. Minimum and Maximum lengths = 1-3500. Minimum Default = 1, Maximum Default = 3500. Minimum Message Length Maximum Message Length 2020/4820/4820 i User’s Guide 7 - 47... -
Page 166: Data Matrix
Scan the barcodes below to change the message length. Refer to Message Length Description (page 7-2) for additional information. Minimum and Maximum lengths = 1-1500. Minimum Default = 1, Maximum Default = 1500. Minimum Message Length Maximum Message Length 7 - 48 2020/4820/4820 i User’s Guide... -
Page 167: Maxicode
Scan the barcodes below to change the message length. Refer to Message Length Description (page 7-2) for additional information. Minimum and Maximum lengths = 1-150. Minimum Default = 1, Maximum Default = 150. Minimum Message Length Maximum Message Length 2020/4820/4820 i User’s Guide 7 - 49... -
Page 168: Aztec Code
Scan the barcodes below to change the message length. Refer to Message Length Description (page 7-2) for additional information. Minimum and Maximum lengths = 1-3750. Minimum Default = 1, Maximum Default = 3750. Minimum Message Length Maximum Message Length 7 - 50 2020/4820/4820 i User’s Guide... -
Page 169: Aztec Runes
Select Enable Runes if you are scanning Aztec runes, which are the smallest type of Aztec Code symbol with the ability to encode a very short license plate message. Enable Runes * Disable Runes 2020/4820/4820 i User’s Guide 7 - 51... - Page 170 7 - 52 2020/4820/4820 i User’s Guide...
-
Page 171: Chapter 8 - Imaging Commands
To achieve a high quality image, it is recommended that you position your imager 4-6" (122-183 cm) away from the image/object you are capturing. 2020/4820/4820 i User’s Guide (page 8-2) (page 8-6) (page 8-16) -
Page 172: Image Snap - Imgsnp
Waits for a hardware button push before taking the image. This is only available when using Photo Style (1P). Takes image immediately (default) Waits for a button push, then takes the image 8 - 2 IMGSNP2G1B 2020/4820/4820 i User’s Guide... - Page 173 Units are 127 microseconds. (Default = 7874) Range: 1 - 7874 Example of Exposure at 7874E with fluorescent lighting: 2020/4820/4820 i User’s Guide Example of Exposure at 100E with fluorescent lighting: 8 - 3...
- Page 174 Photo Style (1P). (Default = 6) Range: 0 - 10 8 - 4 Example of Gain at 4G: Example of White Value at 125W: 2020/4820/4820 i User’s Guide Example of Gain at 8G: Example of White Value at 200W: W - Target...
- Page 175 To alter grayscale values, = 50) Range: 1 - 99 Example of Target Set Point Percentage at 97%: 2020/4820/4820 i User’s Guide W - Target White Value Example of Target Set Point Percentage at 50%: should be used. (Default Example of Target Set...
-
Page 176: Image Ship - Imgshp
Infinity filter off (default) Infinity filter on Example of Infinity Filter off (0A) from approximately 12 feet (3.66m) away: 8 - 6 IMGSNP;IMGSHP8F75K26U Example of Infinity Filter on (1A) from approximately 12 feet (3.66m) away: 2020/4820/4820 i User’s Guide IMGSHP Modifiers (page 8-... - Page 177 Apply edge sharpen for typical image Apply edge sharpen using strength n ( n = 1-24) Example of Edge Sharpen at 0E: 2020/4820/4820 i User’s Guide Example of Compensation at 1C: Example of Edge Sharpen at 24E: 8 - 7...
- Page 178 H - Histogram Stretch Increases the contrast of the transmitted image. Not available with some image formats. No stretch (default) Histogram stretch Example of Histogram Stretch at 0H: 8 - 8 Example of Histogram Stretch at 1H: 2020/4820/4820 i User’s Guide...
- Page 179 Used to reduce the salt and pepper noise in an image. No salt and pepper noise reduction (default) Salt and pepper noise reduction Example of Noise Reduction Off (0if): 2020/4820/4820 i User’s Guide Example of image with Invert Image set to 1ix: Example of Noise Reduction On (1if):...
- Page 180 ( n = 0 - 100) worst quality (smallest file) 100J best quality (largest file) 8 - 10 Example of Image Rotate set to 2ir: Example of Image Rotate set to 3ir: 2020/4820/4820 i User’s Guide...
- Page 181 Range: 000 - 640. (Default = all columns) The top edge of the shipped image corresponds to row n of the image in memory. Range: 000 - 480. (Default = 0) 2020/4820/4820 i User’s Guide Example of Gamma Correction set to 50K: IMGSHP Modifiers...
- Page 182 Hmodem compressed (default for RS-232) Hmodem 8 - 12 Example of Image Crop set to 300R: Example of Image Crop set to 200T: Example of Image Crop set to 238M: 2020/4820/4820 i User’s Guide Example of Image Crop set to 300L:...
- Page 183 Allows you to input parameters to sharpen the edges and smooth the area between the edges of text in an image. This filter should be used with gamma correction (see image captured using the command: 2020/4820/4820 i User’s Guide Example of Pixel Ship set to 2S: page...
- Page 184 Example of Blur Image Off (0V): 8 - 14 page 8-15). This filter also works well when E - Edge Sharpen Example of Document Image Filter set to 26U: Example of Blur Image On (1V): 2020/4820/4820 i User’s Guide (page 8-7) to 22e.
-
Page 185: Image Size Compatibility
640x480 pixels, scan the Force VGA Resolution barcode. Refer to "Show Engine Revision" in your unit. Default = Force VGA Resolution * Force VGA Resolution 2020/4820/4820 i User’s Guide Histogram of image at left: on page 11-1 for information on determining the engine Native Resolution... -
Page 186: Intelligent Signature Capture - Imgbox
Send the following IMGBOX command string after the button push: Note: Case is not important in the command string. It is used here only for clarity. The following image is captured: 8 - 16 IMGBOX245w37h55y. 2020/4820/4820 i User’s Guide... -
Page 187: Imgbox Modifiers
8 bits per pixel, grayscale image (default) 1 bit per pixel, black and white image 2020/4820/4820 i User’s Guide H - Height of Signature Capture Area (page 8-19). (page 8-... - Page 188 Apply gamma correction for brightening typical document image Apply gamma correction factor n ( n = 1-255) Example of Gamma Correction set to 0K: Example of Gamma Correction set to 50K: Example of Gamma Correction set to 255K: 8 - 18 Example: IMGBOX245w37h55y. 2020/4820/4820 i User’s Guide...
- Page 189 .01. In the example, the width of the area to be captured is 2.4 inches, resulting in a value of W = 2.4/0.01 = 240. (A value of 245 was used in the example to accommodate a slightly wider image area.) 2020/4820/4820 i User’s Guide A - Output Image Width Example: IMGBOX245w37h55y.
-
Page 190: Rf Default Imaging Device
Refer to "Image Scanner Name" scanner. 8 - 20 "Quick*View" on page 11-6) and other on page 11-2 to generate a report containing the on page 3-8 set a unique name for each image 2020/4820/4820 i User’s Guide... -
Page 191: Chapter 9 - Ocr Programming
Orientation, page 4-22, if your OCR symbols will not usually be presented upright to the image scanner. Only one OCR symbology can be read at a time. 2020/4820/4820 i User’s Guide < Default All OCR Settings > 9 - 1... -
Page 192: U.s. Currency Font
OCR template, character combinations that fit the template can be scanned (see Creating an OCR 9 - 2 OCR-A On OCR-B On Template, page 9-4). U.S. Currency On Template, page 9-4). MICR E 13 B On 2020/4820/4820 i User’s Guide... -
Page 193: Semi Font
These choices are described in detail below. 2020/4820/4820 i User’s Guide SEMI Font On * All OCR Off... -
Page 194: Creating An Ocr Template
Sample Codes in the back of this manual) to scan the characters for your template. Example: You need to read any combination of eight digits. The template would 9 - 4 (page 9-2). (page 9-13). OCR Programming Chart 2020/4820/4820 i User’s Guide (after the... - Page 195 You may also need to put spaces in your template. Example: You need to read three digits, space, three specific characters (ABC), space, three digits. The template would be: 2020/4820/4820 i User’s Guide dddddddd (page 9-13), then scan the d from the in the back of this manual eight times.
-
Page 196: Stringing Together Multiple Formats (Creating "Or" Statements)
(the hex characters for “space,” 551 ABC 983 ddddddddtddddlldd (page 9-13). Scan the d from the 9-14). This would let you read either type of format, for 99028650 9902XZ50 OCR Programming OCR Programming 2020/4820/4820 i User’s Guide... -
Page 197: Ocr User-Defined Variables
Example: You need to read multiple rows of OCR-A data as shown below: First, enable the OCR-A font. To read the first row of OCR data, you would program the following template: 2020/4820/4820 i User’s Guide 414243 (page 9-13). Scan 414243 from the (the hex characters for “A,”... -
Page 198: Ocr Check Character
0123456 9 - 8 OCRTMP"dddddddd". OCRTMP"llllllll". OCRTMP"ddddddddrllllllll". 12345678 ABCDEFGH ABCD1234 dddddddc OCR Programming Chart (page 9-14). This template will let you 01234569 2020/4820/4820 i User’s Guide seven times, and scan the... -
Page 199: Ocr Modulo 10 Check Character
(6 + 5 + 1 + 2 +3 + 5 + 1 + X) modulo 11 = 0 Since the result is zero, the message is considered to be valid, so the reader outputs the message: 6512351 2020/4820/4820 i User’s Guide OCR Modulo 10 Check Character OCR Modulo 36 Check Character... -
Page 200: Weighting Options
Enter OCR Check Character Code Page Mapping of Printed Barcodes on the inside the back cover of this manual to page 9-10, then scan the following hex values 3031323334353637383958 3-1-3-1 Weighted Modulo 10 Check Character on page A-6. 2020/4820/4820 i User’s Guide... - Page 201 = (0 + 2 + 2 + (1 + 6) + 4 + (1 + 0) + 4) modulo 10 Since the result is zero, the message is considered to be valid, so the reader outputs the message: 012845 2020/4820/4820 i User’s Guide dddddddc 01234565...
-
Page 202: Ocr Isbn Application Example
(represented by a backslash). 4. Scan the symbol below to set up three templates to handle the ISBN number, the three digit price field, and the four digit price field. 9 - 12 barcode on page 9-2. 0123456789- 2020/4820/4820 i User’s Guide... -
Page 203: Ocr Template Codes
† Variable “h” † One or more two-digit numbers and Save are required after reading this programming symbol. Refer to the cover of this manual. 2020/4820/4820 i User’s Guide † Programming Chart Enter User-Defined † Variable “g” on the inside the back... -
Page 204: Exit Selections
Exit Selections Save OCR Template Discard OCR Template 9 - 14 2020/4820/4820 i User’s Guide... -
Page 205: Chapter 10 - Interface Keys
The following Keyboard Function Code, Hex/ASCII Value, and Full ASCII “CTRL”+ relationships apply to all terminals that can be used with the image scanner. Refer to page 2-14 Function Code HEX/ASCII Value 2020/4820/4820 i User’s Guide enable Control + ASCII mode. Full ASCII “CTRL” + 10 - 1... - Page 206 The following chart indicates the equivalents of these five characters for different countries. Country United States Belgium Scandinavia France Germany Italy Switzerland United Kingdom Denmark Norway Spain 10 - 2 Codes < < Ã < ¢ 2020/4820/4820 i User’s Guide...
-
Page 207: Supported Interface Keys
Reserved Delete CR/Enter Insert Escape Home Print Back Space Back Tab * IBM 3191/92, 3471/72, 3196/97, 3476/77, Telex (all models) 2020/4820/4820 i User’s Guide IBM XTs and IBM, DDC, Memorex Compatibles Telex, Harris* Supported Keys Supported Keys Reserved Reserved CR/Enter... - Page 208 Memorex Telex (88)** Supported Keys Reserved Enter PF10 PF11 PF12 Reserved Reserved New Line Field Forward Field Forward Reserved Field Forward Delete New Line Insert Erase Error Reset Reserved Print Back Space Back Field Reserved Home 2020/4820/4820 i User’s Guide...
- Page 209 Supported Interface Keys ASCII 2020/4820/4820 i User’s Guide Esprit 200, 400 Esprit 200, 400 ANSI ASCII Supported Keys Supported Keys Reserved Reserved New Line New Line New Line New Line New Line New Line Escape Escape Insert Insert Back Space...
- Page 210 Supported Interface Keys Apple Mac/iMac ASCII Supported Keys Reserved Enter/Numpad Enter CAPS ALT make ALT break CNTRL make CNTRL break RETURN APPLE make APPLE break RETURN Ins Help Home Prnt Scrn BACKSPACE LSHIFT TAB BACKSPACE 10 - 6 2020/4820/4820 i User’s Guide...
-
Page 211: Chapter 11 - Utilities
5100 engine, version 26 would return: ENGREVType: Revision: 26[ACK] Show Engine Revision Show Scan Driver Revision Scan the barcode below to output the scan driver revision. The scan driver controls image capture. Show Scan Driver Revision 2020/4820/4820 i User’s Guide 11 - 1... -
Page 212: Show Software Revision
Image Scanner Address Scan the barcode below to determine the address of the image scanner you are using. 11 - 2 Show Revision Data Format Settings Reset Imager "Menu Command Syntax" Image Scanner Report Image Scanner Address 2020/4820/4820 i User’s Guide... -
Page 213: Base Address
The following barcode defaults all of the work groups to the factory settings. Standard Product Default Settings: Menu Commands settings for each of the commands (indicated by an asterisk (*) on the programming pages). 2020/4820/4820 i User’s Guide Base Address starting on page 12-5 "Image Scanner Modes"... -
Page 214: Test Menu
When using a USB serial port emulation, only a USB cable is required. Visual Xpress Operations The Visual Xpress software performs the following operations: 11 - 4 * Off Show Software Revision 2020/4820/4820 i User’s Guide... -
Page 215: Installing Visual Xpress From The Web
Imaging also lets you preview the images continuously captured by the image scanner. Installing Visual Xpress from the Web 1. Access the Hand Held Products web site at www.handheld.com. 2. Click in the Quick Search text box and enter Visual Xpress. 3. Click on Search Now. -
Page 216: Quick*View
Barcode information and images are displayed in the Quick*View window. Installing Quick*View from the Web 1. Access the Hand Held Products web site at www.handheld.com. 2. Click on Search and enter Quick*View. 3. Click on Search. 4. Click on the entry for Software. Select Quick*View Software Utility. -
Page 217: Chapter 12 - Serial Programming Commands
For example, the SubTag for the RS-232 baud rate is BAD. Data The new value for a menu setting, identified by the Tag and Sub- Tag. 2020/4820/4820 i User’s Guide page 2-2). The following 12 - 1... -
Page 218: Query Commands
(,) and only the SubTag and Data fields of the additional command are issued. If the additional command requires a different Tag field, the command is separated from previous commands by a semicolon (;). 12 - 2 2020/4820/4820 i User’s Guide... -
Page 219: Responses
(CBRENA) is 1, or on. Example #3: What is the device’s current setting for Codabar Coding Enable? Enter: cbrena?. Response: CBRENA1[ACK] This response indicates that the device’s Codabar Coding Enable (CBRENA) is set to 1, or on. 2020/4820/4820 i User’s Guide 12 - 3... -
Page 220: Trigger Commands
(see "Read Time-Out (Serial Trigger Mode)" on page 4-4 for a description, and the serial command on page 12-10). 12 - 4 (page (page 12-10). Once the image 2020/4820/4820 i User’s Guide 4-4), or by... -
Page 221: Menu Commands
Menu Commands Selection Programming the Interface Terminal ID Program Keyboard Country 2020/4820/4820 i User’s Guide Setting * Indicates default *003 *U.S.A. Belgium Brazil Canada (French) Czech Republic Denmark Finland (Sweden) France Germany/Austria Greece Hungary Israel (Hebrew) Italy Latin America Netherlands (Dutch) - Page 222 Auto Direct Conn. On 300 BPS 600 BPS 1200 BPS 2400 BPS 4800 BPS 9600 BPS 19200 BPS 38400 BPS 57600 BPS *115200 BPS 2020/4820/4820 i User’s Guide Serial Command Page # Indicates a numeric entry KBDSTY0 2-12 KBDSTY1 2-12 KBDSTY2...
- Page 223 RS-232 Handshaking Wand Emulation Connec- tion Data Block Size Delay Between Blocks Overall Checksum 2020/4820/4820 i User’s Guide Setting * Indicates default 7 Data, 1 Stop, Parity Even 7 Data, 1 Stop, Parity None 7 Data, 1 Stop, Parity Odd...
-
Page 224: Basic System Operation
Multiple Image Scanner Oper- ation Image Scanner Name Image Scanner Report *Group 0 Group 1 Group 2 Group 3 Group 4 Group 5 Group 6 2020/4820/4820 i User’s Guide Serial Command Page # Indicates a numeric entry WNDSPD0 2-24 WNDSPD1 2-24 WNDSPD2... -
Page 225: Output Selections
Read Beeper Pitch - Good Read (Frequency) Beeper Duration - Good Read LED - Good Read 2020/4820/4820 i User’s Guide Setting * Indicates default Default - Current Work Group Default - All Work Groups BT Connection - PC/laptop BT Connection - PDA/Mobility... - Page 226 Range 0 - 300,000 ms Short (500 ms) *Medium (750 ms) Long (1000 ms) Extra Long (2000 ms) Range 0 - 30,000 ms Low (50%) *High (100%) 2020/4820/4820 i User’s Guide Serial Command Page # Indicates a numeric entry BEPRPT1 BEPRPT#...
- Page 227 Delay Aimer Mode Centering Window Decode Search Mode Preferred Symbology Output Sequence Editor Require Output Sequence 2020/4820/4820 i User’s Guide Setting * Indicates default *Lights On Lights Off 200 milliseconds 400 milliseconds *Off (no delay) Range 0 - 4,000 ms...
-
Page 228: Prefix/Suffix Selections
Disable Range 0 - 495 ms Delay Length (0 - 495 ms) Character to Trigger Delay Range 0 - 495 ms Range 0 - 495 ms 2020/4820/4820 i User’s Guide Serial Command # Indicates a numeric entry SHOTGN1 SHOTGN0 SHWNRD1... -
Page 229: Data Formatter Selections
Codabar Start/Stop Char. Codabar Check Char. Codabar Concatenation Codabar Message Length Code 39 Code 39 2020/4820/4820 i User’s Guide Setting * Indicates default *Default Data Format (None) Enter Data Format Clear One Data Format Clear All Data Formats *On, but Not Required... - Page 230 Default All Code 93 Settings Minimum (0 - 80) *0 Maximum (0 - 80) *80 Code 93 Code Page Default All Straight 2 of 5 Industrial Settings 2020/4820/4820 i User’s Guide Serial Command Page # Indicates a numeric entry C39SSX0...
- Page 231 Code 128 Code 128 ISBT Concatenation Code 128 Message Length Code 128 Code Page Telepen 2020/4820/4820 i User’s Guide Setting * Indicates default *Off Minimum (1 - 48) *4 Maximum (1 - 48) *48 Default All Straight 2 of 5 IATA...
- Page 232 Maximum (1 - 60) *60 Default All UPC-A Settings *Off *Off *Not Required Required Default All UPC-E Settings *Off Required *Not Required 2020/4820/4820 i User’s Guide Serial Command Page # Indicates a numeric entry TELENA0 7-18 TELENA1 7-18 TELOLD0 7-19...
- Page 233 EAN/JAN-13 Addenda Required EAN/JAN-13 Addenda Separator ISBN Translate EAN/JAN-8 EAN/JAN-8 EAN/JAN-8 Check Digit 2020/4820/4820 i User’s Guide Setting * Indicates default 2 Digit Addenda On *2 Digit Addenda Off 5 Digit Addenda On *5 Digit Addenda Off *Off Default All EAN/...
- Page 234 Minimum (4 - 48) *4 Maximum (4 - 48) *48 Default All GS1 DataBar Omnidirectional Settings Default All GS1 DataBar Lim- ited Settings Default All GS1 DataBar Expanded Settings 2020/4820/4820 i User’s Guide Serial Command Page # Indicates a numeric entry EA8AD20 7-28 EA8AD21...
- Page 235 Code 16K Msg. Length Code 49 Code 49 Code 49 Msg. Length PDF417 PDF417 PDF417 Msg. Length 2020/4820/4820 i User’s Guide Setting * Indicates default Minimum (4 - 74) *4 Maximum (4 - 74) *74 Default All PosiCode Settings A and B On...
- Page 236 EAN • UCC-128 Emulation • *EAN UCC Emulation Off *Off *Off *Off *Off Transmit *Don’t Transmit *Off Transmit *Don’t Transmit *Off *Off 2020/4820/4820 i User’s Guide Serial Command Page # Indicates a numeric entry MPDDFT 7-38 MPDENA1 7-38 MPDENA0 7-38 MPDMIN 7-39 MPDMAX...
- Page 237 Korea Post Msg. Length QR Code QR Code QR Code Msg. Length Data Matrix Data Matrix Data Matrix Msg. Length MaxiCode MaxiCode 2020/4820/4820 i User’s Guide Setting * Indicates default *Off *Off *Bar Output Numeric N Table Alphanumeric C Table *Off...
-
Page 238: Imaging Default Commands
LED State - On *Wait for Trigger Off Wait for Trigger On Update Tries (0-10) *6 Target White Value (0-255) *125 Target Set Point Percentage (1-99) *50 2020/4820/4820 i User’s Guide Serial Command Page # Indicates a numeric entry MAXMIN 7-49... - Page 239 Selection Image Ship 2020/4820/4820 i User’s Guide Setting * Indicates default *Infinity Filter - Off Infinity Filter - On *Compensation Off Compensation On *Pixel Depth - 8 bits/pixel (grayscale) Pixel Depth - 1 bit/pixel (B&W) *Don’t Sharpen Edges Sharpen Edges (0-23)
- Page 240 Ship Every Pixel Ship Every 2nd Pixel Ship Every 3rd Pixel *Document Image Filter Off Document Image Filter On (0- 255) *Don’t Ship Histogram Ship Histogram 2020/4820/4820 i User’s Guide Serial Command Page # Indicates a numeric entry IMGROT1 8-10...
-
Page 241: Ocr Selections
OCR Selections OCR Check Character OCR Templates Minimizing Bluetooth/ISM Band Network Activity Auto Reconnect Mode Maximum Link Attempts Relink Time-Out 2020/4820/4820 i User’s Guide Setting * Indicates default Default All OCR Settings OCR-A On OCR-B On U.S. Currency On MICR E 13 B On... - Page 242 12 - 26 2020/4820/4820 i User’s Guide...
-
Page 243: Chapter 13 - Product Specifications
Range Data Range Temperature Ranges: Operating Battery Charge Storage* Humidity Mechanical Drop 2020/4820/4820 i User’s Guide Specification 6.2 inches (15.7 cm) 5.3 inches (13.5 cm) 3.2 inches (8.1 cm) 9.2 ounces (260.8 g) 617nm +30nm 526nm +30nm VGA, 640x480 (4X00); 752x480 (5X00). Binary, TIFF, or JPEG output. -
Page 244: 4820I Product Specifications
±40 degrees 4 inches (10 cm) per second in both lateral and horizontal directions (manual/serial, Scan Stand, Presentation Mode) 20 inches (50cm) per second on 100% UPC/EAN at the plane of optimum focus (Streaming Presentation Mode) 2020/4820/4820 i User’s Guide... - Page 245 Vibration ESD Sensitivity MTBF Sealant Rating Agency Compliance *Storage outside of this temperature range could be detrimental to battery life. 2020/4820/4820 i User’s Guide 45% minimum for Matrix codes, 37.5% minimum for all others 3.6 Volt 1600 mAHr minimum Standby...
-
Page 246: 2020 Product Specifications
Up to 95% non-condensing Operational after 50 drops from 3.3 feet (1 m) to concrete Withstands 5G peak from 22 to 300 Hz 15 kV to any external surface IP41 2020/4820/4820 i User’s Guide 125mA (will not charge) 850mA 825mA... - Page 247 Agency Compliance 2020/4820/4820 i User’s Guide International: CB Scheme to IEC60950-1 and IEC60825-1. Bluetooth Qualified Design listed. Japan: Equipment Radio Regulations, 2006 Australia/NZ: C-Tick marked. Europe: CE 1995/5/EC R&TTE Directive to EN55022 EN55024, EN61000-3-2, EN61000-3-3 2006/95/EC Low Voltage Directive Germany: TUV GS marked for I.T.E safety...
-
Page 248: Standard Cable Pinouts
Standard Cable Pinouts Keyboard Wedge 13 - 6 2020/4820/4820 i User’s Guide... - Page 249 Standard Cable Pinouts Wand Emulation 2020/4820/4820 i User’s Guide 13 - 7...
- Page 250 Standard Cable Pinouts Serial Output 13 - 8 2020/4820/4820 i User’s Guide...
- Page 251 Standard Cable Pinouts 2020/4820/4820 i User’s Guide 13 - 9...
- Page 252 13 - 10 2020/4820/4820 i User’s Guide...
-
Page 253: Chapter 14 - Maintenance
Inspect the base’s interface cable and connector for wear or other signs of damage. A badly worn cable or damaged connector may interfere with image scanner operation. Contact your Hand Held Products distributor for information about cable replacement. Cable replacement instructions are on 2020/4820/4820 i User’s Guide... -
Page 254: Replacing The 2020 Interface Cable
Replacing the 2020 Interface Cable: 1. Turn the power to the host system OFF. 2. Disconnect the base’s cable from the terminal or computer. 3. Turn the base upside down. 4. Pull the connector out while maintaining pressure on the connector release clip. -
Page 255: Assembling The Battery Charge Sleeve Kit
2. Peel the backing from the metal plate on the coiled tether and affix the metal plate to the back of the 2020 base. Note: For best adhesion, allow a 24 hour cure time before placing stress on the metal plate. -
Page 256: Troubleshooting Base
• The image scanner is correctly placed in the base. • There is external power or 12 volt host power. • Charge mode is turned on. 14 - 4 (See "Base Charge Mode" on page 2020/4820/4820 i User’s Guide 3-3) - Page 257 1. Scan the sample barcodes in the back of this manual. If the image scanner reads the sample barcodes, check that your barcode is readable. Verify that your barcode symbology is enabled (see 2020/4820/4820 i User’s Guide Prefix/Suffix Overview Chapter...
- Page 258 2. If the image scanner still can’t read the sample barcodes, scan Symbologies on page 7-2. 14 - 6 2020/4820/4820 i User’s Guide...
-
Page 259: Appendix A - Reference Charts
EAN-13 with Extended Coupon Code ID-tag (UPU 4-State) Interleaved 2 of 5 Japanese Post KIX (Netherlands) Post Korea Post 2020/4820/4820 i User’s Guide Possible AIM ID Modifiers ( m ) ]z m 0-9, A-C ]F m ]O m 0, 1, 4, 5, 6... -
Page 260: Hand Held
]p m 0, 1, 2 ]Q m ]e m ]R m 0, 1, 3 0, 1, 3 ]B m 0, 1, 2, 4 2020/4820/4820 i User’s Guide Hand Held Products Code ID (hex) m (0x6D) x (0x78) R (0x52) g (0x67) - Page 261 Note: Prefix/Suffix entries for specific symbologies override the universal (All Symbologies, 99) entry. Refer to <Italics>Data Editing Formatting beginning on page 6-1 for information about using Code ID and AIM 2020/4820/4820 i User’s Guide beginning on page 5-1 and <Italics>Data A - 3...
- Page 262 ASCII Conversion Chart (Code Page 1252 Note: This table applies to U.S. style keyboards. Certain characters may differ depending on your Country Code/PC regional settings. Char A - 4 Char “ & ‘ < > Char 2020/4820/4820 i User’s Guide Char ‘...
- Page 263 Š ‹ Œ Ž ‘ ’ “ ” • – — ˜ ™ š › œ ž Ÿ 2020/4820/4820 i User’s Guide Dec. Char Dec. ¡ ¢ £ ¤ ¥ ¦ § ¨ © ª « ¬ ® ¯ °...
-
Page 264: Code Page Mapping Of Printed Barcodes
Description Automatic National Replacement Charac- ters Swedish Replacement Characters French/Belgium Replacement Characters French/Belgium Replacement Characters German Replacement Characters Italian Replacement Characters Swiss Replacement Characters British Replacement Characters Danish Replacement Characters Norwegian Replacement Characters Spanish Replacement Characters 2020/4820/4820 i User’s Guide... -
Page 265: Chapter 15 - Customer Support
Customer Support Technical Assistance If you need assistance installing or troubleshooting, please call your Distributor or the nearest Hand Held Products technical support office: North America/Canada Telephone: (800) 782-4263 Fax number: (315) 554-6705 E-mail: natechsupport@handheld.com Latin America Telephone: (803) 835-8000 Telephone: (800) 782-4263 E-mail: latechsupport@handheld.com... -
Page 266: Online Technical Assistance
Hand Held Products provides service for all its products through service centers throughout the world. To obtain warranty or non-warranty service, return the unit to Hand Held Products (postage paid) with a copy of the dated purchase record attached. Contact the appropriate location below to obtain a Return Material Authorization number (RMA #) before returning the product. -
Page 267: Online Product Service And Repair Assistance
(C) static electricity or electro-static discharge, (D) operation under conditions beyond the specified operating parameters, or (E) repair or service of the product by anyone other than Hand Held Products or its authorized representatives. This warranty shall extend from the time of shipment for the duration published by Hand Held Products for the product at the time of purchase ("Warranty... - Page 268 Products, Inc. extends these warranties only to the first end-users of the products. These warranties are nontransferable. The limited duration of the warranty for the 2020 and 4820/4820i is for three (3) years. The limited duration of the warranty for the image scanner battery is for one (1) year.
-
Page 269: Appendix 16 - Minimizing Bluetooth/Ism Band Network Activ
The table below shows the results of the Auto Reconnect On and Off settings: Event Image scanner out of range Base reset (firmware upgrade or power cycle) 2020/4820/4820 i User’s Guide Auto Reconnect On Re-link occurs automatically. If maximum number of link attempts (see Maximum... -
Page 270: Maximum Link Attempts
(Note: image scanner re-links on power up, but powers on due to one of the above actions.) Re-link occurs automatically. Re-link occurs automatically. Re-link to new base occurs automatically. 4-4) expires. Maximum Link Attempts Auto Reconnect Off 2020/4820/4820 i User’s Guide... -
Page 271: Relink Time-Out
After one hour, the image scanner powers off and batch mode data is lost. Refer to Mode, page 16-1, to review other events that can start the re-link process. 2020/4820/4820 i User’s Guide Relink Time-Out Auto Reconnect... - Page 272 The image scanner attempts to connect to the base unit every 15 seconds, measured from start of attempt to start of attempt. After one half hour, the image scanner powers off. 16 - 4 on page 4-4. 2020/4820/4820 i User’s Guide...
- Page 274 Sample Symbols UPC-A Interleaved 2 of 5 0 123456 7890 Code 128 1234567890 EAN-13 Code 128 Code 39 9 780330 290951 Codabar BC321 Code 93 A13579B Straight 2 of 5 Industrial 123456-9$ 123456...
- Page 275 Sample Symbols Matrix 2 of 5 GS1 DataBar 6543210 PDF417 (01)00123456789012 Postnet Car Registration Zip Code Code 49 Data Matrix 1234567890 QR Code Test Symbol Numbers 4-CB (4-State Customer Barcode) 01,234,567094,987654321,01234567891 ID-tag (UPU 4-State) J18CUSA8E6N062315014880T...
- Page 276 Sample Symbols Aztec Micro PDF417 Package Label MaxiCode Test Message OCR-B with Modulo 10 check character Test Message OCR-A with Modulo 36 check character...
-
Page 277: Ocr Programming Chart
OCR Programming Chart Discard Save... -
Page 278: Programming Chart
Programming Chart... - Page 279 Programming Chart Save Reset Note: If you make an error while scanning the letters or digits (before scanning Save), scan Discard, scan the correct letters or digits, and Save again. Discard...
- Page 280 Hand Held Products, Inc. 700 Visions Drive P.O. Box 208 Skaneateles Falls, NY 13153-0208 4820-UG Rev D 3/08...